Recently a
client call me reporting a strange behavior on the BizTalk Server Administration
Console. Based on what was reported to me, some updates were applied to the
server at the level of the operating system and that after installation, they
would have performed a controlled restart to the environment. However, after
the environment is back once again online when trying to access the
administrative console, they got the following error:
The snap-in performed a non-valid
operation and has been unloaded. To continue working with this snap-in, restart
MMC or try loading the snap-in again.
Just for curiosity, BizTalk Health Monitor, worked perfectly fine. And the BizTalk Server engine was working properly also. It was just a matter of UI.
Cause
I don’t really know the specific reasons that cause this problem, and to be honest, being a production environment, the important was to put everything working again. But in a simple way, this error message normally means that the MMC or one of the snap-ins, in this case, BizTalk Server Administration snap-in did not load correctly.
Restarting the machine again, or even restart
the BizTalk Server Administration console doesn’t solve the issue.
Solution
You can troubleshoot fudder this problem and use
a tool like System File Checker to scan and see if you find the root of the
issue and probably the fix.
However, the simple way to solve this is to:
Repair
BizTalk Server installation;
Once you repair the installation, everything
should be working fine again.
Notice: don’t forget to reinstall the last Cumulative
updates.
I
have an insane roadmap of things to be published but if I didn’t have this week
was fertile in providing me with new content. Full week troubleshooting and
fixing issues in several clients… what an amazing week! But the best one
arrived almost on the last day.
Do
you know the feeling when you develop a solution that has been working properly
for a while and stops working for no logical reason? I bet you do. And this happened
to me this week at a client where we are using the BizTalk Server Logic App
Adapter to extend part of our logical business to the cloud. And without we
make any changes to the Logic Apps or any changes in our BizTalk Server environment
(aka no new development installed, no patch’s or hotfixes installed, no
restarts, …) everything stops to work, we were not receiving any new messages
on our Logic Apps.
When
I access to BizTalk Server environment, I realize that all the requests were
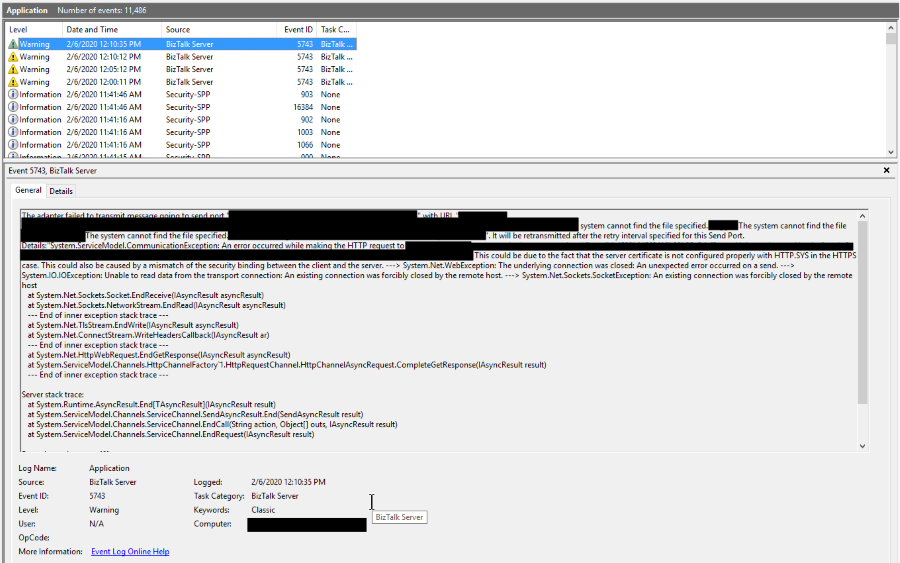
suspended with the following error:
System.ServiceModel.CommunicationException: An error occurred while making the HTTP request to https://prod-….logic.azure.com/workflows/…/triggers/manual/paths/invoke?queryparameters . This could be due to the fact that the server certificate is not configured properly with HTTP.SYS in the HTTPS case. This could also be caused by a mismatch of the security binding between the client and the server. —> System.Net.WebException: The underlying connection was closed: An unexpected error occurred on a send. —> System.IO.IOException: Unable to read data from the transport connection: An existing connection was forcibly closed by the remote host. —> System.Net.Sockets.SocketException: An existing connection was forcibly closed by the remote host at System.Net.Sockets.Socket.EndReceive(IAsyncResult asyncResult) at System.Net.Sockets.NetworkStream.EndRead(IAsyncResult a
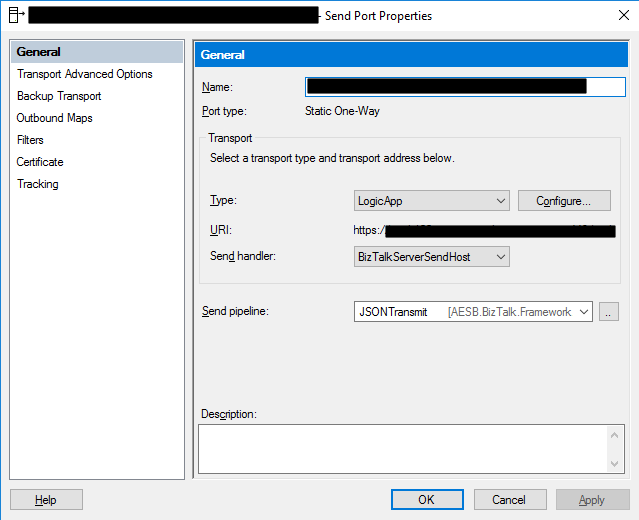
The adapter failed to transmit message going to send port “LOGICAPP_SEND_PORT” with URL “https://prod-….logic.azure.com/workflows/…/triggers/manual/paths/invoke?queryparameters“. It will be retransmitted after the retry interval specified for this Send Port. Details:”System.ServiceModel.CommunicationException: An error occurred while making the HTTP request to https://prod-….logic.azure.com/workflows/…/triggers/manual/paths/invoke?queryparameters. This could be due to the fact that the server certificate is not configured properly with HTTP.SYS in the HTTPS case. This could also be caused by a mismatch of the security binding between the client and the server. —> System.Net.WebException: The underlying connection was closed: An unexpected error occurred on a send. —> System.IO.IOException: Unable to read data from the transport connection: An existing connection was forcibly closed by the remote host. —> System.Net.Sockets.SocketException: An existing connection was forcibly closed by the remote host
at System.Net.Sockets.Socket.EndReceive(IAsyncResult asyncResult)
at System.Net.Sockets.NetworkStream.EndRead(IAsyncResult asyncResult)
— End of inner exception stack trace —
at System.Net.TlsStream.EndWrite(IAsyncResult asyncResult)
at System.Net.ConnectStream.WriteHeadersCallback(IAsyncResult ar)
— End of inner exception stack trace —
at System.Net.HttpWebRequest.EndGetResponse(IAsyncResult asyncResult)
at System.ServiceModel.Channels.HttpChannelFactory`1.HttpRequestChannel.HttpChannelAsyncRequest.CompleteGetResponse(IAsyncResult result)
— End of inner exception stack trace —
Server stack trace:
at System.Runtime.AsyncResult.End[TAsyncResult](IAsyncResult result)
at System.ServiceModel.Channels.ServiceChannel.SendAsyncResult.End(SendAsyncResult result)
at System.ServiceModel.Channels.ServiceChannel.EndCall(String action, Object[] outs, IAsyncResult result)
at System.ServiceModel.Channels.ServiceChannel.EndRequest(IAsyncResult result)
Exception rethrown at [0]:
at System.Runtime.Remoting.Proxies.RealProxy.HandleReturnMessage(IMessage reqMsg, IMessage retMsg)
at System.Runtime.Remoting.Proxies.RealProxy.PrivateInvoke(MessageData& msgData, Int32 type)
at System.ServiceModel.Channels.IRequestChannel.EndRequest(IAsyncResult result)
at Microsoft.BizTalk.Adapter.Wcf.Runtime.WcfClient`2.RequestCallback(IAsyncResult result)”.
The other curious thing was that all my environments DEV, QA, and PROD were with the same symptom and all of them start at the same time which made this problem even more intriguing.
However,
I was able to connect with the adapter, see and select all the Logic Apps in my
subscription.
To
demystify if that was a problem with the adapter, I switch to the HTTP adapter
in order to try. Nevertheless, I got identical problems that made me dismiss
the idea that there could be something wrong with the adapter.
The
next step was to see if there was a network issue, maybe a firewall or proxy, which
should be because there was no intervention in the environment, but it is
always worth testing. To do that, I used one of my favorite tools, postman, and
to my surprise, everything was working fine. I was able to communicate and send
requests to all my Logic Apps in all my environments!
Cause
If you don’t are really
familiar with this type of problem, you may be pointed for a certificate issue,
but in our case, we were not using any kind of certificates to call our Logic
Apps and no additional type of authentication.
But I was sure that I had
already seen that error in the past, and I was related to security protocol (TLS
1.0 or TLS 1.2) used on the HTTPS communication and yes HTTPS because
all Logic Apps endpoints are in HTTPS.
BizTalk
Server came out-of-the-box and works very well with SSL (Secure Socket Layer)
3.0 or TLS (Transport Layer Security) 1.0, and these are the security
protocol used. New versions of BizTalk Server allow us to use TLS 1.2, but that
required extra manual configurations that we need to do in the environment and I
know that everyone is deprecating TLS 1.0 and 1.1 because of the well know vulnerabilities,
nevertheless, everything was working fine I have been doing this kind of hybrid
solution connecting with Logic Apps.
What
I discovered on the official documentation was that they say that: The
Request trigger supports only Transport Layer Security (TLS) 1.2 for incoming
calls. Outgoing calls continue to support TLS 1.0, 1.1, and 1.2.
Nevertheless,
that wasn’t true until a few days ago, and my guess is that they actually discontinue
support for TLS 1.0 and 1.1 on the incoming calls without any notice, something
that, in my opinion, you shouldn’t do.
Solution
The solution was very simple,
we just need to specify that the default security protocol on BizTalk Server is
TLS 1.2. And to do that you need:
To
make some changes on the registry to set TLS 1.2 as default security protocol TLS1.2;
Or
creating a Custom BizTalk Server behavior;
I
choose the first option, making some changes to the registry. And to accomplish
that we need to add the below DWORD values in our registry:
On the [HKEY_LOCAL_MACHINESYSTEMCurrentControlSetControlSecurityProvidersSCHANNELProtocolsTLS 1.2Client]
Create the following DWORD (32-bit) values
Name: DisabledByDefault
Value Data: 0
Name: Enabled
Value Data: 1
On the [HKEY_LOCAL_MACHINESYSTEMCurrentControlSetControlSecurityProvidersSCHANNELProtocolsTLS 1.2Server]
Create the following DWORD (32-bit) values
Name: DisabledByDefault
Value Data: 0
Name: Enabled
Value Data: 1
On the [HKEY_LOCAL_MACHINESOFTWAREMicrosoft.NETFrameworkv4.0.30319]
Create the following DWORD (32-bit) values
Name: SchUseStrongCrypto
Value Data: 1
On the [HKEY_LOCAL_MACHINESOFTWAREWow6432NodeMicrosoft.NETFrameworkv4.0.30319]
Create the following DWORD (32-bit) value
Name: SchUseStrongCrypto
Value Data: 1
If
you try resending a message to your Logic App, everything should work properly
again.
As most of us are aware, starting with BizTalk Server 2013 and newer versions, Microsoft BizTalk ESB Toolkit is integrated with the BizTalk Server setup.
The wait is over, BizTalk Server 2020 is out now! On 15th of January 2020, Microsoft announced the release of BizTalk Server 2020. We got an opportunity to install and configure the ESB toolkit using BizTalk Server 2020.
While installing and configuring ESB we faced a huge challenge and surprise, that the ESB Portal was missing!!! In this blog, we would like to share our experience with you all that we gained and how we configured the ESB portal.
We would like to start from scratch, right from the installation of ESB in BizTalk Server 2020.
Prerequisites
Choose Windows Server 2019 (Preferred) / 2016
Install Visual Studio 2019 – Required for BizTalk Server Developer Tools and SDK.
.NET Framework 4.7 – BizTalk projects created in Visual Studio require the Visual Studio build target to be set to your .NET Framework version
Microsoft SQL Server 2019 (Preferred) – 2017 / 2016 SP2
Install Enterprise Library 5.0 from the link- http://www.microsoft.com/en-us/download/details.aspx?id=15104
Install Microsoft Report Viewer Redistributable 2008 from the link – http://www.microsoft.com/en-us/download/details.aspx?id=577
Add Roles & Features
IIS with IIS 6 compatibility Tools(complete)
Windows Authentication & Basic Authentication (Under: Web Server(IIS) -> Security
WCF & HTTP Activation for both .Net 3.5 and 4.5/4.7
Installing ESB
Close any programs you have opened.
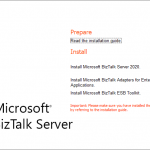
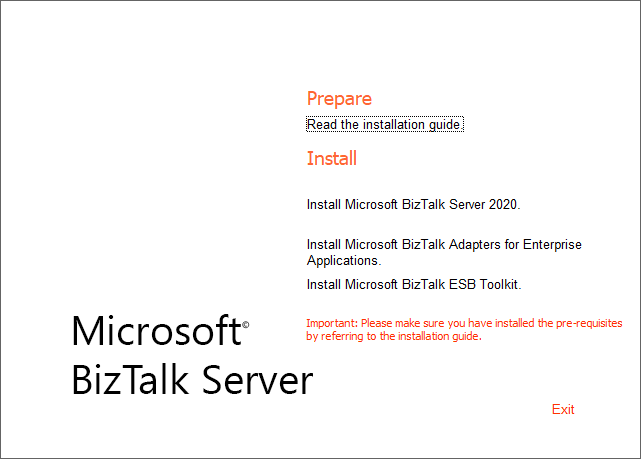
Run the BizTalk Server 2020 setup.exe file as Administrator
On the BizTalk Server installation Start page, click InstallMicrosoft BizTalk ESB Toolkit
On the License Agreement page, select “Yes, I accept the terms of the license agreement” and then select Next
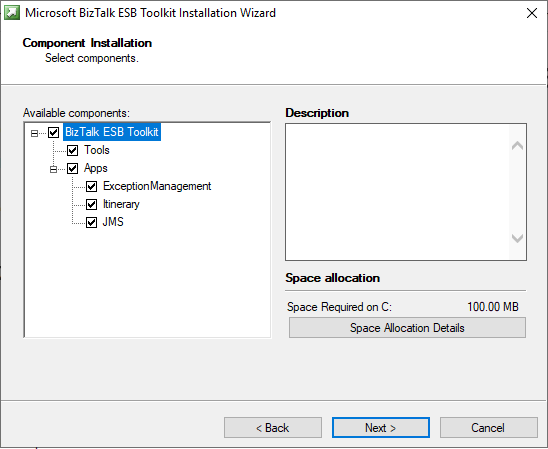
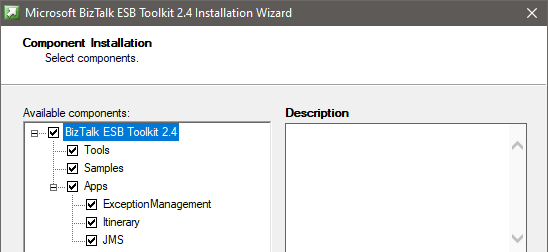
In the Component Installation page, select the components you want to install, and then select Next
Note: If you observe the installation wizard, you may find the ESB Toolkit version is missing while comparing it with the BizTalk Server 2016.
In the Summary, review the installation details that you chose, and then select Install
On the Installation completed page, Select Finish to close the installation wizard. An install log file is created, similar to C:UsersyourUserNameAppDataLocalTempSetup(xxxxxx).htm
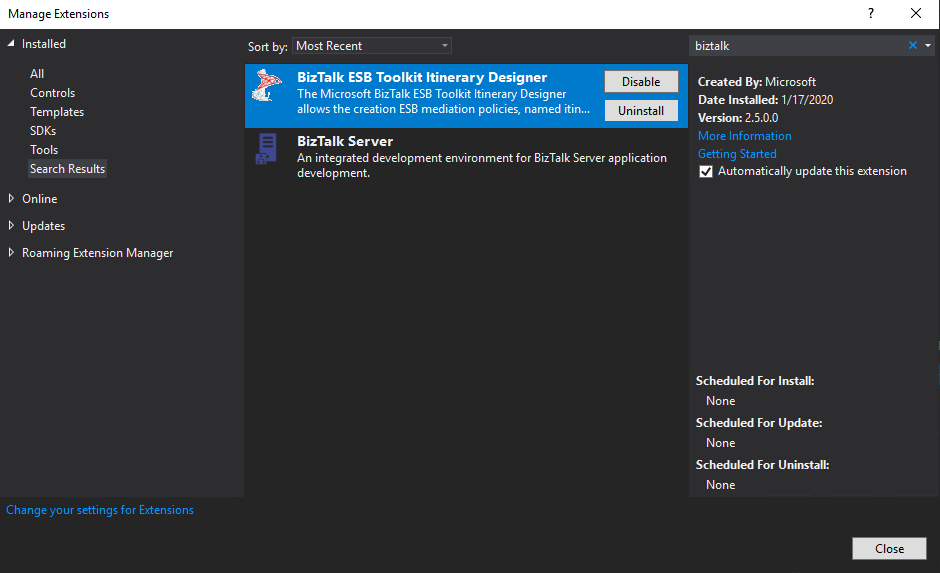
Starting with BizTalk Server 2020, to install the Itinerary Designer, also install the BizTalk ESB Toolkit Itinerary Designer extension in Visual Studio
Using Visual Studio 2019 -> Continue without code -> Extensions -> Manage Extensions -> Install BizTalk ESB Toolkit Itinerary Designer
Note:
You must configure BizTalk Server before configuring BizTalk ESB Toolkit
You must run the ESB Configuration Tool as an administrator
Configuring Microsoft BizTalk ESB Toolkit
From the Start menu, type ESB Configuration Tool or Scroll and select Microsoft BizTalk ESB Toolkit, and then select ESB Configuration Tool
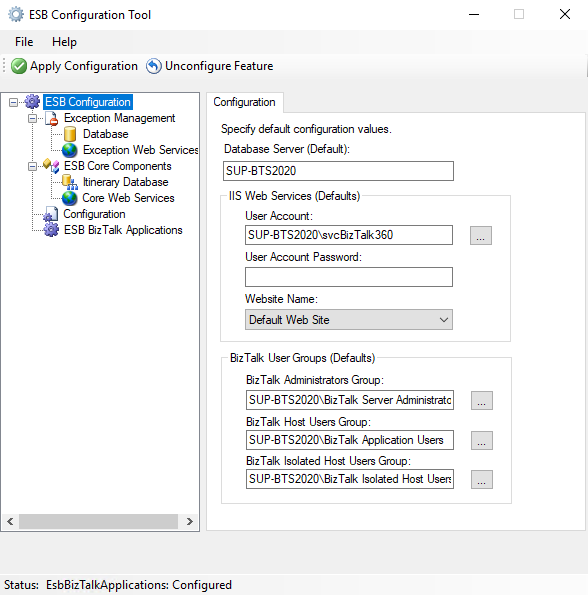
In the ESB Configuration Tool, from the left pane, select ESB Configuration.
On the right pane, for Database Server: specify the database server where the databases, which are required for BizTalk ESB Toolkit, are created
In the IIS Web Services box, specify the User Account credentials under which the applications required for BizTalk ESB Toolkit are created. Also, specify the name of the website in IIS under which the applications are created
The BizTalk User Groups box lists the default user groups which are available for ESB configuration
Note: At this stage, you can click “Apply Configuration” towards the top of the ESB Configuration Tool to configure the Microsoft BizTalk ESB Toolkit with the default settings. However, if you want to do a custom configuration, you can perform the remaining steps as well. In such a case, the values you specify in the subsequent steps take precedence over the default values.
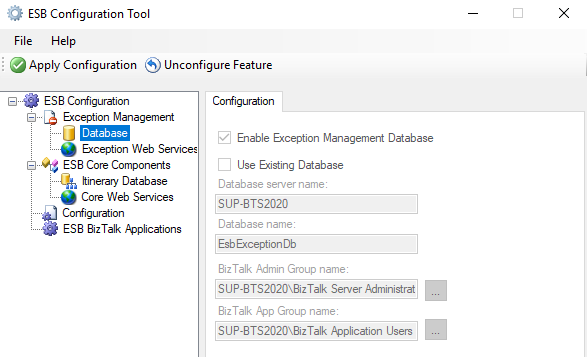
In the left pane, expand ESB Configuration, expand Exception Management, and then:
If you don’t want to configure an exception management database, then select Database, and uncheck the Enable Exception Management Database
If you want to use an existing database instead of creating a new database, then select Database, and select Use Existing Database. Enter the database server name and the database name
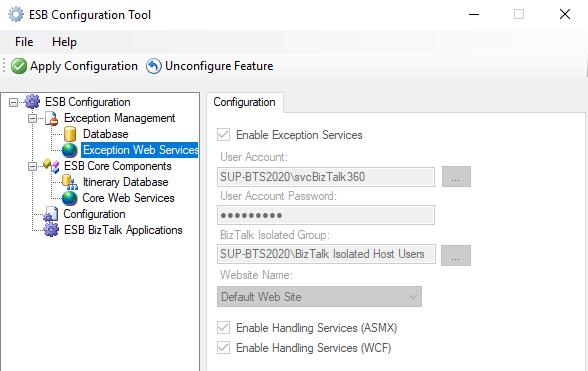
If you don’t want to configure exception web service, then select Exception Web Services, and uncheck Enable Exception Services. If you want to run these services under a different website, you can enter that here
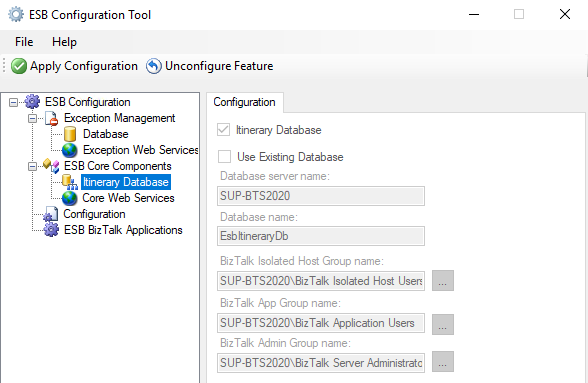
In the left pane, expand ESB Core Components, and then:
If you don’t want to configure an itinerary database, then select Itinerary Database, and uncheck Itinerary Database
If you want to use an existing itinerary database, then select Itinerary Database and select Use Existing Database. Enter the database server name and the database name
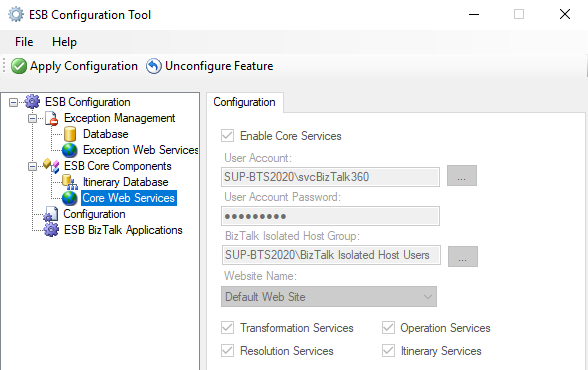
If you don’t want to configure these web services, then select Core Web Services, and uncheck Enable Core Services. If you want to run these services under a different website, you can enter that here
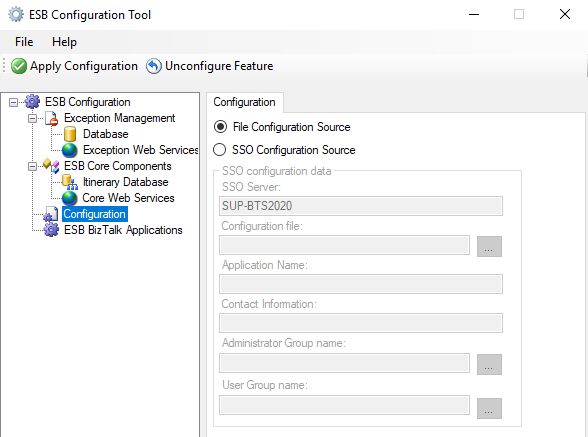
In the left pane, select Configuration
If you are installing and configuring the BizTalk ESB Toolkit in a single server environment, select File Configuration Source.
If you are setting up a multiple-machine deployment, select the SSO Configuration Source, and then enter the following:
SSO Server: Enter the name of the SSO server
Configuration file: Click the ellipsis, and then browse to the esb.config file (Program Files (x86)Microsoft BizTalk ESB Toolkit)
Application Name: Enter a name for the SSO application. For example, enter ESB Toolkit
Contact Information: Enter a valid email address the appropriate contact information in the following format: [email protected]
Administrator Group Name: Select the ellipsis, and then browse to the appropriate admin group
User Group Name: Select the ellipsis, and then browse to the appropriate group
Click Apply Configuration. Open IIS and notice that the applications required for BizTalk ESB Toolkit are now created under the website you specified while configuring BizTalk ESB Toolkit.
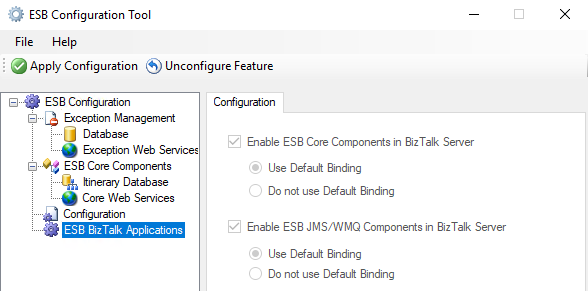
In the ESB Configuration Tool, select ESB BizTalk Applications, and then:
Select Enable ESB Core Components in BizTalk Server to create the application in the BizTalk Server Administration console. Select Use Default Binding to bind this application to the default host. Select Do not use Default Binding, if you do not want to bind the application to the default host. In this scenario, you must explicitly bind the application to a host once the application is created.
Select Enable ESB JMS/WMQ Components in BizTalk Server to create the application in the BizTalk Server Administration console. Select Use Default Binding to bind this application to the default host. Select Do not use Default Binding if you do not want to bind the application to the default host. In this scenario, you must explicitly bind the application to a host once the application is created.
Click Apply Configuration to create the applications you selected. Verify that the applications are created in the BizTalk Server Administration console.
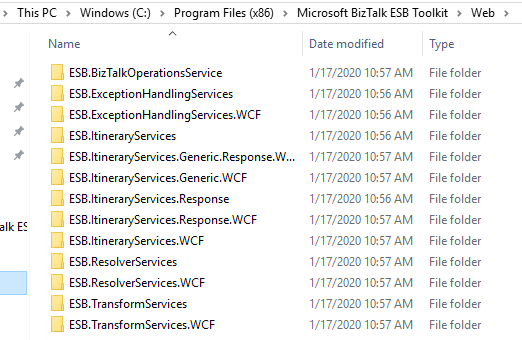
Verify Your Installation
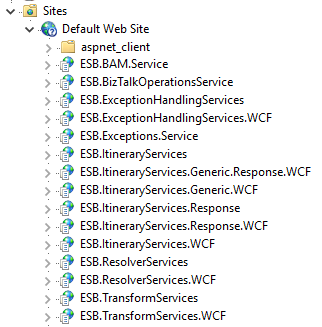
To ensure if the site has been configured correctly, navigate to the folder C:Program Files (x86)Microsoft BizTalk ESB ToolkitWeb. Compare the folders and subfolders, and the sites under IIS -> Sites -> Default Web Site.
Open the BizTalk Server Administration console and notice that the ESB applications is now installed and present in our console.
Finally, ensure the availability of the “EsbExceptionDb” and “EsbItineraryDb” in the database.
ESB Portal Findings
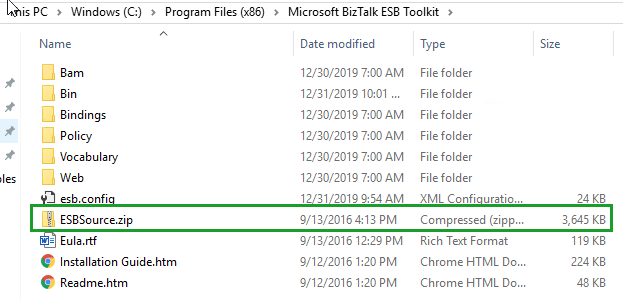
Once after the installation and configuration of ESB Toolkit, if you have a look at the installation folder to configure ESB Portal, you will find that the file “ESBSource.zip” is missing…!!!
Once after the configuration in BizTalk Server 2016, you will be able to find the ESBSource.zip file. But it is not available in BizTalk 2020.
*Screenshot from BizTalk Server 2016 ESB Toolkit installed folder location
*Screenshot from BizTalk Server 2020 ESB Toolkit installed folder location
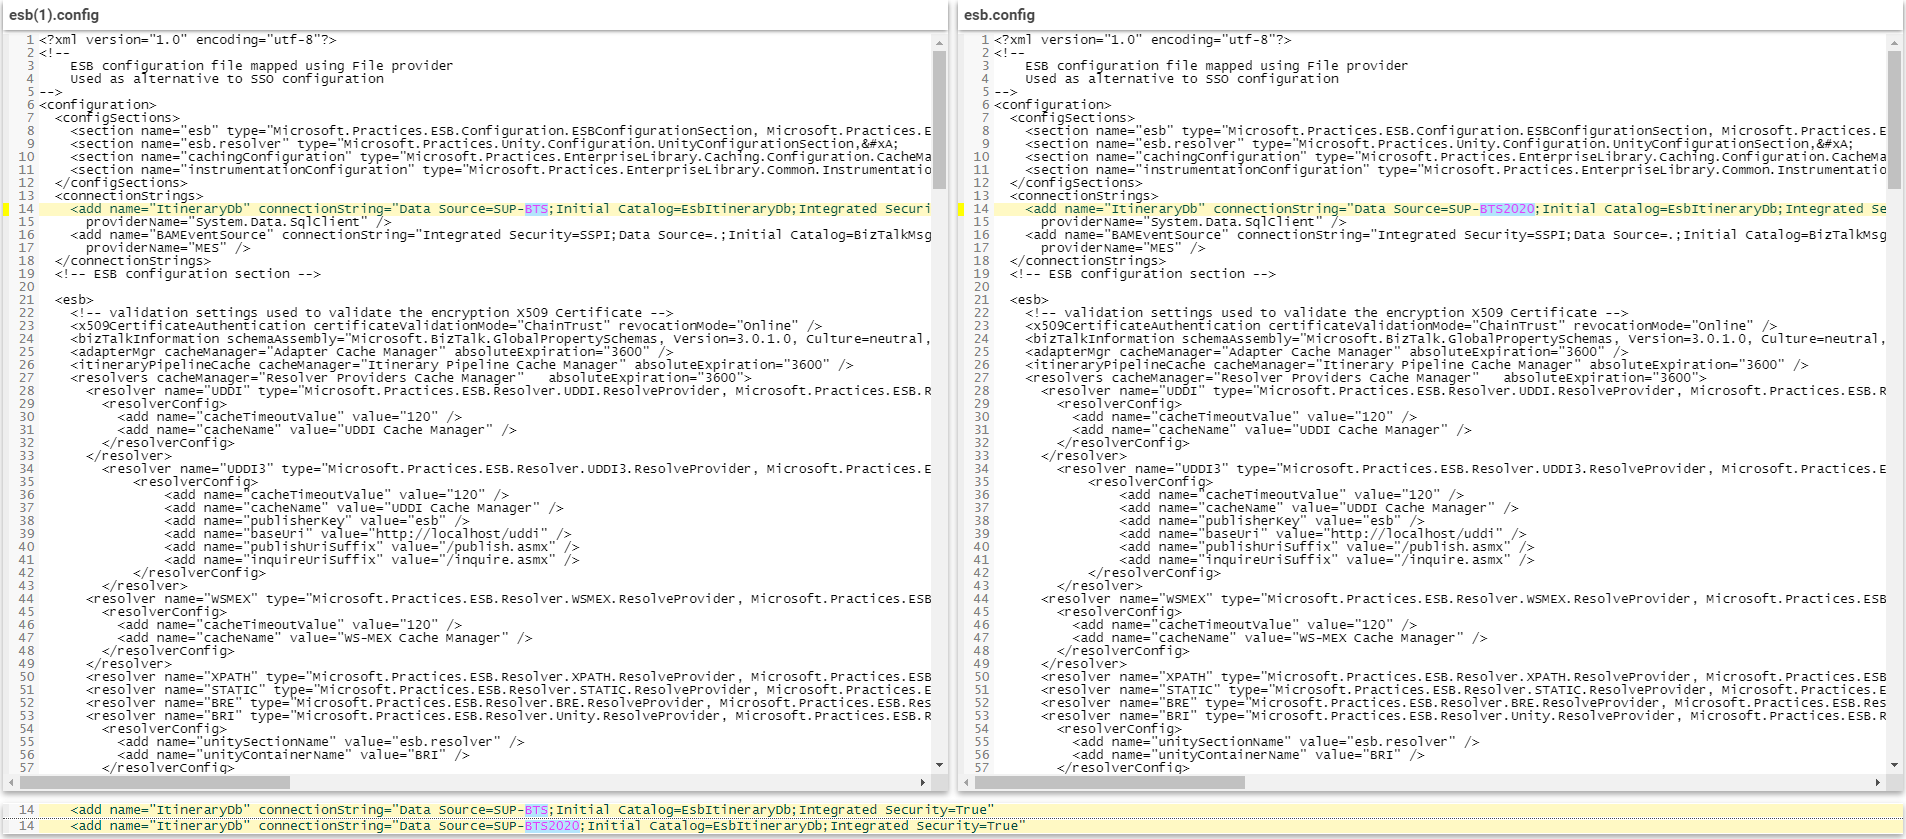
But, if you want to use the default ESB portal, you need the “ESBSource.zip” file to create it, or if you have another option, you can build your custom portal. We have compared the esb.config file to check if any changes have been done. When we checked the file, we found out that no changes have been done in the latest file. So, we thought of using the same portal in BizTalk server 2020 that was already used in the BizTalk server 2016.
To be able to use the existing ESB portal, we have copied the “ESBSource.zip” file from BizTalk Server 2016 and pasted inside the BizTalk Server 2020 folder C:Program Files (x86)Microsoft BizTalk ESB Toolkit.
ESB Portal Installation and Configuration
To install the default ESB portal
Create a folder in your C: drive and name it as Projects. Now, unzip ESBSource.zip file from the download location into the C:ProjectsMicrosoft.Practices.ESB folder
Once after extraction, Remove the Read-only attribute from all files in C:ProjectsMicrosoft.Practices.ESB folder
Install Microsoft Report Viewer Redistributable 2008 from http://www.microsoft.com/en-us/download/details.aspx?id=577
Note: Leave step 4 and 5 if you have already done it earlier
In Visual Studio 2019, open ESB.Portal.sln found in C:ProjectsMicrosoft.Practices.ESBSourceSamplesManagement PortalESB.Portal
When Visual Studio 2019 starts converting the solution to the current format, a dialog pops up that warns you about ESB.Portal.Setup.vdproj file not being supported in Visual Studio 2019. Click OK. Wait until the solution opens
In the Solution Explorer, add Microsoft.Practices.ServiceLocation.dll as a reference to the ESB.BAM.Service.Implementation project. This assembly is found in C:Program Files (x86)Microsoft Enterprise Library 5.0Bin
Save all files in the solution
Rebuild ESB.Portal solution
Close Visual Studio
Run Management_Install.cmd file found in C:ProjectsMicrosoft.Practices.ESBSourceSamplesManagement PortalInstallScripts
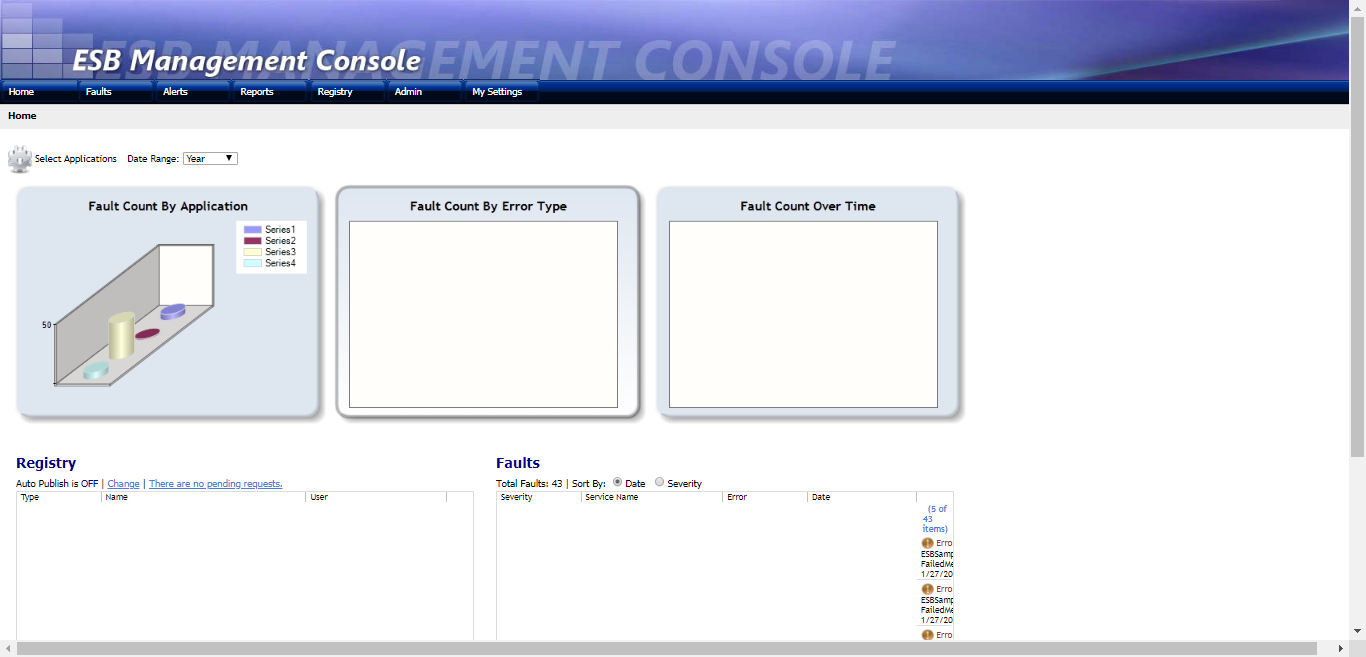
If you can successfully run the Management_Install.cmd without any error/exception, the portal will be configured. Now when you open Internet Explorer and navigate to http://localhost/ESB.Portal you should see the ESB Management Console home page.
If you face any issues/exceptions when you run the Management_Install.cmd and the portal is not created, follow the below steps.
Open PowerShell as an Administrator and run the following command:
set-executionpolicy unrestricted
Open a command prompt as an administrator and run the following command to ensure WCF script maps are registered:
Make sure that the UDDI Service is installed from BizTalk Server Setup before running the UDDI Publisher Tool. Run the UDDI Publisher tool (you can install it at %ESB Install Folder%BinMicrosoft.Practices.ESB.UDDIPublisher.exe). Now, continue to the next step, even though you might get some errors.
Navigate to SamplesManagement PortalInstallScripts from the command prompt run the following commands
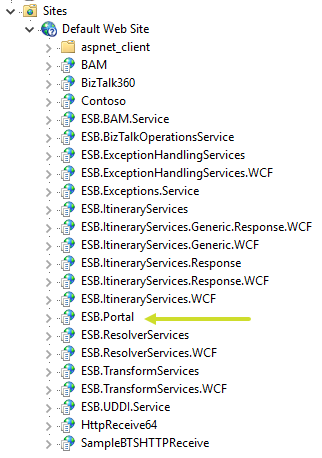
Now, without any errors/exceptions, the portal should be configured. Check if the ESB.Portal is available in IIS. When you open Internet Explorer and navigate to http://localhost/ESB.Portal you should see the ESB Management Console home page.
Phew!!! That’s how we configured ESB Portal.
Hub for Modern and Legacy World
Now we will come to the second option, custom portal…!
Even though the Exception Management framework is very robust and strong, the Exception Management Portal that comes out of BizTalk Server is not that easy to configure as we have experienced.
Firstly, the portal from the ESB Toolkit can be replaced with a portal within BizTalk360. BizTalk360 addresses these challenges in several ways. As with all features within BizTalk360, this portal is protected with security and auditing.
You don’t need to configure the default ESB portal. We want to mention here that a few of our customers haven’t installed the ESB portal.
Instead, they are using BizTalk360’s ESB Portal alone and from the portal, they are performing actions successfully.
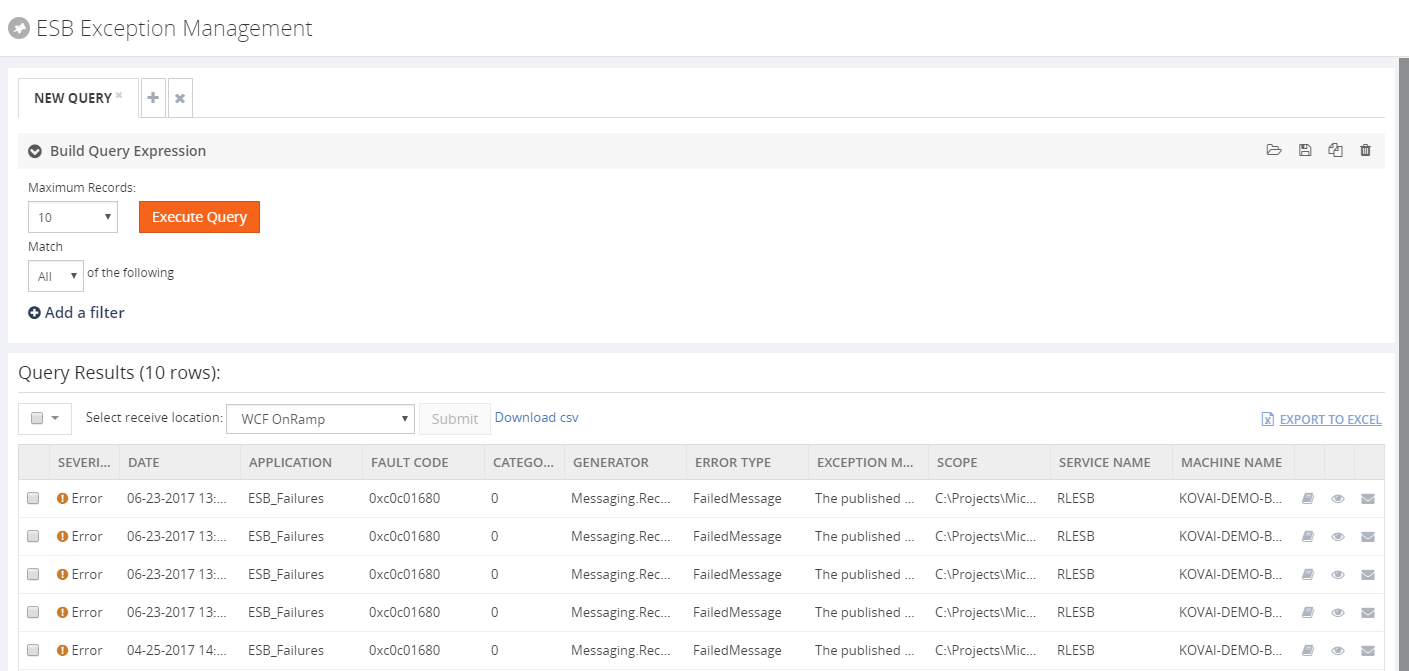
To be able to repair ESB Faults, there is an Edit and Resubmit feature in BizTalk360. To make the repair even easier, you can write and associate Knowledge Base articles to the ESB Faults. So, in case of recurring problems, you can simply document the solution in such a KB article and associate it with the ESB Fault, thereby making repairs in the future easier.
How much time will it take to configure ESB portal within BizTalk360?
All you need to do to configure the ESB Exception management framework within BizTalk360, is to simply provide the connection string to your ESB exception database, relevant to your BizTalk Environment.
That’s it! You are set (takes about 3 minutes, definitely not more than that).
Check the below blogs to know more about BizTalk360 ESB Portal.
For those of you who are not aware of BizTalk360, I would like to give a short intro and we are excited to announce that after working with Microsoft for the past few months, we are now fully supporting Microsoft BizTalk Server 2020 with our latest release.
Why not give BizTalk360 a try? It takes about 10 minutes to install on your BizTalk environments. Get started with the free 30 days trial.
And of course, this was my answer: @WSilveiraNZ a new BizTalk Server 2020 sticker is being made… just to let you know #msbts but then Coen Dijkgraaf joined and asked if the sticker would be available on time for Global Integration Bootcamp?
I was undecided
about whether to publish or wait to INTEGRATE to be a surprise. But I at the
end I decided to create not one but two stickers:
On to published during the INTEGRATE event… spam alert: it is awesome!
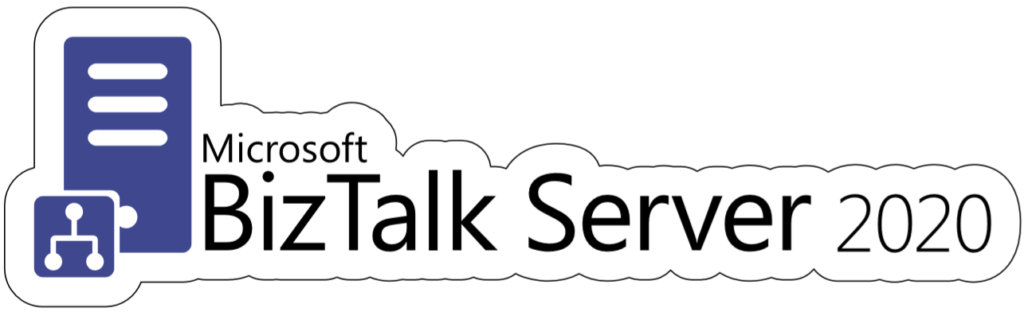
And this one above to publish now in order for you all to grab it and go to a graphics shop to make your BizTalk Sticker. A simple and clean BizTalk Server 2020 sticker identical to the logo that I publish this week: BizTalk Server 2020: a new unofficial logo
This package is a collection of 3 different image formats of the new BizTalk
Server 2020 sticker, two of them are available in vector
format that will allow you to use and resize without losing quality:
BizTalkSticker.ai
BizTalkSticker.pdf
BizTalkSticker-01.png
All of the
resources are in the original size ready to print in a graphics shop.
Thanks to Cristóvão Silva (Graphic & Web Designer @ DevScope) for helping me creating these resources.
I hope you enjoy!
Download
BizTalk Server 2020 sticker Microsoft | TechNet Gallery
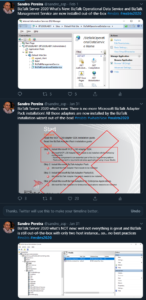
BizTalk Server 2020 was officially released in the middle of January, January 15, 2020, to be more accurate. And you may be asking, why haven’t I written a post about this new version yet.
The answer is simple. I think this version should be properly analyzed, tested by us, and then we can talk about it. And for me, it all starts with installing and configuring the product, and this is where you will find the big differences between the previous version, BizTalk Server 2016 for this new version. You may have a quick overview of that on my twitter handle: https://twitter.com/sandro_asp:
It is not yet available, but for now, I can tell you that I have finished my BizTalk Server 2020 installation and configuration guide – 122 pages guide describing detail instructions to install all the features of the product – I think I may be the first one installing and configuring BAM Portal and is running properly. The installation guide will be published soon but for now, is under review.
It is a sign that you like it, but, once again, this is not the official logo. The official logo was released by Microsoft when BizTalk Server 2016 was launched and at that time Microsoft decided to drop the fancy Server icon from the logo and the version identification, now it is a simple generic logo with just Text that will be consistent in this and further versions of BizTalk Server. You may find the official logo here: Because BizTalk Server 2016 is almost here… take a look to the new BizTalk Server logotype.
But people sometimes prefer to use the “old” format just because it specifies the version, so it is easier to associate with the last version or a specific version of the product. And that was the main reason for me to create that logo.
Nevertheless, during BizTalk Server 2016 release, Microsoft also updated or released a BizTalk Server icon/stencil that you may find in the official BizTalk Server twitter handle:
So I decided that my first blog post after BizTalk Server 2020 was launched, it would be about updating my unofficial BizTalk Server logo and this time it would combine:
The official BizTalk Server icon with the official BizTalk Server logo.
Plus the version number.
And the end
result is this:
This package is a collection of 4 different image formats of the new Unofficial BizTalk Server 2020 logotype, two of them are available in vector format that will allow you to use and resize without losing quality:
BizTalkLogo.ai
BizTalkLogo.pdf
BBizTalkLogo-01.jpg
BizTalkLogoWhite-01.png
Thanks to Cristóvão Silva (Graphic & Web Designer @ DevScope) for helping me creating these resources.
Download
New Unofficial BizTalk Server 2020 logo in vector format Microsoft | TechNet Gallery
Do you feel difficult to keep up to date on all the frequent updates and announcements in the Microsoft Integration platform and Azure iPaaS?
Integration weekly update can be your solution. It’s a weekly update on the topics related to Integration – enterprise integration, robust & scalable messaging capabilities and Citizen Integration capabilities empowered by Microsoft platform to deliver value to the business.
Nino Crudele just published a free whitepaper about Azure Fundamental for Ethical Hackers and Special Ops Team. This is a 39 pages whitepaper about Azure Fundamentals and Penetration Testing and if you’re passionate about security or want to know a little more, then you shouldn’t miss this opportunity.
Nino Crudele is a freelance living in the United Kingdom. He is Global Azure Lead and Cybersecurity expert in Hexagon Manufacturing Intelligence, a global manufacturing company. He is responsible for leading the Microsoft Azure Cloud area, supporting and advising the Company to select the most appropriate cloud strategies and solutions from high-level design to implementation and Security is one of my top priorities.
What to expect about Azure Fundamental for Ethical Hackers and Special Ops Team whitepaper
This whitepaper will provide:
A good understanding of Microsoft Azure, how it is organized and how it works, and this is a good prerequisite in order to create penetration tests, understanding the weaknesses and the critical areas and for any type of security operator.
A good introduction and understanding about penetration testingS, the phases, the standards, the technique, and the methodologies related to Microsoft Azure
Where you can download it
The whitepaper is completely free and you can download it here:
I would like to take this opportunity also to say thanks to Nino Crudele for inviting me to be is a technical reviewer for this whitepaper, as always with him it was a nightmare but a very enjoyable one.
At our annual event Integrate, Microsoft announced last year that BizTalk Server 2020 should have released in the first quarter of 2019. Only two weeks in the new year, Microsoft has released BizTalk Server 2020 (v3.13.717.0)! In this blog, we want to update you on what’s new in this version of the product.
No Changes in Available Editions
Similar to earlier versions of the product, BizTalk Server 2020 comes in 4 flavors:
Microsoft BizTalk Server 2020 Developer
Microsoft BizTalk Server 2020 Branch
Microsoft BizTalk Server 2020 Standard [to do: changed limitations]
Microsoft BizTalk Server 2020 Enterprise
You can download these products when you have an Enterprise MSDN account.
New Features in BizTalk Server 2020
During Integrate 2019, Paul Larsen, the Program Manager who is responsible for BizTalk Server, already highlighted which new features are coming in BizTalk Server 2020. You can read a recap about Paul’s session here.
As you can understand from Paul’s session, we were already expecting platform alignment. More importantly, BizTalk Server 2020 contains all features from BizTalk Server 2016, including the 3 Feature Packs, which have been released.
But, let’s have a look at some of the new features and capabilities.
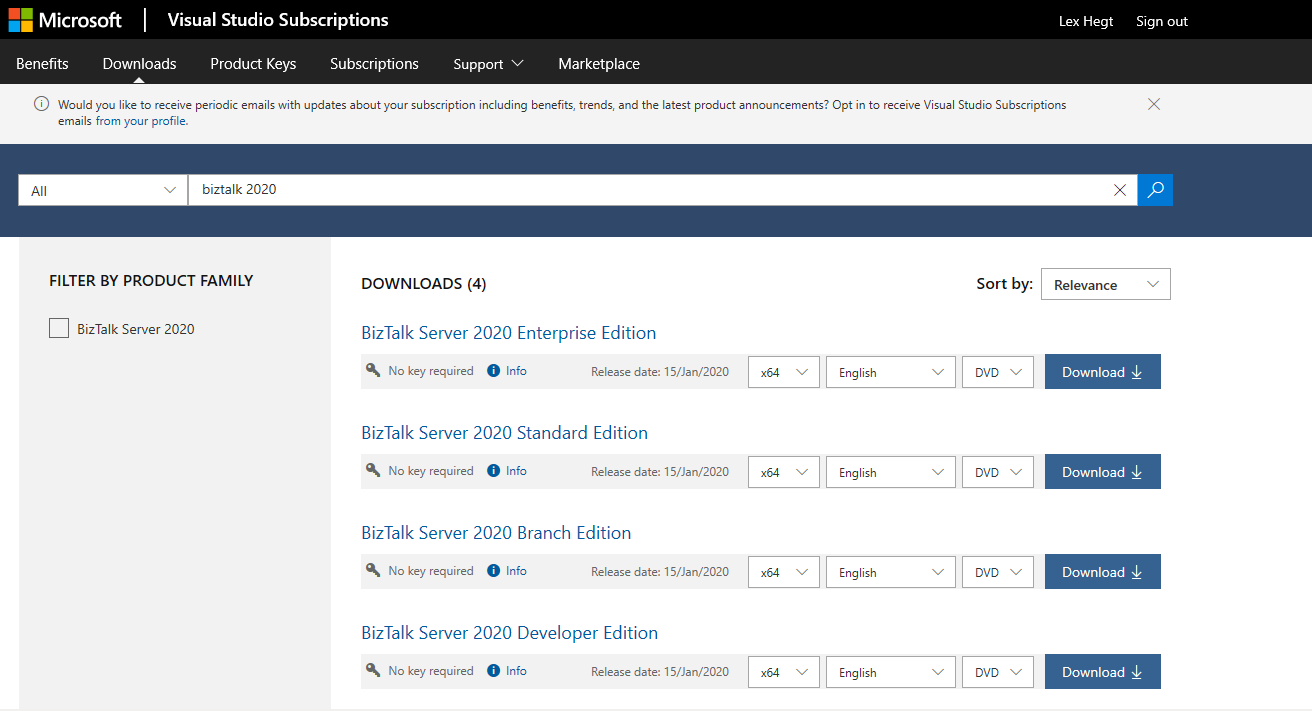
Support for newer platforms
BizTalk Server 2020 adds support for the following Microsoft platforms:
– Visual Studio 2019
– Windows Server 2019, Windows Server 2016, Windows 10
– SQL Server 2019, SQL Server 2017, SQL Server 2016 SP2
– Office 2019, Office 2016
Operational Data Monitoring and Analytics.
Leverage the power of Azure (Application Insight and Event Hub) for deep data storage and Power BI for reporting and viewing of data.
Using Visual Studio Team Services, you can define multi-server deployments of BizTalk Server 2020, and then maintain those systems throughout the application lifecycle.
Using the new Event Hub Adapter, BizTalk Server can send and receive messages with Azure Event Hubs, where BizTalk Server can function as both an event publisher and subscriber, as part of a new Azure cloud-based event-driven application.
Leverage the power of BizTalk in newer office automation workflows by integrating with Adapters that allow you to send or receive Office 365 emails, receive or transmit Office 365 calendar events, and create Office 365 contacts.
Making BizTalk further secure by maintaining audit trails of all management operations.
New Read-Only Operator role
Brand new read-only operator role in facilitating the dev-ops model, where access to production stamp is provided without the ability to update anything.
Additional updates
· Move to new long term supported Microsoft OLEDB Driver for SQL Server
· Support for SSO Affiliate applications in the SFTP adapter
· SQL Availability Group support for BAM DTS Package via SSIS Catalog
· Partially disabled receive locations
· Throughput improvements for Dynamic Send Ports with Ordered Delivery
Deprecated and Removed Features
Some features of the product are deprecated or removed from the product. Here’s the list:
Based on the above lists, and besides the already expected features and improvements, a few features catch the eye.
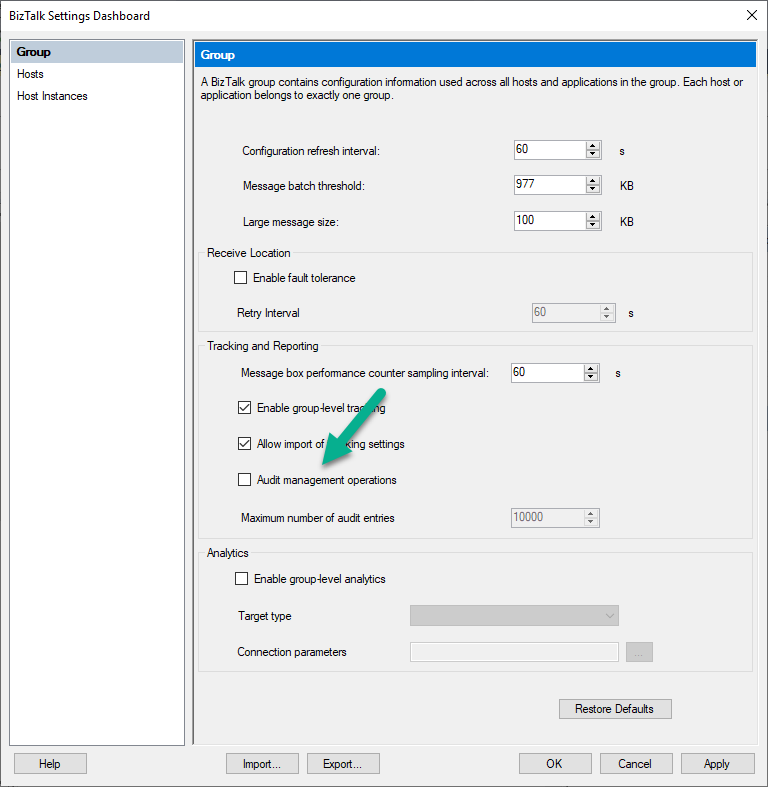
Audit Log
Until now, no auditing was available for any operations performed against the BizTalk environment. Luckily, from BizTalk Server 2020 on, the Administration console provides auditing of operations. To be able to use this feature, you will have to turn it on in the Group Settings screen.
The auditing data is stored in the Management database, and you can access it via the Operational Services. At the moment, the supported operations are:
Creating, updating and deleting ports
Suspending, resuming and terminating service instances
Adding, updating and removing BizTalk applications
Importing binding files
Although this is a good start, multiple important operations are still missing; think of starting/stopping of ports, orchestrations, and host instances. We hope that Microsoft adds such operations in the future.
Earlier, Microsoft has announced that .NET 4.8 will be supported.
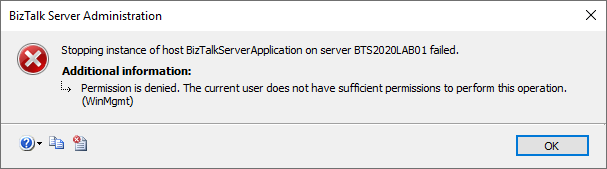
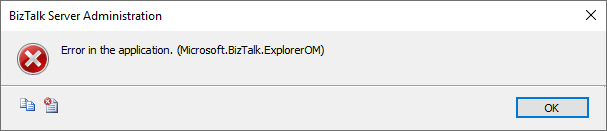
New Read-Only Operator role
The BizTalk Operator role has changed. Where before, it was possible to perform actions like stopping/starting ports and changing the port configuration, this role is now completely read-only. This can certainly be useful for facilitating DevOps scenarios.
When accessing the BizTalk Server 2020 Admin console as a BizTalk Operator, all the operations are still accessible. However, when an operator tries, for example, to stop a port, an error message shows up, and the operation becomes blocked. Unfortunately, the error message is not always clear that the operation is blocked due to insufficient permissions.
BAM Portal is Deprecated
Microsoft has decided to deprecate the BAM portal. Probably due to the new capabilities to push data to Azure, they decided to deprecate the old-fashioned BAM portal. In case you are using BAM, and you are considering upgrading to BizTalk Server 2020, you can still install and configure the BAM portal from the BizTalk installer and configuration wizard; you won’t be left in the dark.
Deprecated and Removed Adapters
Multiple updates in this area as well. For example, Microsoft deprecates the POP3 and the SMTP adapters in favor of the Office 365 adapters, which appeared in the BizTalk Server 2016 Feature Packs. Next, the old SQL adapter has been removed and replaced by the WCF-SQL adapter, and the JDE OneWorld and the WCF-NetTcpRelay adapter have both been deprecated.
BizTalk360 Support of BizTalk Server 2020
The BizTalk360 product team has eagerly followed the developments around BizTalk Server 2020, and we are glad that BizTalk Server 2020 has been released. For BizTalk360, it is evident that the product must support all recent versions of BizTalk Server.
That’s why we made the latest released versions of BizTalk360 and Atomic Scope compatible with BizTalk Server 2020!
Conclusion
BizTalk Server 2020 has been released. This is the 11th version of the product since its inception in 2000. Although we have already seen most of the features of this release (in the BizTalk Server 2016 Feature Packs), this is still a useful release. Especially when you are still on versions older than BizTalk Server 2016, it will certainly be worth upgrading or migrating to this release.
Do you feel difficult to keep up to date on all the frequent updates and announcements in the Microsoft Integration platform and Azure iPaaS?
Integration weekly update can be your solution. It’s a weekly update on the topics related to Integration – enterprise integration, robust & scalable messaging capabilities and Citizen Integration capabilities empowered by Microsoft platform to deliver value to the business.
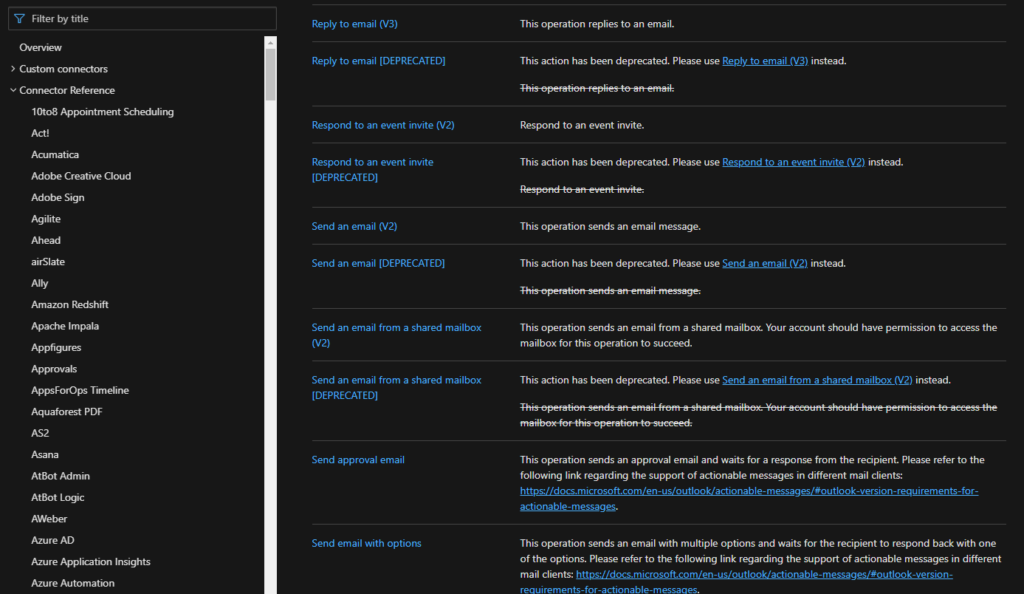
Microsoft has been discontinuing some actions for some time or at least
running side by side different versions, don’t get me wrong. But they were never
extremely good at providing proper documentation, even in the old days that we
had software releases every two or three years, now imagine in this crazy fast
delivery world that we are leaving! What you see is:
A big gap between the documentation and the features that we have available or not properly documented in terms of how they work;
There is nothing that tells you what was change or how certain task that was possible to do in previous versions of action can now be done.
When I say that for the first time that Microsoft deprecated connection
actions, I mean actual remove from the list of actions on the Logic App design,
taking from the example the two connectors mention above you can’t see
the deprecated action on the Logic App designer anymore:
But don’t be alarmed, your existing logic apps that still use these
deprecated actions continue to work properly.
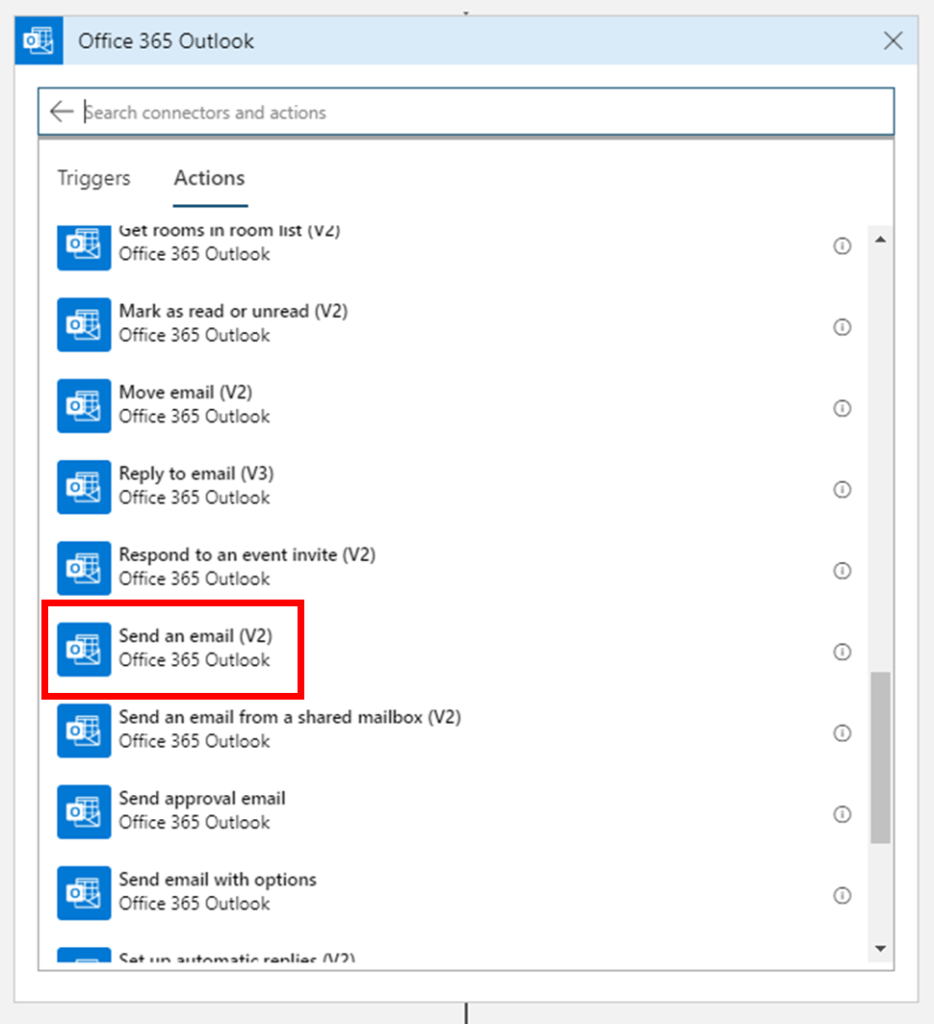
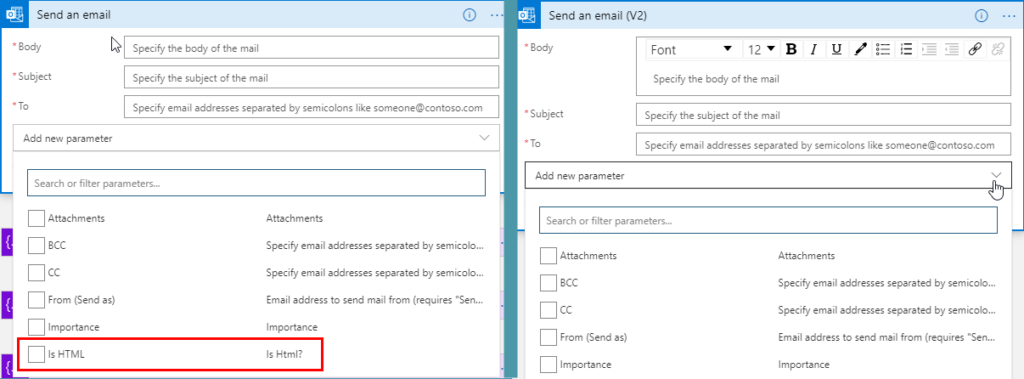
In this article, we will address the Office 365 Outlook connector and especially the Send an Email V2 action because Send an Email action is now deprecated. So the question here is:
How to send a well-formatted custom HTML Email using Send an Email V2 action available on the Office 365 Outlook connector?
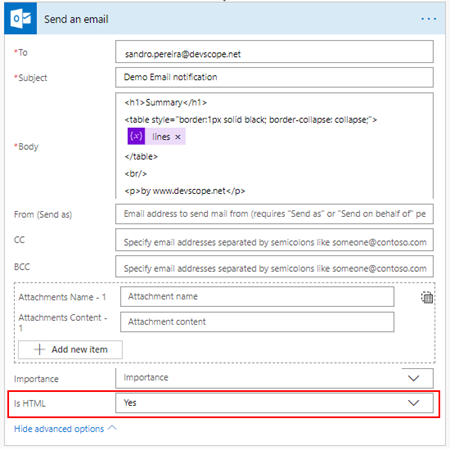
I personally liked the Send
an Email action because we were able to directly put HTML code on the body
property and define that the email body format would be HTML bt setting the
property Is HTML to true.
Quite simple to use and
efficient.
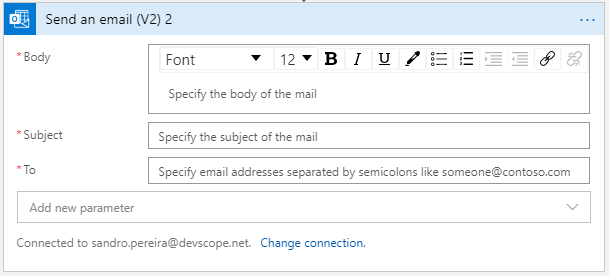
However, Send an email (V2) action has totally different
behavior. First of all, it owns fewer properties:
Is HTM property was removed from this action;
And a completely new look
and feel of the Body property as you see in the picture below:
With a powerful editor similar to what we have in our office tools (Word, Outlook, …)
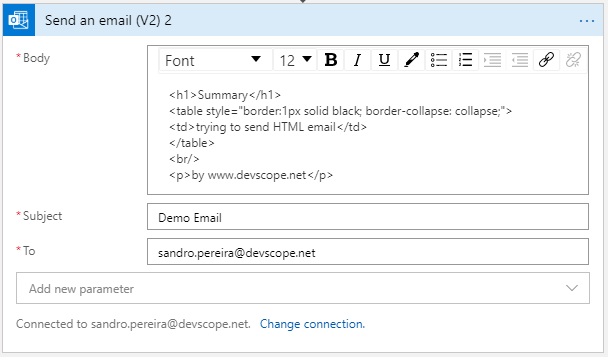
That also means that we no longer have the possibility to directly insert HTML code into the body property of the message as we did earlier with the previous version. Well, we can write HTML code on the body of this action:
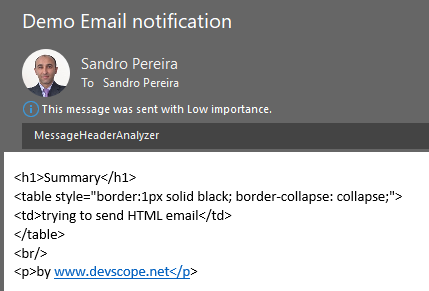
But the end result will not be what you expect:
Unluckily Power Automate designer, we don’t have a Code View button (</>) on the Body property editor, I will be blogging about this feature soon on Serveless360 blog. So, who we are able to send a proper well-formatted HTML Email using Send an email V2 action?
The answer is: unfortunately, at least in my opinion, we need to build the HTML in an action beforehand in a composite action or in a variable. And then put the compose output or variable as the send mail body property, and the action will render correctly the output as an HTML.
To do that we need:
On
the Logic App designer, add the next step by clicking the +New step
button
On
the Choose an action window, enter Variables and select the
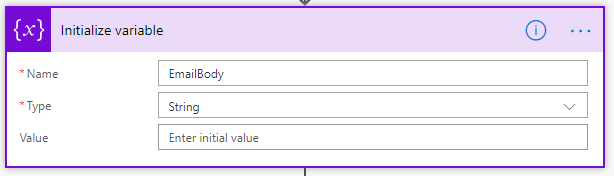
action Initialize variable
On
the Variable action configuration:
On
the Name property, type “EmailBody”
On
the Type property, specify the type as “String”
On
the Value property leave it blank
On
the Logic App designer, add the next step by clicking the +New step
button
On
the Choose an action window, enter Variables and select the
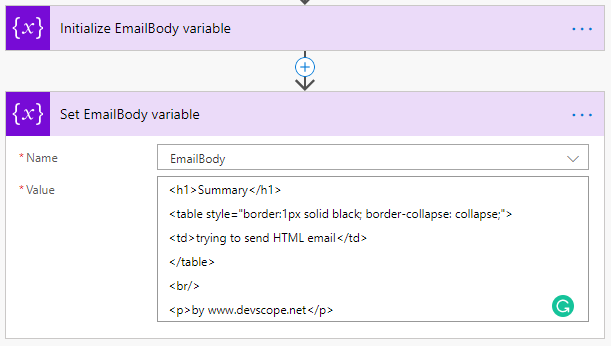
action Set variable
On
the Variable action configuration:
On
the Name property, select “EmailBody” variable
On
the Value property, type your custom HTML
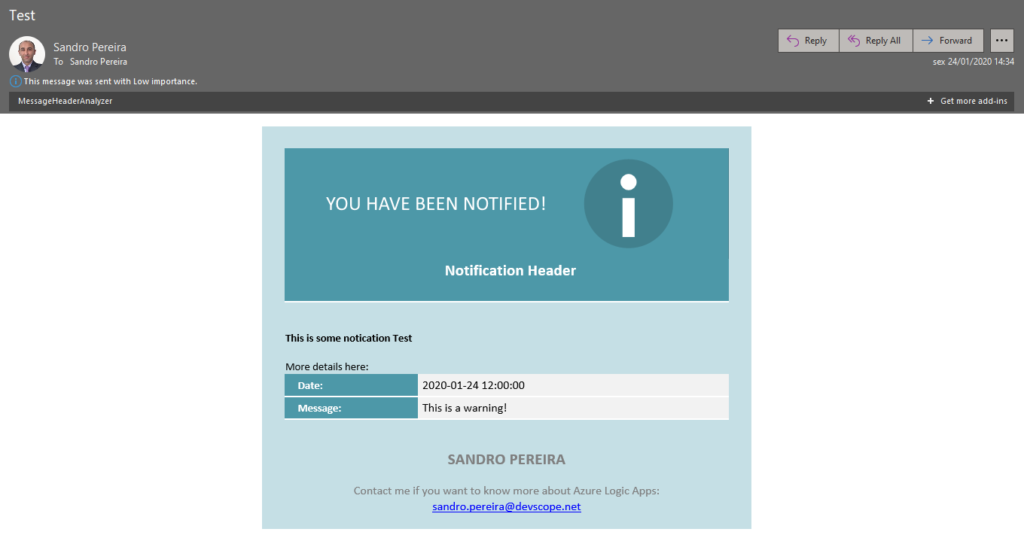
Note: you can take as example this fancy HTML Template that I created specifically for this article here: HTML Notification Template to use Logic App or Power Automate Outlook connector and not this basic HTML that you are seeing on the picture.
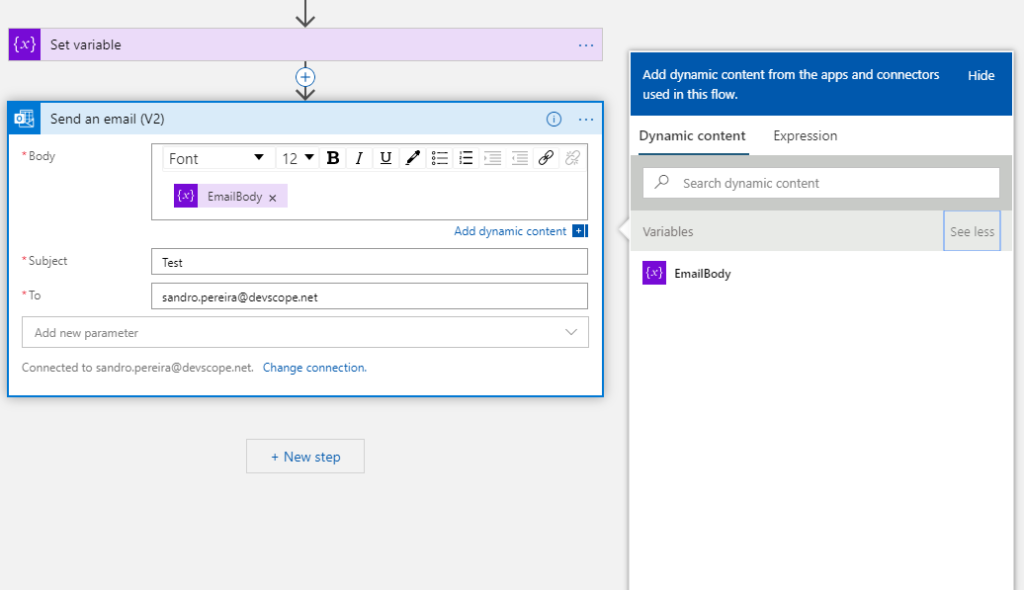
And then define directly on the Body editor (without switching to Code View) that the body will be the content of the variable we created earlier:
And you will see that you
will be receiving also a well-formatted HTML email on your mailbox:
Thanks Thiago Almeida for the help and credits to Pedro Rosa that helped me creating this HTML Template and most important to be compatible with Outlook because not all the stylesheets that we can apply aren’t compatible.


 #msbts but then
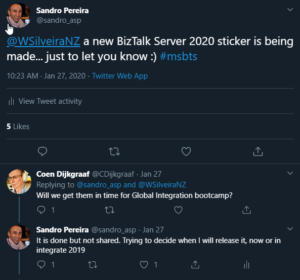


![Azure Fundamental for Ethical Hackers and Special Ops Team [free whitepaper] By Nino Crudele](https://www.biztalkgurus.com/wp-content/uploads/2020/01/Azure-Fundamental-for-Ethical-Hackers-and-Special-Ops-Team-1-150x150.png)