As most of us are aware, starting with BizTalk Server 2013 and newer versions, Microsoft BizTalk ESB Toolkit is integrated with the BizTalk Server setup.
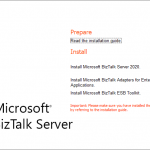
The wait is over, BizTalk Server 2020 is out now! On 15th of January 2020, Microsoft announced the release of BizTalk Server 2020. We got an opportunity to install and configure the ESB toolkit using BizTalk Server 2020.
While installing and configuring ESB we faced a huge challenge and surprise, that the ESB Portal was missing!!! In this blog, we would like to share our experience with you all that we gained and how we configured the ESB portal.
We would like to start from scratch, right from the installation of ESB in BizTalk Server 2020.
Prerequisites
- Choose Windows Server 2019 (Preferred) / 2016
- Install Visual Studio 2019 – Required for BizTalk Server Developer Tools and SDK.
- .NET Framework 4.7 – BizTalk projects created in Visual Studio require the Visual Studio build target to be set to your .NET Framework version
- Microsoft SQL Server 2019 (Preferred) – 2017 / 2016 SP2
- Install Enterprise Library 5.0 from the link- http://www.microsoft.com/en-us/download/details.aspx?id=15104
- Install Microsoft Report Viewer Redistributable 2008 from the link – http://www.microsoft.com/en-us/download/details.aspx?id=577
Add Roles & Features
- IIS with IIS 6 compatibility Tools(complete)
- Windows Authentication & Basic Authentication (Under: Web Server(IIS) -> Security
- WCF & HTTP Activation for both .Net 3.5 and 4.5/4.7
Installing ESB
Close any programs you have opened.
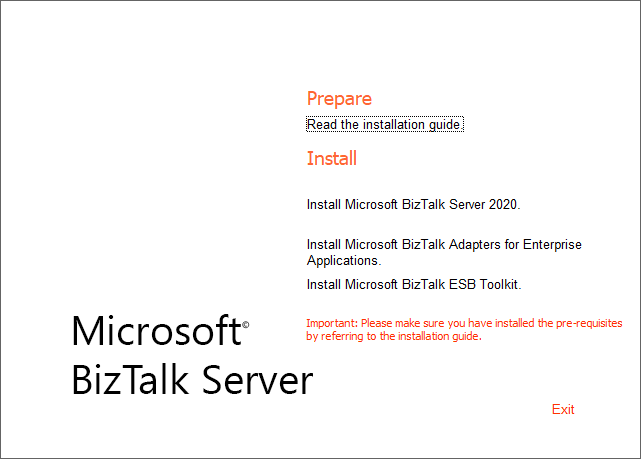
- Run the BizTalk Server 2020 setup.exe file as Administrator
- On the BizTalk Server installation Start page, click Install Microsoft BizTalk ESB Toolkit
- On the License Agreement page, select “Yes, I accept the terms of the license agreement” and then select Next
- In the Component Installation page, select the components you want to install, and then select Next
- In the Summary, review the installation details that you chose, and then select Install
- On the Installation completed page, Select Finish to close the installation wizard. An install log file is created, similar to C:UsersyourUserNameAppDataLocalTempSetup(xxxxxx).htm
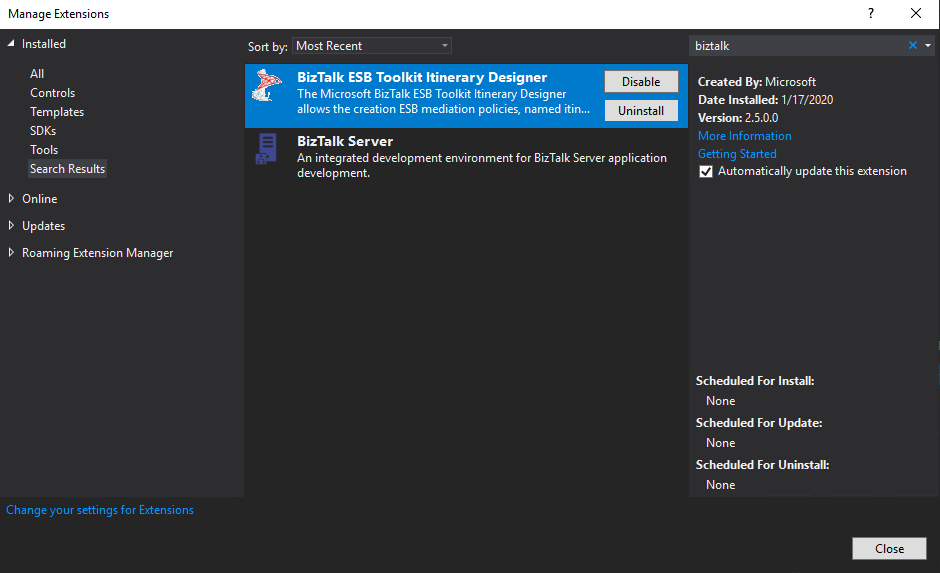
- Starting with BizTalk Server 2020, to install the Itinerary Designer, also install the BizTalk ESB Toolkit Itinerary Designer extension in Visual Studio
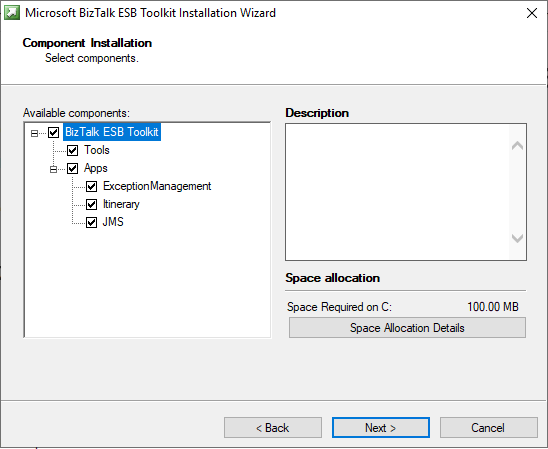
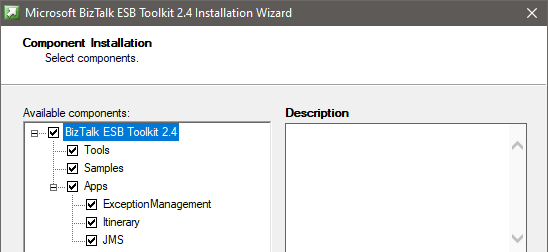
Note: If you observe the installation wizard, you may find the ESB Toolkit version is missing while comparing it with the BizTalk Server 2016.
Using Visual Studio 2019 -> Continue without code -> Extensions -> Manage Extensions -> Install BizTalk ESB Toolkit Itinerary Designer
Note:
- You must configure BizTalk Server before configuring BizTalk ESB Toolkit
- You must run the ESB Configuration Tool as an administrator
Configuring Microsoft BizTalk ESB Toolkit
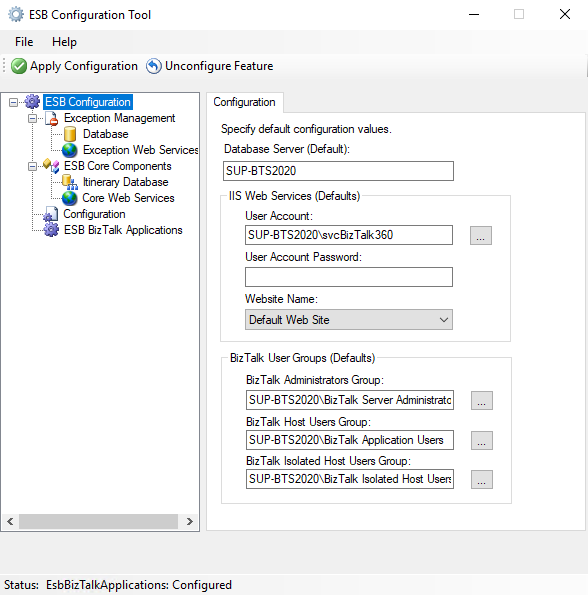
- From the Start menu, type ESB Configuration Tool or Scroll and select Microsoft BizTalk ESB Toolkit, and then select ESB Configuration Tool
- In the ESB Configuration Tool, from the left pane, select ESB Configuration.
- On the right pane, for Database Server: specify the database server where the databases, which are required for BizTalk ESB Toolkit, are created
- In the IIS Web Services box, specify the User Account credentials under which the applications required for BizTalk ESB Toolkit are created. Also, specify the name of the website in IIS under which the applications are created
- The BizTalk User Groups box lists the default user groups which are available for ESB configuration
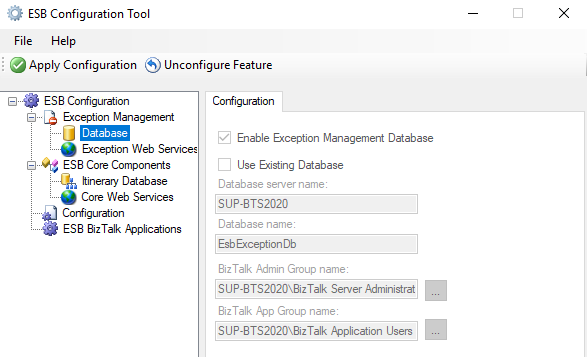
- In the left pane, expand ESB Configuration, expand Exception Management, and then:
Note: At this stage, you can click “Apply Configuration” towards the top of the ESB Configuration Tool to configure the Microsoft BizTalk ESB Toolkit with the default settings. However, if you want to do a custom configuration, you can perform the remaining steps as well. In such a case, the values you specify in the subsequent steps take precedence over the default values.
- If you don’t want to configure an exception management database, then select Database, and uncheck the Enable Exception Management Database
- If you want to use an existing database instead of creating a new database, then select Database, and select Use Existing Database. Enter the database server name and the database name
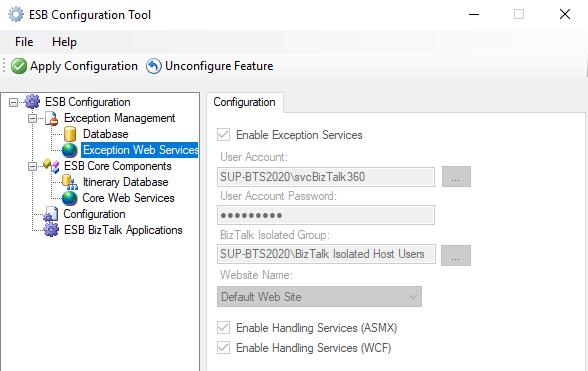
- If you don’t want to configure exception web service, then select Exception Web Services, and uncheck Enable Exception Services. If you want to run these services under a different website, you can enter that here
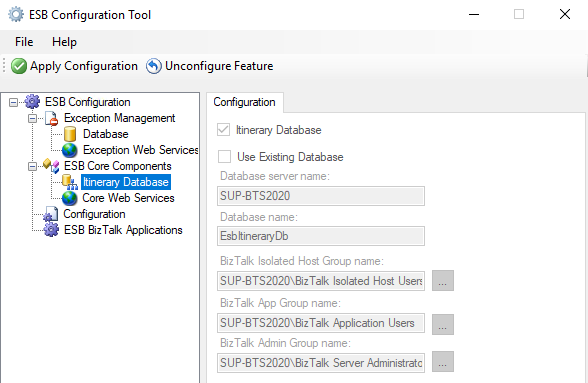
- If you don’t want to configure an itinerary database, then select Itinerary Database, and uncheck Itinerary Database
- If you want to use an existing itinerary database, then select Itinerary Database and select Use Existing Database. Enter the database server name and the database name
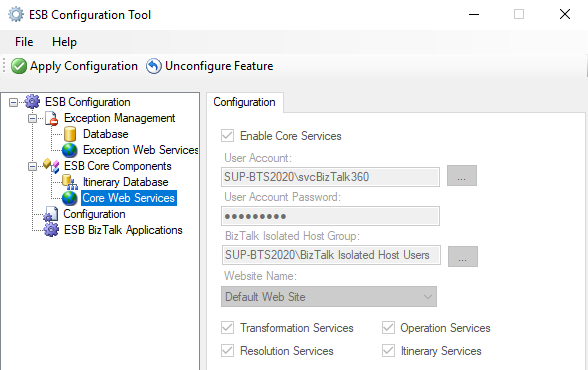
- If you don’t want to configure these web services, then select Core Web Services, and uncheck Enable Core Services. If you want to run these services under a different website, you can enter that here
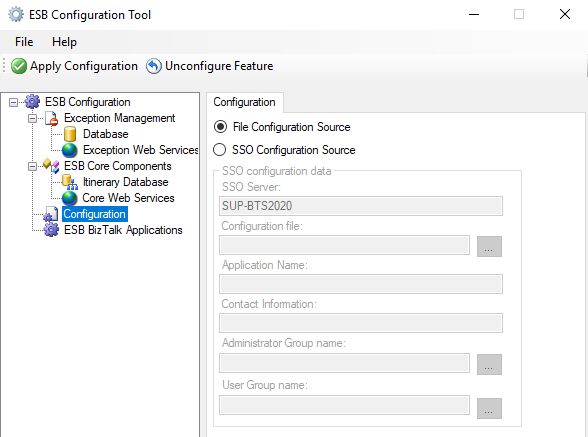
If you are installing and configuring the BizTalk ESB Toolkit in a single server environment, select File Configuration Source.
If you are setting up a multiple-machine deployment, select the SSO Configuration Source, and then enter the following:
- SSO Server: Enter the name of the SSO server
- Configuration file: Click the ellipsis, and then browse to the esb.config file (Program Files (x86)Microsoft BizTalk ESB Toolkit)
- Application Name: Enter a name for the SSO application. For example, enter ESB Toolkit
- Contact Information: Enter a valid email address the appropriate contact information in the following format: [email protected]
- Administrator Group Name: Select the ellipsis, and then browse to the appropriate admin group
- User Group Name: Select the ellipsis, and then browse to the appropriate group
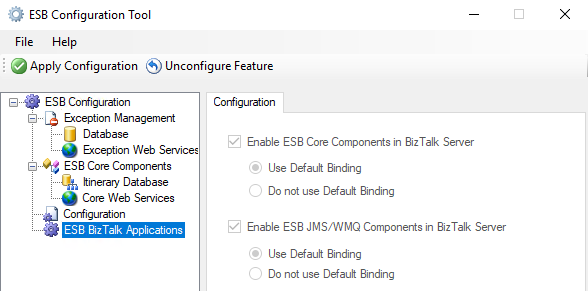
- Select Enable ESB Core Components in BizTalk Server to create the application in the BizTalk Server Administration console. Select Use Default Binding to bind this application to the default host. Select Do not use Default Binding, if you do not want to bind the application to the default host. In this scenario, you must explicitly bind the application to a host once the application is created.
- Select Enable ESB JMS/WMQ Components in BizTalk Server to create the application in the BizTalk Server Administration console. Select Use Default Binding to bind this application to the default host. Select Do not use Default Binding if you do not want to bind the application to the default host. In this scenario, you must explicitly bind the application to a host once the application is created.
- Click Apply Configuration to create the applications you selected. Verify that the applications are created in the BizTalk Server Administration console.
Verify Your Installation
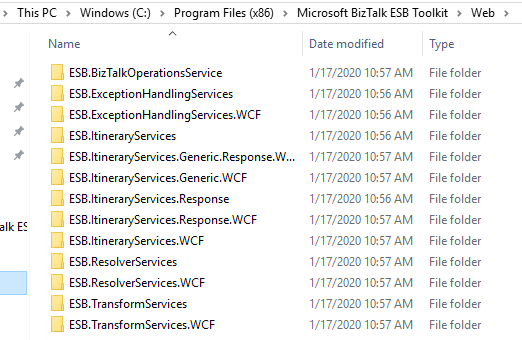
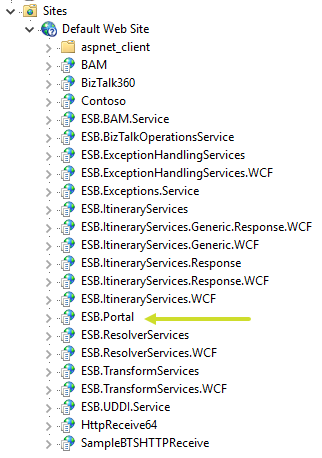
To ensure if the site has been configured correctly, navigate to the folder C:Program Files (x86)Microsoft BizTalk ESB ToolkitWeb. Compare the folders and subfolders, and the sites under IIS -> Sites -> Default Web Site.
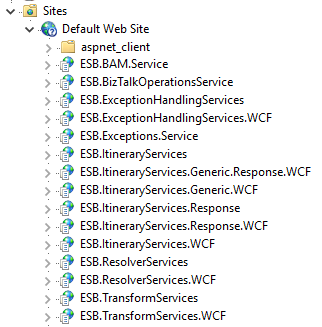
Open the BizTalk Server Administration console and notice that the ESB applications is now installed and present in our console.

Finally, ensure the availability of the “EsbExceptionDb” and “EsbItineraryDb” in the database.
ESB Portal Findings
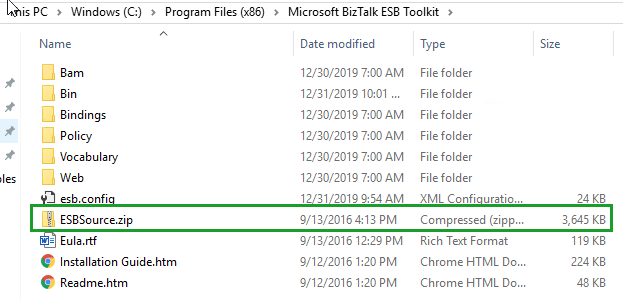
Once after the installation and configuration of ESB Toolkit, if you have a look at the installation folder to configure ESB Portal, you will find that the file “ESBSource.zip” is missing…!!!
Once after the configuration in BizTalk Server 2016, you will be able to find the ESBSource.zip file. But it is not available in BizTalk 2020.
*Screenshot from BizTalk Server 2016 ESB Toolkit installed folder location
*Screenshot from BizTalk Server 2020 ESB Toolkit installed folder location
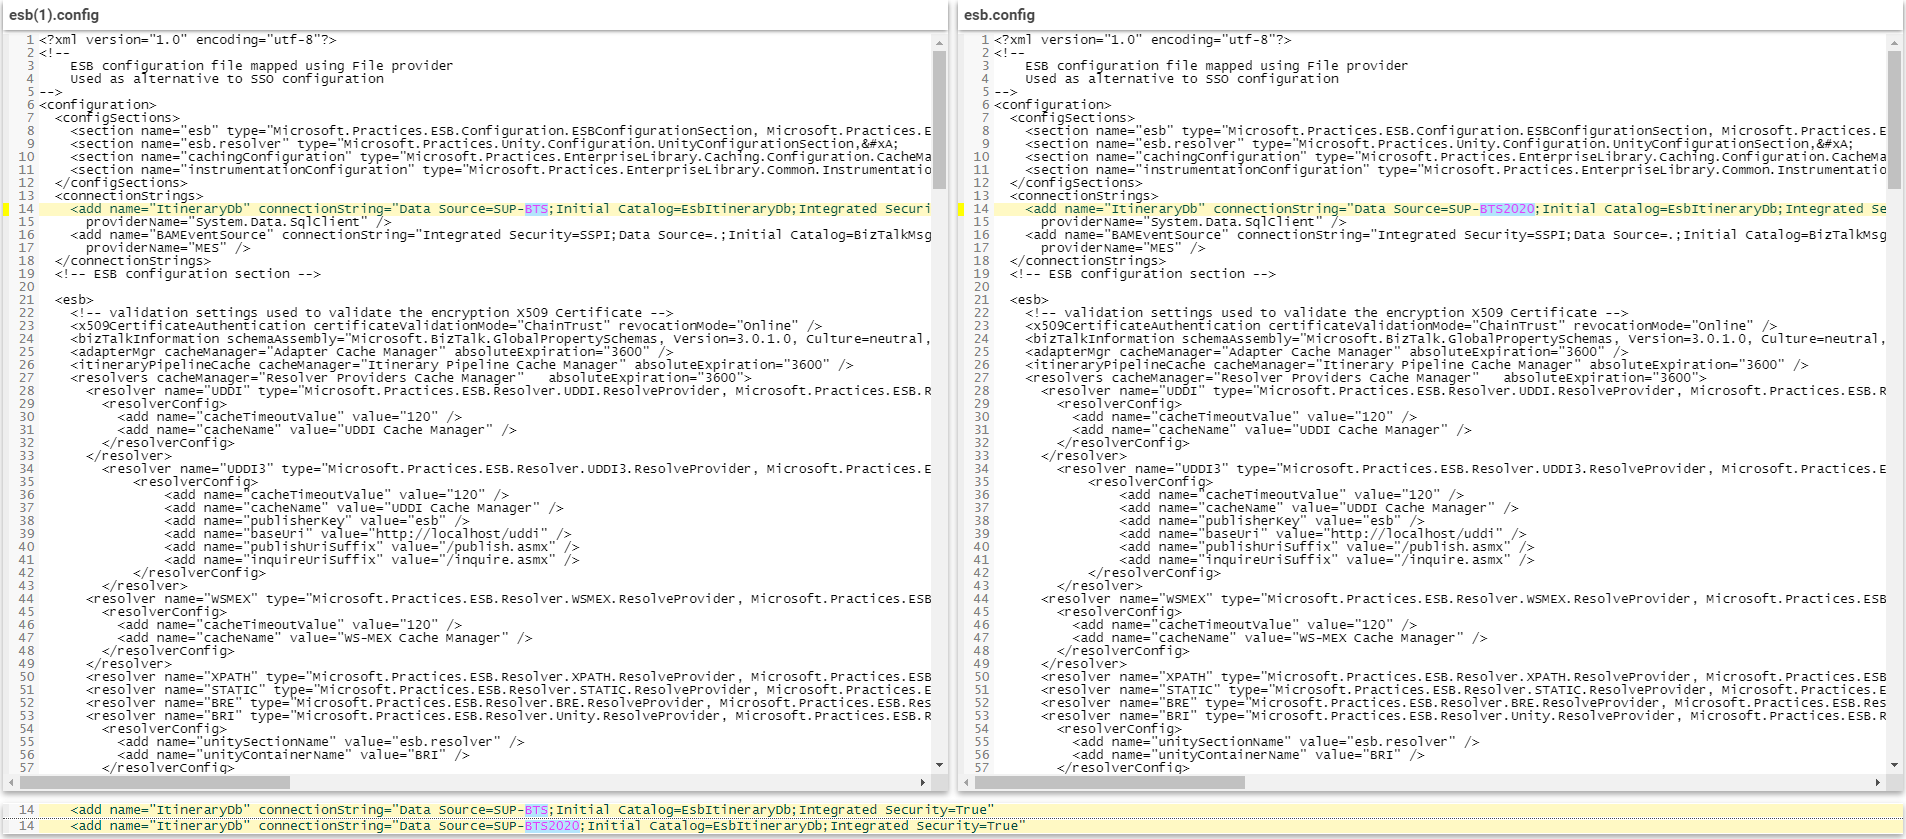
But, if you want to use the default ESB portal, you need the “ESBSource.zip” file to create it, or if you have another option, you can build your custom portal. We have compared the esb.config file to check if any changes have been done. When we checked the file, we found out that no changes have been done in the latest file. So, we thought of using the same portal in BizTalk server 2020 that was already used in the BizTalk server 2016.
To be able to use the existing ESB portal, we have copied the “ESBSource.zip” file from BizTalk Server 2016 and pasted inside the BizTalk Server 2020 folder C:Program Files (x86)Microsoft BizTalk ESB Toolkit.
ESB Portal Installation and Configuration
To install the default ESB portal
- Create a folder in your C: drive and name it as Projects. Now, unzip ESBSource.zip file from the download location into the C:ProjectsMicrosoft.Practices.ESB folder
- Once after extraction, Remove the Read-only attribute from all files in C:ProjectsMicrosoft.Practices.ESB folder
- Install Enterprise Library 5.0 from http://www.microsoft.com/en-us/download/details.aspx?id=15104
- Install Microsoft Report Viewer Redistributable 2008 from http://www.microsoft.com/en-us/download/details.aspx?id=577
- In Visual Studio 2019, open ESB.Portal.sln found in C:ProjectsMicrosoft.Practices.ESBSourceSamplesManagement PortalESB.Portal
- When Visual Studio 2019 starts converting the solution to the current format, a dialog pops up that warns you about ESB.Portal.Setup.vdproj file not being supported in Visual Studio 2019. Click OK. Wait until the solution opens
- In the Solution Explorer, add Microsoft.Practices.ServiceLocation.dll as a reference to the ESB.BAM.Service.Implementation project. This assembly is found in C:Program Files (x86)Microsoft Enterprise Library 5.0Bin
- Save all files in the solution
- Rebuild ESB.Portal solution
- Close Visual Studio
- Run Management_Install.cmd file found in C:ProjectsMicrosoft.Practices.ESBSourceSamplesManagement PortalInstallScripts
Note: Leave step 4 and 5 if you have already done it earlier
If you can successfully run the Management_Install.cmd without any error/exception, the portal will be configured. Now when you open Internet Explorer and navigate to http://localhost/ESB.Portal you should see the ESB Management Console home page.
If you face any issues/exceptions when you run the Management_Install.cmd and the portal is not created, follow the below steps.
- Open PowerShell as an Administrator and run the following command:
- Open a command prompt as an administrator and run the following command to ensure WCF script maps are registered:
- Got to turn on Windows Feature make sure the
set-executionpolicy unrestricted
C:WindowsMicrosoft.NETFrameworkv4.0.30319> ServiceModelReg.exe -r –y
- WCF features have been selected
- Web Core option also configured
- Powershell –executionpolicy bypass –file .Management_Install.ps1
- Management_Install.cmd
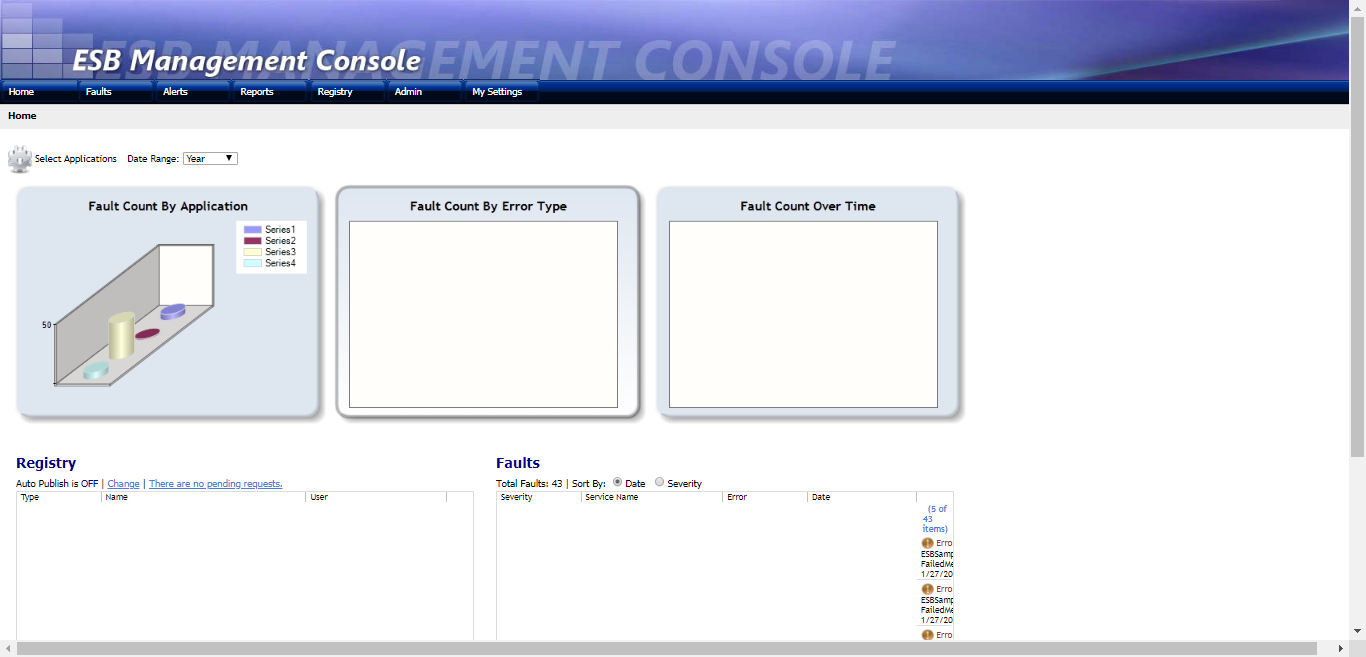
Now, without any errors/exceptions, the portal should be configured. Check if the ESB.Portal is available in IIS. When you open Internet Explorer and navigate to http://localhost/ESB.Portal you should see the ESB Management Console home page.
Phew!!! That’s how we configured ESB Portal.
Hub for Modern and Legacy World
Now we will come to the second option, custom portal…!
Even though the Exception Management framework is very robust and strong, the Exception Management Portal that comes out of BizTalk Server is not that easy to configure as we have experienced.
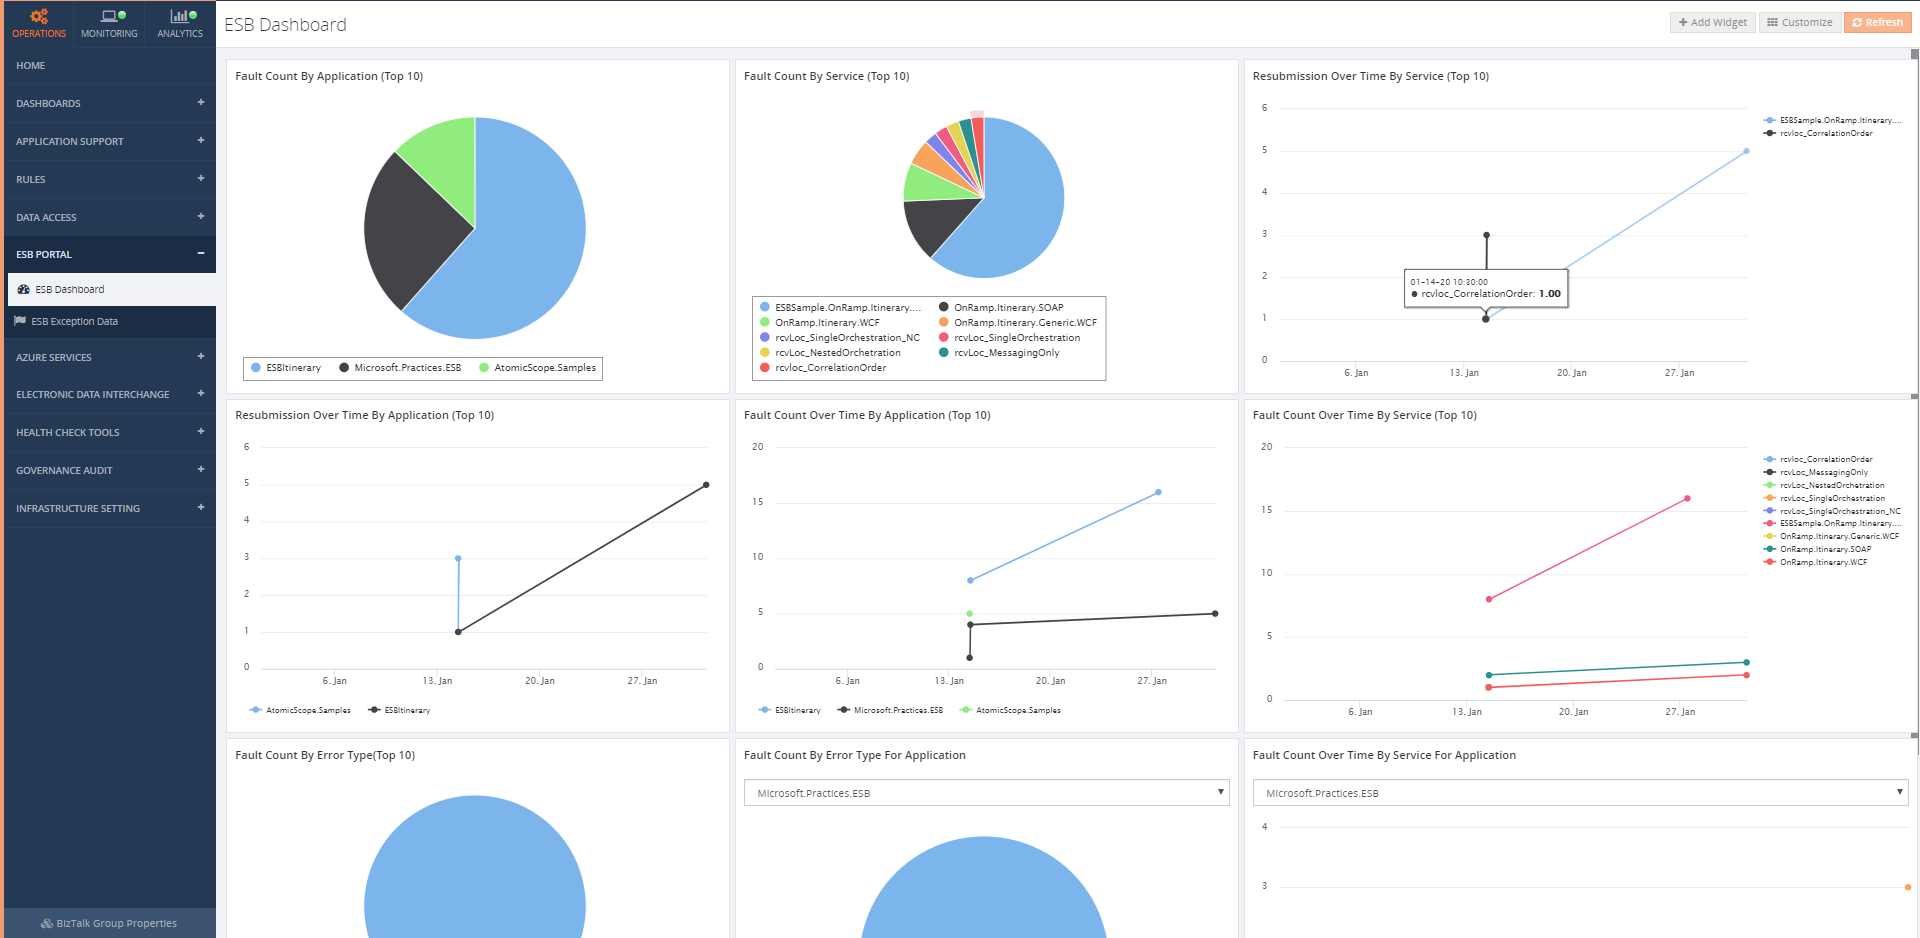
Firstly, the portal from the ESB Toolkit can be replaced with a portal within BizTalk360. BizTalk360 addresses these challenges in several ways. As with all features within BizTalk360, this portal is protected with security and auditing.
You don’t need to configure the default ESB portal. We want to mention here that a few of our customers haven’t installed the ESB portal.
Instead, they are using BizTalk360’s ESB Portal alone and from the portal, they are performing actions successfully.
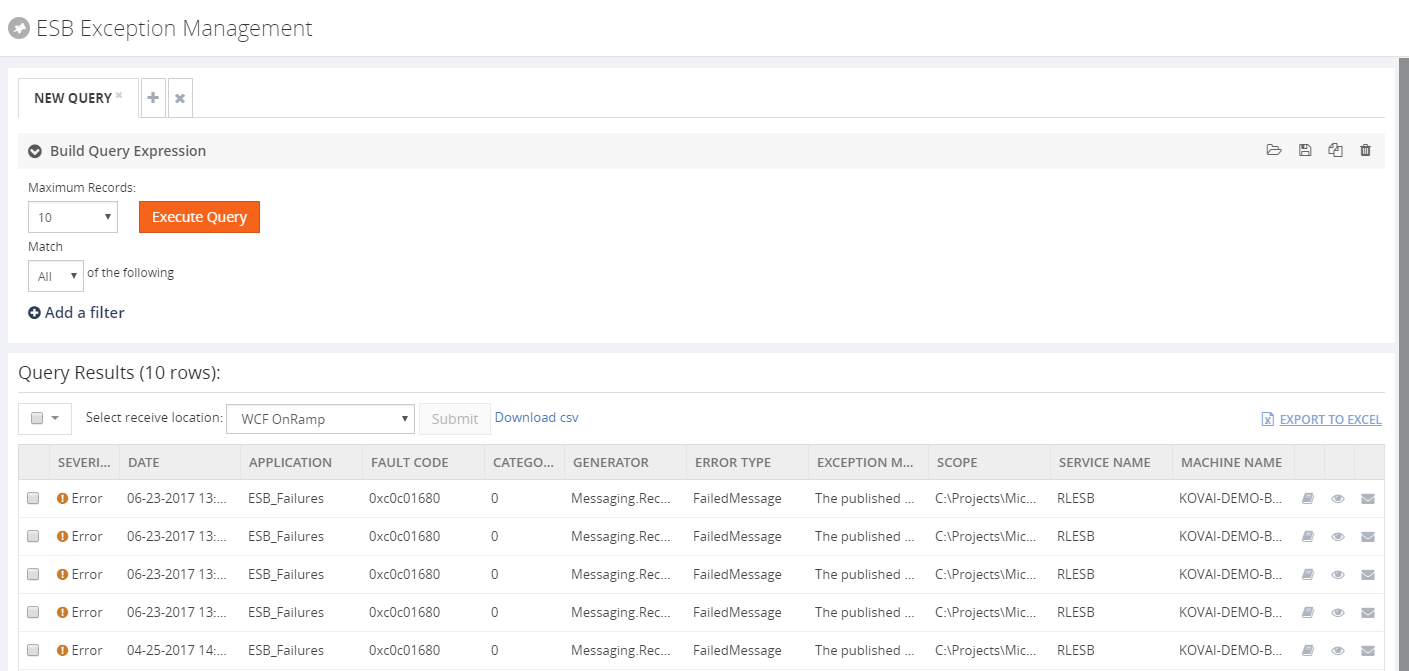
To be able to repair ESB Faults, there is an Edit and Resubmit feature in BizTalk360. To make the repair even easier, you can write and associate Knowledge Base articles to the ESB Faults. So, in case of recurring problems, you can simply document the solution in such a KB article and associate it with the ESB Fault, thereby making repairs in the future easier.
How much time will it take to configure ESB portal within BizTalk360?
All you need to do to configure the ESB Exception management framework within BizTalk360, is to simply provide the connection string to your ESB exception database, relevant to your BizTalk Environment.
That’s it! You are set (takes about 3 minutes, definitely not more than that).
Check the below blogs to know more about BizTalk360 ESB Portal.
BizTalk360 is ready for BizTalk Server 2020!
For those of you who are not aware of BizTalk360, I would like to give a short intro and we are excited to announce that after working with Microsoft for the past few months, we are now fully supporting Microsoft BizTalk Server 2020 with our latest release.
Why not give BizTalk360 a try? It takes about 10 minutes to install on your BizTalk environments. Get started with the free 30 days trial.

The post Configuring ESB in BizTalk Server 2020 appeared first on BizTalk360.