by Tomasso Groenendijk | Apr 9, 2016 | BizTalk Community Blogs via Syndication
When you create a Web API or API App it’s essential to monitor it while it is running. Most importantly, you want to detect failures before most of your customers do. You also want to discover and fix performance issues and want to know what the users are doing with your Web API like are they using the latest features for example.
Application Insights is an extensible Application Performance Management (APM) service for web developers that monitors your running Web API. It tells you about failures and performance issues, and helps you analyze how customers use your app.
Perform the following steps to use the Application map and Alerts in Application Insights:
1. Add the Application Insights SDK to the API App
2. Use the Application Insights API in the API App for custom events and metrics
3. Use the Application Map in Application Insights to drill down errors
4. Set Alerts in Application Insights
Step 1: Add the Application Insights SDK to the API App
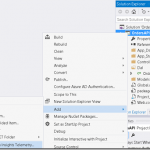
Right-click your API app project in Solution Explorer, and choose Add, Application Insights Telemetry. |
 |
Note
In Visual Studio 2015, there’s also an option to add Application Insights in the New Project dialog.) |
| |
|
Continue to the Application Insights configuration page:
| – |
Select the account and subscription that you use to access Azure. |
| – |
Select the resource in Azure where you want to see the data from your app. Usually you create a separate resource for each app. |
| – |
Click Register to go ahead and configure Application Insights for your web app. Telemetry will be sent to the Azure portal, both during debugging and after you have published your app. |
|
 |
| |
| |
Step 2: Use the Application Insights API in the API App for custom events and metrics
In Application Insights, a custom event is a data point that you can use to find out what users are doing with the API App, or to help diagnose issues. The Application Insights API for custom events and metrics is the same API that the standard Application Insights data collectors use. |
| |
| Use the following lines of code in your application to send an event whenever a document is not found: |
|
using Microsoft.ApplicationInsights;
private TelemetryClient telemetry = new TelemetryClient();
telemetry.TrackEvent(“[OrderManager.GetOrderById] Document not found”);
|
| |
 |
| |
| |
Step 3: Use the Application Map in Application Insights to drill down errors
There are plenty of ways to explore your telemetry data in Application Insights. One option is to use the Application Map in the Azure Portal. An Application Map is a visual layout of the dependency relationships of your application components. Each component shows KPIs such as load, performance, failures, and alerts, to help you discover any component causing a performance issue or failure. |
| |
|
To open the Application Map go to the Azure portal and then navigate to the API App that you created.
| – |
In the App Service blade, click Application settings. |
| – |
In the overview panel click on VIEW MORE IN APPLICATION INSIGHTS |
|
 |
| |
| Click on App map from the Application Insights blade to open the Application map. |
 |
| |
| Click on the error or warning to further investigate. |
 |
| |
| When you click on the error a new blade opens with an overview of the Failed Requests. |
 |
| |
| Click on the error to see the properties of the failed HTTP request. |
 |
| |
| Click on the link “All available telemetry for this operation” to see the telemetry and custom events. |
 |
| |
| |
Step 4: Set Alerts in Application Insights
Application Insights can also alert you to changes in performance or usage metrics in your API App. You can use the Metric alerts tell you when any metric crosses a threshold value for some period – such as response times, exception counts, CPU usage, or page views. |
| |
| Click on Alerts to open the Alert rules blade, and then click on the Add alert button. |
 |
| |
Use the Failed request metric to set an alert if a HTTP request to the API App fails and returns an error to the client.
If you check the box “Email owners…”, alerts will be sent by email to an administrator for example. |
 |
| |
| You then get a Failed Request Alert email when an alert changes state between inactive and active. |
 |
| |
| The current state of each alert is also shown in the Alert rules blade. |
 |
Application Insights is really a very good way to monitor your API App. It’s easy to add to your code and it has many great features like for example Alerts and the Application map. It’s also very mature and with the Basic pricing option, you pay based on the volume of telemetry your application sends, with a 1 GB free allowance per month. This free data allowance gives you a great way to try out Application Insights as you get started!
by community-syndication | Apr 9, 2016 | BizTalk Community Blogs via Syndication
On April 16th is the fourth edition of the Global Azure Bootcamp where you can get up to speed on developing Cloud Computing Applications for Azure.
In many locations (like for example at Motion10 where there are sessions and also Hands-on Labs about API en App Integration with Azure App Service) you need a laptop so that you can participate yourself.
The following things are needed for the Hands-on Labs:
- Laptop (don’t forget your power cord!)
- Azure account
- Visual Studio (2013 or 2015)
- Azure SDK for .NET
Azure account
You can:
- Open an Azure account for free. You get credits that can be used to try out paid Azure services. Even after the credits are used up, you can keep the account and use free Azure services and features, such as the Web Apps feature in Azure App Service.
- Activate Visual Studio subscriber benefits. Your MSDN subscription gives you credits every month that you can use for paid Azure services.
Azure SDK for .NET
If you don’t have Visual Studio 2015, download the latest Azure SDK for Visual Studio 2015. Visual Studio 2015 is automatically installed with the SDK if you don’t already have it.
If you have Visual Studio 2013, and you want to use that, download the latest Azure SDK for Visual Studio 2013. The instructions are basically the same but some screens may look different.
Steps
| 1. Go to the download page: https://azure.microsoft.com/nl-nl/downloads/ |
|
| |
| 2. Click on VS 2015 or VS 2013 (Depending on your version of Visual Studio) |
| |
| 3. Click on the downloaded file to install the SDK (VWDOrVs2015AzurePack.exe) |
|
| |
| Note: |
| Depending on how many of the SDK dependencies you already have on your machine, installing the SDK could take a long time, from several minutes to a half hour or more. |

by Eldert Grootenboer | Apr 9, 2016 | BizTalk Community Blogs via Syndication
This is the fourth post in my series on Integration of Things. In this post, we will use Entity Framework Code First to set up an Azure Sql database, which will later on be filled with the data we receive from our Service Bus Queue. As we will want to access this database from multiple projects, we will add it to the DataTypes Class Library we created in the previous blogpost. The code for this blogpost can be found here.
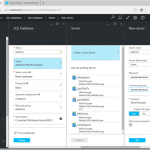
First we will create an empty database in Azure.
As we will be using Entity Framework Code First we need to install the NuGet package for this library.
Using code first we define the layout of our tables in our code, so let’s add a class in the DataTypes project representing the table which will hold the error and warning data we are going to receive from the Service Bus Queue. Note the data annotations, this will specify the schema for our database.
using System;
using System.ComponentModel.DataAnnotations;
using System.ComponentModel.DataAnnotations.Schema;

namespace Eldert.IoT.Data.DataTypes
{
    [Table("ErrorAndWarning")]
    public class ErrorAndWarning
    {
        // By specifying the name ID, entity framework will know this should be an auto-incrementing PK
        public int ID { get; set; }

        [StringLength(50)]
        public string ShipName { get; set; }

        public string Message { get; set; }

        public DateTime CreatedDateTime { get; set; }
    }
}
|
The next step is to create a class which inherits from the DbContext class, which will be used as the context for communication with our database.
using System.Data.Entity;

namespace Eldert.IoT.Data.DataTypes
{
    public class IoTDatabaseContext : DbContext
    {
        public IoTDatabaseContext() : base("name=IoTDatabaseContext")
        {
        }

        public virtual DbSet ErrorAndWarningsEntries { get; set; }
    }
}
|
To be able to communicate with the database in Azure we will have to add a connection string to the App.config. The connection string to be used can be found in the Azure portal in the properties of the database we just created.
<connectionStrings>
  <add name="IoTDatabaseContext" connectionString="Server=tcp:yourserver.database.windows.net,1433;Database=yourdatabase;User ID=yourname@yourserver;Password={your_password_here};Encrypt=True;TrustServerCertificate=False;Connection Timeout=30;" providerName="System.Data.SqlClient">
</connectionStrings>
|
All code we need is now in place, we will now go and enable migrations on our project. Migrations are the way of EF Code First to update our database when we make changes to our code. Open the Package Manage Console in Visual Studio (can be found under View, Other Windows), make sure the current project is set as default project, and enter the command Enable-Migrations.
After enabling the migrations, we have to create an initial migration which will scaffold the setup of the table we just created. On the Package Manager Console, enter the command Add-Migration CreateErrorAndWarningTable, and wait for scaffolding to be finished. Once done, you will find a new class in the Migrations folder with the code which will create our database.
We now have set up our connection to our database, the first time an application uses this library to access the database the table will be created. In my next blogpost I will show how we can use an Azure WebJob to process data from Service Bus Queues and use this library to save the data to our Azure SQL database.
Code
by Eldert Grootenboer | Apr 9, 2016 | BizTalk Community Blogs via Syndication
This is the fourth post in my series on Integration of Things. In this post, we will use Entity Framework Code First to set up an Azure Sql database, which will later on be filled with the data we receive from our Service Bus Queue. As we will want to access this database from multiple projects, we will add it to the DataTypes Class Library we created in the previous blogpost. The code for this blogpost can be found here.
First we will create an empty database in Azure.
As we will be using Entity Framework Code First we need to install the NuGet package for this library.
Using code first we define the layout of our tables in our code, so let’s add a class in the DataTypes project representing the table which will hold the error and warning data we are going to receive from the Service Bus Queue. Note the data annotations, this will specify the schema for our database.
using System;
using System.ComponentModel.DataAnnotations;
using System.ComponentModel.DataAnnotations.Schema;

namespace Eldert.IoT.Data.DataTypes
{
    [Table("ErrorAndWarning")]
    public class ErrorAndWarning
    {
        // By specifying the name ID, entity framework will know this should be an auto-incrementing PK
        public int ID { get; set; }

        [StringLength(50)]
        public string ShipName { get; set; }

        public string Message { get; set; }

        public DateTime CreatedDateTime { get; set; }
    }
}
|
The next step is to create a class which inherits from the DbContext class, which will be used as the context for communication with our database.
using System.Data.Entity;

namespace Eldert.IoT.Data.DataTypes
{
    public class IoTDatabaseContext : DbContext
    {
        public IoTDatabaseContext() : base("name=IoTDatabaseContext")
        {
        }

        public virtual DbSet ErrorAndWarningsEntries { get; set; }
    }
}
|
To be able to communicate with the database in Azure we will have to add a connection string to the App.config. The connection string to be used can be found in the Azure portal in the properties of the database we just created.
<connectionStrings>
  <add name="IoTDatabaseContext" connectionString="Server=tcp:yourserver.database.windows.net,1433;Database=yourdatabase;User ID=yourname@yourserver;Password={your_password_here};Encrypt=True;TrustServerCertificate=False;Connection Timeout=30;" providerName="System.Data.SqlClient">
</connectionStrings>
|
All code we need is now in place, we will now go and enable migrations on our project. Migrations are the way of EF Code First to update our database when we make changes to our code. Open the Package Manage Console in Visual Studio (can be found under View, Other Windows), make sure the current project is set as default project, and enter the command Enable-Migrations.
After enabling the migrations, we have to create an initial migration which will scaffold the setup of the table we just created. On the Package Manager Console, enter the command Add-Migration CreateErrorAndWarningTable, and wait for scaffolding to be finished. Once done, you will find a new class in the Migrations folder with the code which will create our database.
We now have set up our connection to our database, the first time an application uses this library to access the database the table will be created. In my next blogpost I will show how we can use an Azure WebJob to process data from Service Bus Queues and use this library to save the data to our Azure SQL database.
Code

by community-syndication | Apr 8, 2016 | BizTalk Community Blogs via Syndication
Microsoft Integration Product team announced yesterday on their monthly webcast (that you can see it here) some of the new features that are now available in Logic Apps like: “Run” any trigger now HTTP Webhook in Designer SQL Azure Connector now supports Store Procedures Azure Functions Integration and a few other features In this my […]
Blog Post by: Sandro Pereira
by Jeroen | Apr 8, 2016 | BizTalk Community Blogs via Syndication
The Problem:
After configuring a brand new BizTalk 2013R2 production environment and requesting the needed firewall exclusions to the security department, we were unable to send messages to Azure ServiceBus using the SB-Messaging adapter in BizTalk 2013R2 (using ACS authentication). We found the following warning in the EventLog:
The adapter “SB-Messaging” raised an error message. Details “System.ServiceModel.EndpointNotFoundException: The X.509 certificate CN=servicebus.windows.net is not in the trusted people store. The X.509 certificate CN=servicebus.windows.net chain building failed. The certificate that was used has a trust chain that cannot be verified. Replace the certificate or change the certificateValidationMode. A certificate chain could not be built to a trusted root authority.
The Solution:
Thanks to this post on StackOverflow I was able to fix the problem by “auto installing” the missing certificate.
The following steps solved our problem:
- Configure the company web proxy needed for internet connectivity on the server used by BizTalk for ServiceBus connectivity
- Use a .NET console test application to send/receive a dummy message to an Azure ServiceBus test queue
- Remove the web proxy config
- Repeat on every server
- Test using the BizTalk SB-Messaging Adapter
After using the console test application, we got the following info message in the eventlog:
Small sidenote regarding the .NET console test application, make sure you use the “AutoDetect” connectivity mode:
1
|
ServiceBusEnvironment.SystemConnectivity.Mode = ConnectivityMode.AutoDetect;
|
by community-syndication | Apr 7, 2016 | BizTalk Community Blogs via Syndication
This is a temporary post that was not deleted. Please delete this manually. (7279a178-00a7-4b13-a5fb-a6bcebd7f0b0 – 3bfe001a-32de-4114-a6b4-4005b770f6d7)
The post Temporary Post Used For Theme Detection (b597ec8c-78cd-4aa7-93da-63512cd1400b – 3bfe001a-32de-4114-a6b4-4005b770f6d7) appeared first on BizTalk360 Blog.
Blog Post by: Rajeshkumar Kandhasamy
by community-syndication | Apr 7, 2016 | BizTalk Community Blogs via Syndication
Wanted to make sure everyone was aware of the upcoming INTEGRATE 2016 event in London next month. This is the premier integration conference for anyone who is working in the Microsoft Integration platform space. Hosted by Microsoft partner BizTalk 360, this conference is geared towards addressing the challenges of modern day integration and digital transformation….
Blog Post by: BizTalk Team

by community-syndication | Apr 7, 2016 | BizTalk Community Blogs via Syndication
In the sequence of my last two post (here and here) and following the same topic, in order to finalize it, let’s talk about the last option and see how we can accomplish the same goal but this type configuring the Send Handler for existing static Send Ports in your environment. Well, the two previous […]
Blog Post by: Sandro Pereira