This is the fourth post in my series on Integration of Things. In this post, we will use Entity Framework Code First to set up an Azure Sql database, which will later on be filled with the data we receive from our Service Bus Queue. As we will want to access this database from multiple projects, we will add it to the DataTypes Class Library we created in the previous blogpost. The code for this blogpost can be found here.
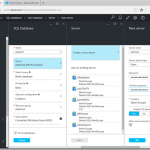
First we will create an empty database in Azure.
As we will be using Entity Framework Code First we need to install the NuGet package for this library.
Using code first we define the layout of our tables in our code, so let’s add a class in the DataTypes project representing the table which will hold the error and warning data we are going to receive from the Service Bus Queue. Note the data annotations, this will specify the schema for our database.
using System; using System.ComponentModel.DataAnnotations; using System.ComponentModel.DataAnnotations.Schema; namespace Eldert.IoT.Data.DataTypes { [Table("ErrorAndWarning")] public class ErrorAndWarning { // By specifying the name ID, entity framework will know this should be an auto-incrementing PK public int ID { get; set; } [StringLength(50)] public string ShipName { get; set; } public string Message { get; set; } public DateTime CreatedDateTime { get; set; } } } |
The next step is to create a class which inherits from the DbContext class, which will be used as the context for communication with our database.
using System.Data.Entity; namespace Eldert.IoT.Data.DataTypes { public class IoTDatabaseContext : DbContext { public IoTDatabaseContext() : base("name=IoTDatabaseContext") { } public virtual DbSet ErrorAndWarningsEntries { get; set; } } } |
To be able to communicate with the database in Azure we will have to add a connection string to the App.config. The connection string to be used can be found in the Azure portal in the properties of the database we just created.
<connectionStrings> <add name="IoTDatabaseContext" connectionString="Server=tcp:yourserver.database.windows.net,1433;Database=yourdatabase;User ID=yourname@yourserver;Password={your_password_here};Encrypt=True;TrustServerCertificate=False;Connection Timeout=30;" providerName="System.Data.SqlClient"> </connectionStrings> |
All code we need is now in place, we will now go and enable migrations on our project. Migrations are the way of EF Code First to update our database when we make changes to our code. Open the Package Manage Console in Visual Studio (can be found under View, Other Windows), make sure the current project is set as default project, and enter the command Enable-Migrations.
After enabling the migrations, we have to create an initial migration which will scaffold the setup of the table we just created. On the Package Manager Console, enter the command Add-Migration CreateErrorAndWarningTable, and wait for scaffolding to be finished. Once done, you will find a new class in the Migrations folder with the code which will create our database.
We now have set up our connection to our database, the first time an application uses this library to access the database the table will be created. In my next blogpost I will show how we can use an Azure WebJob to process data from Service Bus Queues and use this library to save the data to our Azure SQL database.
Code