As of today, there is still no BizTalk Server 2020 Developer VM image available in Azure.
So, what do we need to do to configure a developer environment in Azure?
Here are some easy steps to get you up to running in no time:
Disclaimer: an MSDN subscription is required to make use of developer licenses.
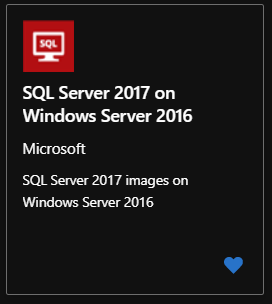
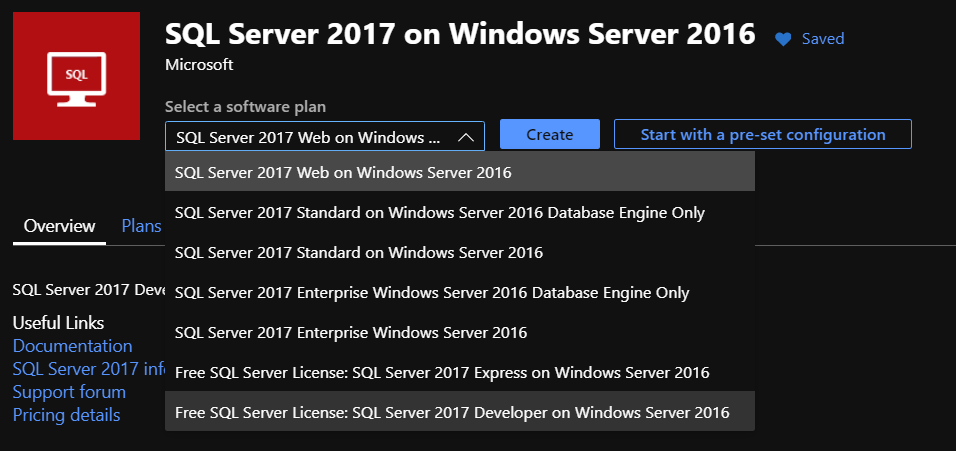
Step 1: Create a new VM based on the “SQL Server 2017 on Windows Server 2016 image”:
Why? It is possible to assign this image a “free developer license”. This image also comes with SQL Server 2017 (and Management Studio) installed and preconfigured.
Step 2: Download and install Visual Studio 2019 Professional
Step 3: Download, install and Configure BizTalk Server 2020 Developer Edition from MSDN.
Step 5: Install the BizTalk Server Developer tools (more info there)
NEW: With Visual Studio 2019 and BizTalk Server 2020, the Developer tools are now installed using a separate plugin.
Conclusion: In 5 easy steps, my development environment was ready in about 2 hours. The VM size used was a “Standard D4s v3 (4 vcpus, 16 GiB memory)”.
TL;DR – There is no decent .NET support for PCF in the IBM client, but we can use IKVM.NET to convert JARs to DLLs so we can still use .NET instead of JAVA to use PCF.
Intro
Programmable Command Formats (PCFs) define command and reply messages that can be used to create objects (Queues, Topics, Channels, Subscriptions,…) on IBM Websphere MQ. For my current project we wanted to build a custom REST API to automate object creation based on our custom needs. The IBM MQ REST API was not a possible alternative at that moment in time.
The problem
The .NET PCF namespaces are not supported/documented by IBM and do not provide the possibility to inquired the existing subscriptions on a queue manager. All other tasks we wanted to automate are possible in .NET. Using JAVA seemed to be the only alternative if we wanted to build this custom REST API with all features.
Being able to use the .NET platform was a requirement at that time, because the whole build and deployment pipeline was focused on .NET.
IKVM.NET
After some searching I stumbled upon IKVM.NET:
“IKVM.NET is a JVMfortheMicrosoft .NET Framework and Mono. It can both dynamically run Java classes and canbeusedtoconvertJavajarsinto.NETassemblies. It also includes a port of the OpenJDK class libraries to .NET.“
Based on this description it sounded like it could offer a possible solution!
Using IKVM.NET we should be able to convert the IBM JARs to .NET assemblies and use the supported and documented IBM Java Packages from a .NET application.
From JAR to DLL
Now I will shortly explain how we were able to put it all together. Using IKVM.NET is not that easy when you use it for the first time. The whole process consists basically out of 3 steps:
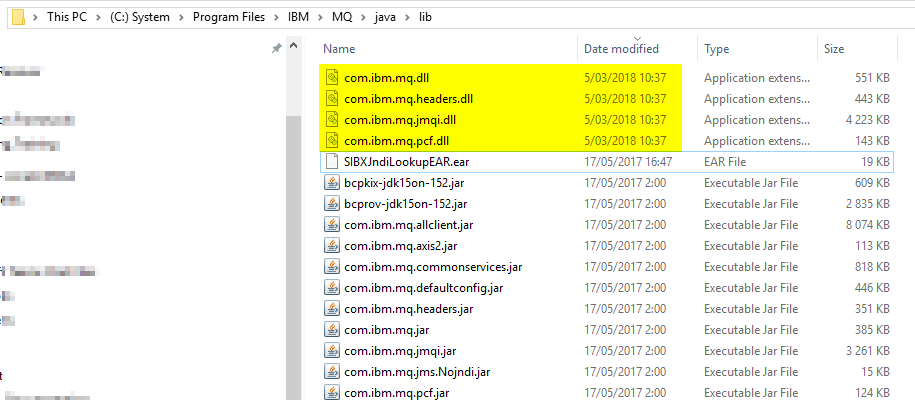
The IBM Converted JARs and the IKVM.NET Runtime dlls
Convert JAR to DLL
Download IKVM: https://sourceforge.net/projects/ikvm/ Extract the IKVM files (c:toolsIKVM) I have the IBM client installed, so the JAR files will be on there default installation (C:Program FilesIBMMQjavalib)
Open up a Command Prompt:
1
2
3
4
5
set path=%path%;c:toolsIKVMbin
cd C:Program FilesIBMMQjavalib
ikvmc -target:library -sharedclassloader { com.ibm.mq.jar}{ com.ibm.mq.jmqi.jar}{ com.ibm.mq.headers.jar}{ com.ibm.mq.pcf.jar}
You will find the output in the source directory of the JAR files:
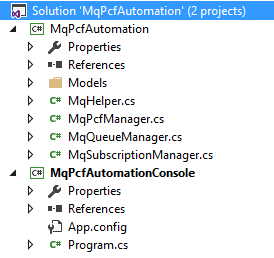
Add References…
Now that we have our DLLs, we can add them to our .NET project. This seemed less easy then I thought, I spend a lot of time figuring out what dependencies I needed. In the end, this was my result:
1 = The IBM JARs converted to DLLs 2 = The IKVM.NET runtime DLLs
In the sample a showcase the functionality described in the table at the beginning of this post.
Conclustion
In the end I am happy that I was able to build a solution for the problem. The question is if this approach is advised… I don’t think IBM approves this approach, but it works for what we need it. We are using this solution now for more then 6 months without any issues. In the future we might be able to move to the IBM MQ REST API as more features will be added.
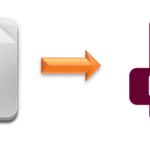
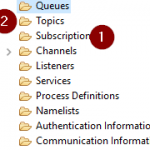
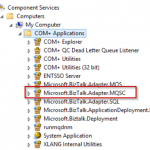
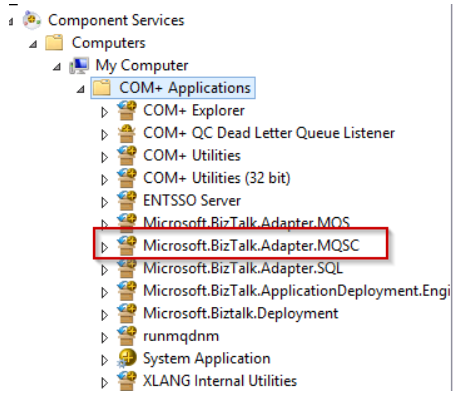
When using the IBM MQ Client library for .NET it is possible to directly make use of “Subscriptions” (1) on IBM MQ, without a topic object (2), by specifying the “TopicString” while sending a message.
The BizTalk MQSC adaptor cannot directly specify a “TopicString” in the adaptor. Also, it is not possible to directly connect to a “Topic” (2) object. It only supports sending to a “Queue” object.
The Solution:
It is however, perfectly possible to create a Queue Alias that has a Topic as BaseObject. This Topic can be linked to one or more Subscriptions based on the TopicString.
[Queue Alias, with base object Topic] => [Topic, with TopicString /xyz/] => [Subscriptions, based on TopicString /xyz/]
IBM Websphere MQ can be an overwhelming product to use as a message broker if you have worked in the past with Microsft’s MSMQ or the Azure Service Bus. The best way to learn and understand a product is to have your local lab environment, that you can recreate when needed.
With this post I share with you some links how you can setup your own local IBM MQ 9 installation for development purposes.
This very well written blog posts explain how you can setup a queue manager, configure a channel and create a queue.
(Skip step 10 as it isn’t the best way to disable security)
Step 3: Disable MQ Security
The default installation of IBM MQ has security turned on. Without disabling this you won’t be able to use your .NET client application or the BizTalk Adapter to send/receive messages. Be aware that you should only do this on your development environment!
Step 4: Add a firewall exclusion rule
If you are planning to host your local IBM MQ setup in a seperate VM, you will most likely need to setup a firewall exlusion rule so you can access the queue manager from another machine. (If you install IBM MQ as a service it will listen by default on all IP addresses)
Simply add an exclusion rule to allow inbound TCP traffic for the port your queue manager is running on (default is 1414).
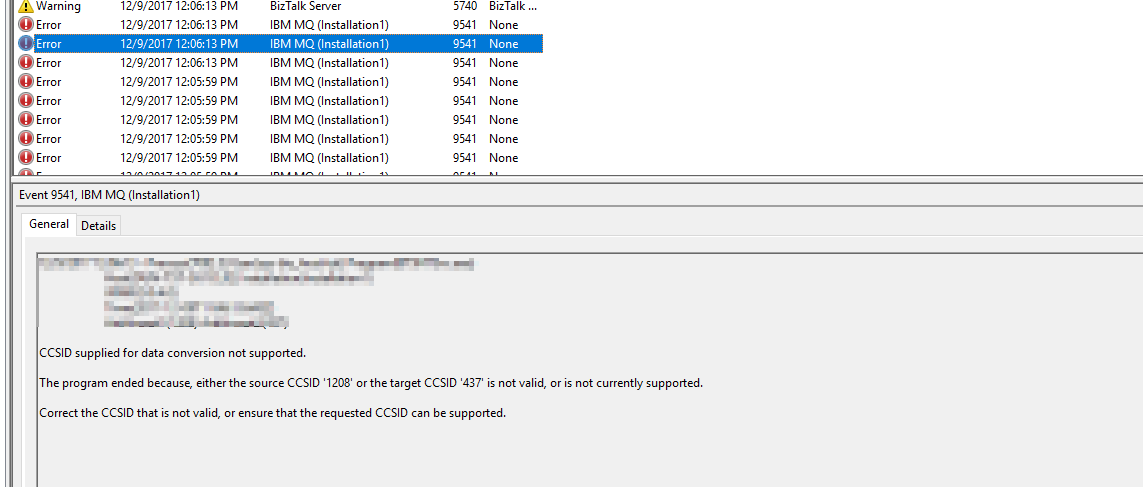
During a smoke test of a new BizTalk Server 2016 (with HIS 2016 and the IBM MQ 8.0.0.8 client) we stubled upon the following exception:
“The program ended because, either the source CCSID ‘1208’ or the target CCSID ‘437’ is not valid, or is not currently supported.”
In this simple test we were sending and receiving messages to/from a queue with a couple of ports, and dit not yet use a pipeline component to set IBM MQ Series Context Properties.
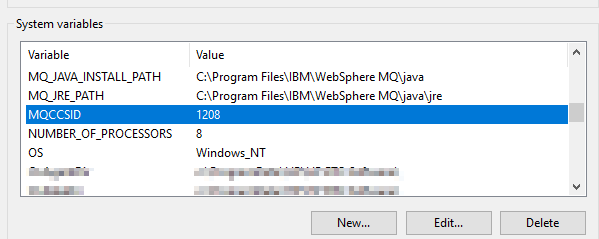
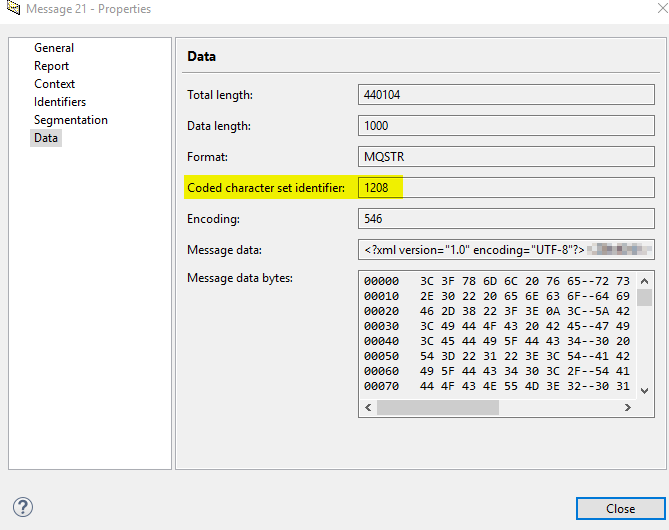
But wait, we needed a way to set the CCSID to 1208!
Luckily, you can set an Environmet Variable to specify the desired CCSID globally:
MQCCSID: Specifies the coded character set number to be used and overrides the native CCSID of the application. (IBM Knowledge Center)
After applying this, the messages were sent using the correct CCSID:
In a previous blogpost I wrote about how you could use HIS2016 together with BizTalk 2013R2 in order to use the MQSC adapter with IBM WebSphere MQ9.
This post is about upgrading an existing configured BizTalk 2013R2 environment without removing your current (port) configuration. By reading this description you should already know that this involves some “manual” actions…
These are the steps I followed to upgrade an already configured BizTalk 2013R2 with lots of MQSC SendPorts/ReceiveLocations where I didn’t want to remove all the current binding configuration (wich is what you need to do if you want to remove an adapter and follow the normal installation path…).
Before you start
Make sure everything is backed-up correctly
Stop everything: host-instances, SQL jobs, SSO,..
Uninstall the old
Uninstall the currently installed IBM MQ Client
Uninstall HIS2013 (but don’t unconfigure anything, just leave the MQSC adapter untouched)
Install .NET 4.6.2 (.NET 4.6 is a minimal requirement for HIS 2016)
Install HIS 2016 (no configuration, more details here)
Install IBM MQ Client 8.0.0.7 (64 Bit)
Install HIS 2016 CU1
The “manual” part
Update the MQSC Adapter info in the BizTalkMgmtDb “Adapter” table
Update the AssemblyVersion in InboundTypeName/OutboundTypeName columns to the newer version.
1
2
3
4
5
6
7
SELECT * FROM [BizTalkMgmtDb].[dbo].[adm_Adapter] where name like 'MQSC'

New InboundTypeName:
Microsoft.BizTalk.Adapter.Mqsc.MqscReceiver, Microsoft.BizTalk.Adapter.MQSC, Version=10.0.1000.0, Culture=neutral, PublicKeyToken=31bf3856ad364e35, Custom=null

New OutboundTypeName:
Microsoft.BizTalk.Adapter.Mqsc.MqscTransmitter, Microsoft.BizTalk.Adapter.MQSC, Version=10.0.1000.0, Culture=neutral, PublicKeyToken=31bf3856ad364e35, Custom=null
This worked for a running setup at my current customer. I cannot give you any garantees this will work on your envirenment! Always test this kinds of upgrades before applying this in your production environment!
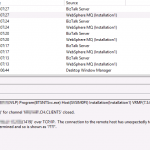
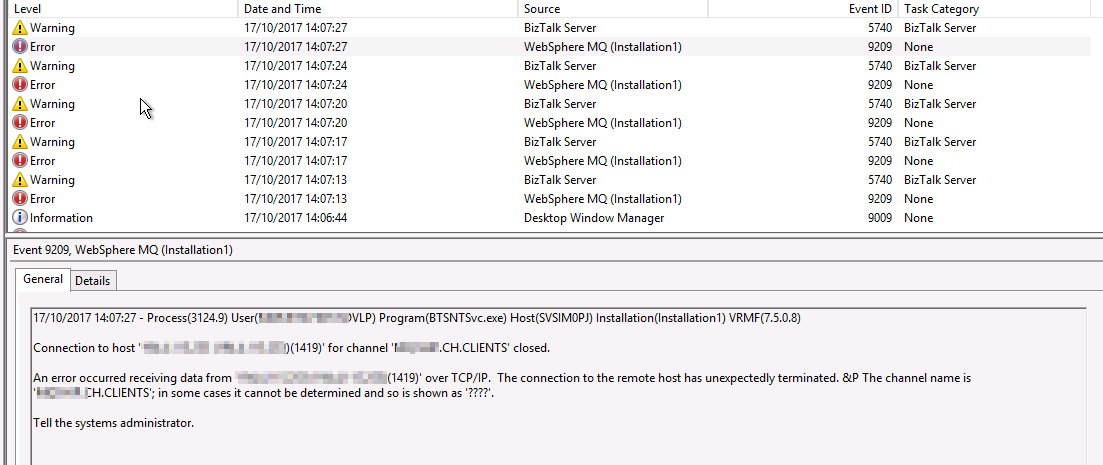
My current customer has an integration landscape with a lot of IBM WebSphere MQ. After an upgrade to IBM WebSphere MQ 9 of a certain queue manager, we were no longer able to receive messages from a queue that was working perfectly before the upgrade. Sending was still working as before.
At that moment in time we were running BizTalk 2013R2 CU7 with Host Integration Server (HIS) 2013 CU4 and using the IBM MQ Client 7.5.0.8.
Our eventlog was full of these:
This setup was still working perfectly with IBM WebSphere MQ 7 and 8 queue managers. I also tried to update the MQ client to a higher version (8.0.0.7), but this resulted in even more errors…
The Solution: Host Integration Server (HIS) 2016
When you take a look at the System Requirements of HIS 2016 you see that it supports MQ 8. No mention of MQ 9, I know… But it also supports BizTalk Server 2013R2! At this point we really needed a solution, so we took it for a spin!
I installed and configured everything in following order (the installation is always very import!):
Install BizTalk 2013 R2
Install BizTalk Adapter Pack
Configure BizTalk
Install BizTalk 2013 R2 CU7
Install .NET 4.6.2 (required for HIS 2016)
Install HIS 2016 (no configuration)
Install IBM MQ Client 8.0.0.7 (64 Bit)
Add MQSC Adapter to BizTalk
Install HIS 2016 CU1
Reboot Servers
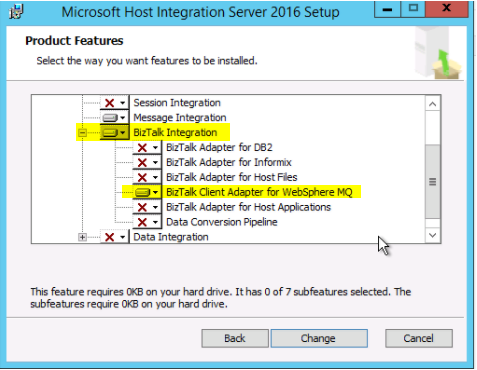
For HIS 2016 I used the following minimal installation (as we only require the MQSC Adapter):
After all of this I was able to successfully do the following:
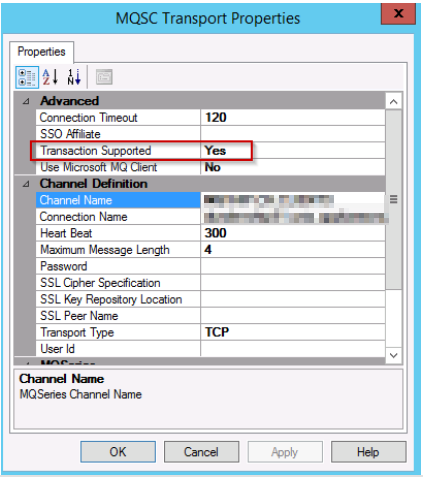
Send and Receive message from IBM WebSphere MQ 9 queues with “Transactional Supported” by using a 64 Bit Host Instance
Conclusion
At the end we reached our goal and were able to send and receive messages from an IBM WebSphere MQ 9 queue with BizTalk Server 2013R2.
Some people may ask why I didn’t use the Microsoft MQ Client. Well, I didn’t work straight away and we agreed to not further research this as we already started our migration project to BizTalk Server 2016.
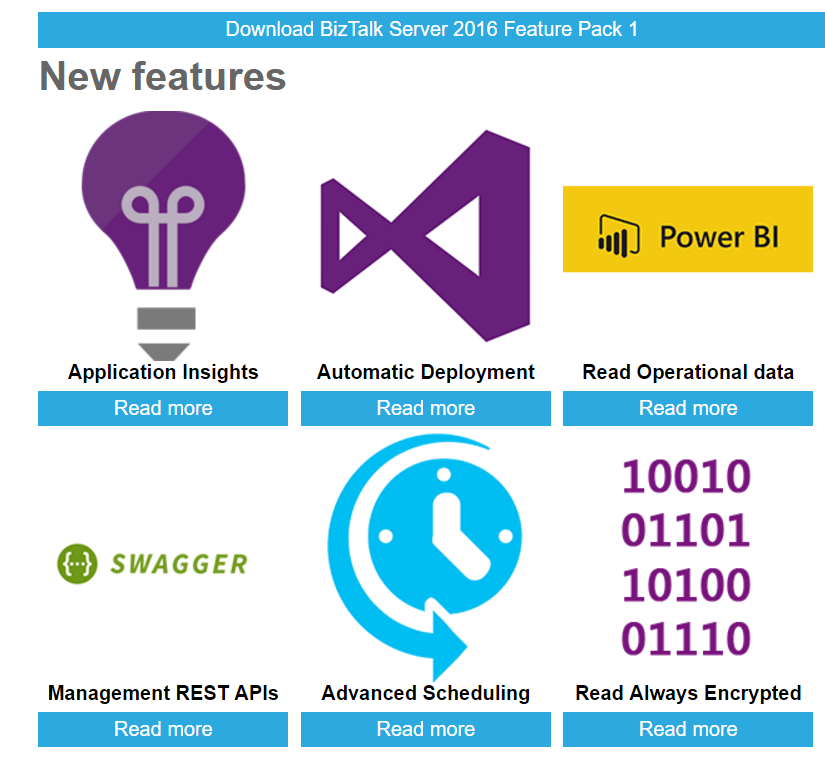
Today Microsoft release the BizTalk Server 2016 Feature Pack 1: http://biztalkfp1.azurewebsites.net/
I’m was particularly interested in the Management REST APIs, because at the current customer our team has spent a lot of time developing a custom API on top of the ExplorerOM and Operations DLLs. So maybe we could learn something the way Microsoft did this.
Starting with BizTalk Server 2016 Feature Pack 1, there’s a Windows PowerShell script that installs the REST APIs, and their swagger definitions. Using these APIs, make REST calls to remotely manage your artifacts, including ports, orchestrations, partners, agreements, pipelines, and more. Provides full support of API REST management endpoints with full swagger support.
I went to this page on MSDN for the installer instructions. Also BizTalk360 has a nice write up about this topic here.
…
Bot guidelines are NOT complete and are missing the part were you also need to install the ‘OperationalData’ service via a second command.
To install both the ManagmentService and the OperationalDataService, you need to do it like this:
1. Open up a Powershell(x86) prompt
2. Install the ManagementService
FeaturePack.ConfigureServices.ps1
 -Service Management
 -WebSiteName 'Default Web Site'
 -ApplicationPool BtsMgmtAppPool
 -ApplicationPoolUser BtsAdmin
 -ApplicationPoolUserPassword Azerty123
 -AuthorizationRoles 'BizTalk Server Administrators'
3. Install the OperationDataService
FeaturePack.ConfigureServices.ps1
 -Service OperationalData
 -WebSiteName 'Default Web Site'
 -ApplicationPool BtsMgmtAppPool
 -ApplicationPoolUser BtsAdmin
 -ApplicationPoolUserPassword Azerty123
 -AuthorizationRoles 'BizTalk Server Administrators'
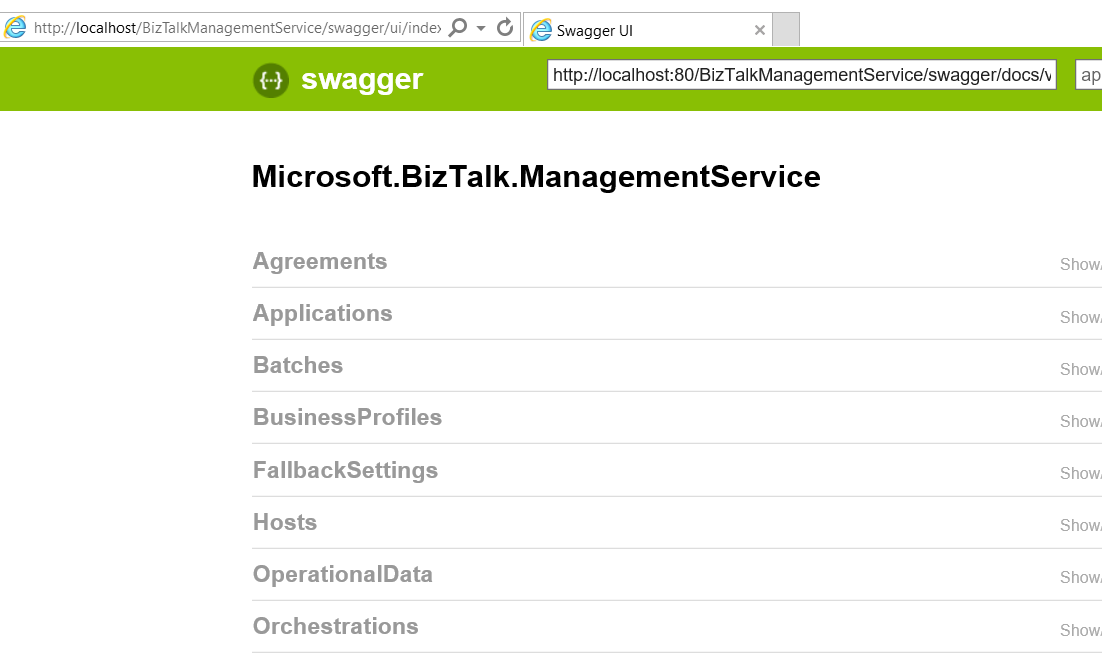
After that, you can open the Swagger of the ManagementService at http://localhost/BizTalkManagementService/swagger to start exploring the available methods:
The complete list of available operations is also viewable on MSDN here.
After giving it a quick spin, i can conclude that it works great and all methods are doing as they are supposed. But what about HostInstances? It would be very nice to be able to manage them as well via this new API. Just my 2 cents!
After rolling out BizTalk 2013R2 CU5 on a development server we experienced the following error when loading the group hub: “Could not find stored procedure ‘ops_ClearOperationsProgress’”
It looked like something when wrong during the installation of the cumulative update. After investigation of the log file, the following SQL error showed up:
To conclude: the installation failed because of insufficient SQL access rights.
(To bad the installer didn’t check this requirement before starting the installation…)
In the end we were able to fix the issue by taking the following steps:
Providing the SQL sysadmin role
Uninstalling the CU5 update
Restoring the BizTalkMsgBoxDb database prior the update
Installing the CU5 update again
My key takeaways regarding BizTalk updates:
Always test BizTalk updates before rolling them out!
Create a backup of your BizTalk databases before installing anu update – even for your development environments!
After configuring a brand new BizTalk 2013R2 production environment and requesting the needed firewall exclusions to the security department, we were unable to send messages to Azure ServiceBus using the SB-Messaging adapter in BizTalk 2013R2 (using ACS authentication). We found the following warning in the EventLog:
The adapter “SB-Messaging” raised an error message. Details “System.ServiceModel.EndpointNotFoundException: The X.509 certificate CN=servicebus.windows.net is not in the trusted people store. The X.509 certificate CN=servicebus.windows.net chain building failed. The certificate that was used has a trust chain that cannot be verified. Replace the certificate or change the certificateValidationMode. A certificate chain could not be built to a trusted root authority.
The Solution:
Thanks to this post on StackOverflow I was able to fix the problem by “auto installing” the missing certificate.
The following steps solved our problem:
Configure the company web proxy needed for internet connectivity on the server used by BizTalk for ServiceBus connectivity
Use a .NET console test application to send/receive a dummy message to an Azure ServiceBus test queue
Remove the web proxy config
Repeat on every server
Test using the BizTalk SB-Messaging Adapter
After using the console test application, we got the following info message in the eventlog:
Small sidenote regarding the .NET console test application, make sure you use the “AutoDetect” connectivity mode: