by shadabanwer | Sep 13, 2015 | BizTalk Community Blogs via Syndication
In this post, I will demonstrate BizTalk solution deployment using BTDF and OctopusDeploy. Octopus Deploy is a friendly deployment automation system mainly for .NET developers. This post mainly describe BizTalk solution deployment using Octopus deploy.
Some of the pre-requisites are:
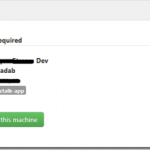
- Octopus Tentacles been installed and configure on the BT server. A “bizTalk-app” (it can be any name) role is created.
- Octopus Tentacles service running under BT Service account.
- Environments (BT Server configuration) is created and completed on the Octopus server using Octopus portal. The “green tick” confirm that octopus server can communicate with the BT Machine.

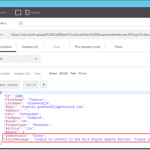
- In BTDF project Environment Settings file template, create a column named “Export_OctopusSettings.xml” before generating MSI as per below.

- Generate MSI using TFS Build. Normally the build server create incremented folders for the generated BTDF MSI. We need to copy the MSI from the drop TFS folder to the local folder on machine. To copying the MSI from the drop TFS folder to the local folder, I created the PS script following the below “Create Step Templates” step below. This script get the latest folder from the drop location and copy the MSI file to the local folder.
$TFSDropDir = $OctopusParameters[“TFSRootDir”]
$TargetFolder = $OctopusParameters[“DestinationFolder”]
if ([string]::IsNullOrEmpty($TFSDropDir)) {
Write-Host “No TFSDropDir has been specified”
Exit
}
if ([string]::IsNullOrEmpty($TargetFolder)) {
Write-Host “No TargetFolder has been specified”
Exit
}
if ( (Test-Path $TargetFolder) -eq $false) {
Write-Host “The target directory doesn’t exist. Unable to copy!”
Exit
}
if ( (Test-Path $TFSDropDir) -eq $false) {
Write-Host “The TFS Drop directory doesn’t exist. Unable to copy!”
Exit
}
$TFSCurrentBuildDir = Get-ChildItem -Path $TFSDropDir -name | Sort-Object LastAccessTime -Descending | Select-Object -First 1
$DeployMSICompletePath= “$TFSDropDir” + “$TFSCurrentBuildDir”
Write-Host “MSI Full path: $DeployMSICompletePath”
# Copy the items!
Write-Host “Copying items from $DeployMSICompletePath to $TargetFolder … please wait.”
robocopy $DeployMSICompletePath $TargetFolder
#Robocopy can success with multiple codes!
$exitcode = $LastExitCode
if($exitcode -in 0,1,2,3,4,5,6,7){
$LastExitCode = 0
}
return $LastExitCode
- “Run – Windows Installer” and “Variable – Substitute in files step” templates should be created in octopus (to create/import templates see below). You can download these templates from octopus library https://library.octopusdeploy.com/#!/listing
Steps to follow on Octopus Server.
- Create Step Templates for BTDF Deployment using the below script. You just need to Import the script using the Import button on the Step templates page. Copy the below script in the below window.

For Template please contact [email protected]
The above Json template will generate the below PS script.
For PS script please contact [email protected]
2. Save the templates and go to the Parameters tab on the same screen. All parameters can be viewed as per the below screen.

3. Navigate to created Project “Test”. Click “Process”, click “add Step”. Chose “Run – Windows Installer” from the step type.

4. Select target roles “(this is the role created during configuration of octopus tentacles”). MSI File Path “C:OctopusTest.MSI”. Click Save. If you using nuget package (.nuspec) step to extract MSI on Octopus tentacles folder, you can use the below to run the MSI.
#{Octopus.Action[Deploy Package].Output.Package.InstallationDirectoryPath}#{Octopus.Project.Name}-#{Octopus.Release.Number}.msi
5. Click “Add Step” to replace variables in the setting file using Octopus variables (mentioned below). Chose “Variables – Substitute in Files” from the step type. Parameter template files should be “C:Program Files (x86)Test for BizTalk1.0DeploymentEnvironmentSettingsSettingsFileGenerator.xml”. Click Save.

6. Click “Add Step” to create BTDF deployment. Chose “Deploy – BizTalk Application” from the step type. Below is the configuration details.

Install Directory – #{Octopus.Action[Run – Windows Installer].Output.InstallDirectory}
Package Install – #{Octopus.Action[Deploy Package].Output.Package.InstallationDirectoryPath}
Process page should look like the below.
7. Navigate to Variables. Create Variables as mentioned in the below screen. These variables can be distinguished on basis of scope. You can create many variables with the same name for different scope (or environment like TEST, QA, Prod etc).

8. Next step is to create Release. Goto Release, click create release and save. Deploy this release to the specific server and can later promote this release to other servers.

9. Click on Task Log – there is all the information including the logging of the deployment steps. The BTDF deployment logging is also in there.

BizTalk Continuation Integration Build and Deployment can be fully automated using Teamcity and Octopus, you need to install octopack to do so. At the moment, I am working with automating CI with TFS and Octopus. If someone has already done this, would love to hear from them.
Thanks,
Shadab Anwer
by Nick Hauenstein | Sep 8, 2015 | BizTalk Community Blogs via Syndication
This post is designed to serve as a companion to my AzureCon 2015 talk titled Processing NFC Tag Reads in a Logic App. As a result, I will be recapping the talk and digging a little bit deeper into the code behind the talk. If you’d like to jump straight into the code, you can find the completed source code here, or head down to the section titled Writing the Device Code.
By the time we’re through, we’ll see what it would look like to build a solution that reads vCard data (virtual business cards) from conference attendee badges, and uses those tag read events to trigger a Logic App which imports that information as Sales Lead records into both SugarCRM and Salesforce. Are you ready?
Let’s Start with a Story
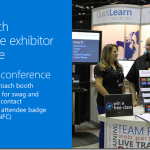
Let’s imagine for a moment that you are working for a hot tech start-up and you’re showing off the full capabilities of your products at a trade show. You’re one of many booths on the exhibition floor hoping to have the opportunity to connect with customers so that you can tell them how their lives could be better with your products. What might those customer interactions look like?
You’re going to have attendees approaching the booth, not quite knowing what to expect – maybe hoping to grab some free swag. You might make eye contact, strike up a conversation, and mutually discover that they would benefit greatly from having your product in their lives. So you say “Hey can I scan your conference badge? Not only will I be able to get in touch with you later this week, but you’ll also be entered to win our super awesome contest!” At this point, everything looks really slick as you quickly tap their badge with a mobile device and their data is zapped into position.
But what really happens?
Well, in a lot of cases, after the conference, the data is removed from the scanning devices, loaded up into a CSV file, and returned to the exhibitors via email and/or through a dedicated purpose-built website. From there, it is up to mere mortal human beings to forget that data for a few days, before eventually downloading the attachment, navigating to the CRM website of choice (Dynamics, Salesforce, SugarCRM, etc…), and finally uploading the data where it actually belongs — just in time for it to be too late to make the sale. Your customer has gone with the competitors and will lead a far less fulfilling life.
There’s something a little barbaric in all of this. There’s a lot of ceremony going on over not a lot of bytes of data. While it looks really cool to the customer on the trade show floor, the experience doesn’t translate the second you’ve crammed your life back into two suitcases waiting for the moment that you can be home so that the trees can just stand still for a while.
There must be a better way.
A few years back, at the ALM Summit 3 conference in Redmond, WA, James Whittaker asserted that a new era of computing has begun – the Know and Do Era.
Before this era, we had the Store and Compute era, which drove how we interacted with data all the way up through the late 90’s. In the Store and Compute era, we focused our efforts as developers on building Applications that worked with Files. The early 2000’s through 2012 saw the dominance of the Search and Browse era, in which we built Web Pages, Web Services, and even Apps to extend the reach of that data, and make it more discoverable. The Know and Do era is one that is and will be focused on building Experiences. Experiences allow interactions with data that are painted on a canvas of time and space, agnostic of the device you have at your disposal. It’s an era where our devices become the agents of our will and use available signals to make things happen.
That sounds really cool, but seriously, how do I build it? Do I create an application? A web page? An app? Where’s the Visual Studio project template for “Experience”.
Well, here’s the thing about that – experiences don’t live in one place. They don’t deal with a small slice of data that lives in one place. They are integrations between smart things, with action brokers like Logic Apps, with data normalizers, and enrichers, and rules-based processing. They’re distributed applications that take smart devices with sensors and signals available to them, join them with data repositories (no matter how narrowly focused or curated) and make those devices seem magical.
So, what makes Logic Apps a good fit? Well, for one, they’re hosted in the cloud. I’m not going to write code for every device to be able to integrate with Salesforce, SugarCRM, Dropbox, SharePoint, Oracle databases, and a random file share back at my office – nor am I necessarily going to be able to anticipate the future integration needs of code already deployed. Instead of putting the burden on the device, I’m shifting those concerns to the cloud (you can argue whether or not that’s for better or worse amongst yourselves – in this scenario, I think it’s a good fit).
Second, with Logic Apps, I have the full Azure Marketplace full of connectors and actions at my disposal, and if I don’t find something there that meets my needs, then I’m free to write my own.
So, what does the same story we started earlier look like with a Logic App in play? We’re going to throw away all of the ceremony around manually juggling CSV files and instead focus directly on getting those hot sales leads into our CRM system directly. As the badges are scanned, the device that reads them will trigger a Logic App. That Logic App will do the work of parsing out the information read from the tag, and it will then pass that data along to the CRM system using the out of the box connectors.
How Does the Data Get to the Logic App as it Becomes Available?
That’s an excellent question! Logic Apps start processing whenever they’re triggered. They support manual invocation, invocation through a webhook, and through polling and push trigger API Apps (and yes, I have written about how to build a Polling Trigger API App). In this case, a push-style trigger would be a decent choice (not to discount something like an Event Hub or Service Bus in general, depending on application load).
A Push Trigger API App essentially sits waiting for a Logic App to indicate its interest in some event. The way that it does this is through an HTTP PUT request that includes both the URI and credentials of where to POST data, should it become available, as well as the configuration for the trigger (e.g., don’t send me the same tag read twice in a row, don’t send me tag reads if your GPS location is within the main company office, etc…) As the author of a Push Trigger API App, you get to decide the shape of that configuration data, and you define it simply as a .NET class. The Logic App designer will display this configuration data on the card for your trigger.
The Push Trigger API App will then take this information and store it somewhere, so that when data is available, it (or some other app) can use that URL and credentials to call the Logic App back. In the case of our NFC conference badge scenario, it’s going to be a device that will trigger the Logic App.
What about the storage mechanism? What shall we use for that? Well in the spirit of using as much of Azure App Service in a single demo as possible, I decided to go with an Azure Mobile App as my backend for both the Push Trigger API App and the Universal Windows app that will be running across devices.
Writing the Device Code
Let’s take a look at what we’re going to start with. We’re going to start with a set of projects that looks like this:
From top to bottom we have an API App project titled NfcPushTrigger, a Universal Windows 10 app titled NfcClientApp, and a shared portable class library called DataModels that will contain classes representing the shape of data in our Azure Mobile App, and the configuration / output of the trigger (currently empty).
Let’s crack open that device app and build out a really compelling UI:
Well, that’s enough XAML for me, let’s go write some C# instead. I’m going to switch over to the code, while you gaze upon this work of art.
Okay. Over in the code, things are going well. I have all the standard default stuff and I’m ready to start interacting with the NFC reader attached to my laptop. The class that I use to get access to the NFC Reader on my laptop – or really any device that supports it – is the ProximityDevice class that lives in the Windows.Networking.Proximity namespace. That class has a method called GetDefault that I can use to get an instance of the default NFC Reader.
From there, I can subscribe for messages (tag reads) by calling SubscribeForMessage passing it a parameter indicating the type of message and a parameter that serves as a callback for whenever a message (tag) arrives. The type of messages we’re dealing with are NDEF messages where the first record of the message is a vCard record containing conference attendees’ Given (First) name, Family (last) name, and Email Address. In this case, that means we want to use NDEF as the type of message.
So we have our callback readied (we’ll eventually be doing some async work, hence the async lambda), but what are we going to do when we get a tag read?
The raw tag data is available as an IBuffer member named Data on the second callback parameter. I’m going to write some code to convert that in a few different ways – (1) human readable ASCII text for my own benefit, so that I can see the name on the badge that was scanned while debugging, and (2) a base64 encoded string that can be passed cleanly to a Logic App, and passed around that Logic App further. While I’m at it, I’m also going to write some code to determine if we’re seeing the same tag twice in a row.
So, let’s set a breakpoint, deploy, and launch this application so that we can see what we have so far when I scan a tag. After launching it and scanning my test conference badge, we hit the breakpoint.
Looking good so far! However, there’s not yet a way for a Logic App to declare its interest in this data collected by the Universal Windows app. As a result, it is time to switch over to the NfcPushTrigger API App, so that we can enable Logic Apps to register their interest in the data, and provide callback details for use in this client app.
Building the Push Trigger API App
In the Push Trigger API App, I’m going to start by adding a few package references. I’m going to add a reference to the latest pre-release of the Mobile App SDK, so that we will have access to the MobileServicesClient class for interaction with our data store. I’m also going to add a package reference to both T-Rex and the QuickLearn Push Trigger Tools.
T-Rex provides us a painless way to decorate properties, methods, and parameters with attributes that help our API Apps look pretty within the Logic App designer without resorting to manually writing a bunch of Swashbuckle filters. The QuickLearn Push Trigger Tools on the server side really only provides us with a single interface, ICallbackStore, which you can see here. Using that, we can write our push trigger code against the interface to make sure we’re doing all the necessary things within the callback registration and then simply implement that interface for our callback storage mechanism.
Once I have those package references added, I’m going to start clearing out the ValuesController, so that it doesn’t contain code that I don’t need. Then, I’m going to write comments to remind myself what it is I’m trying to do:
Let’s start by renaming the ValuesController class to something more meaningful, like CallbacksController. Also, we have attributes routing. I don’t need to name my method “Put” when its purpose is to register a callback. Let’s adjust that a little bit.
Looks good so far. However, in the Logic App designer, this will show up as an action titled something awful like “CallbacksController_RegisterCallback” – and who will even know that has anything to do with starting the Logic App when an NFC tag is read on a device? We’ll want to use some of those attributes in the T-Rex Metadata Library to address that (also a good opportunity to add the c.ReleaseTheTRex() statement of code back in the SwaggerConfig.cs file).
You might be looking at that code, and thinking to yourself, “wait a minute, what’s a PushTriggerOutput?” That’s a fair question, we haven’t seen that class yet. It’s one that we actually still need to define. This just needs to be some class that represents the shape of the output that our trigger returns (or rather the shape of the input into the Logic App). In our case, it’s going to be a string that contains base64 encoded NFC tag read data. So, something like this might suffice (T-Rex metadata added for clarity).
Let’s go back to the RegisterCallback method now. This method is ultimately going to be receiving information about a URI to call back to the Logic App (with embedded credentials). Right now, that’s not represented in the parameters of the method.
In this case, we have a special class that comes with the Azure App Service SDK called TriggerInput. The TriggerInput class is actually a generic class that has us specify a class that is the shape of the configuration data that we want to use for the Logic App and a class that is the shape of the output we want to use for the Logic App. We already have the output, but what about the configuration? Let’s do something like this, so that we can make use of that duplication detection code that we wrote:
Now that we know the shape of both the configuration settings that we will be able to set for the trigger, as well as the shape of the output that the trigger can return, we’re in a good position to actually finish out the method signature of our RegisterCallback method and move on to implementation.
I’m going to go ahead and start writing against that ICallbackStore interface to store the callback data (we’ll worry about implementation a little bit later).
There might be a little bit of mystery at this point, particularly if you have never interacted with the TriggerInput class. TriggerInput looks something like this:
The TriggerInput class is passed into our RegisterCallback method as the parameter named parameters. That means when I’m typing parameters.inputs, it’s giving me an instance of my PushTriggerConfiguration class (the instance that described how the trigger’s card was configured in the Logic App designer). GetCallback() is a little more interesting. The object returned by that method looks like this:
The CallbackUri member contains not only the Uri to the Logic App, but also the credentials to send a request. Further, if I decided to invoke this callback directly from an application that had a package reference to the App Service SDK, then I could invoke the callback through this class as well. In this case, I want to avoid adding such a heavy dependency for such a small task.
Once the callback is stored, the only other thing the Push Trigger has to do is to report back to the Logic App that the callback was stored successfully. In this case, it’s going to be pretty straight-forward boilerplate code.
At this point, there are a few things sticking out. First, we’re returning an HttpResponseMessage through this boilerplate code (via an extension method on the Request object added by the App Service SDK) – but our RegisterCallback method doesn’t specify a return type. Second, we’ve called a method with Async in the name, but haven’t awaited it. We’re going to solve both at once by changing the method signature for the last time, and adding that missing await.
We still have a null callback store, but if we take a step back and look at this code for what it is, it’s demonstrating that we can write ANY push trigger in 3 lines of code (with heaps of attributes). In fact, the only scenario-specific items are the class names, and metadata providing the friendly name for the method. The hard part, then, lies in actually storing the callbacks.
So, let’s make the hard part easy, by just giving it to you directly over here. With that, the final implementation of the RegisterCallback method can be seen below:
I’m going to go ahead and publish that to Azure, and switch back to the device code, so that we can read in the callback and act on it.
Wrapping Up the Device Code
On the device, I’m also going to be adding a package reference to the Mobile App SDK because we will be interacting directly with that same Mobile App we used to store the callbacks in the push trigger API App. I’m also going to add a package reference to the QuickLearn Push Trigger Client Tools package.
That package provides us a Callback class that can be instantiated by providing the callback URI. Once instantiated, it can be used to invoke the Logic App from nearly any .NET app. As an aside, it does add some shape to the output by wrapping the content in a body object to be consistent with other triggers in the gallery, so you will want to take that into account when testing and writing expressions against its output.
That package also provides a very similar client-side interface for interacting with a storage location for push trigger callbacks. Feel free to use those classes directly and/or modify them for your purposes if you’d rather not take an external dependency over a few interfaces and classes.
With both those packages in place, I’m going to do the same thing that I did before, and provide an implementation of the callback store, so that I can go and write my code. The code I’m going to write will retrieve the callbacks from the store (wastefully, on every single tag read without caching), loop through those callbacks (Logic Apps awaiting tag reads), and check the configuration associated. If they’re configured to suppress duplicates, and I have a duplicate read, I’ll move on to the next awaiting Logic App. Otherwise, I’ll invoke the callback with a new PushTriggerOutput object:
At this point, all of the C# coding is done, and it’s off to build the Logic App.
Defining the Logic App
In my Logic App, I already have a few steps defined, but I don’t yet have any triggers defined.
Looking at that screenshot, you might be wondering, “where did the ndefparser API App come from?” Well, that’s a custom purpose-built API App for parsing vCard data out of NDEF formatted NFC tag reads – exactly what we have in the case of our conference badges. You can find a copy of that API App here, complete with a Deploy to Azure button, so that you can provision it directly into your Azure subscription without a fuss.
Anyway, the ndefparser API App starts the process. It is then followed by the built-in SugarCRM connector and Salesforce connector – each of which binds to the outputs of the ndefparser (Given Name, Family Name, and Email Address) — for various fields related to Create Lead(s) actions.
Let’s get the custom trigger in place and wire up the ndefparser to its output:
That’s much better. Now our Logic App is setup to be triggered by NFC tag reads from our app.
Testing the Process
Before we scan the tag, how do we know that the callback registration worked? Well, one good clue can be found in the Trigger History for our Logic App.
The Trigger History shows every call out to the push trigger to perform the callback registration, as well as the response from the push trigger API App for each of those calls. In fact, you’ll notice that the Logic App continually makes it known that it is still interested in that tag read data (calling into question whether or not we really need something as durable as an Azure Mobile App for storing callbacks).
Scanning The Final Badge
Now I’ve set aside a special conference badge for a moment such as this. One that I imagine that Scott Guthrie might wear if he were at a conference wearing a disguise (i.e., something other than a Red Polo).
Already, as I investigate the most recent run of the Logic App, I’m seeing good signs. I’m seeing on the outputs link (outputs of our push trigger) that the Logic App has received raw tag data from the tag. I can also see that all of the API Apps have succeeded (including those that talk to SugarCRM and Salesforce):
Further, as I look in both SugarCRM and Salesforce, I have a new Scott Guthrie lead:
Where Do We Go From Here?
We’ve seen quite a bit over the course of this post, but where do we take this solution from here if we want to make it even more of a Know and Do experience?
Maybe we look to enriching data with other signals (e.g., GPS location of the tag read to correlate with a specific conference, shakiness of the hand as read by the gyro inside the device which could be indicative of nerves induced by meeting a VIP).
Maybe we enrich the data with data from other systems we already have. For example, reaching out to look up company metrics for the conference attendee to potentially disqualify them as a lead if it turns out the cost of our product offering exceeds gross revenues of their organization, or our product offering isn’t suited to an enterprise as large as their organization.
Maybe we start long-running processes when we read their badge, like a drip marketing campaign. Maybe we use the power of BizTalk’s rule-based processing to make an intelligent decision about the lead based on all of the signals and data we have.
Above all, though, I want to you to remember, that even if you don’t care about lead generation or sales, this solution can be generalized. In my case, lead generation does not thrill me, but playing with NFC tags does. NFC is found everywhere. Tags are used in transit passes, room keys, loyalty cards, authentication mechanisms – I even have one in my ring to unlock my door. Think of all of the data that those types of scenarios need access to, and imagine if it really makes more sense to build all of that connectivity by hand, or to use an integration framework that does lots of the heavy lifting for you.
Maybe you don’t care about NFC, but you do see the value in triggering processes in the cloud whenever certain social event happens (e.g., someone tweets something nasty about your organization should open a case in CRM). Imagine you’re writing code for a logistics company and you want to trigger some actions in the cloud whenever a truck gets close to the destination. Imagine you have temperature, or humidity, or other sensors that should trigger actions in the cloud when certain thresh holds are met.
All of those are excellent opportunities to generalize this.
That’s All Folks!
If you’ve actually read this whole blog post, I salute you! This was a really long one, but it was designed to capture the entirety of my AzureCon 2015 session for those that prefer text over video, and prefer to take things at their own pace.
If you’d like to see even more, QuickLearn Training provides live instructor-led training all over the world (with remote connectivity available) on Logic Apps, BizTalk Server, and Team Foundation Server. We would love to see you in class.
I hope you found this post valuable and that you can go build great things!
As always, remember , this is a sample app, don’t use provided sample code directly in production. Shortcuts have been taken with storing credentials inline, not caching, ignoring the option of using event hubs or service bus – which might be better depending on anticipated load, not following the MVVM pattern while building our Universal app, etc…