Finally, the last chapter of this blog post series where we address:
What we need to install to begin developing our stateful and stateless workflows using Azure Logic Apps (Preview) – PART I;
The first approach to what you need to create a new Logic App (Preview) resource and new stateful or stateless workflows through VS Code – PART II;
Today, I will start to explain a different and more powerful way for you to create your Logic Apps (Preview) projects and workflows. Notice that, for this approach, you need to have all the prerequisites installed; otherwise, it will not work correctly or at least certain features like Logic App Designer, debug, or inline code.
If you are like me, a developer used to work with Visual Studio as his primary tool, then you need a little learning curve to start developer using VS Code. It is a different way to developer your solutions.
Create a local project
Before you can create your logic app, the first thing you need to do is to create a local project. This will allow you to manage and deploy your logic app from Visual Studio Code.
To do that, you need to:
In your development environment, create an empty local folder:
in my case, C:VSCODEMy-First-Logic-App-Preview
This folder will be used for our Logic App (Preview) project that you’ll later associate in the Visual Studio Code.
Note: Using the VS Code, there are multiple ways for you to:
Create the local project: you can do it at the Subscription level or the Logic App (Preview) resource level (n the Logic App (Preview) extension);
Create the Logic Apps (Preview) resource in Azure: Directly from the Subscription level on the Logic App (Preview) extension or during the local project deployment;
And even the deployment: once again in the Logic App (Preview) resource level (n the Logic App (Preview) extension) or at the Çocal project level;
I will approach and explain the way I prefer better and which I think is the most ideal.
I am assuming that you have already created the Logic App (Preview) resource in Azure. If not, check to Create a new Logic App (Preview) resource in PART II.
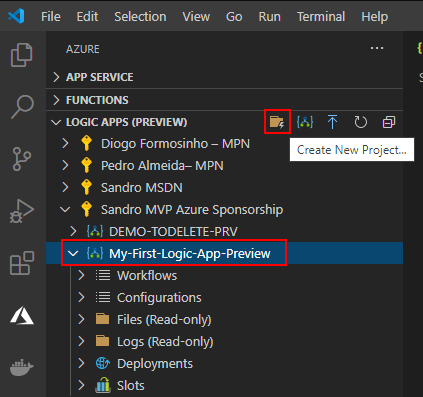
In the Azure pane, from the Logic Apps (Preview) extension, expand your Subscription, select the Logic App (Preview) resource, and click on Create New Project.
This will open the Browse Explorer, select the folder we have created.
C:VSCODEMy-First-Logic-App-Preview
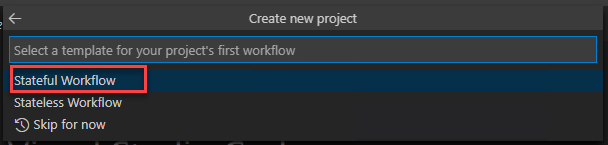
Centered at the top of the VS Code editor window, a wizard will appear asking to select a template for your project’s first workflow, select either Stateful Workflow or Stateless Workflow. We will be using Stateful Workflow.
Provide a workflow name for the workflow you are creating or leave the default nameType Stateful-workflow-example and press Enter
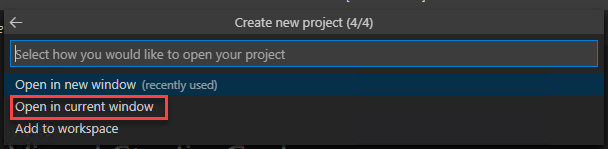
Next, the wizard will ask you if we would like to open your project in a new window or the current one; select Open in current window.
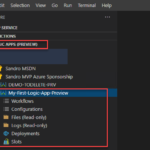
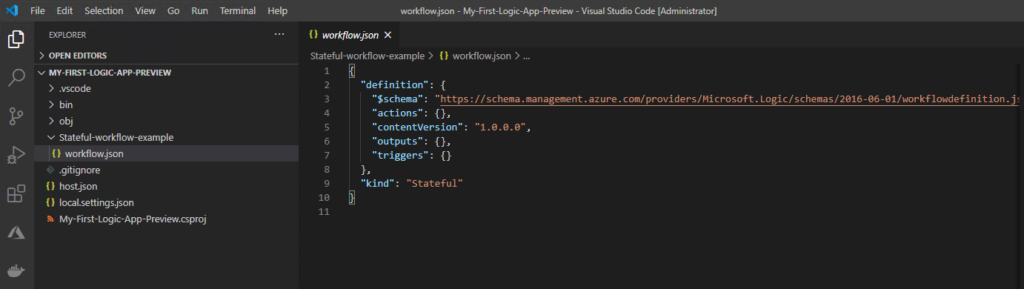
Visual Studio Code reloads and will switch to the Explorer pane, showing you the workflow definition and your new Logic App (Preview) local project, which will include several automatically generated project files. For example:
The project will have a folder with the name that you specify for your workflow – Stateful-workflow-example. Inside this folder, the workflow.json file contains your logic app workflow’s underlying JSON definition.
Also host.json and local.settings.json files;
and so on.
Developing your Logic Apps in VS Code
Now that we have everything we need already created, we can start developing our logic apps locally on VS Code.
To do that, you need to:
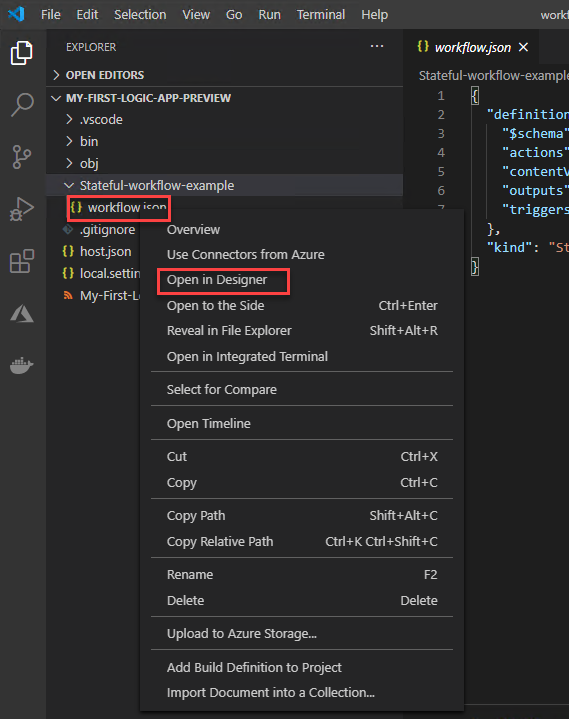
Expand the project folder, in my case MY-FIRST-LOGIC-APP-PREVIEW, and then expand your workflow folder, Stateful-workflow-example. Righ-click workflow.json file and select Open in Designer.
From the Enable connectors in Azure list, select Use connectors from Azure, which applies to all managed connectors that are available and deployed in Azure, not just connectors for Azure services.
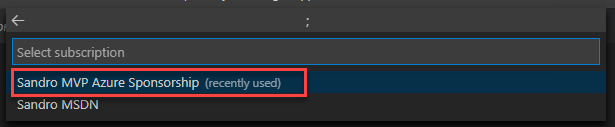
From the Select subscription list, select your subscription. This will be were the connectores will be created.
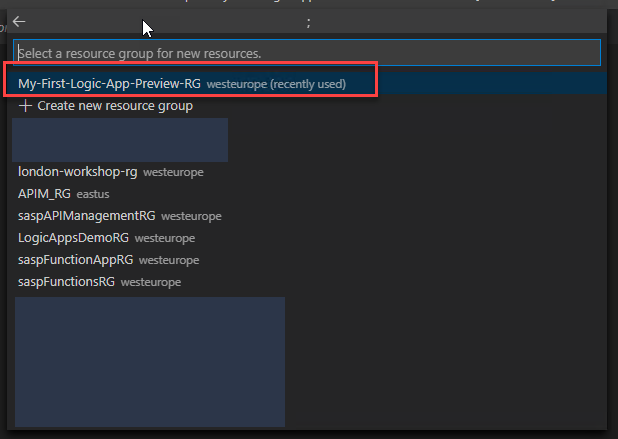
And finally, from the Select a resource group for new resources list, select the resource that you created for this project.
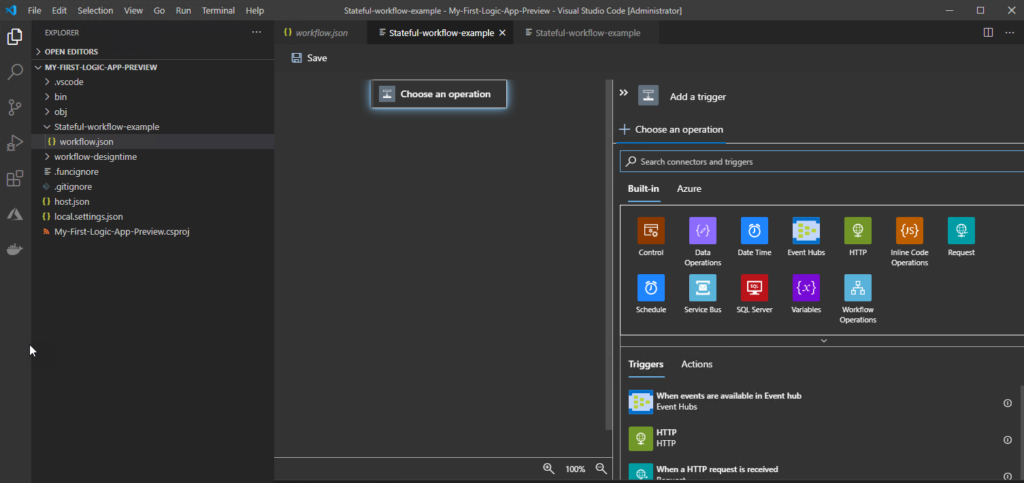
After that, the Logic App Designer appears, the Choose an operation prompt appears on the designer and is selected by default, which shows the Add a trigger pane.
Note: If you have .NET Core SDK 5.x, this version might prevent you from opening the logic app’s underlying workflow definition in the designer. Rather than uninstall this version, in your project’s root location, create a global.json file that references the .NET Core runtime 3.x version that you have that’s later than 3.1.201, for example:
Make sure that you explicitly add that global.json file to your project at the root location from inside Visual Studio Code. Otherwise, the designer won’t open.
To check the versions that are installed on your computer, run the following command:
..Users{yourUserName}dotnet --list-sdks
And the rest is basically the same that we are already used to doing it in our “original” Logic Apps, or using the Azure Portal or inside Visual Studio. We need to add a trigger and actions.
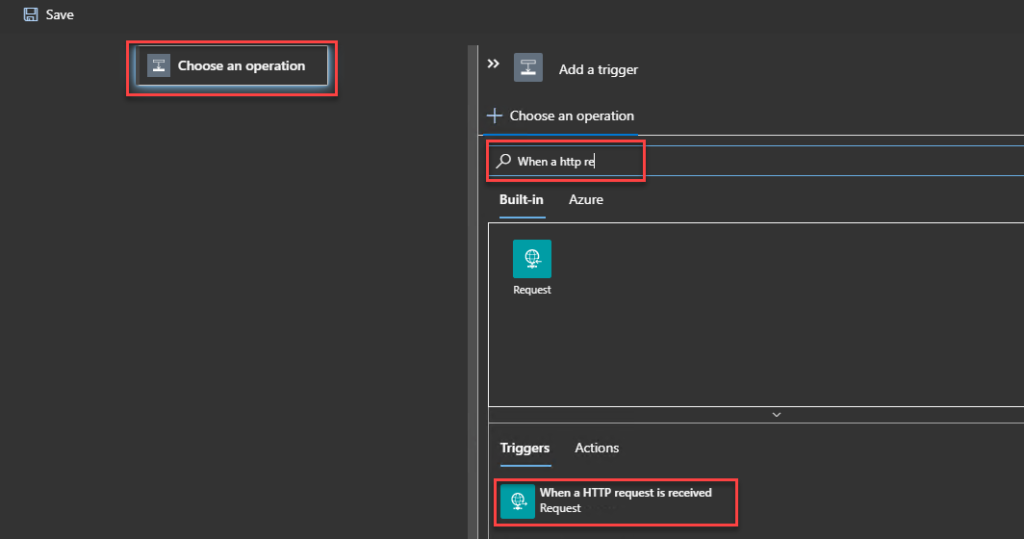
On the designer, select the Choose an operation an in the Add a trigger pane, under the Choose an operation search box, make sure that Built-in is selected so that you can select a trigger that runs natively.
In the Choose an operation search box, enter when a http request, and select the built-in Request trigger that’s named When a HTTP request is received.
When the trigger appears on the designer, the trigger’s details pane opens to show the trigger’s properties, settings, and other actions.
This means that you can now define the JSON Schema, method, and all the other properties of this trigger.
Let’s leave the default for now.
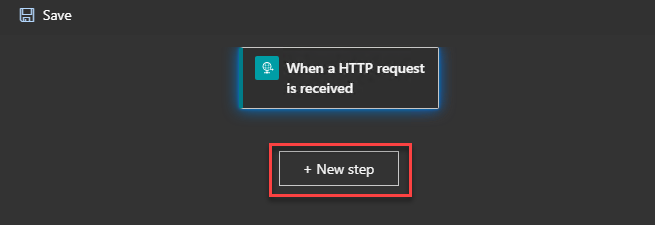
Because this is a simple sample, let’s add an HTTP Response to our logic. On the designer, under the trigger that you added, select New step.
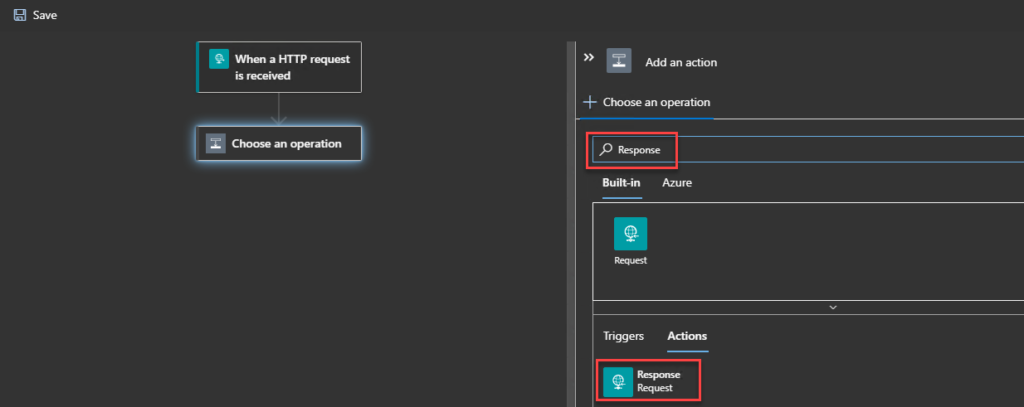
On the Add an action pane, under the Choose an operation search box, enter Response, and select the built-in Request action that’s named Response.
To have a more friendly response, set the body property of the Response action to be:
{
     "Message": "Welcome to your first Stateful Workflow"
}
Finally, on the designer, select Save.
Now what we need before deploying this is to run and test this workflow locally.
Testing locally our Logic Apps
To do that, we need to:
On the Visual Studio Code toolbar, open the Run menu, and select Start Debugging (F5).
A Terminal window will open so that we can review the debugging session.
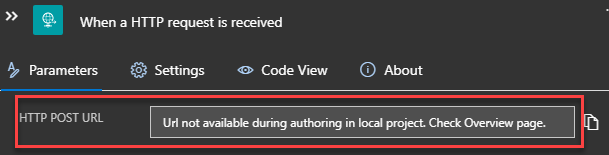
Because this workflow is trigger by an HTTP request, we need to find the callback URL for the endpoint on the Request trigger. Usually, we go to the When a HTTP request is received trigger, after we save our Logic App, and on the HTTP POST URL, we would find the callback URL. However, we will not find it locally. Instead, we will find a message saying, “Url not available during authoring in local project. Check the Overview page.”
As the message describes, for us to now the callback URL for the endpoint on the Request trigger we need to:
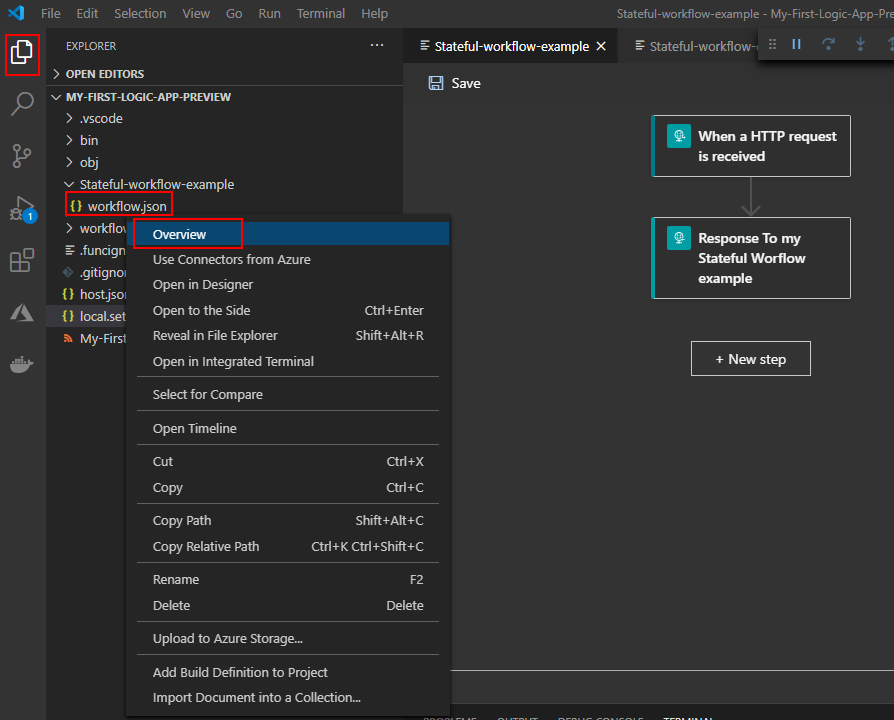
Reopen the Explorer pane so that you can view your project.
And from the workflow.json file’s inside the workflow folder – Stateful-workflow-example – right-click and select Overview.
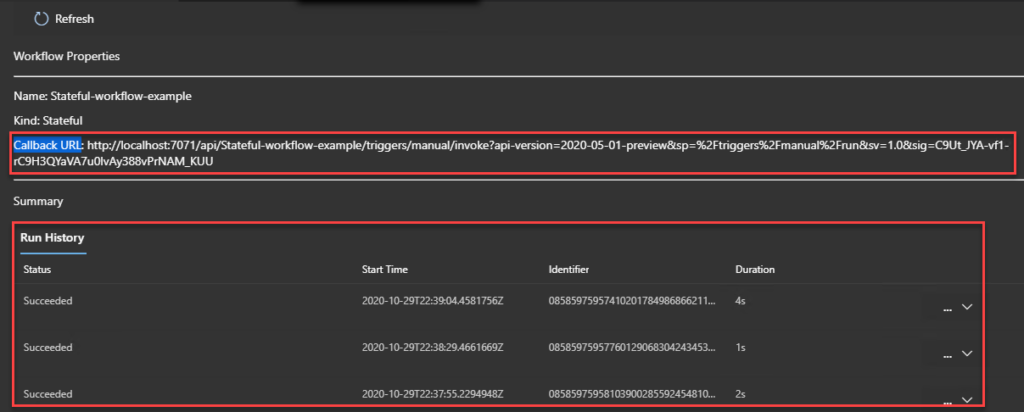
There you will find the Workflow Properties like the Callback URL but also the local Run History of that workflow
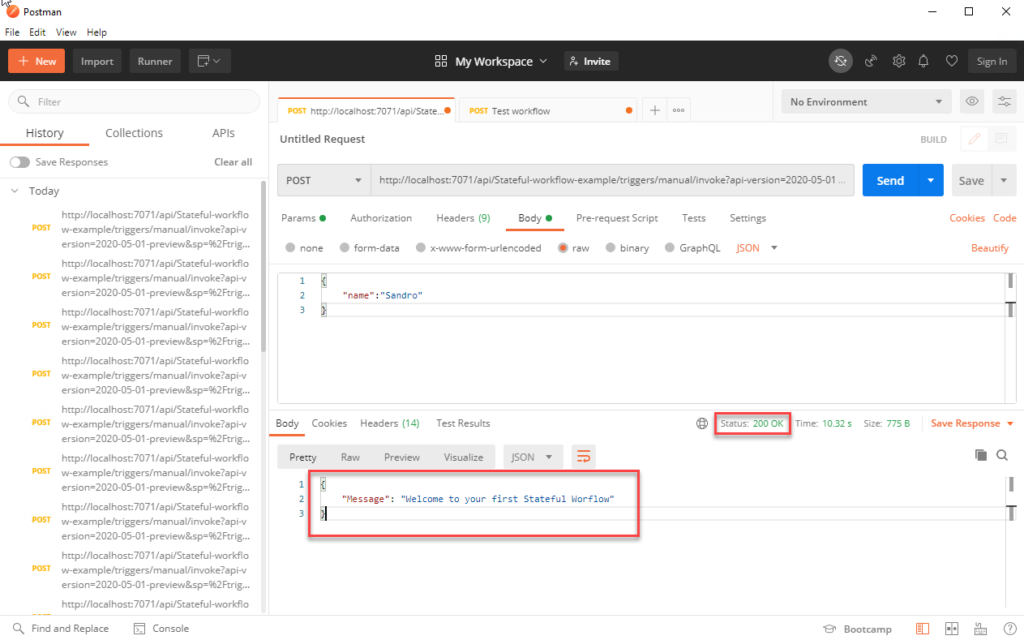
Copy that URL to Postman or any other tool, and test sending a request to see if you get the desired outcome.
On the Overview page, you will get another entry on the Run History.
How can I add more workflows to my project?
Can I add more workflows to my local project? If so, how can I do it?
Yes, you can. And to do that, you need to:
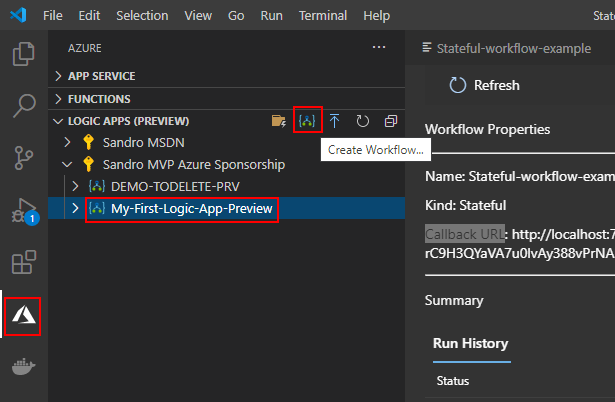
Switch back to Azure pane and under Logic App (Preview), select your Logic App resource, and select Create Workflow.
A wizard will appear asking to select a template for your workflow, select either Stateful Workflow or Stateless Workflow. We will be using Stateful Workflow.
Provide a workflow name for the workflow you are creating or leave the default name, Type Another-Stateful-workflow-example, and press Enter.
Now, if we switch back again to the Explorer pane, we will notice that we have another workflow added to our local project.
Publish (deploy) to Azure Logic App (Preview) resource
Everything we created above is not created/publish on Azure, they were developed and created locally. Nevertheless, from Visual Studio Code, you can deploy your project and with it all your workflows directly to Azure. If the Logic App (Preview) resource type is not yet created, you can create in Azure during the deployment.
To do that, you need to:
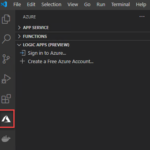
On the Visual Studio Code toolbar, select the Azure icon.
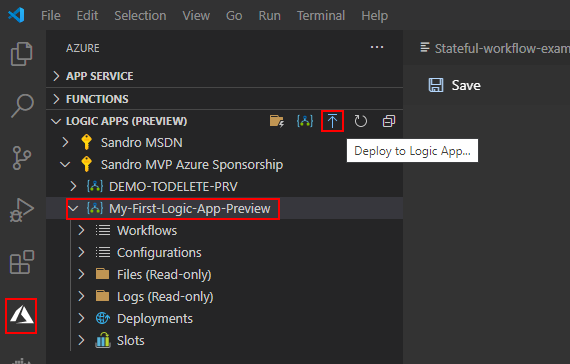
On the Azure: Logic Apps (Preview) pane toolbar, select your Logic App (Preview) resource type, in our case, My-First-Logic-App-Preview, and then select Deploy to Logic App.
The deploy wizard will appear asking to Select subscription from the list.
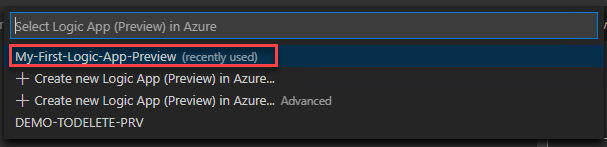
And then to Select Logic App (Preview) in Azure. We will be selecting the one that we craete previously
If a message appear asking you if you want to continue with the deployment and overwrite any previou depoyment, select Deploy.
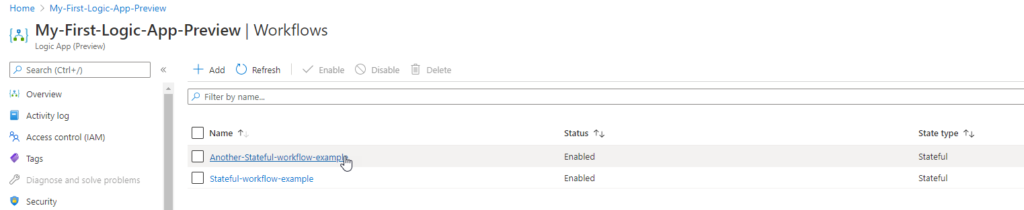
This will trigger the deployment process to Azure. Once the deployment is finished, you will be able to see your stateful workflows live in Azure and enabled by default.
Today we will see one of the ways to create a new Logic App (Preview) resource and new stateful or stateless workflows through VS Code. This doesn’t mean that it’s the best way, but later we will address this topic.
Create a new Logic App (Preview) resource
To do that, you need:
Open your VS Code, select the Azure icon.
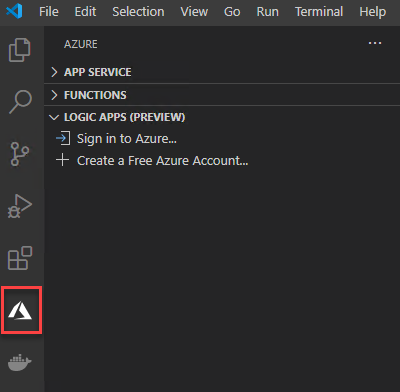
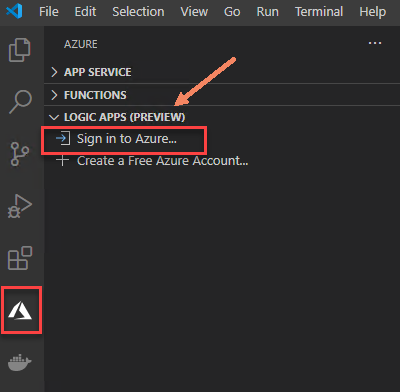
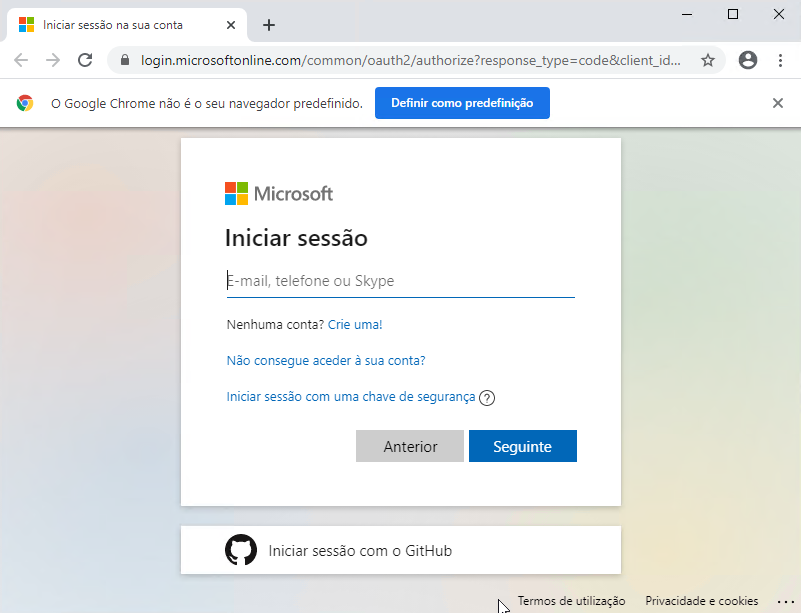
In the Azure pane, under Azure: Logic Apps (Preview), select Sign in to Azure.
When the Visual Studio Code authentication page appears, sign in with your Azure account.
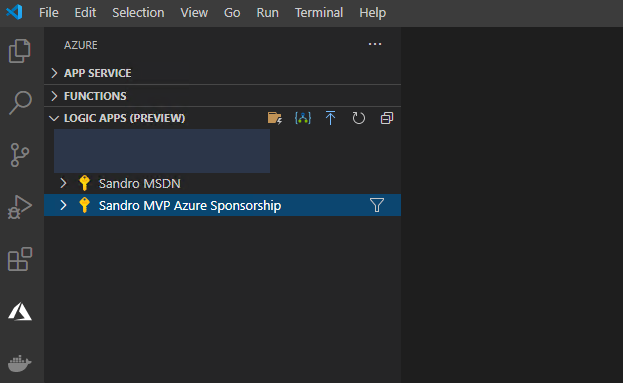
After you sign in, the Azure pane shows the subscriptions in your Azure account.
Any Logic Apps resources you may have already deployed/released it will not be showing here. You can see any original Logic Apps resources you created using the original extension in the released extension’s Logic Apps section.
In the Logic App (Preview) section, you will only see the new Logic Apps (Preview) resource type within functions runtime.
Note: You cannot create a Logic Apps (Preview) resource type directly from the Azure Portal. The only option at the moment is using Visual Studio Code (and probably scripting).
This is probably the best way, but if you don’t fill comfortable to work in VS Code, the first thing you can do is:
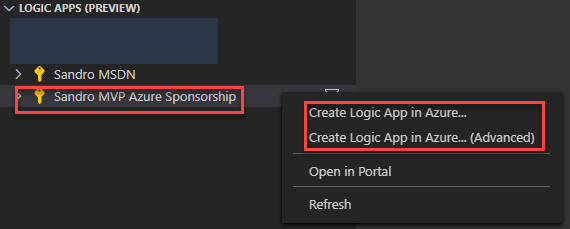
From the Logic Apps (Preview) extension, right-click on your Subscription and select one of the two options:
Create Logic App in Azure…
Create Logic App in Azure… (Advance) – we will be using this one.
Centered at the top of the VS Code editor window, a wizard will appear asking to specify a globally unique name for the logic app, which is the name to use for the Logic App (Preview) resource.
Type My-First-Logic-App-Preview and press Enter.
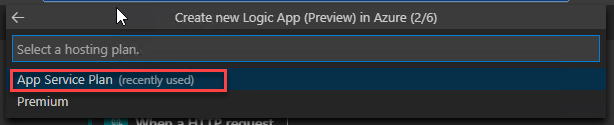
The second step will ask you to select a hosting plan for your new logic app, either App Service Plan or Premium.
Select App Service Plan.
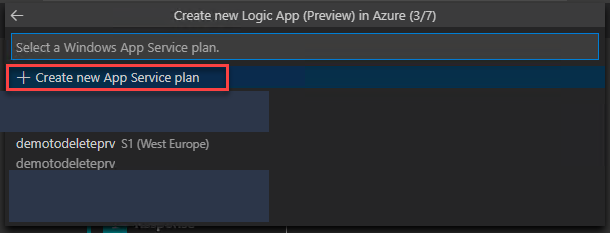
The next step asks you if you want to create a new App Service plan or select an existing plan.
Select Create new App Service Plan.
Enter the name of the new App Service Plan you are creating or leave the default name
Type My-First-Logic-App-Preview-AS-Plan and press Enter.
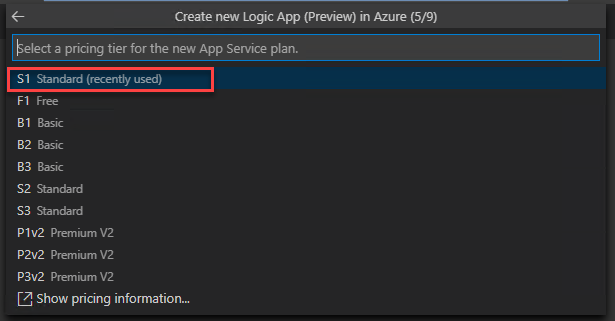
And then select a pricing tier for the new App Service plan.
Select the S1 Standard plan (you can choose F1 Free plan).
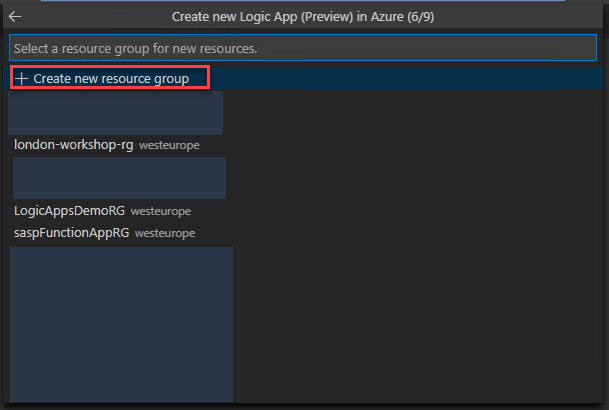
The next step asks you if you want to create a new resource group for new resources or select an existing resource group.
In this case, select Create new resource group
Enter the name of the new resource group you are creating or leave the default name
Type My-First-Logic-App-Preview-RG and press Enter.
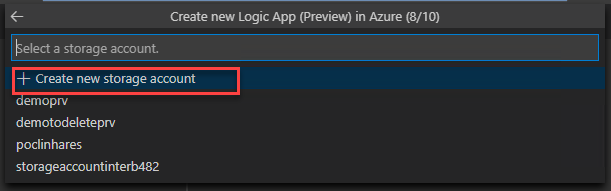
The next step asks you if you want to create a new storage account or select an existing storage account.
In this case, select Create new storage account
Enter the name of the new storage account you are creating or leave the default name
Type myfirstlogicapppreviewsa and press Enter.
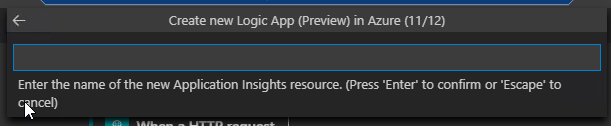
The next step asks you if you want to create a new Application Insights resource or select an existing Application Insights resource.
In this case, select Create new Application Insights resource
Enter the name of the new Application Insights resource you are creating or leave the default name
Type My-First-Logic-App-Preview-AppIns and press Enter.
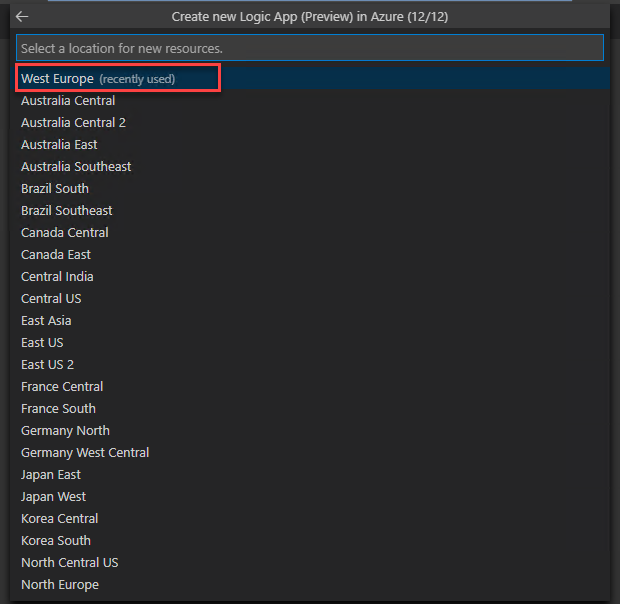
And finally, select a location for the new resources
In our case, West Europe
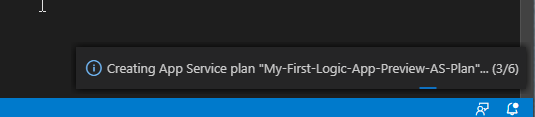
After that, you will see on the bottom right of VS Code Editor windows a status progress of the resources being created in Azure:
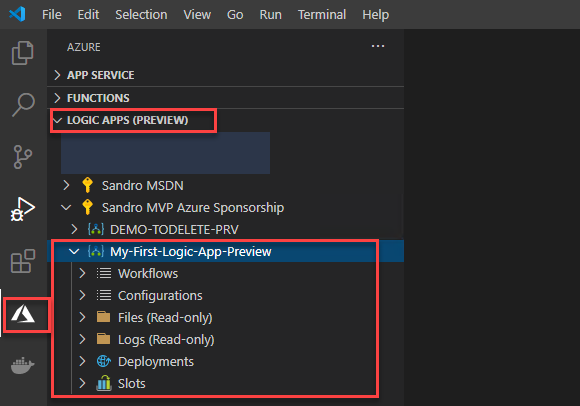
After it is finished, you will be able to see that resources in VS Code:
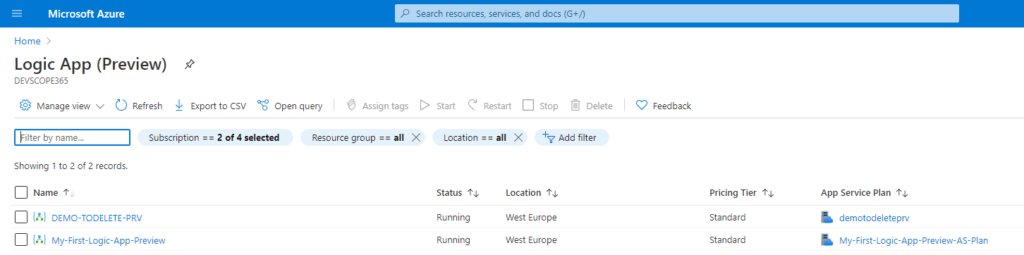
And the same thru the Azure Portal:
Create a new stateful or stateless workflows
Now that we have our Logic App (Preview) resource created, we can start creating our:
Stateful workflows: Stateful logic apps provide high resiliency if or when outages happen. After services and systems are restored, you can reconstruct the interrupted logic app runs from the saved state and rerun the logic apps to completion. Stateful workflows can continue running for up to a year.
Create stateful logic apps when you need to keep, review, or reference data from previous events. These logic apps keep the input and output for each action and their workflow states in external storage, which makes reviewing the run details and history possible after each run finishes.
or Stateless workflows: Create stateless logic apps when you don’t need to save, review, or reference data from previous events in external storage for later review. These logic apps keep the input and output for each action and their workflow states only in memory, rather than transfer this information to external storage. As a result, stateless logic apps have shorter runs that are usually no longer than 5 minutes, faster performance with quicker response times, higher throughput, and reduced running costs because the run details and history aren’t kept in external storage. However, if or when outages happen, interrupted runs aren’t automatically restored, so the caller needs to manually resubmit interrupted runs. These logic apps can only run synchronously and for easier debugging, you can enable run history, which has some impact on performance.
To do that we can:
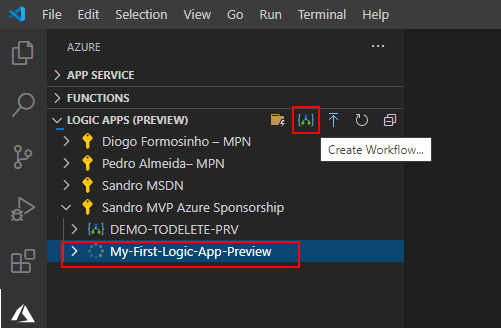
Select the Logic App (Preview) resource we created previously, My-First-Logic-App-Preview, and then click on the Create Workflow… button.
Centered at the top of the VS Code editor window, a wizard will once again appear asking to select a template for your workflow, select either Stateful Workflow or Stateless Workflow.
We will be using Stateful Workflow
Provide a workflow name for the workflow you are creating or leave the default name
Type My-First-Stateful-Workflow and press Enter
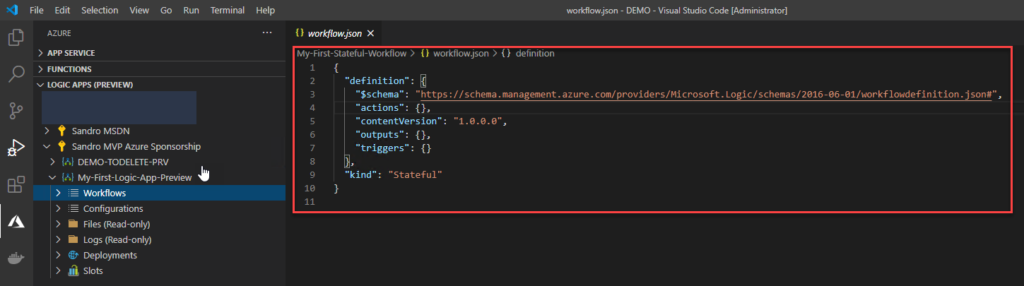
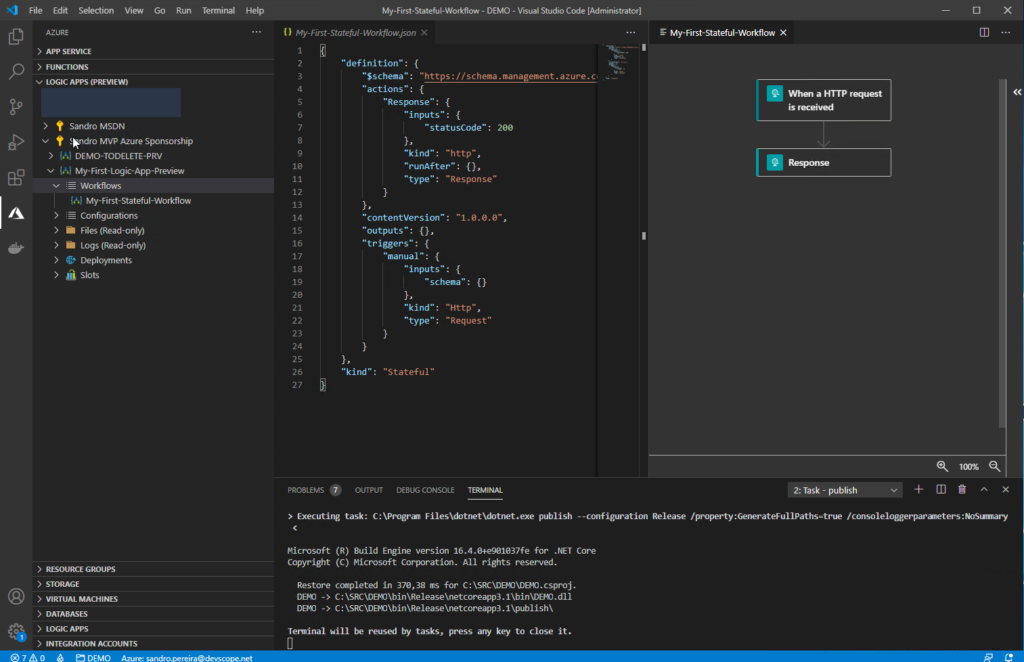
This will create locally a workflow.json file that contains your logic app workflow’s underlying JSON definition.
Note: the Stateful Workflow is not yet created in Azure.
Since full Logic Apps designer is supported in VS Code in this kind of resource, you may be thinking that now you can switch to Logic Apps designer… Unfortunately, using this creation strategy, you can’t! It will be exactly like the original Logic App extension. Only the code view is supported, and the Designer is read-only.
Does that mean that Logic Apps designer is not supported in VS Code? No, it is, but you need to use a different approach that we will address later in Part III.
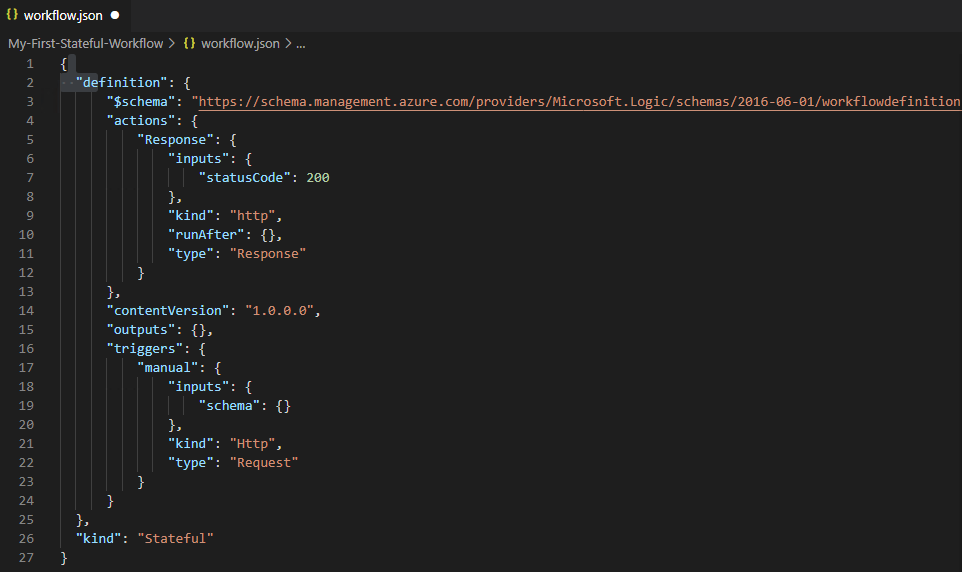
You can modify the workflow logic as you want, for example, the bellow code:
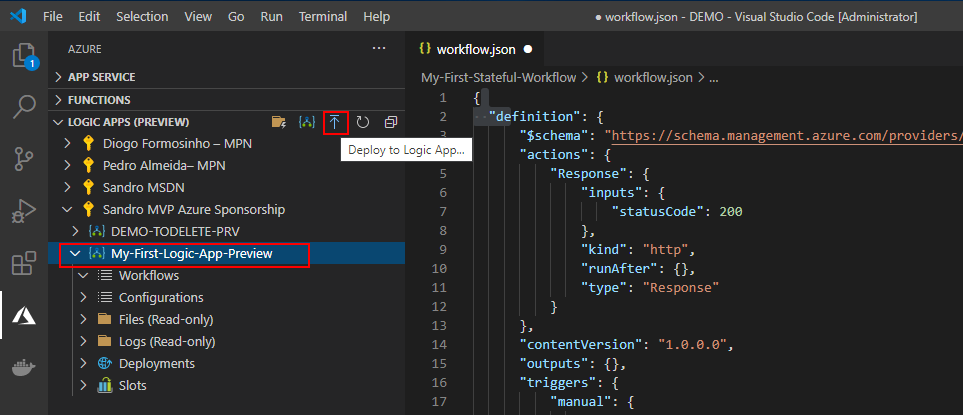
Now, to actually create this resource in Azure (in the Logic App (Preview) resource group) you need to:
Select the Logic App (Preview) resource we created previously, My-First-Logic-App-Preview, and then click on the Deploy to Logic App… button.
If it asks if you are sure and if you want to overlap existing resources, select Yes.
The deployment will make take some minutes to finish. After that, you will be able to see it on the Workflow list inside the Logic App (Preview) resource in VS Code:
Once again, the Designer is read-only.
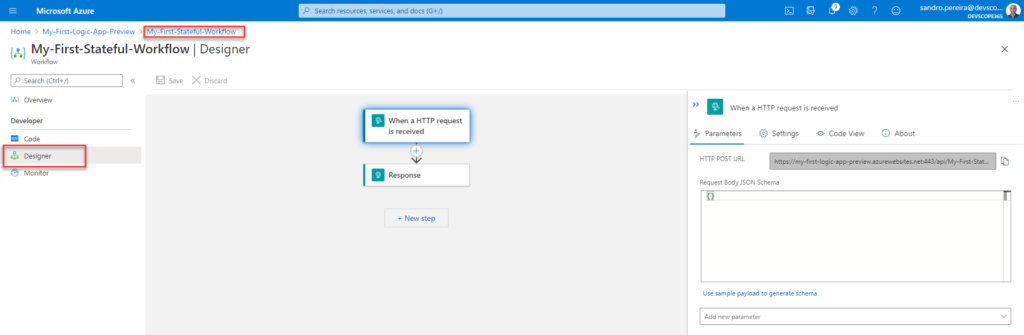
But you can also find the stateful workflow in the Azure Portal, and from there, you will be able to use the new Logic App Designer.
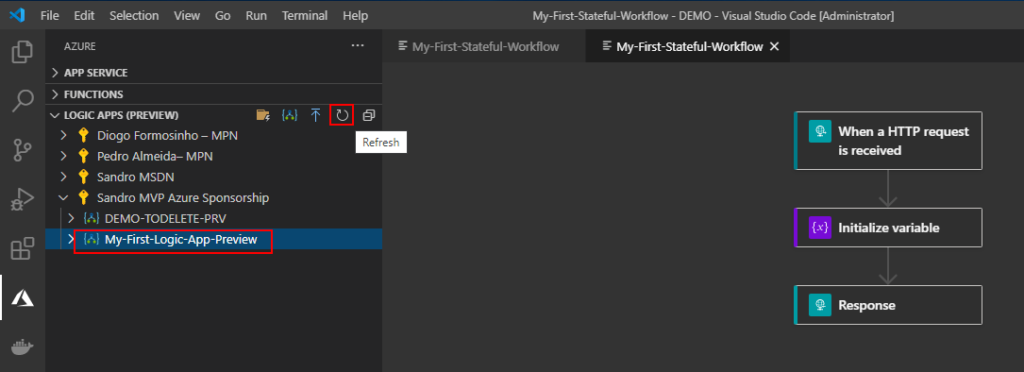
Of course, all the changes you make in the Portal can be synchronized back to VS Code by selecting the Refresh button
In the next blog post, we will explain a different and more powerful way for you to create your Logic Apps (Preview) projects and workflows. Stay tuned!
Microsoft Logic Apps Team recently announced a public preview of the new Logic Apps runtime. This new release adds several new features to Azure Logic Apps, including:
Development improvements
Full Logic Apps designer support in VS Code;
Local project support;
New Logic Apps Designer;
Hosting Flexibility – ability to run Logic apps workflows where you need to, including on-premises and edge environments
Run local (i.e. on my dev box);
Deploy to Azure or run containerized in Docker or Kubernetes environments;
Performance improvements
Stateless mode for low latency – better performance for request/response scenarios;
To create Logic Apps stateful or stateless workflows, you need to use Visual Studio Code and the Azure Logic Apps (Preview) extension – at the moment, there is no other way.
Prerequisites
To be able to use all capabilities of the Azure Logic Apps (Preview) extension for Visual Studio Code, you need:
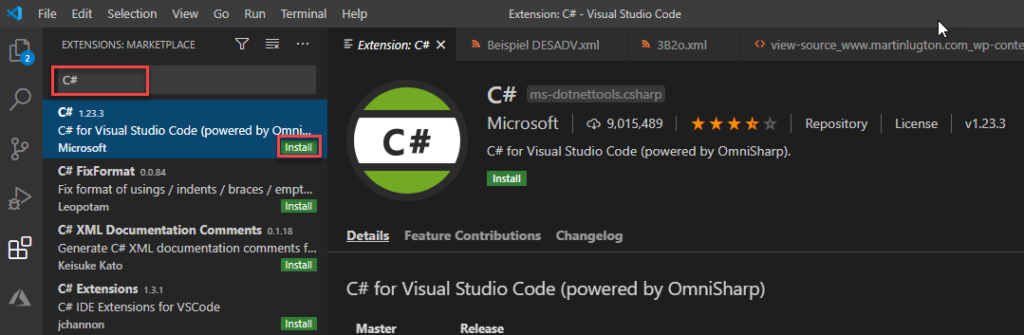
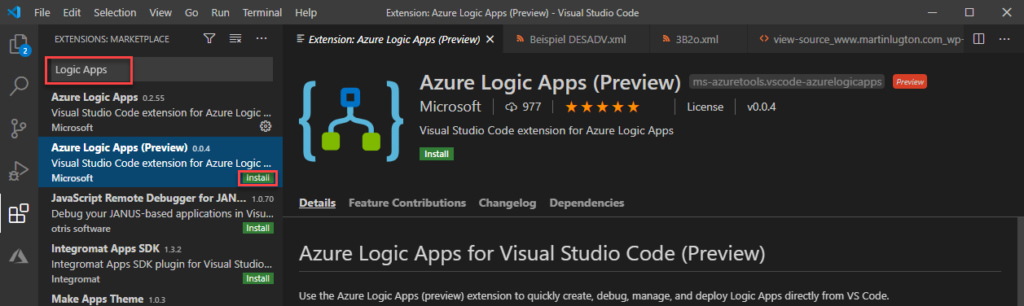
To have Visual Studio Code 1.31.0 (January 2019) or later and you need the following VS Code extensions:
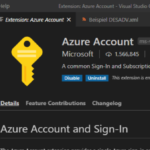
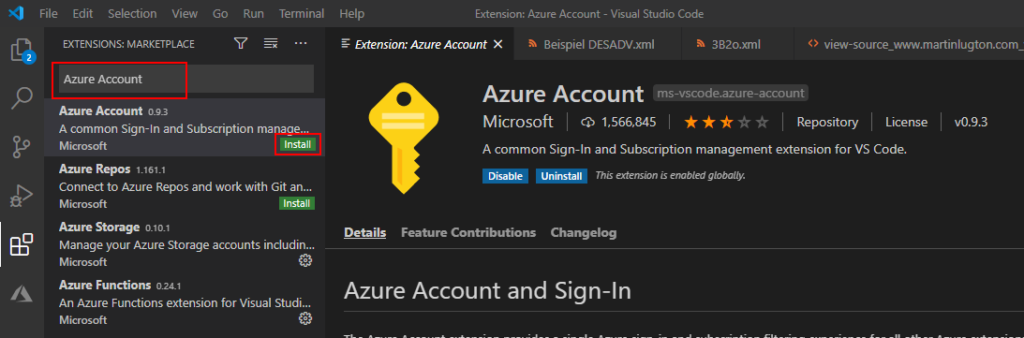
Azure Account extension provides a single common Azure sign-in and subscription filtering experience for all other Azure extensions in the Visual Studio Code.
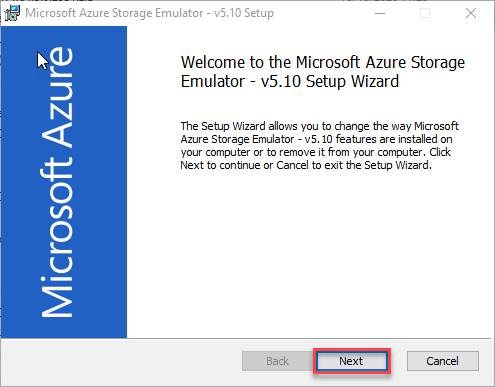
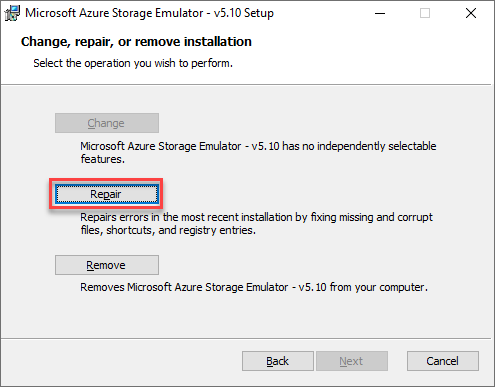
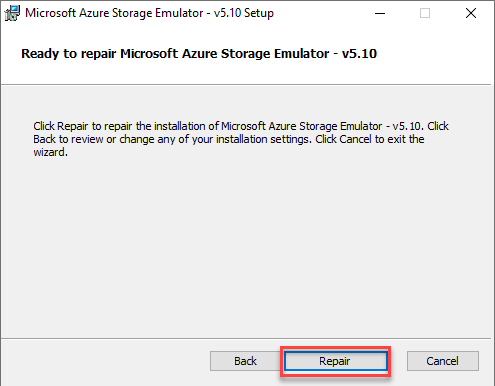
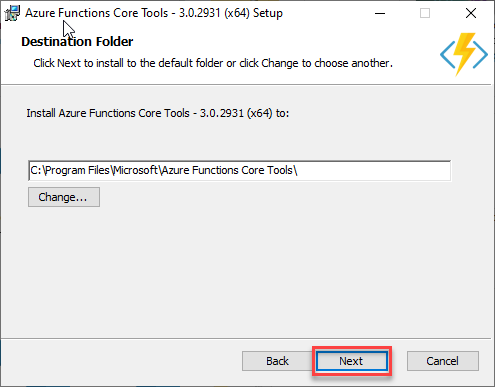
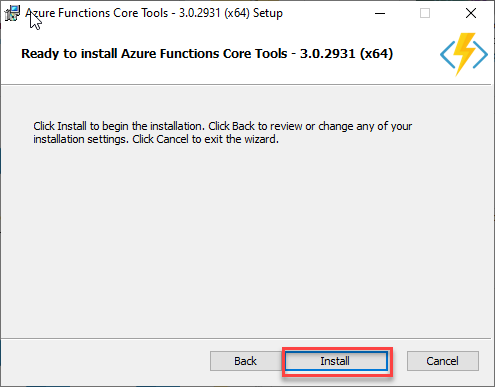
And finally, you need to install through the Microsoft Installer (MSI) the Azure Functions Core Tools, either version 3.0.2931 or 2.7.2936. These tools include a version of the same runtime that powers the Azure Functions runtime that runs in Visual Studio Code.
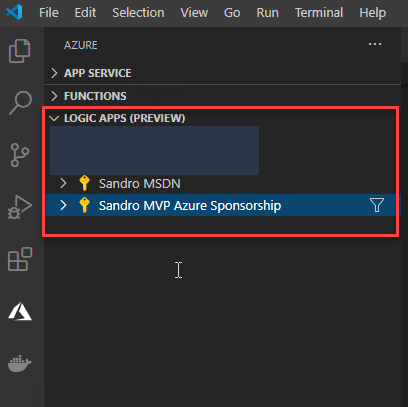
After installing this extension, you will find the two Azure Logic Apps (Preview) section of the Explore section of the VS Code, but the first thing you need to do is to Sign in to Azure…
Once again, to make sure that this extension is correctly installed, reload or restart the VS Code.
Set up VS Code Azure Logic Apps (preview) extension
For everything to work correctly, you need to make sure that the following two properties are correctly configured:
Azure Logic Apps V2: Panel Mode
Azure Logic Apps V2: Project Runtime
To do that, you need:
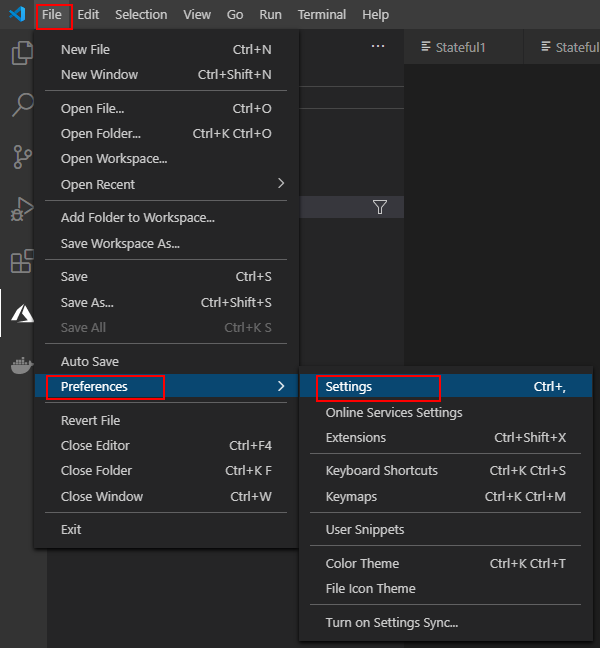
Open your VS Code, and on the File menu, go to Preferences, and then Settings.
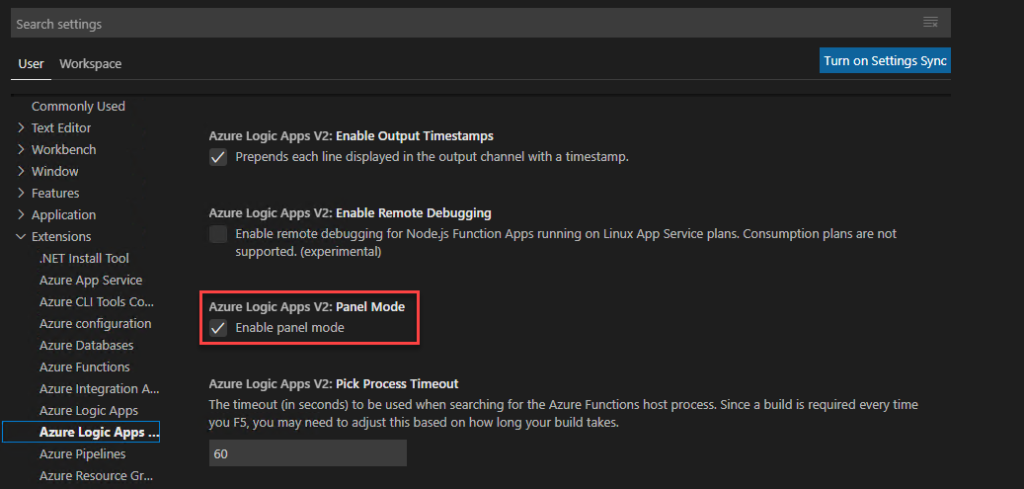
On the User tab, go to >Extensions>Azure Logic Apps (Preview).
Check if the Enable panel mode option is selected on Azure Logic Apps V2: Panel Mode property. Otherwise, please enable it.
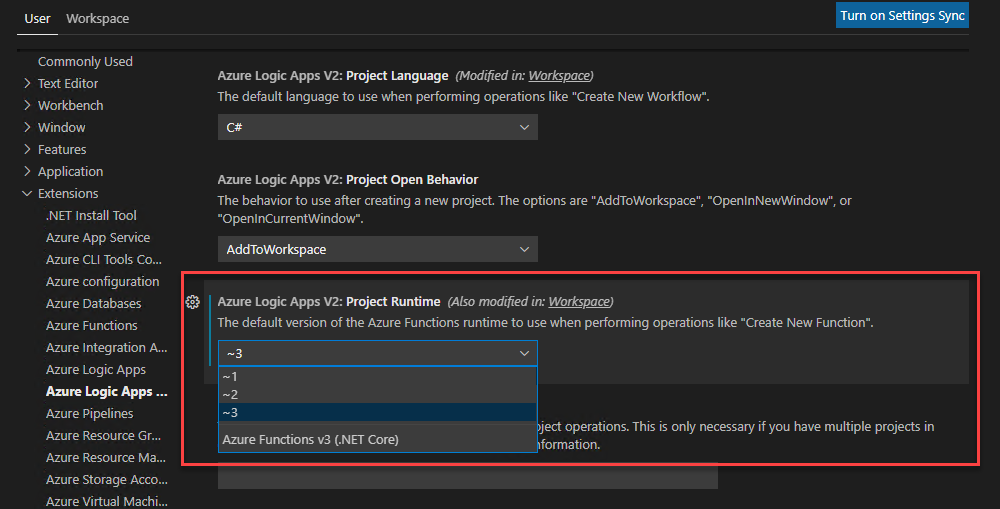
Under Azure Logic Apps V2: Project Runtime, set the version to ~3 or ~2, based on the Azure Functions Core Tools version that you installed earlier.
In our case: 3
If you want to use the Inline Code action for running JavaScript code, make sure that you use Project Runtime version 3 because the action doesn’t support version 2. Also, this action currently isn’t supported on Linux operating systems.
In the next blog post, we will explain how you can create your first Logic Apps (Preview) project. Stay tuned!
Azure Logic Apps Tools is available for Visual Studio 2019, 2017, and 2015 Community edition or greater and will allow you to design and deploy your logic apps from within Visual Studio. The Logic App designer integrates with the current Azure Resource Group project so you can seamlessly work with resource deployments that include Logic Apps.
Although this tool is officially supporting three versions of Visual Studio, I will advise you to install it only on Visual Studio 2019 and not in older versions. At some point, they will be officially removed or discontinued.
Prerequisites
Visual Studio 2019, 2017, or 2015 – Community edition or greater;
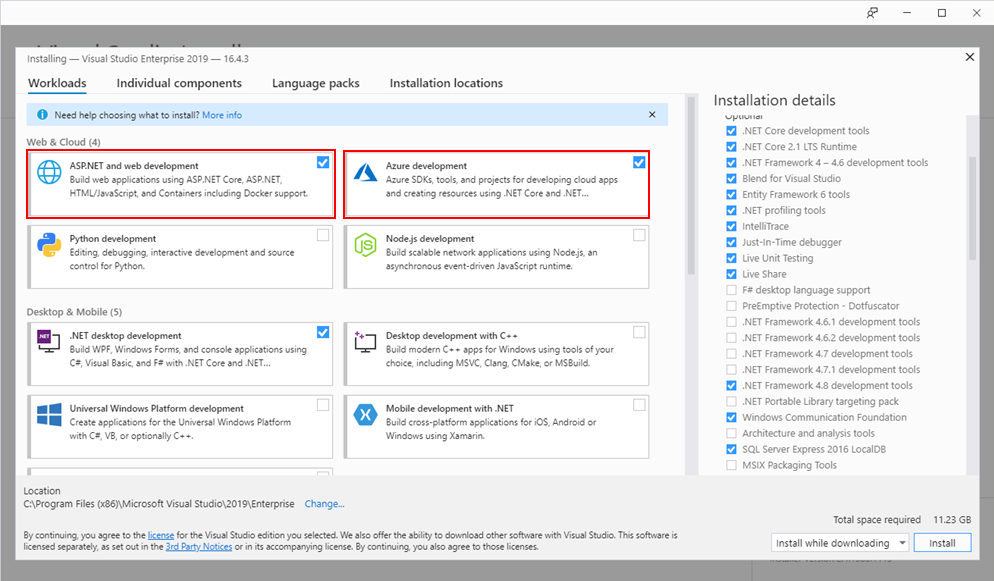
Visual Studio Tools for Azure: Azure SDK, tools, and projects for developing cloud apps and creating resources using .NET Core and .NET. Important also to create hybrid solutions without having the need for another development environment.
In the Visual Studio installer, install Visual Studio (or modify an existing installation). Make sure the Azure development and ASP.NET and web development workloads are selected.
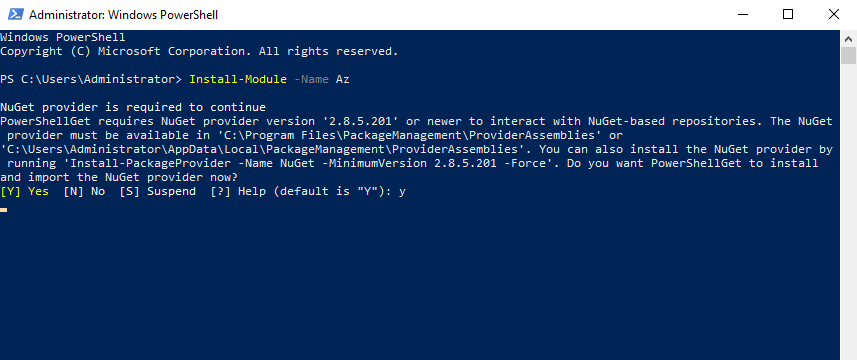
and run the following command: Install-Module -Name Az
Note: of course, for this or any other approach describe above, you need an Azure subscription or sign up for a free Azure account.
Install Azure Logic Apps Tools for Visual Studio 2019
AftAfter you install the prerequisites, this is a straightforward process. To accomplish that, we need to:
Open your Visual Studio, on the entry screen select the option Continue without code->
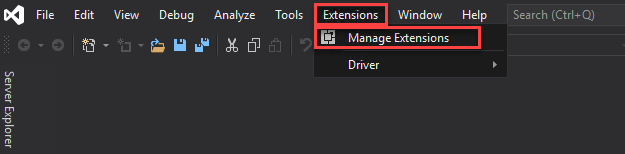
Then on the menu, navigate to Extensions > Manage Extensions
Select Online and search for Logic Apps
The add-in will be listed in the search results section. Click Download to download and install the add-in. You need to close your Visual Studio in order to begin installing this extension.
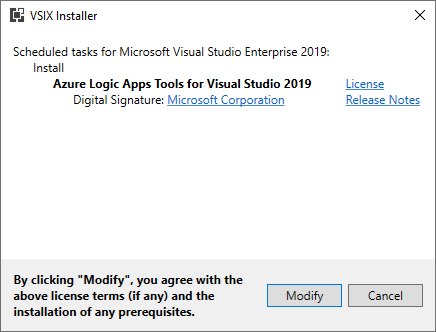
On the VSIX Installer screen
Make sure that the correct version of Visual Studio is selected.
Click Install or Modify. This will download and install the add-in to your version of Visual Studio.
At the end select Close.
Creating a Visual Studio Logic App project
The Logic Apps designer integrates with the current Azure Resource Group project. That saying, you will not find any Logic App template from the list of templates. Instead, we need to create an Azure Resource Group project to get started and to do that, we need:
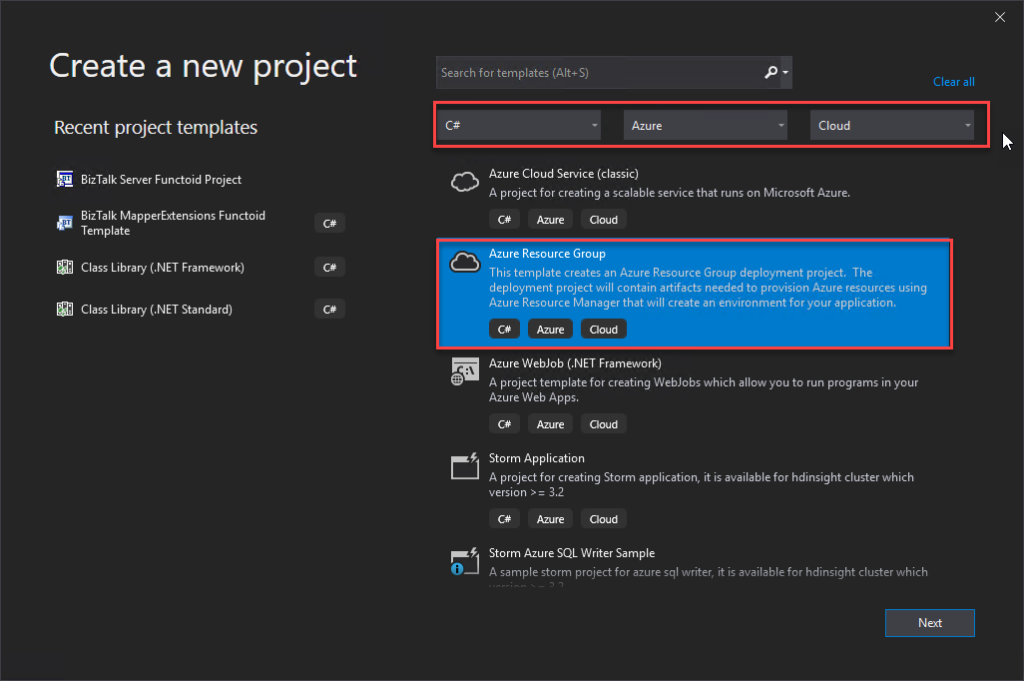
Open Visual Studio and on the Create a new project panel, select C# -> Azure -> Cloud, or select for Azure Resource Group;
Select Azure Resource Group from the template list;
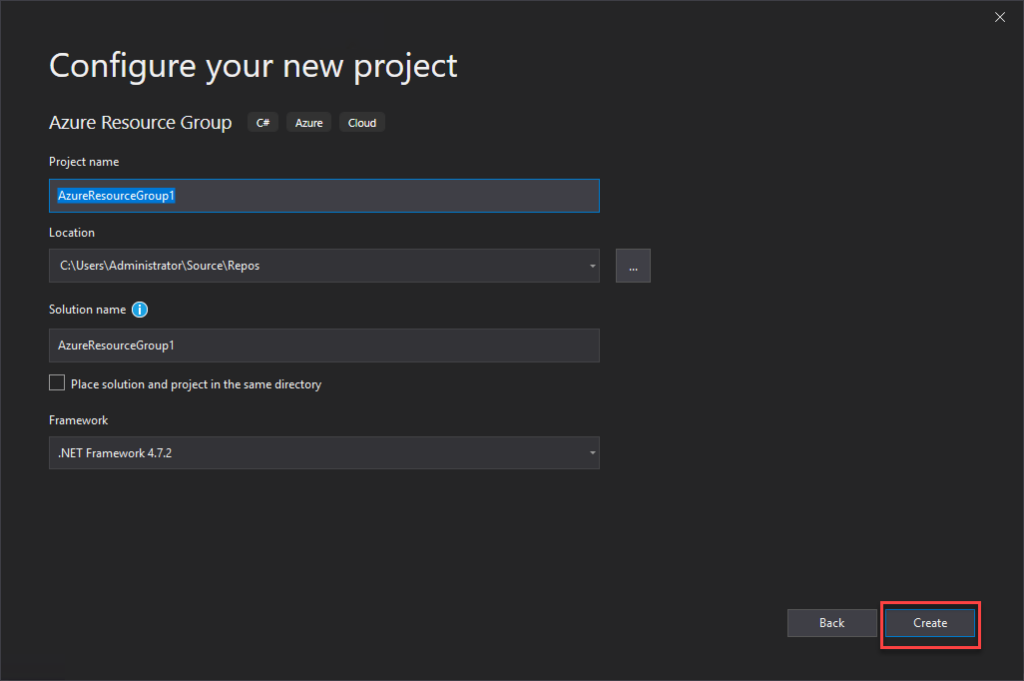
On the Configure your new project panel, give a proper Project name, Location, Solution name, and leave the Framework as .Net Framework 4.7.2 and select Create.
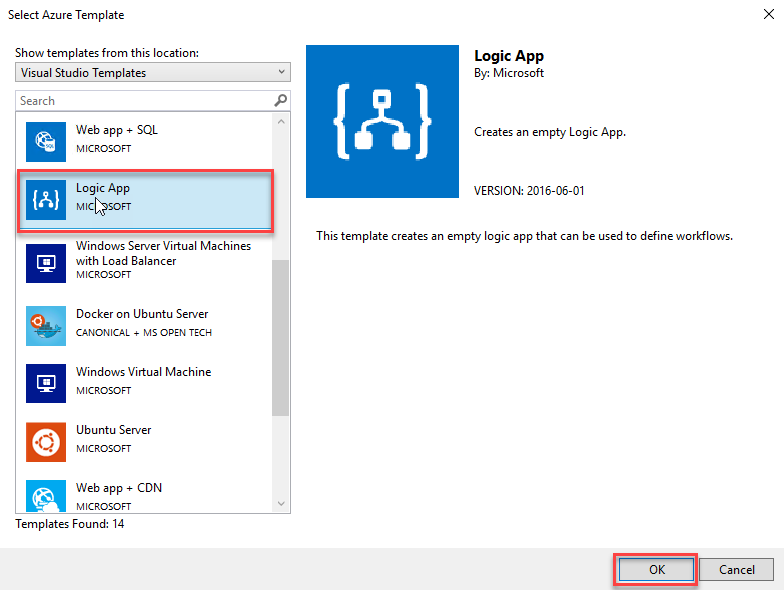
Finally, on the Select Azure Template panel, from the Visual Studio Templates list, select the Logic App template and select OK.
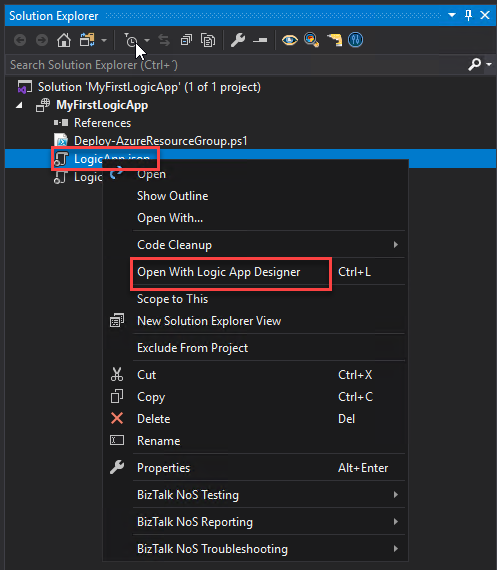
This will create an empty Visual Studio Logic App solution. Now on the Visual Studio solution:
Right-click on the LogicApp.json file and select Open With Logic App Designer
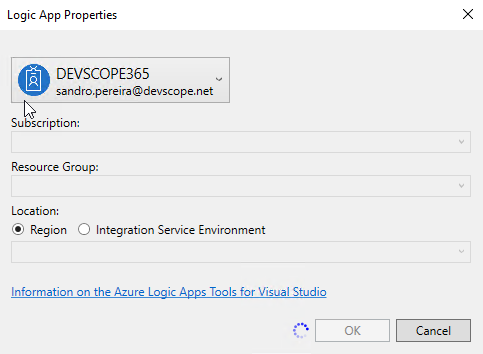
This will open a Logic App Properties window, where you need to:
Define the credentials to authenticate on the Azure subscription;
Define the Subscription and Resource Group where you want to create these resources;
Define if you want the Location to be in the same Region or in an Integration Service Environment (ISE);
And then select OK.
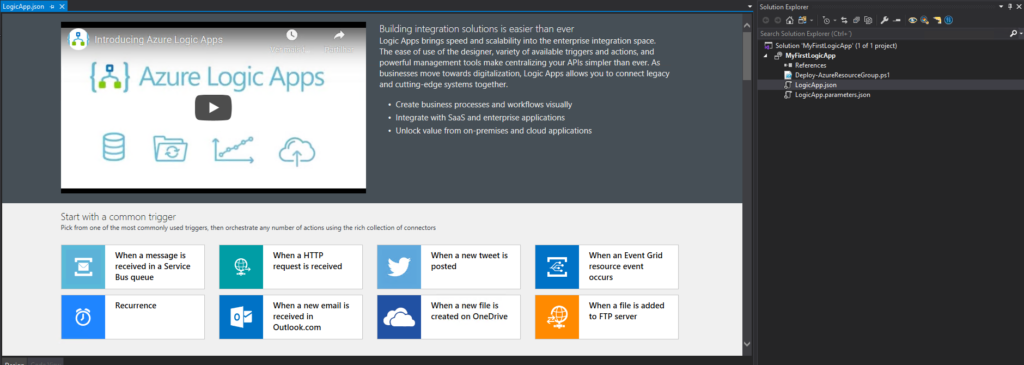
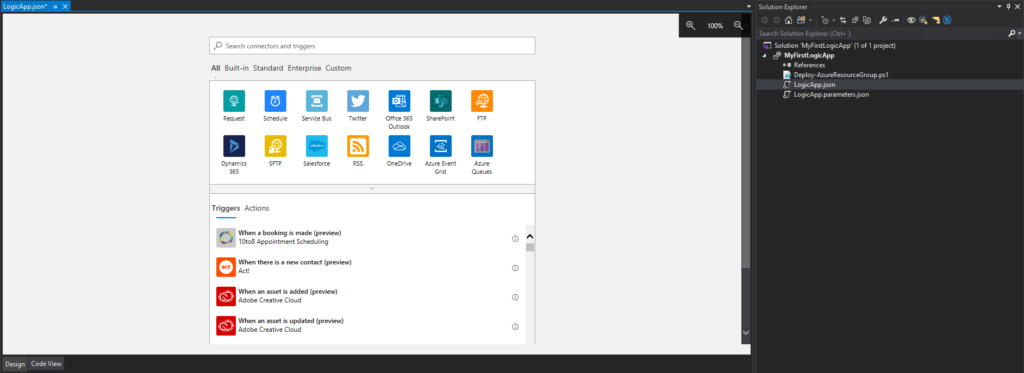
This will embed the Logic App designer inside the Visual Studio.
Now you need to select a common trigger, a template, or use a blank Logic App to start creating your business process.
It was with great pleasure to speak for the first time Auckland Connected Systems User Group (New Zealand), unfortunately, do this COVID-19 pandemic, this was an online event, nevertheless, it was a great experience and something to repeat if they desire. I still plan to visit New Zealand in the future, and maybe it will be a face-to-face event.
From my part I have to say thanks, Will, Alessandro, Wagner, Mark, Mike, Coen, and Craig for inviting me, it was indeed a pleasure!
Today I’m happy to share with you the slides and the video of the session.
Logic Apps: Best practices, tips, and tricks
10 tips you should know for being more productive and building more reliable, effective Logic Apps. In this session, we will do a reflection to your existing Logic Apps processes and when thru a list of must-have best practices, tips, and tricks that will allow you to build more reliable and effective workflows. At the same time, these will allow you to be more productive and document your workflows from the beginning.
Video recording
ACSUG June 2020 – Azure Logic Apps: Best practices, tips and tricks
A few months ago, my dear friend Wagner Silveira asked me if I was interested in giving a talk at the Auckland Connected Systems User Group since they were planning to start doing online events in the user group because of COVID-19 and they were planning to invited speakers from overseas, since now this was an online event, and that one of the first names that were dropped was mine.
I usually never say no to these invites, I love doing talks about topics I care and love, especially doing it locally in person, but in this case, and the way the invite was made, I couldn’t refuse… but be aware I still plan to visit New Zealand in the future!
Nevertheless, it will be a challenge. I need to be awake at 6 AM to deliver this session! I can’t say that this will be the first time I will deliver a session with a coffee cup in the hand because I still remember the first time I went to Norway, in the old days of the BizTalk Crew, and because of a problem in Oslo airport, my flight was forced to land in Sweden. So, I had to travel all night without sleeping to be in Stavanger at 9 AM to know that the schedule was changed, and I was delivering the first session! Since that day, I question myself if Tord Nordahl is my friend.
Logic Apps: Best practices, tips and tricks
I would like you to invite you to join us at the Auckland Connected Systems User Group meeting that will happen on June 30, 2020. This will be the first time I will be delivering a session in the user group but I hope it will be the first of many.
Abstract: Logic Apps: Best practices, tips and tricks
Azure Logic Apps helps you build powerful integration solutions by automating your workflows without writing a single line of code. In this session, I will be highlighting 10 tips you should know for being more productive and building more reliable, effective Logic Apps. We will also do a reflection to your existing Logic Apps processes and will go through a list of must-have best practices, tips, and tricks that will allow you to build more reliable and effective workflows. At the same time, these will allow you to be more productive and document your workflows from the beginning
It was with great pleasure that I presented, last May, 25 another session in the Integration Monday series this time about Logic Apps: Best practices, Tips, and Tricks, this was my eleventh talk in this community in 4 years of existence. I can say that I am one of the most regular speakers at the Integration User Group only behind Michael Stephenson that has 13 talks.
Logic Apps: Best practices, tips, and tricks
Azure Logic Apps helps you build powerful integration solutions by automating your workflows without writing a single line of code. In this session, I will be highlighting 10 tips you should know for being more productive and building more reliable, effective Logic Apps. We will also do a reflection to your existing Logic Apps processes and will go through a list of must-have best practices, tips, and tricks that will allow you to build more reliable and effective workflows. At the same time, these will allow you to be more productive and document your workflows from the beginning.
I hope you enjoy and find it an interesting session. Also, I advise you to visit and view the history of sessions that have taken place every Monday in the Integration User Group – Integration Monday series.
My other talks at Integration Monday – Integration User Group
Do you feel difficult to keep up to date on all the frequent updates and announcements in the Microsoft Integration platform and Azure iPaaS?
Integration weekly update can be your solution. It’s a weekly update on the topics related to Integration – enterprise integration, robust & scalable messaging capabilities and Citizen Integration capabilities empowered by Microsoft platform to deliver value to the business.
Microsoft has been discontinuing some actions for some time or at least
running side by side different versions, don’t get me wrong. But they were never
extremely good at providing proper documentation, even in the old days that we
had software releases every two or three years, now imagine in this crazy fast
delivery world that we are leaving! What you see is:
A big gap between the documentation and the features that we have available or not properly documented in terms of how they work;
There is nothing that tells you what was change or how certain task that was possible to do in previous versions of action can now be done.
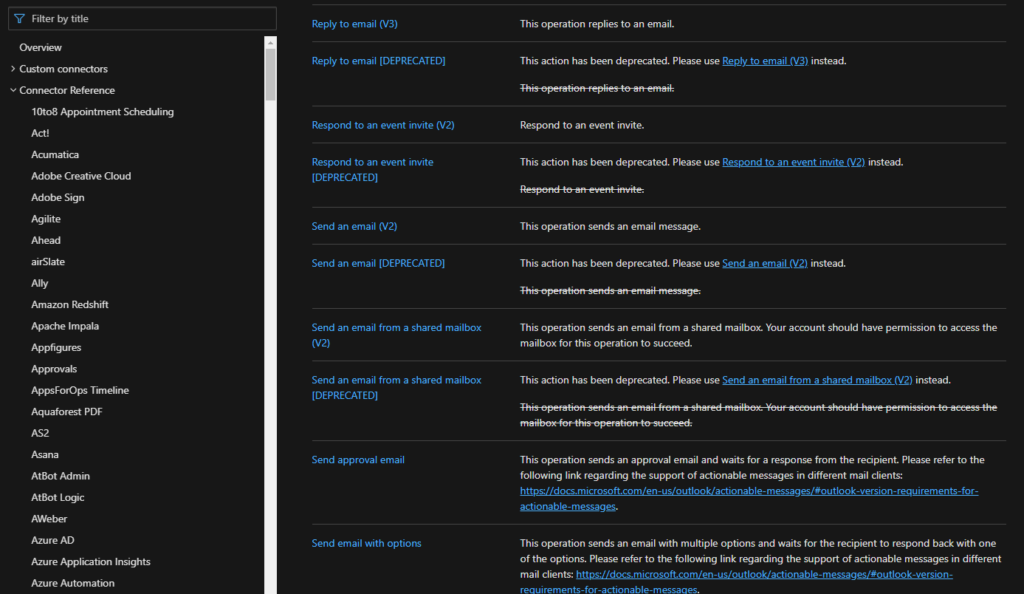
When I say that for the first time that Microsoft deprecated connection
actions, I mean actual remove from the list of actions on the Logic App design,
taking from the example the two connectors mention above you can’t see
the deprecated action on the Logic App designer anymore:
But don’t be alarmed, your existing logic apps that still use these
deprecated actions continue to work properly.
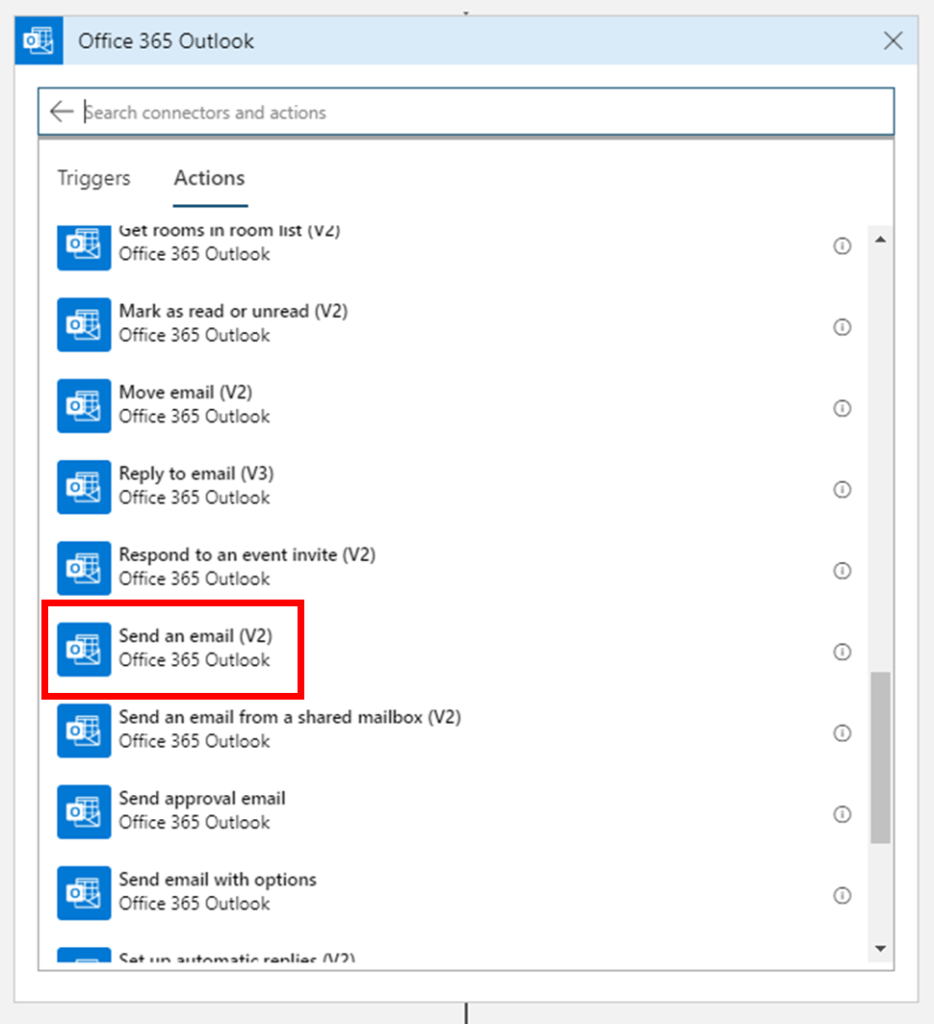
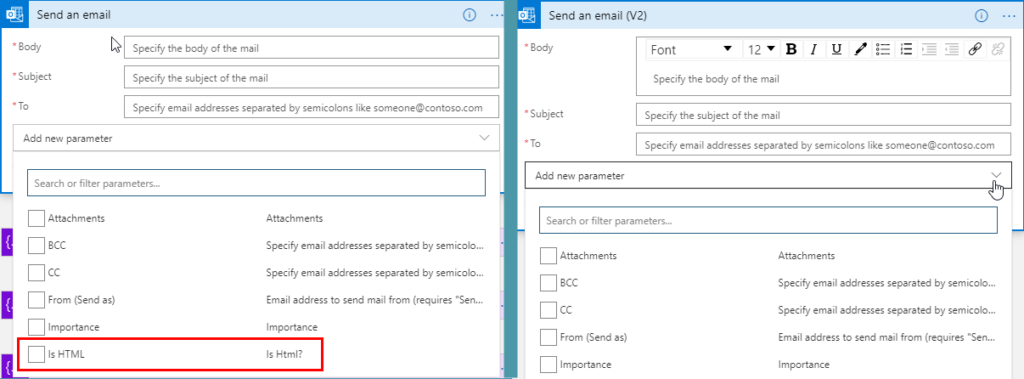
In this article, we will address the Office 365 Outlook connector and especially the Send an Email V2 action because Send an Email action is now deprecated. So the question here is:
How to send a well-formatted custom HTML Email using Send an Email V2 action available on the Office 365 Outlook connector?
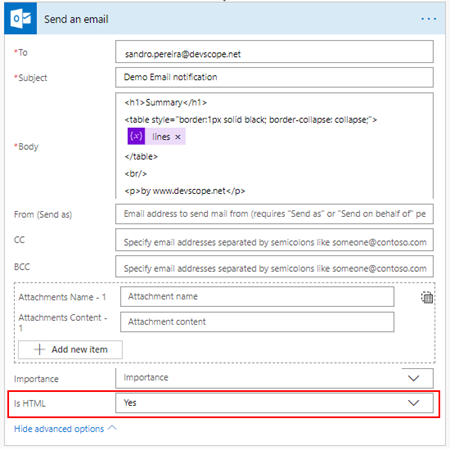
I personally liked the Send
an Email action because we were able to directly put HTML code on the body
property and define that the email body format would be HTML bt setting the
property Is HTML to true.
Quite simple to use and
efficient.
However, Send an email (V2) action has totally different
behavior. First of all, it owns fewer properties:
Is HTM property was removed from this action;
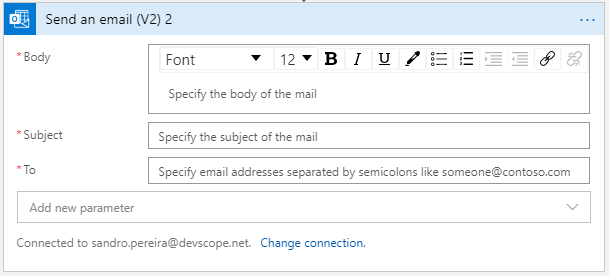
And a completely new look
and feel of the Body property as you see in the picture below:
With a powerful editor similar to what we have in our office tools (Word, Outlook, …)
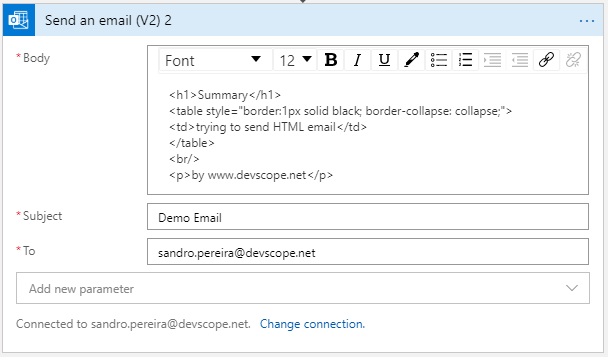
That also means that we no longer have the possibility to directly insert HTML code into the body property of the message as we did earlier with the previous version. Well, we can write HTML code on the body of this action:
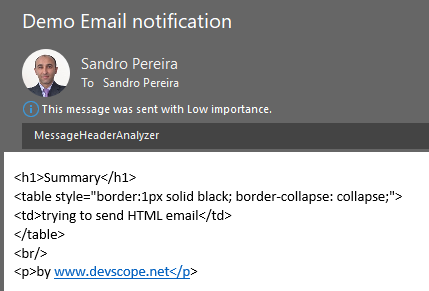
But the end result will not be what you expect:
Unluckily Power Automate designer, we don’t have a Code View button (</>) on the Body property editor, I will be blogging about this feature soon on Serveless360 blog. So, who we are able to send a proper well-formatted HTML Email using Send an email V2 action?
The answer is: unfortunately, at least in my opinion, we need to build the HTML in an action beforehand in a composite action or in a variable. And then put the compose output or variable as the send mail body property, and the action will render correctly the output as an HTML.
To do that we need:
On
the Logic App designer, add the next step by clicking the +New step
button
On
the Choose an action window, enter Variables and select the
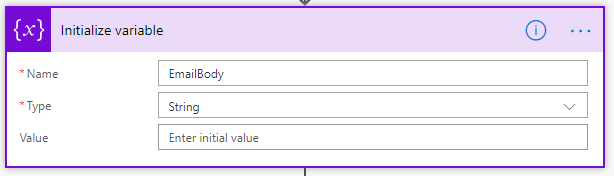
action Initialize variable
On
the Variable action configuration:
On
the Name property, type “EmailBody”
On
the Type property, specify the type as “String”
On
the Value property leave it blank
On
the Logic App designer, add the next step by clicking the +New step
button
On
the Choose an action window, enter Variables and select the
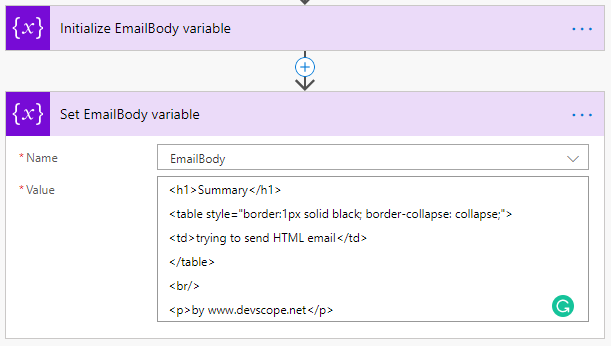
action Set variable
On
the Variable action configuration:
On
the Name property, select “EmailBody” variable
On
the Value property, type your custom HTML
Note: you can take as example this fancy HTML Template that I created specifically for this article here: HTML Notification Template to use Logic App or Power Automate Outlook connector and not this basic HTML that you are seeing on the picture.
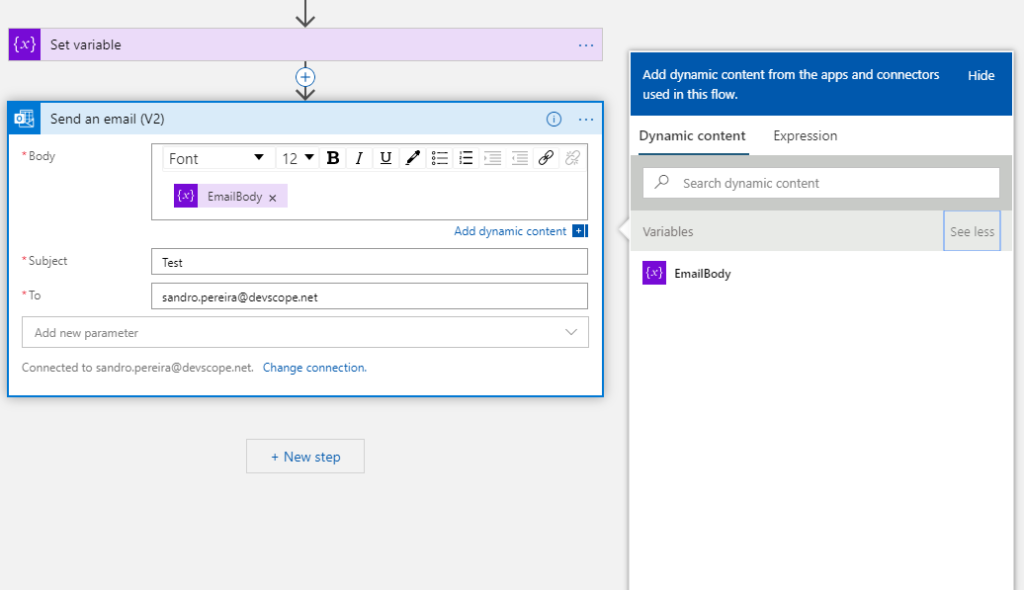
And then define directly on the Body editor (without switching to Code View) that the body will be the content of the variable we created earlier:
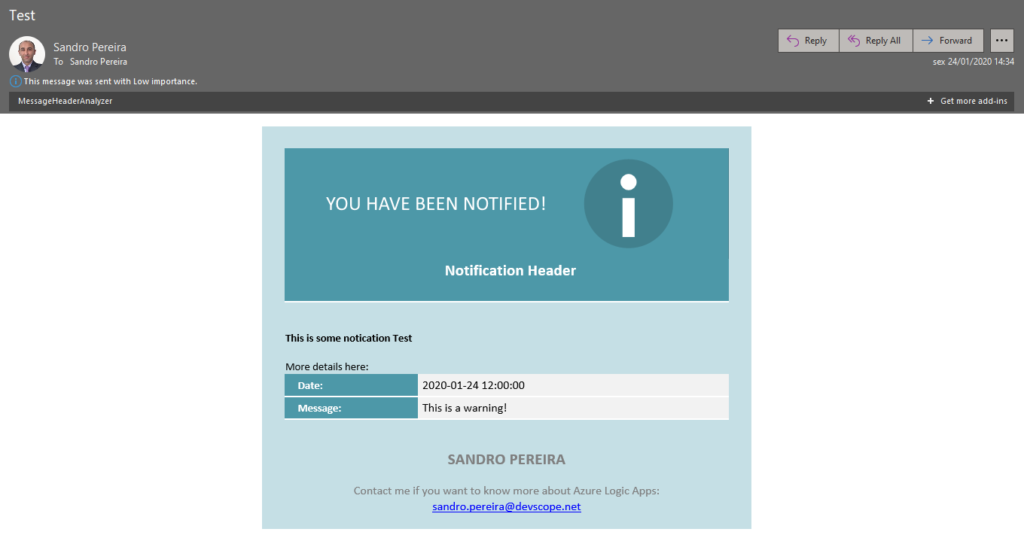
And you will see that you
will be receiving also a well-formatted HTML email on your mailbox:
Thanks Thiago Almeida for the help and credits to Pedro Rosa that helped me creating this HTML Template and most important to be compatible with Outlook because not all the stylesheets that we can apply aren’t compatible.
Do you feel difficult to keep up to date on all the frequent updates and announcements in the Microsoft Integration platform and Azure iPaaS?
Integration weekly update can be your solution. It’s a weekly update on the topics related to Integration – enterprise integration, robust & scalable messaging capabilities and Citizen Integration capabilities empowered by Microsoft platform to deliver value to the business.