In the first part of this blog post series – What do I need to do to start developing stateful or stateless workflows – Azure Logic Apps (Preview)? (Part I) – I explained what we need to install to begin developing our stateful and stateless workflows using Azure Logic Apps (Preview). Today, I will start to explain what we actually need to do to create our first Azure Logic Apps (Preview) workflow.
Today we will see one of the ways to create a new Logic App (Preview) resource and new stateful or stateless workflows through VS Code. This doesn’t mean that it’s the best way, but later we will address this topic.
Create a new Logic App (Preview) resource
To do that, you need:
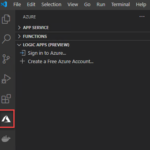
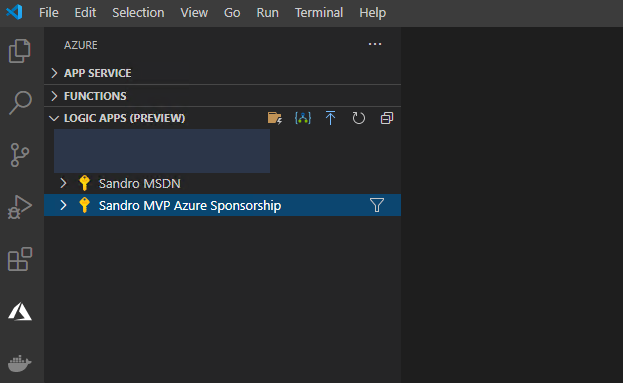
- Open your VS Code, select the Azure icon.
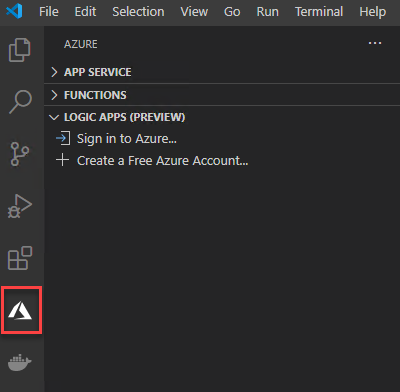
- In the Azure pane, under Azure: Logic Apps (Preview), select Sign in to Azure.
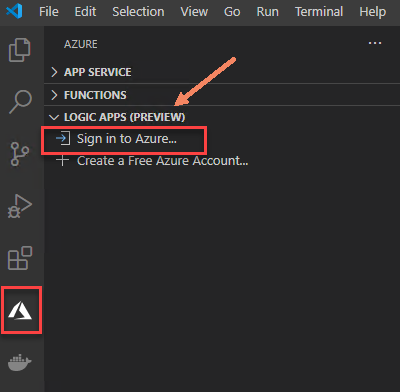
- When the Visual Studio Code authentication page appears, sign in with your Azure account.
- After you sign in, the Azure pane shows the subscriptions in your Azure account.
- Any Logic Apps resources you may have already deployed/released it will not be showing here. You can see any original Logic Apps resources you created using the original extension in the released extension’s Logic Apps section.
- In the Logic App (Preview) section, you will only see the new Logic Apps (Preview) resource type within functions runtime.
Note: You cannot create a Logic Apps (Preview) resource type directly from the Azure Portal. The only option at the moment is using Visual Studio Code (and probably scripting).
This is probably the best way, but if you don’t fill comfortable to work in VS Code, the first thing you can do is:
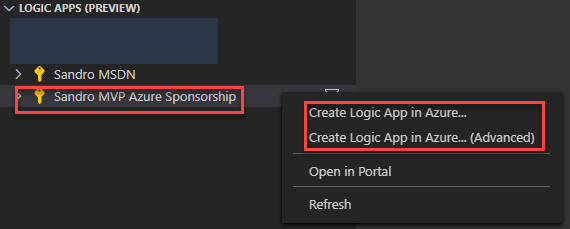
- From the Logic Apps (Preview) extension, right-click on your Subscription and select one of the two options:
- Create Logic App in Azure…
- Create Logic App in Azure… (Advance) – we will be using this one.
- Centered at the top of the VS Code editor window, a wizard will appear asking to specify a globally unique name for the logic app, which is the name to use for the Logic App (Preview) resource.
- Type My-First-Logic-App-Preview and press Enter.

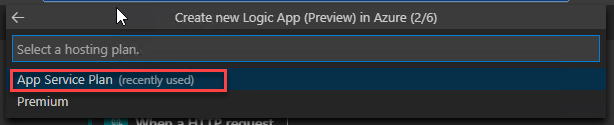
- The second step will ask you to select a hosting plan for your new logic app, either App Service Plan or Premium.
- Select App Service Plan.
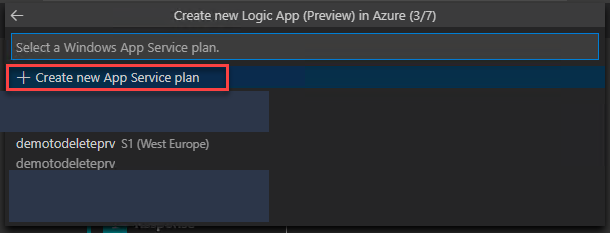
- The next step asks you if you want to create a new App Service plan or select an existing plan.
- Select Create new App Service Plan.
- Enter the name of the new App Service Plan you are creating or leave the default name
- Type My-First-Logic-App-Preview-AS-Plan and press Enter.

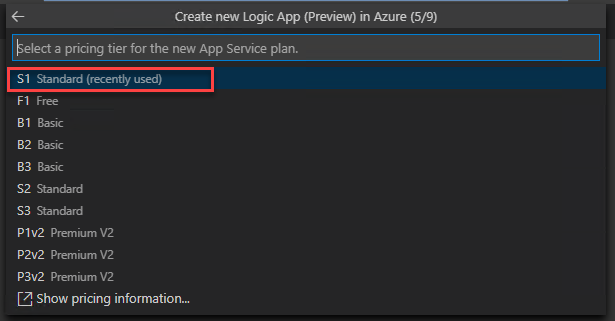
- And then select a pricing tier for the new App Service plan.
- Select the S1 Standard plan (you can choose F1 Free plan).
- The next step asks you if you want to create a new resource group for new resources or select an existing resource group.
- In this case, select Create new resource group
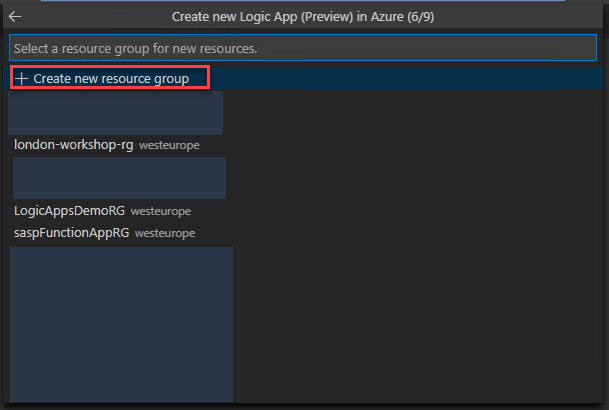
- Enter the name of the new resource group you are creating or leave the default name
- Type My-First-Logic-App-Preview-RG and press Enter.

- The next step asks you if you want to create a new storage account or select an existing storage account.
- In this case, select Create new storage account
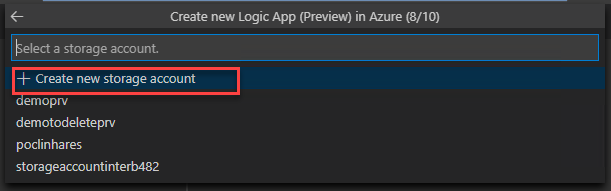
- Enter the name of the new storage account you are creating or leave the default name
- Type myfirstlogicapppreviewsa and press Enter.

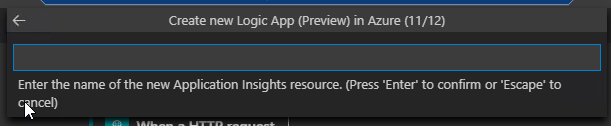
- The next step asks you if you want to create a new Application Insights resource or select an existing Application Insights resource.
- In this case, select Create new Application Insights resource

- Enter the name of the new Application Insights resource you are creating or leave the default name
- Type My-First-Logic-App-Preview-AppIns and press Enter.
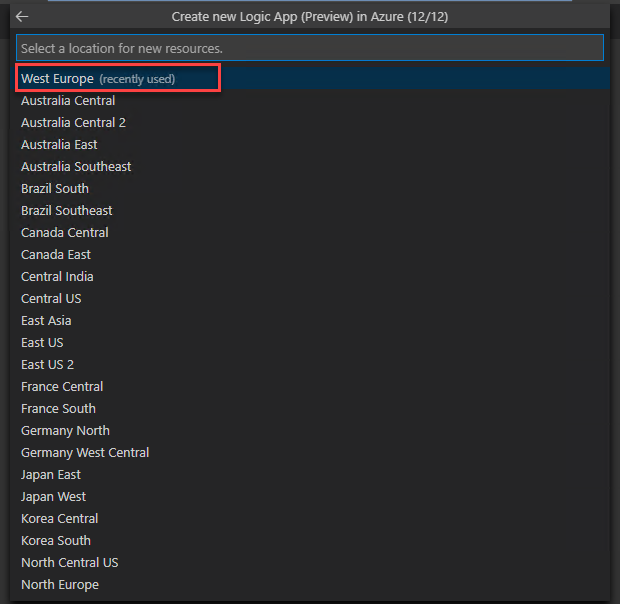
- And finally, select a location for the new resources
- In our case, West Europe
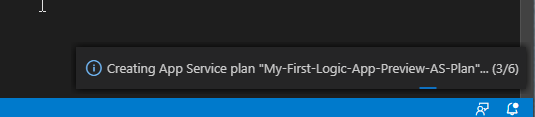
After that, you will see on the bottom right of VS Code Editor windows a status progress of the resources being created in Azure:
After it is finished, you will be able to see that resources in VS Code:

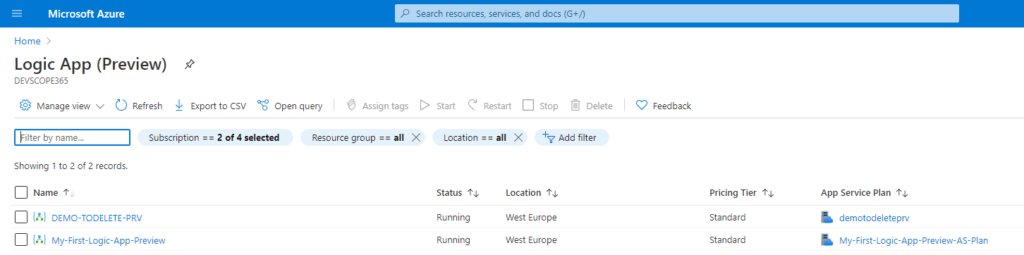
And the same thru the Azure Portal:
Create a new stateful or stateless workflows
Now that we have our Logic App (Preview) resource created, we can start creating our:
- Stateful workflows: Stateful logic apps provide high resiliency if or when outages happen. After services and systems are restored, you can reconstruct the interrupted logic app runs from the saved state and rerun the logic apps to completion. Stateful workflows can continue running for up to a year.
- Create stateful logic apps when you need to keep, review, or reference data from previous events. These logic apps keep the input and output for each action and their workflow states in external storage, which makes reviewing the run details and history possible after each run finishes.
- or Stateless workflows: Create stateless logic apps when you don’t need to save, review, or reference data from previous events in external storage for later review. These logic apps keep the input and output for each action and their workflow states only in memory, rather than transfer this information to external storage. As a result, stateless logic apps have shorter runs that are usually no longer than 5 minutes, faster performance with quicker response times, higher throughput, and reduced running costs because the run details and history aren’t kept in external storage. However, if or when outages happen, interrupted runs aren’t automatically restored, so the caller needs to manually resubmit interrupted runs. These logic apps can only run synchronously and for easier debugging, you can enable run history, which has some impact on performance.
To do that we can:
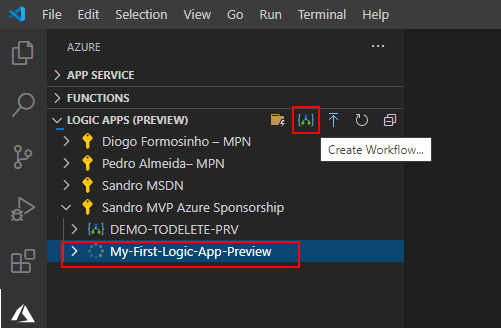
- Select the Logic App (Preview) resource we created previously, My-First-Logic-App-Preview, and then click on the Create Workflow… button.
- Centered at the top of the VS Code editor window, a wizard will once again appear asking to select a template for your workflow, select either Stateful Workflow or Stateless Workflow.
- We will be using Stateful Workflow

- Provide a workflow name for the workflow you are creating or leave the default name
- Type My-First-Stateful-Workflow and press Enter

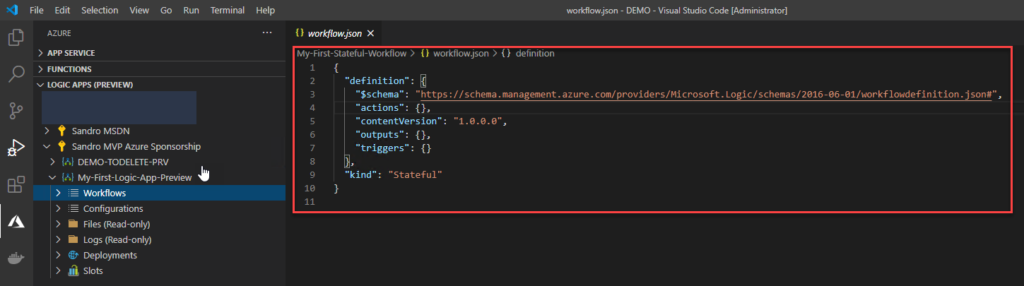
- This will create locally a workflow.json file that contains your logic app workflow’s underlying JSON definition.
- Note: the Stateful Workflow is not yet created in Azure.
Since full Logic Apps designer is supported in VS Code in this kind of resource, you may be thinking that now you can switch to Logic Apps designer… Unfortunately, using this creation strategy, you can’t! It will be exactly like the original Logic App extension. Only the code view is supported, and the Designer is read-only.
Does that mean that Logic Apps designer is not supported in VS Code? No, it is, but you need to use a different approach that we will address later in Part III.
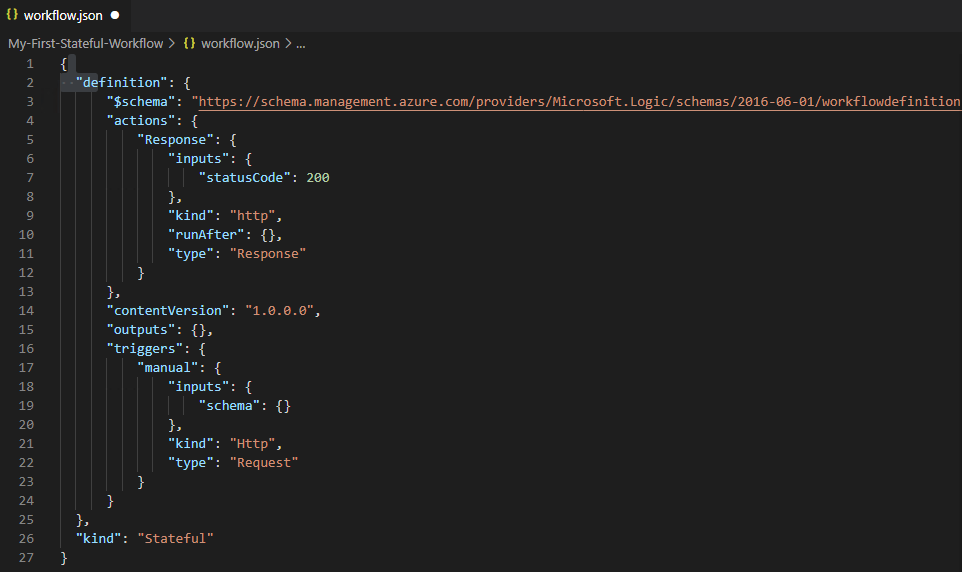
You can modify the workflow logic as you want, for example, the bellow code:
Now, to actually create this resource in Azure (in the Logic App (Preview) resource group) you need to:
- Select the Logic App (Preview) resource we created previously, My-First-Logic-App-Preview, and then click on the Deploy to Logic App… button.
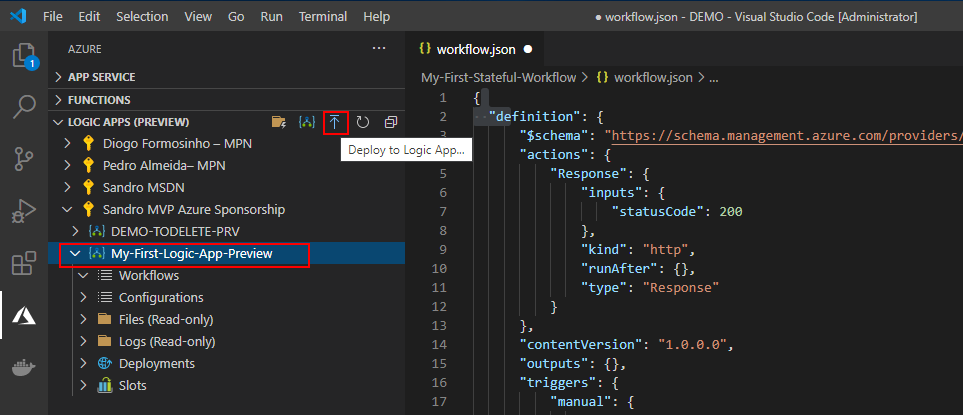
- If it asks if you are sure and if you want to overlap existing resources, select Yes.
The deployment will make take some minutes to finish. After that, you will be able to see it on the Workflow list inside the Logic App (Preview) resource in VS Code:
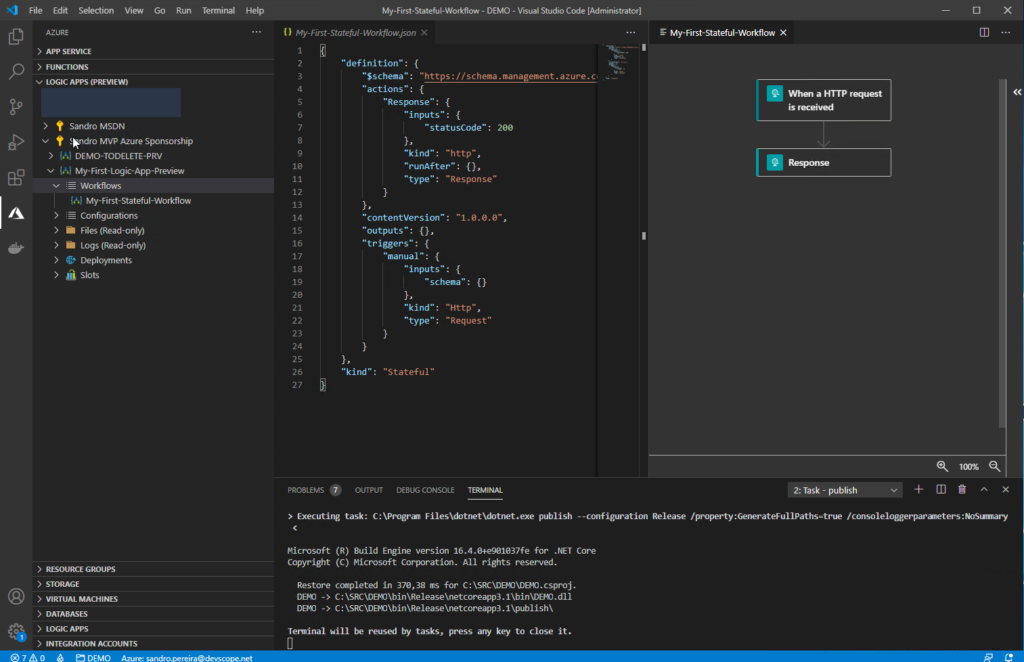
Once again, the Designer is read-only.
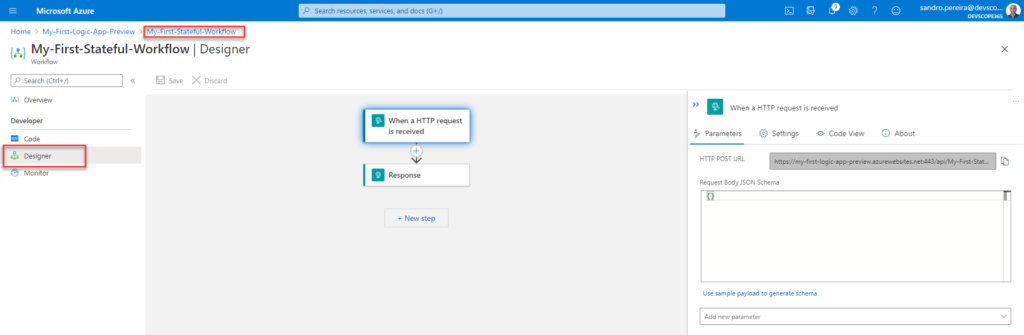
But you can also find the stateful workflow in the Azure Portal, and from there, you will be able to use the new Logic App Designer.
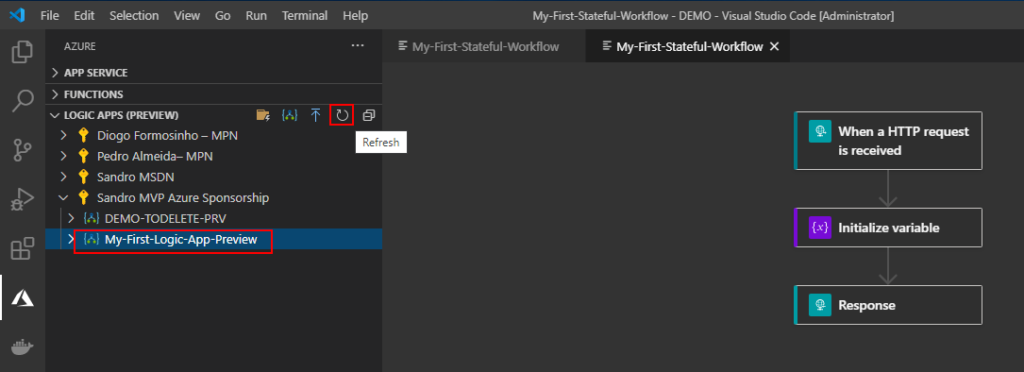
Of course, all the changes you make in the Portal can be synchronized back to VS Code by selecting the Refresh button
In the next blog post, we will explain a different and more powerful way for you to create your Logic Apps (Preview) projects and workflows. Stay tuned!
The post What do I need to do to start developing stateful or stateless workflows – Azure Logic Apps (Preview)? (Part II) appeared first on SANDRO PEREIRA BIZTALK BLOG.