BizTalk Server leverages the Enterprise Single Sign-On (SSO) capabilities for securely storing critical information such as secure configuration properties (for example, the proxy user ID, and proxy password) for the BizTalk adapters. Therefore, the BizTalk Server requires SSO to work properly.
But it also can keep your own application configuration data in the SSO database, let say the usual configurations that we normally keep in a configuration file (“app.config”)). Unfortunately, there is no command-line tool to allow you to script the deployment SSO Application Configurations or perform CI/CD thru DevOps.
BizTalk Server SSO Application Configuration CLI
BizTalk ServerSSO Application Configuration CLI is a command-line tool that provides the ability to import SSO configuration applications – key-value pairs in the SSO database – that can be deployed to different environments. This way enables you to script these tasks.
This tool is designed to address this gap allowing you to:
You can securely import Application configurations by using this CLI application;
And it mandatory accepts 5 arguments:
Path: full path to the .sso file
Password: password to unencrypted the .sso file
Contact Info: Internal field that is normally in the format of an email that is used internally in SSO tables for Application Configurations
Application User Account: SSO Affiliate Administrators Group or the Group that will access (read) key.values, for example: BizTalk Application Users.
Application Admin Account: SSO Administrator Group – Administrators of the Enterprise Single Sign-On (SSO) service.
Download
THIS TOOL IS PROVIDED “AS IS”, WITHOUT WARRANTY OF ANY KIND.
You can download BizTalk Server SSO Application Configuration Tool from GitHub here:
Patrick Wellink, a long-time BizTalk Server consultant from the Netherlands, asked me to broadcast this news. I’m happy to do it because I know that many of you use and like BizTalk Deployment Framework (BTDF) to perform deployment across your environments.
Patrick suppresses a need by developing a Visual Studio 2019 plugin (VSIX) for BizTalk Server 2020. Of course, there was already a new version of The BTDF Framework. But one of the convenient things was the visual studio plugin… that was missing.
Unfortunately, and I understand this feeling entirely because I also have several community projects, we always have to for the owner and developer to upgrade his project, and we usually struggle to find the time. So I take this opportunity to encourage all community members to start contributing to these initiatives as Patrick did. Start performing changes and submit your contributions to the repo. I speak for myself, and from what I know from the community, we accept the changes and are happy that you contribute.
And it wasn’t that difficult, rephrasing Patrick:
With some guidance of this post and some fiddeling I got the VSIX to work for VS2019. After some more fiddeling I got the project wizard to run as well.
I did so with minimal effort.
Where I can download it
You can download the Visual Studio 2019 plugin (VSIX) for BizTalk Server 2020 here:
Historically, deploying BizTalk Server solutions across environments is or can be a complicated process depending how complex is your solution. There are many ways to deploy BizTalk artifacts for example:
Importing them as part of an application by using the Deployment Wizard (from an .msi file), importing them using BTSTask.exe – this is the default way to deploy across environments.
You can replace and use allow BTSTask, PowerShell scripts.
Or deploy them from Visual Studio – this is the default way to deploy to your development environment.
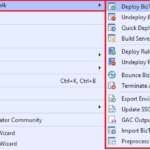
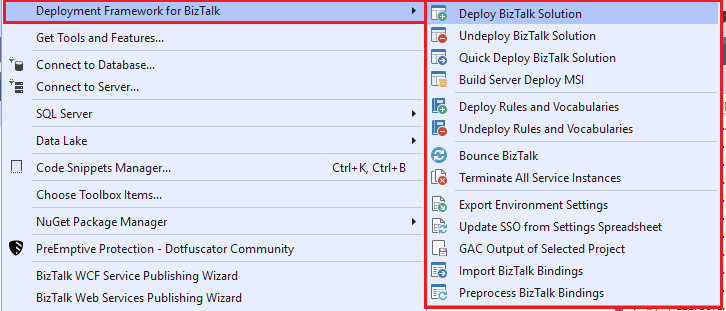
During the years, the BizTalk Server Community created an open-source deployment framework called Deployment Framework for BizTalk (BTDF) – https://github.com/BTDF/DeploymentFramework. The Deployment Framework for BizTalk is an easy-to-use toolkit for deploying and configuring your BizTalk solutions. In reality, BTDF is an MSBuild project with custom MSBuild tasks, and it can be customizable according to customer BizTalk project needs, and it is extensible. This framework brings new capabilities and advantages to deploying BizTalk Server solutions, but it also has limitations or disadvantages.
Azure DevOps and Azure Pipelines
Microsoft has introduced automated deployment of BizTalk Applications in BizTalk Server 2016 Feature Packs using Azure DevOps (previously called Visual Studio Team Services – VSTS). In BizTalk Server 2016 Feature Pack 1, automatic deployment and application lifecycle management (ALM) experience was introduced. The automatic deployment process has been improved with the release of BizTalk Server 2016 Feature Pack 2. These features were only available on the Enterprise edition of BizTalk Server 2016.
BizTalk Server 2020 brings all these functionalities out-of-the-box across all editions: Enterprise, Standard, Development, or Branch.
To accomplish this, we need basically 3 steps:
BizTalk Server: Add a BizTalk Server Application project in your Visual Studio solution.
We will not address this topic today.
DevOps: Create a build agent.
DevOps: Create a Build and release Azure Pipeline.
Today we will talk about starting to configure your Azure Pipeline to create a BizTalk Server Build Agent.
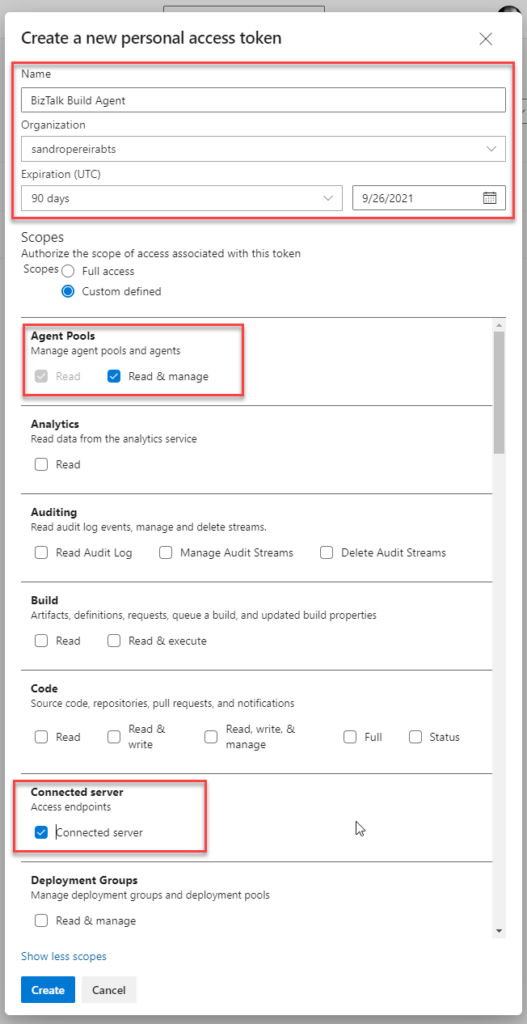
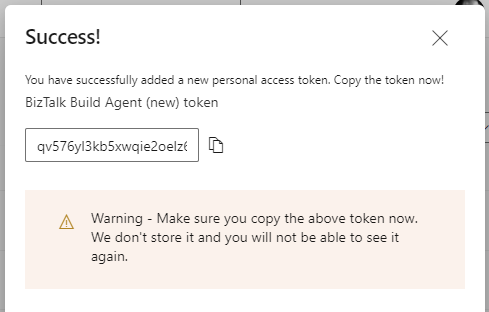
Create a Personal Access Token
A personal access token (PAT) is created in DevOps. This token is your password and is used by the DevOps build agent to authenticate. The token is only shown when you create it. After that, it isn’t shown anymore. Once you create it, you should save it to another file in a rememberable location.
If you do not have an account, select Create new account, and enter a name. To manage your code, choose your personal preference between Git or Team Foundation Version Control. When finished, your new account is created, you will be able to access Azure DevOps Portal.
Select your DevOps organization and then click the top second right-side corner icon – User settings – and select User settings > Personal access tokens.
The Personal Access Tokens page will be presented a list of all existing personal access tokens.
If you don’t have an existing PAT for your agent, select Add, and on the Create a new personal access token page, enter the following configuration:
On the Name property, enter a name for your PAT, for example, BizTalk Build Agent.
On the Organization property, leave the default organization.
On the Expiration (UTC) property, set an expiration date, for example, 90 days.
In Scopes, select Show all scopes, and then select Agent Pools – Read & manage option and Connected server – Connected server.
Select Create to finish the PAT creation.
Important Note: You need to save the token value. You need it in future steps. If you don’t know the access token value and didn’t take note of it anywhere, it cannot be retrieved. In this case, you need to create a new PAT.
Install the Build Agent
The build agent is installed on the BizTalk development computer. If using deployment groups, the build agent is installed on all the BizTalk servers you want to deploy to. Also, use these same steps to add a build computer, which might be different than the BizTalk development computer.
The following steps show you how to install the build agent on a single computer:
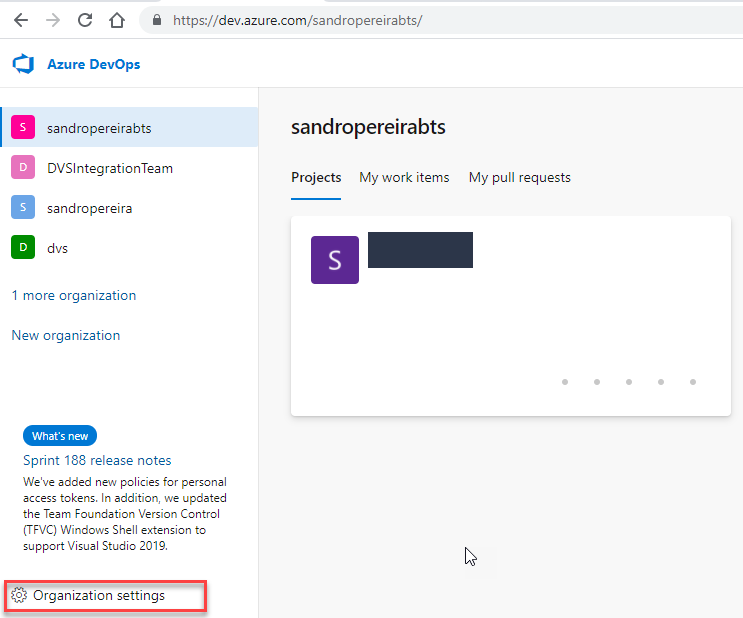
Open your Azure DevOps organization and then select the Organization settings icon and then Agent Pools.
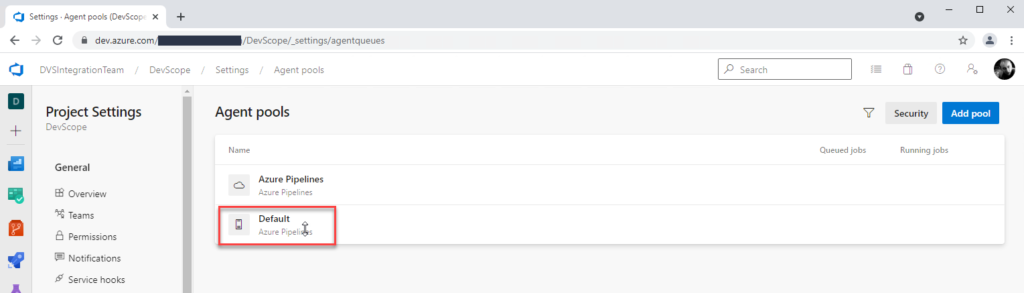
Optional you can choose a Project inside your Organization and then select the Project settings icon and select Agent Pools.
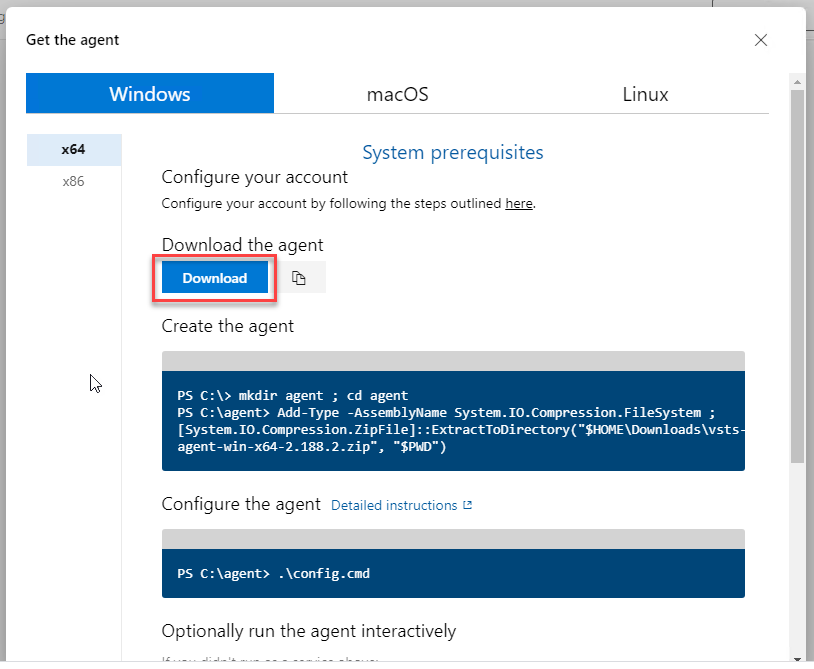
Open Agent pools page, select the Default (Azure Pipelines) agent.
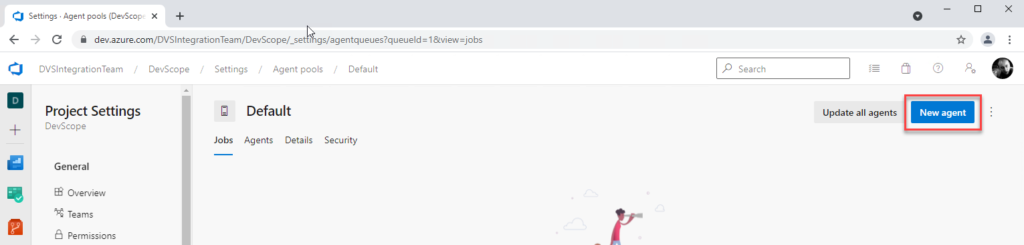
On the Default agent page, select New agent.
On the Get the agent pop-up window, select your SO, and on the Download the agent section, select Download.
It is important for you to save the file to your Downloads folder – on your BizTalk Server Development machine since the scripts will be referencing that folder.
Depending on your SO, this will download a zip file, for example, vsts-agent-win-x64-2.188.3.zip, that you will need to create the agent on the BizTalk Server Development machine.
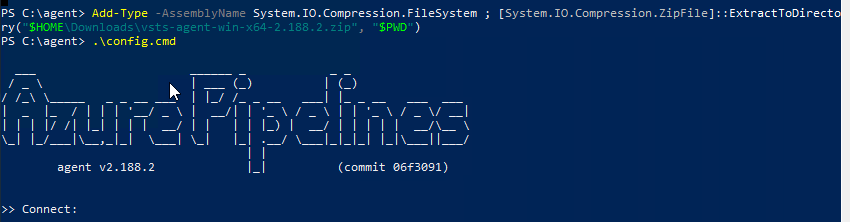
The first step is to create the agent on your BizTalk Server Development machine. To do that open Windows PowerShell as Administrator and type the following command:
Note: The vsts-agent file version changes. Make sure the zip file name is the correct one.
The second step, as you also see in the picture is to configure the agent. To do that type the following command:
PS C:agent> .config.cmd
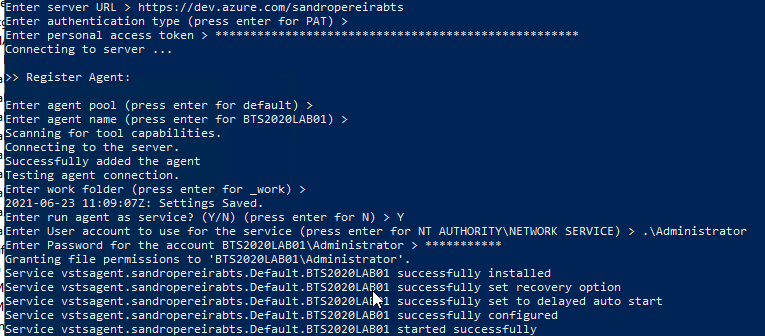
Enter the following details:
Server URL: Type https://dev.azure.com/{your-organization}.
Authentication Type: Enter PAT.
Personal access token: Paste your Azure DevOps token.
Agent pool: Click Enter for assuming the default value.
Agent name: Click Enter for assuming the default value.
Replace: Only displays if you have an existing agent.
Work folder: Click Enter for assuming the default value.
Run agent as a service: Enter Y.
User account: This value is up to you, but you may run into a permissions issue. Consider entering your current logged-on account, which is a local admin.
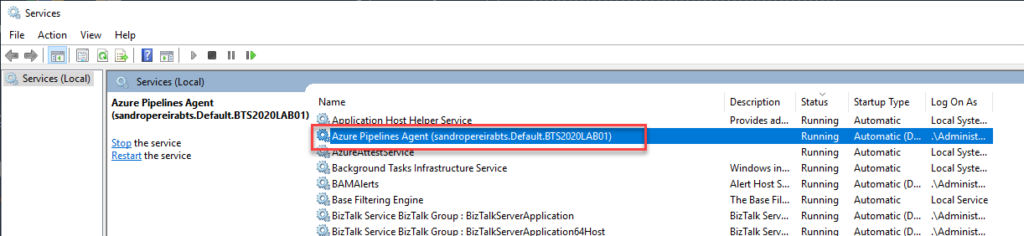
To validate if the agent was properly installed, Open services.msc to see the new service called Azure Pipelines Agent (<organization>.<agent pool>.<server>). The job should be running, otherwise type the following command:
PS C:agent> .run.cmd
Now, if we go back to our DevOps organization > Organization settings > Agent pools > Default (Azure Pipelines) > Agents, you will see your BizTalk Server Development server on the list:
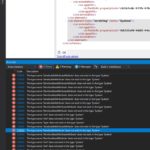
I’m just playing with BizTalk Server doing a small proof-of-concept using BizTalk Server and Azure Service Bus, and I was surprised with a few bunches of errors while I tried to compile my simple project:
Severity Code Description Project File Line Suppression State Error CS0426 The type name ‘SerializableAttributeAttribute’ does not exist in the type ‘System’ POC.BizTalk.AzureServiceBus C:DEVPOCPOC.BizTalk.AzureServiceBusPOC.BizTalk.AzureServiceBusSchemasASBPropertySchema.xsd.cs 9 Active Severity Code Description Project File Line Suppression State Error CS0426 The type name ‘Xml’ does not exist in the type ‘System’ POC.BizTalk.AzureServiceBus C:DEVPOCPOC.BizTalk.AzureServiceBusPOC.BizTalk.AzureServiceBusSchemasASBPropertySchema.xsd.cs 85 Active
Were is the full error list:
The type name ‘SerializableAttributeAttribute’ does not exist in the type ‘System’
The type name ‘SerializableAttribute’ does not exist in the type ‘System’
The type name ‘NonSerializedAttributeAttribute’ does not exist in the type ‘System’
The type name ‘NonSerializedAttribute’ does not exist in the type ‘System’
The type name ‘NonSerializedAttributeAttribute’ does not exist in the type ‘System’
The type name ‘NonSerializedAttribute’ does not exist in the type ‘System’
The type name ‘SerializableAttributeAttribute’ does not exist in the type ‘System’
The type name ‘SerializableAttribute’ does not exist in the type ‘System’
The type name ‘NonSerializedAttributeAttribute’ does not exist in the type ‘System’
The type name ‘NonSerializedAttribute’ does not exist in the type ‘System’
The type name ‘Xml’ does not exist in the type ‘System’
The type name ‘Xml’ does not exist in the type ‘System’
The type name ‘Type’ does not exist in the type ‘System’
Cause
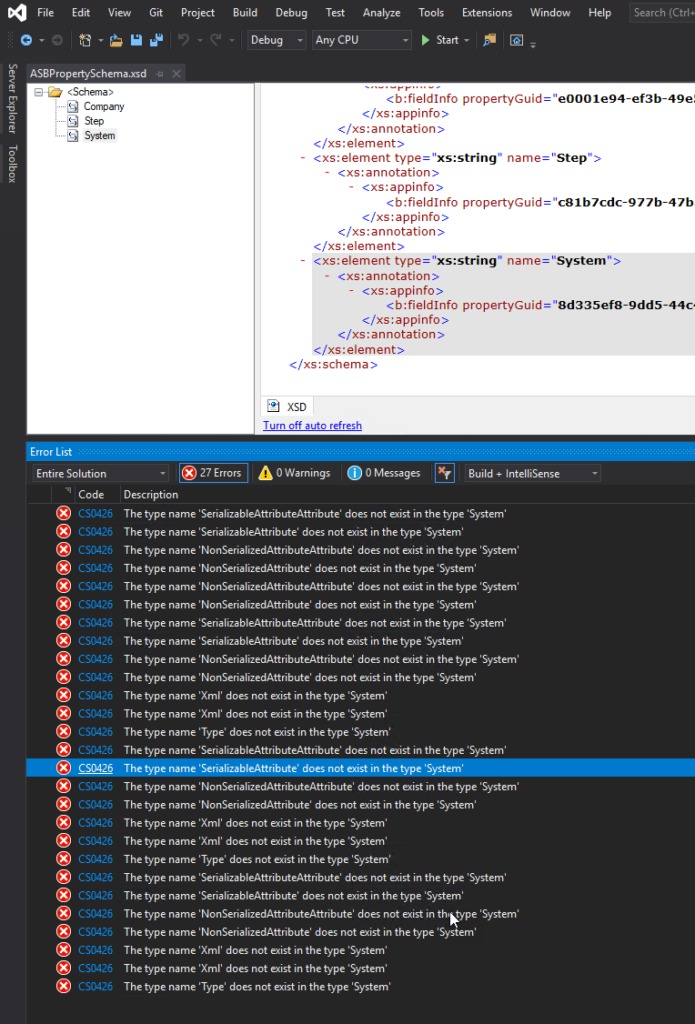
Initially, I have to be honest, I was not realizing why this error was happening, mainly because the main error description may elude us and point us to DLL reference problems: Xml, System, SerializableAttributeAttribute, and so on. But looking carefully to the error message details, all of the errors will point us to the PropertySchema file.
After realizing that, it was not difficult to realize that I had on my Property Schema an element call System. System is a reserved word that you CANNOT use inside the property schemas.
Solution
The solution to this issue is quite simple, you need to:
Rename your System element inside your Property Schema to another word, for example ExtSystem
Of course, fix all the dependencias inside your project, if you were already using this element iside your solution, for example Message Assigment shape
It has been a while since I didn’t follow carefully all the comments or issues posted on my blog or GitHub regarding BizTalk Scheduled Task Adapter. It was not by lack of interest but instead due to my lack of free time or just because I was focused on other projects or contributions.
Since I recently (7 days ago) publish I new version of the adapter with some further improvements and optimized it to BizTalk Server 2020. And I have a brand new environment that I need to install this adapter. I decided that it was an excellent opportunity and time to read the existing feedback and address, once and for all, all the reported issues or unexpected behaviors:
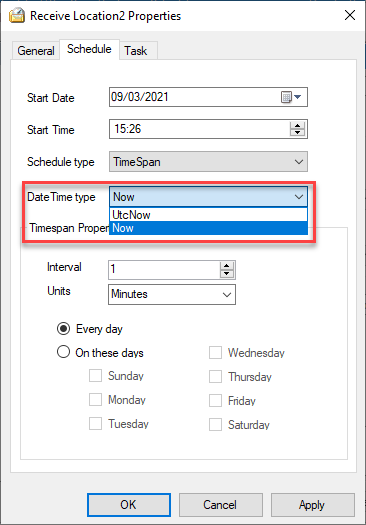
Using the Timespan schedule type may trigger unlimited messages;
Using the Timespan schedule type, if the time is set to past time, the task will not be triggered in certain cases.
Using the Timespan schedule type, when stopping the receive locations or stop/restart the host instances, you start to get a time drift from the original time set.
What is new?
New schedule capabilities:
Capability to set DateTime you want to use on the Timespan schedule type: DateTime.Now or DateTime.UtcNow
By adding this capability to chose between DateTime.Now or DateTime.UtcNow, it will address and solve the issues reported regarding unlimited messages being triggered if you are using a different timezone than UTC.
The functionality always to trigger the message at 00 seconds and respect the original time set was added again to the Timespan schedule type. The GetNextActivationTime method was improved to fix all these unexpected behaviors reported that indeed was a feature by design.
BizTalk Scheduled Task Adapter
The BizTalk Scheduled Task Adapter is an in-process receive adapter that executes a prescribed task on a daily, weekly or monthly schedule. The adapter is configured entirely within BizTalk, all configurations are stored within the SSODB and can be exported and imported via binding files.
The schedule capabilities are similar to those available with the Windows Scheduled Task Service.
Four simple tasks are included:
XmlStringStreamProvider – generates a BizTalk message from a configured Xml string
FileStreamProvider – generates a BizTalk message from the contents of a file
HttpDownload – generates a BizTalk message from data downloaded from a web site
SQLStreamProvider – generates a BizTalk message from the contents of a SQL Query (similar to the old SQL adapter) – Since version 3.0
Custom tasks can be created. Any .NET class that implements the appropriate interface can be scheduled.
Big thanks to Pedro Almeida, my team member, that took 95% of my work and finalize this version!
Download
You can download this “new” version of the adapter in BizTalk Scheduled Task Adapter from GitHub:
Please feel free to use the adapter, and If you find any problems or bugs, please open an issue on the adapter GitHub site: https://github.com/sandroasp/BizTalk-Scheduled-Task-Adapter and help evolve this community adapter. You can also suggest new features, and I am also open to new ideas.
Once again, after many requests and many postponements, due to my unavailability and free time to take these tasks, BizTalk Scheduled Task Adapter is finally officially available and optimized for BizTalk Server 2020 on GitHub!
The BizTalk Scheduled Task Adapter is an in-process receive adapter that executes a prescribed task on a daily, weekly or monthly schedule. The adapter is configured entirely within BizTalk, all configurations are stored within the SSODB and can be exported and imported via binding files.
The schedule capabilities are similar to those available with the Windows Scheduled Task Service.
Four simple tasks are included:
XmlStringStreamProvider – generates a BizTalk message from a configured Xml string
FileStreamProvider – generates a BizTalk message from the contents of a file
HttpDownload – generates a BizTalk message from data downloaded from a web site
SQLStreamProvider – generates a BizTalk message from the contents of a SQL Query (similar to the old SQL adapter) – Since version 3.0
Custom tasks can be created. Any .NET class that implements the appropriate interface can be scheduled.
What is new?
New schedule capabilities:
HTTPDownload task was changed and improved to control timeouts better and to avoid the receive locations disabling themselves automatically (Contribution made by Rickard Karlmats)
HTTPDownload task was changed and improved to support REST/JSON (Contribution made by Pedro Almeida)
Improved and optimized to BizTalk Server 2020 but it will also be compatible with BizTalk Server 2016
You can download this “new” version of the adapter in BizTalk Scheduled Task Adapter from GitHub:
Please feel free to use the adapter, and If you find any problems or bugs, please open an issue on the adapter GitHub site: https://github.com/sandroasp/BizTalk-Scheduled-Task-Adapter and help evolve this community adapter. You can also suggest new features, and I am also open to new ideas..
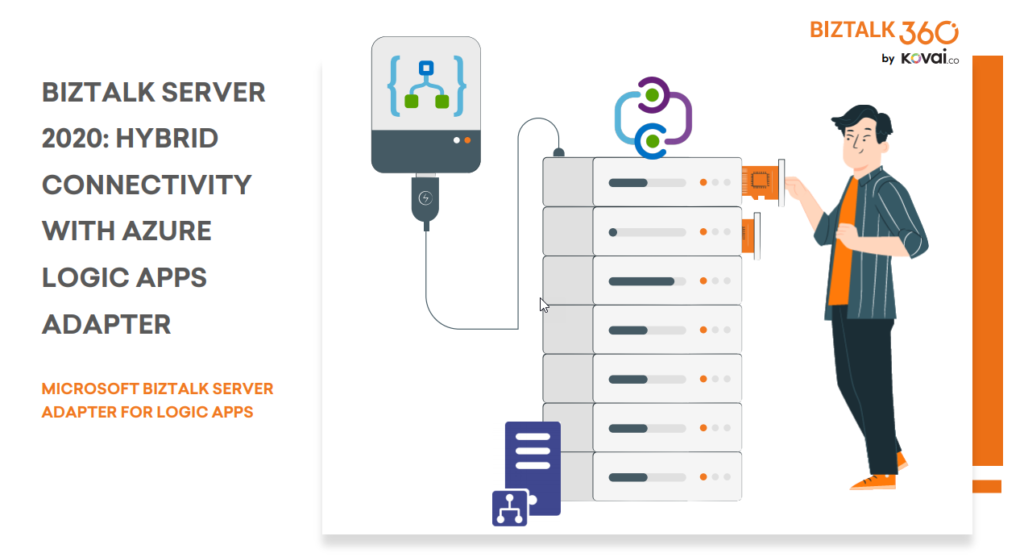
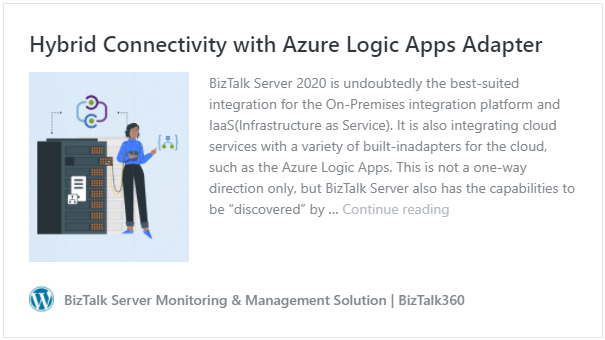
BizTalk Server 2020 is undoubtedly the best-suited integration for the On-Premises integration platform and IaaS (Infrastructure as Service). It is also integrating cloud services with a variety of built-in adapters for the cloud, such as the Azure Logic Apps.
The Azure Logic Apps adapter is used by BizTalk Server to communicate with Azure Logic Apps. This could also be possible using the HTTP adapter, but the Logic App adapter provides a better and straightforward experience.
This whitepaper will show you how BizTalk Server 2020 can interact with Logic Apps:
How BizTalk Server can send messages to Logic Apps using the Logic App adapter
How Logic Apps can send messages through BizTalk Server using the BizTalk Connector
Where I can download it
You can download the whitepaper here:
You can also find, download and enjoy several other free whitepapers of my own here:
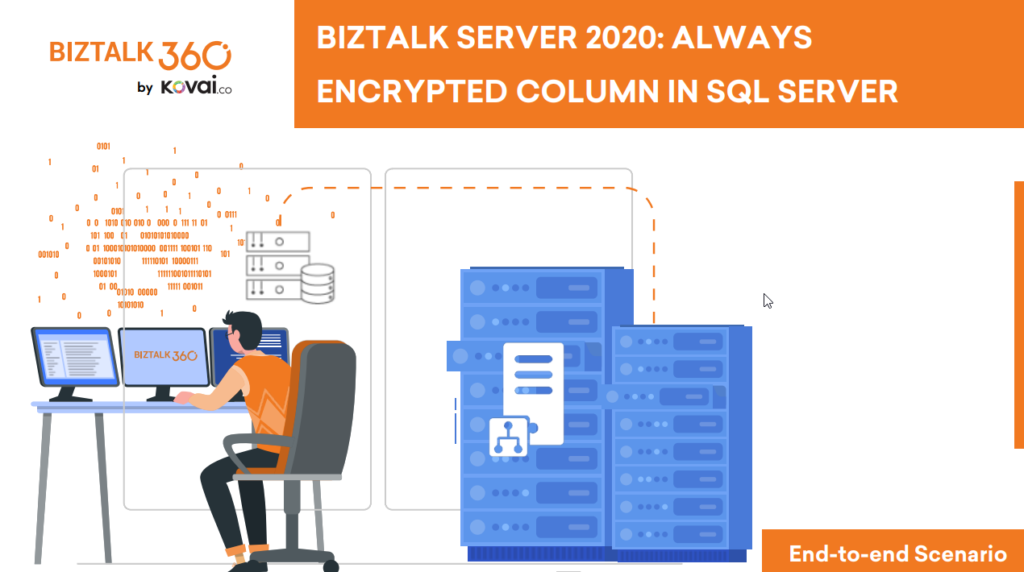
Much has been written about the European Union’s (EU) General Data Protection Regulation (GDPR), which came into effect last May 28, 2018. the GDPR applies no matter where you are located, and with many organizations storing critical data in their database platforms, it will be incumbent upon them to ensure that the entire IT environment complies with the legislation, to avoid fines or penalties of up to €20 million or 4% of annual worldwide turnover.
Always Encrypted is a feature designed to protect sensitive data, such as credit card numbers or national identification numbers (for example, U.S. social security numbers), stored in Azure SQL Databases or on-premises SQL Server databases.
Always Encrypted allows clients to encrypt sensitive data inside client applications and never reveal the encryption keys to the Database Engine (SQL Database or SQL Server). As a result, Always Encrypted provides a separation between those who own the data (and can view it) and those who manage the data (but cannot view it). By ensuring on-premises database administrators, cloud database operators, or other high-privileged (but unauthorized) users, cannot access the encrypted data, Always Encrypted enables customers to confidently store sensitive data outside of their direct control. This allows organizations to encrypt data at rest and in use for storage in Azure, to enable delegation of on-premises database administration to third parties, or to reduce security clearance requirements for their own DBA staff.
This whitepaper will give you a detailed understanding of the following:
Creating SQL Server Database in BizTalk 2020
Creating always encrypted column in BizTalk Server
Querying and inserting data in the encrypted columns
Where I can download it
You can download the whitepaper here:
You can also find, download and enjoy several other free whitepapers of my own here:
We live in the age of fast digital transformation. Different emerging services appear extremely fast which results in a more heterogeneous IT architecture. However, when we have this heterogeneous landscape compose of different legacy and modern systems, a major problem that may arise is how can we put all of these systems to interact with each other to create the concept of a single production system.
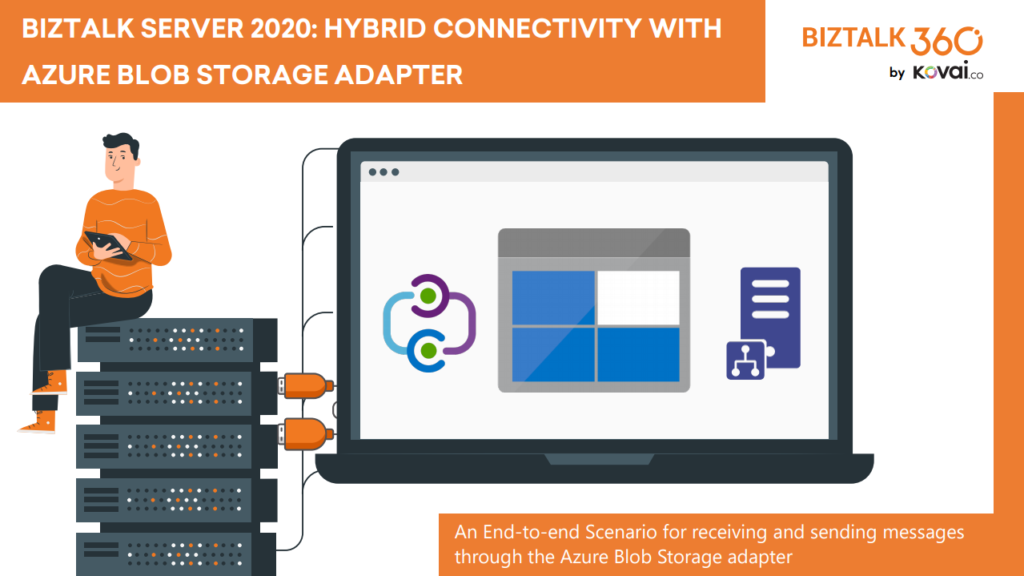
BizTalk Server 2020 is undoubtedly the best-suited integration for the On-Premises integration platform and IaaS (Infrastructure as Service). This whitepaper is intended to show you the complete process of receiving and sending messages through the newly introduced Azure Blob Storage adapter.
This whitepaper will give you a detailed understanding of the following:
Creating Azure Blob storage
Sending messages from BizTalk Server to Blob Storage using the Blob Storage adapter
Receiving messages to BizTalk Server from Blob Storage using the Blob Storage adapter
Where I can download it
You can download the whitepaper here:
You can also find, download and enjoy several other free whitepapers of my own here:
I previously wrote several posts about how you can Check/Get a list of BizTalk Server Cumulative Updates installed in your machines for previous versions of the product:
Now it is time to update this script to BizTalk Server 2020.
Checking what CU is installed is not a difficult task to do, but without a doubt, it is one of the most annoying tasks to do as an administrator because, and once again:
you can do it manually by checking “Control PanelProgramsPrograms and Features” and then view the “Installed Updates”, try to find them in the list can be sometimes very confusing because they are not organized in a category BizTalk;
Or rely on tools like BizTalk MsgBoxViewer, which sometimes are not up to date, to check and provide that information;
Probably there are other ways, nevertheless, this simple task should be simple, extremely easy and fast to do, what you really want to know is what are the BizTalk Cumulative Updates installed like:
This is the list of BizTalk Server Cumulative Updates installed in this machine: BTS2020LAB01
- Microsoft BizTalk Server 2020 Cumulative Update 1
To check if the last Cumulative is installed or not.
PowerShell script overview
So how can we easily automate tasks? and reuse them whenever necessary and at the same time saving significant time for other tasks?
Using PowerShell is a good option. Windows PowerShell is a Windows command-line shell designed especially for system administrators and can be used by BizTalk administrators to help them in automating repetitive tasks or tasks that are time-consuming to perform manually.
This is a simple script that allows you to configure the template name of the cumulative updates, that will change from version to version, and will give you the list of all BizTalk Server 2016 cumulative updates installed on your server: