
by stephen-w-thomas | Apr 25, 2016 | Stephen's BizTalk and Integration Blog
I am excited to be presenting at the 2016 INTEGRATE conference in London. Not only will I be able to get great pizza at Pizza Express, I will hopefully get to fill in everyone on the latest offerings in Azure IaaS.
Registration is still open for the conference. Rates are $450 pounds per person for the 3 day event. It is a super deal compared to other conferences. You can get more details on registration here.

My session title is “Azure IaaS Essentials for the BizTalk Developer”.
The abstract is below:
Azure Infrastructure as a Service consists of Virtual Networking and Virtual Machines. In this session Stephen will cover the essentials every developer should know about IaaS including on premise connectivity options, how to use virtual network with virtual machines, sizing options of virtual machines, and management options. Stephen will show you how to use PowerShell to take full control of Azure Virtual Machines and make Infrastructure almost as fun as Development! In addition, see how simple it is to build a full isolated BizTalk domain in Azure with just a few clicks.
If you are new to Azure or been out of the loop for even a few months, Michael Stephenson is putting on four “Zero-to-Cloud” sessions. Two are before the conference and 2 after. Each session is limited to 10 people and they are held at the BizTalk 360 office just outside of London (an easy 30 mina train ride from central London). While I have not attended one of his classed myself, I am sure it will not disappoint! Get more details on this even here.

Hope to see you in London in just a few week!!!
by community-syndication | Apr 25, 2016 | BizTalk Community Blogs via Syndication
Axon Olympus is er trots op te worden toegelaten tot Microsofts nieuwe Azure IoT Red Carpet programma. De partners hiervoor worden per stuk door Microsoft geselecteerd op basis van hun deskundigheid bij de uitvoering van IoT oplossingen. Internet of Things (internet der dingen of liever integratie van dingen) verbindt apparaten en sensoren met Cloud gebaseerde analysemogelijkheden.
Blog Post by: AxonOlympus
by Eldert Grootenboer | Apr 23, 2016 | BizTalk Community Blogs via Syndication
In my my previous post, I showed how we can use a WebJob to process a Service Bus queue and store the data in an Azure SQL database. This was pretty simple to set up, but it did require a good understanding of how to connect with these and process the data. Sometimes however we just want to do a quick integration without needing to set up all this plumbing. Recently Microsoft announced a new feature called Azure Functions, with now makes this possible. Azure functions can be used to create a small function which can run stand-alone, or be called from other applications, for example from a logic app, as has been described here by Sandro Pereira. Azure Functions provide out of the box connections for triggers, input and output to a lot of other Azure features, including Event Hubs, Service Bus, Azure Storage and DocumentDB. In this post I will show how we can process our message from the queue we created in this blogpost, and store it in an Azure Storage table. We will start by creating a new Function App in the portal.
Fill out the fields as specified. In case we allready have other App Services, we can run the Function in the same App Service Plan we are using for these by choosing Classic App Service Plan. However if we want the true cloud experience, it can also be run in a Dynamic App Service Plan, in which case Azure will provide all of the necessary resources when needed, and it will only cost us when our code is actually running.
Once the Function has been deployed, we can find it under App Services. Let’s create a new function in our Function App we just created. There’s either the possibility to start from scratch, or to use one of the premade templates.
We will create a function from scratch for this demo. Click on New Function, and select the ServiceBusQueueTrigger – C# template.
Now we can set up our function. We can either choose to use an existing queue, or if we specify a name for a queue which is not in the selected namespace yet, it will be created for us. We will select the queue we created earlier. When creating the connection to our Service Bus namespace, we have to use credentials with Manage permissions.
Once this simple setup has been done, click Create and we will see a Code editor in our browser with the outline for our function. As you will see, by default this function expects a string from our queue, however we are sending in a BrokeredMessage. Luckily, we can reference any namespace from our function as well. There are a couple of options to import namespaces. In our function, we will want to import the Microsoft.ServiceBus.Messaging namespace, which is part of the WindowsAzure.ServiceBus package. As this package is available from NuGet, we will use this to add the reference. Start by creating a project.json file, and add the following code, which will add a reference to version 2.7.6 of the package.
{
    "frameworks": {
        "net46":{
            "dependencies": {
                "WindowsAzure.ServiceBus": "2.7.6"
            }
        }
    }
}
|
Now we will use Kudu to upload the project.json file. The Kudu for our Function App can be reached on https://YOURAPP.scm.azurewebsites.net/. Go to the CMD Debug Console, and navigate to D:homesitewwwroot. Now we can drag and drop our project.json file here to upload it.
Going back to our Function App’s console, we will now see that the NuGet package we just added is being restored.
Now that we have added this NuGet package, we can reference the Microsoft.ServiceBus.Messaging from our code, and use the BrokeredMessage class in our incoming parameters.
Now that we have our input set up, we will add our output. Open the Integrate tab, and click New Output. Select Azure Storage Table as output, and set up the properties. We will let the function create a table for us, and we will use the shipname as a partition key.
To save our object to the Azure Storage Table, we have to create a class which will be used to map the data. Add the following class after the function. Be sure to include the PartitionKey and RowKey fields, as these are required when writing to Azure Table Storage. The other fields will hold the data we receive from our queue.
public class ErrorWarning
{
    public string PartitionKey { get; set; } // Required for writing to table storage
    public string RowKey { get; set; } // Required for writing to table storage
    public string CreatedDateTime { get; set; }
    public string ShipName { get; set; }
    public string Message { get; set; }
}
|
We also have to add a parameter to the function’s input parameters. When working with Azure Table Storage, this has to be an ICollector holding instances of the class we just created. Make sure to use the Table parameter name we just specified as name of the parameter. Once this is done, we can start implementing our function’s body. We will start by writing the data to the log, followed by creating an instance of our ErrorWarning class with the data we just received from the queue. We will then add this data to the Azure Table Storage.
public static void Run(BrokeredMessage myQueueItem, ICollector<ErrorWarning> queuesAndWarningsStorageTable, TraceWriter log)
{
    log.Verbose($"C# ServiceBus queue trigger function processed message: {myQueueItem.Properties["time"]}, {myQueueItem.Properties["ship"]}, {myQueueItem.Properties["exceptionMessage"]}");

    var item = new ErrorWarning {
        PartitionKey = myQueueItem.Properties["ship"].ToString(),
        RowKey = Guid.NewGuid().ToString(),
        CreatedDateTime = myQueueItem.Properties["time"].ToString(),
        ShipName = myQueueItem.Properties["ship"].ToString(),
        Message = myQueueItem.Properties["exceptionMessage"].ToString()
    };

    queuesAndWarningsStorageTable.Add(item);

    log.Verbose($"Added item {item.PartitionKey} to the table");
}
|
Now click Save and we will see our function is being compiled.
Now whenever a message is being placed on the queue, our Azure Function will pick it up, process the data, and place it into our Table Storage.

by Mick Badran | Apr 22, 2016 | BizTalk Community Blogs via Syndication

One word – #AWESOME!!!!! The packaging makes you feel like you’re about to ride a high end sports car, or ski with some serious ski gear. Very slick packaging.
To be honest I wasn’t certain of what to expect when taking the Hololens for a spin. Was it going to be like going to a 3D movie where 15 mins into the movie you forget you’re in a 3D movie and the ‘3D-ness’ isn’t all that it’s cracked up to be….
Putting it on for the first time there’s a little bit of weight to the unit, so be sure to get the head strap tightened right so the Hololens doesn’t sit totally on the bridge of your nose (you can pull the glasses away from you nose and have them sit out in space).
The first thing that hits you is the ‘holographic’ nature of it. Two screens on the left and right eye present the 3D picture right in front of you. Walking closer makes it bigger and walking away makes it smaller – it doesn’t just travel at a fixed distance.
Volume + Brightness controls make a nice touch for tuning your environment.
Calibration – after the friendly walk through from Cortana the unit was calibrated and we’re ready to rock.
One time only – had to connect to a Wi-Fi network, and enter my Microsoft Account details. This was a bit painful given the onscreen keyboard and just getting to know the unit.
Wow! Where do I start! You’ve got the familiar Win10 experience and Store functionality along with Cortana to get help – you can even ask her “What’s my IP address?” and she comes back with the goods.
The first thing I did was head off to the store and download Skype + the games 🙂
It’s sensor rich!!!! motion, space, kinect type camera on the front sensing movement, objects etc – think joint minecraft by all.
Right off the bat – during calibration there’s a few hand gestures you’re given and a couple of voice commands. So armed with a little knowledge I’m ready to take on the world.
The amazing thing is that you can launch for e.g. IE and pin it to a wall. When you come back to the wall, you can see the IE again (or whatever app you’ve got) – so I immediately covered my room with photos. Everywhere I looked – roof, floor, walls …different ones on different slide shows etc. You could even pin your favourite browser based TV series somewhere in the house too.
Spacial awareness – the unit is amazing in this area as it maps out your environment/place/work etc. You can walk down hallways, up stairs, balconies and the unit will remember what you’ve played with in each room. (You can even see the model the unit has generated from your environment through the browser).
The unique thing – is the interaction in space, we talk about augmented reality and totally immersive technologies, but having the blend of the real world and computer simulated world coming through just made for an amazing experience.
Talking to a friend while looking over the latest sports results is a very unique situation indeed & while listening to everything they say 🙂
Development – it’s a Win10 device!!!
Development is done through familiar tools such as VS.NET, and a good understanding of 3D meshes, models and maps makes for a great experience in Hololens. You most definitely can have ‘flat apps’ that you pin to a wall – e.g. photos, IE etc. but the unit comes to life when it sees 3D.
The hard part is conveying the awesomeness seen by you to the person next to you….“Did you see that!!” “No I’m just looking at a wall”
I discovered in the settings sections (similar to Win10 IOT Core) we can control the unit through the browser – as soon as I enabled that through settings I get the view of a lifetime!!! You can record what the wearer is seeing and doing as in my videos.
Here’s some samples…. (NOTE: I had to grab them at a lower resolution. There are no ‘holes’ or black spots in the final vision. I just think this was from the real time recording and down sampling)
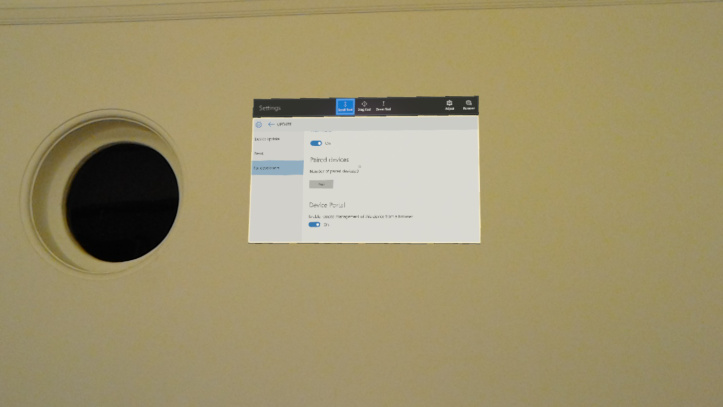
 This is the settings screen pinned up on the wall, where I enabled the developer mode and browser access to the device.
  A simple 3D world built in the lounge room -which can be exported to a 3D Print file and printed. Building the scene is interactive, you can walk around it, move things, rotate, colour and so on.
Through the Hololens the scene are alot more immersive, the lenses are darker, there’s ambiance stereo music playing with game play chatter going on. It’s like you’re really at the game!
Here’s an Overview of some of the features and general usage – pretty cool. I recorded this via remote control from the browser with the unit recording the scene and I downloaded it later.
 An overview of using the Hololens – initially against a blank wall with a window
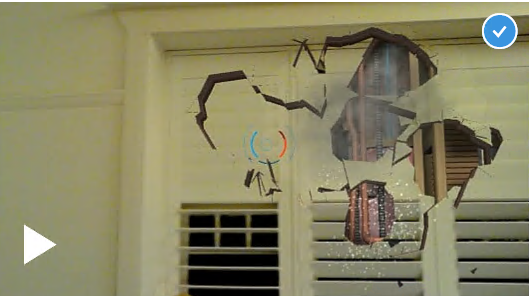
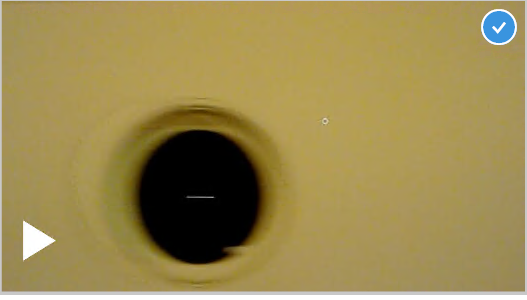
 A snippet from one of the holo games. Kept everyone busy for hours. This is a wall with some laser holes in it.

by Mick Badran | Apr 22, 2016 | BizTalk Community Blogs via Syndication

One word – #AWESOME!!!!! The packaging makes you feel like you’re about to ride a high end sports car, or ski with some serious ski gear. Very slick packaging.
To be honest I wasn’t certain of what to expect when taking the Hololens for a spin. Was it going to be like going to a 3D movie where 15 mins into the movie you forget you’re in a 3D movie and the ‘3D-ness’ isn’t all that it’s cracked up to be….
Putting it on for the first time there’s a little bit of weight to the unit, so be sure to get the head strap tightened right so the Hololens doesn’t sit totally on the bridge of your nose (you can pull the glasses away from you nose and have them sit out in space).
The first thing that hits you is the ‘holographic’ nature of it. Two screens on the left and right eye present the 3D picture right in front of you. Walking closer makes it bigger and walking away makes it smaller – it doesn’t just travel at a fixed distance.
Volume + Brightness controls make a nice touch for tuning your environment.
Calibration – after the friendly walk through from Cortana the unit was calibrated and we’re ready to rock.
One time only – had to connect to a Wi-Fi network, and enter my Microsoft Account details. This was a bit painful given the onscreen keyboard and just getting to know the unit.
Wow! Where do I start! You’ve got the familiar Win10 experience and Store functionality along with Cortana to get help – you can even ask her “What’s my IP address?” and she comes back with the goods.
The first thing I did was head off to the store and download Skype + the games 🙂
It’s sensor rich!!!! motion, space, kinect type camera on the front sensing movement, objects etc – think joint minecraft by all.
Right off the bat – during calibration there’s a few hand gestures you’re given and a couple of voice commands. So armed with a little knowledge I’m ready to take on the world.
The amazing thing is that you can launch for e.g. IE and pin it to a wall. When you come back to the wall, you can see the IE again (or whatever app you’ve got) – so I immediately covered my room with photos. Everywhere I looked – roof, floor, walls …different ones on different slide shows etc. You could even pin your favourite browser based TV series somewhere in the house too.
Spacial awareness – the unit is amazing in this area as it maps out your environment/place/work etc. You can walk down hallways, up stairs, balconies and the unit will remember what you’ve played with in each room. (You can even see the model the unit has generated from your environment through the browser).
The unique thing – is the interaction in space, we talk about augmented reality and totally immersive technologies, but having the blend of the real world and computer simulated world coming through just made for an amazing experience.
Talking to a friend while looking over the latest sports results is a very unique situation indeed & while listening to everything they say 🙂
Development – it’s a Win10 device!!!
Development is done through familiar tools such as VS.NET, and a good understanding of 3D meshes, models and maps makes for a great experience in Hololens. You most definitely can have ‘flat apps’ that you pin to a wall – e.g. photos, IE etc. but the unit comes to life when it sees 3D.
The hard part is conveying the awesomeness seen by you to the person next to you….“Did you see that!!” “No I’m just looking at a wall”
I discovered in the settings sections (similar to Win10 IOT Core) we can control the unit through the browser – as soon as I enabled that through settings I get the view of a lifetime!!! You can record what the wearer is seeing and doing as in my videos.
Here’s some samples…. (NOTE: I had to grab them at a lower resolution. There are no ‘holes’ or black spots in the final vision. I just think this was from the real time recording and down sampling)
 This is the settings screen pinned up on the wall, where I enabled the developer mode and browser access to the device.
 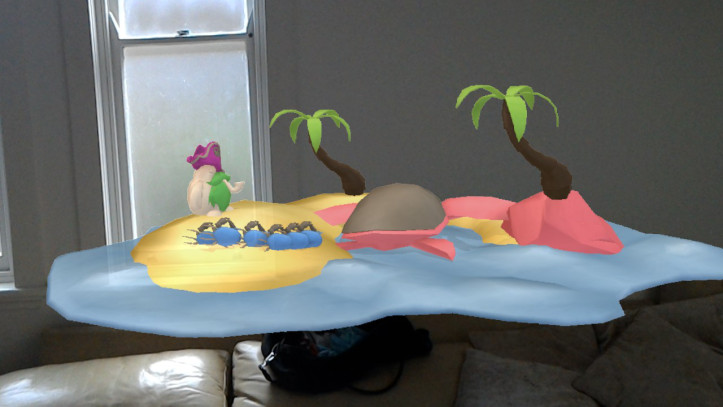 A simple 3D world built in the lounge room -which can be exported to a 3D Print file and printed. Building the scene is interactive, you can walk around it, move things, rotate, colour and so on.
Through the Hololens the scene are alot more immersive, the lenses are darker, there’s ambiance stereo music playing with game play chatter going on. It’s like you’re really at the game!
Here’s an Overview of some of the features and general usage – pretty cool. I recorded this via remote control from the browser with the unit recording the scene and I downloaded it later.
 An overview of using the Hololens – initially against a blank wall with a window
 A snippet from one of the holo games. Kept everyone busy for hours. This is a wall with some laser holes in it.

by Mick Badran | Apr 22, 2016 | BizTalk Community Blogs via Syndication
One word – #AWESOME!!!!! The packaging makes you feel like you’re about to ride a high end sports car, or ski with some serious ski gear. Very slick packaging.
To be honest I wasn’t certain of what to expect when taking the Hololens for a spin. Was it going to be like going to a 3D movie where 15 mins into the movie you forget you’re in a 3D movie and the ‘3D-ness’ isn’t all that it’s cracked up to be….
Putting it on for the first time there’s a little bit of weight to the unit, so be sure to get the head strap tightened right so the Hololens doesn’t sit totally on the bridge of your nose (you can pull the glasses away from you nose and have them sit out in space).
The first thing that hits you is the ‘holographic’ nature of it. Two screens on the left and right eye present the 3D picture right in front of you. Walking closer makes it bigger and walking away makes it smaller – it doesn’t just travel at a fixed distance.
Volume + Brightness controls make a nice touch for tuning your environment.
Calibration – after the friendly walk through from Cortana the unit was calibrated and we’re ready to rock.
One time only – had to connect to a Wi-Fi network, and enter my Microsoft Account details. This was a bit painful given the onscreen keyboard and just getting to know the unit.
Wow! Where do I start! You’ve got the familiar Win10 experience and Store functionality along with Cortana to get help – you can even ask her “What’s my IP address?” and she comes back with the goods.
The first thing I did was head off to the store and download Skype + the games 🙂
It’s sensor rich!!!! motion, space, kinect type camera on the front sensing movement, objects etc – think joint minecraft by all.
Right off the bat – during calibration there’s a few hand gestures you’re given and a couple of voice commands. So armed with a little knowledge I’m ready to take on the world.
The amazing thing is that you can launch for e.g. IE and pin it to a wall. When you come back to the wall, you can see the IE again (or whatever app you’ve got) – so I immediately covered my room with photos. Everywhere I looked – roof, floor, walls …different ones on different slide shows etc. You could even pin your favourite browser based TV series somewhere in the house too.
Spacial awareness – the unit is amazing in this area as it maps out your environment/place/work etc. You can walk down hallways, up stairs, balconies and the unit will remember what you’ve played with in each room. (You can even see the model the unit has generated from your environment through the browser).
The unique thing – is the interaction in space, we talk about augmented reality and totally immersive technologies, but having the blend of the real world and computer simulated world coming through just made for an amazing experience.
Talking to a friend while looking over the latest sports results is a very unique situation indeed & while listening to everything they say 🙂
Development – it’s a Win10 device!!!
Development is done through familiar tools such as VS.NET, and a good understanding of 3D meshes, models and maps makes for a great experience in Hololens. You most definitely can have ‘flat apps’ that you pin to a wall – e.g. photos, IE etc. but the unit comes to life when it sees 3D.
The hard part is conveying the awesomeness seen by you to the person next to you….“Did you see that!!” “No I’m just looking at a wall”
I discovered in the settings sections (similar to Win10 IOT Core) we can control the unit through the browser – as soon as I enabled that through settings I get the view of a lifetime!!! You can record what the wearer is seeing and doing as in my videos.
Here’s some samples…. (NOTE: I had to grab them at a lower resolution. There are no ‘holes’ or black spots in the final vision. I just think this was from the real time recording and down sampling)
 This is the settings screen pinned up on the wall, where I enabled the developer mode and browser access to the device.
  A simple 3D world built in the lounge room -which can be exported to a 3D Print file and printed. Building the scene is interactive, you can walk around it, move things, rotate, colour and so on.
Through the Hololens the scene are alot more immersive, the lenses are darker, there’s ambiance stereo music playing with game play chatter going on. It’s like you’re really at the game!
Here’s an Overview of some of the features and general usage – pretty cool. I recorded this via remote control from the browser with the unit recording the scene and I downloaded it later.
 An overview of using the Hololens – initially against a blank wall with a window
 A snippet from one of the holo games. Kept everyone busy for hours. This is a wall with some laser holes in it.

by community-syndication | Apr 22, 2016 | BizTalk Community Blogs via Syndication
If you are following Logic Apps since its beginning, you must love the new Logic Apps Designer! That is a little closer to his on premise brother (BizTalk Orchestration Designer). I am saying this because now, finally, the new designer uses a top-down approach instead of a left-right approach that existed in the previous version […]
Blog Post by: Sandro Pereira

by community-syndication | Apr 21, 2016 | BizTalk Community Blogs via Syndication
Following my latest posts whereI talked about the new “The ability to call nested Logic Apps directly from Logic Apps Designer”. Let’s look how a nested Logic App can help us overcome the current Logic Apps limitation regarding to for each operation, in special, the ability to add more than one action inside the loop; […]
Blog Post by: Sandro Pereira

by Howard Edidin | Apr 20, 2016 | BizTalk Community Blogs via Syndication
There are times where you need to do data type conversions in a Logic App.
I recently ran into an issue where I was syncing records between CRMOL (on line) and Salesforce. The record coming from CRMOL had NULL values. When converted to JSON, the NULL value is a string.
I could use the Logic App Replace function, but when you have to evaluate 30 to 50 fields, it becomes a tedious chore.
I decided to create a Function App. I used a C# Web Hook, so I can pass in the Response coming out of CRMOL. I could return the parsed Record to be mapped to Salesforce.
The code is very simple. I loop through each field and replace the “NULL” values with a empty string.
In Part – 2, I will show you the code and other utility functions that can be used in Logic Apps.
Related