by Sandro Pereira | Apr 27, 2017 | BizTalk Community Blogs via Syndication
We are used to having Service Pack (I think the last one was in 2006 R2) and Cumulative Updates for BizTalk Server (see the full list here) that basically brings hotfixes for BizTalk Server and adapter pack issues that were resolved after the release of that specific BizTalk Server version. Now Microsoft introduces a new concept in BizTalk Server 2016: Feature Packs.
BizTalk Server 2016 will use feature pack approach to providing new functionalities to the product at a faster pace. Now new features (or at least non-breaking features) will be delivered when they’re ready we no longer need to wait 2 years for the next major release of the product to have new features!
BizTalk Server uses the feature pack to provide improvements, features, and closer integration with Azure. Feature Pack 1 extends functionality in key areas, such as deployment, analytics, and runtime. – https://msdn.microsoft.com/en-us/library/mt800834.aspx
Feature Pack’s will be available for Software Assurance customers running BizTalk Server 2016 Developer and Enterprise editions or customers running BizTalk Server 2016 in Azure under an Enterprise Agreement
Should we expect new BizTalk Server Cumulative Updates?
Yes, Microsoft will continue to release CU to provide hotfixes for issues that were resolved in the same cadence as they have done in the past
Microsoft BizTalk Server 2016 Feature Pack 1: System Requirements
BizTalk Server 2016 Feature Pack 1 requirements:
- Microsoft BizTalk Server 2016 Enterprise Edition
- Microsoft BizTalk Server 2016 Developer Edition
Important note: is required to restart BizTalk Server machine to finish the FP1 installation process.
Note: Feature Packs are not supported in BizTalk Server 2016 Standard Edition.
Microsoft BizTalk Server 2016 Feature Pack 1: Step-by-step Installation Instructions
After you download the Microsoft BizTalk Server 2016 Feature Pack 1 You should:
- Run the downloaded .EXE file – BTS2016-KB4014788-ENU.exe – from your hard drive.
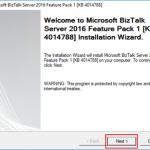
- In the “Welcome to Microsoft BizTalk Server Feature Pack 1 Installation Wizard” screen, click “Next”

- In the “License agreement” screen, select the option “I accept the terms of this license agreement” and then click “Next”

- In the “Ready to Install”, it will be provided a list of products that will be enhanced, you should click “Next” to continue with the installation.

- The FP1 installation will prompt a window with the list of services that will be restarted during the installation process, click “Yes” to continue with the installation.

- The installation process may take some minutes to complete, and you probably see some “background” windows to appear and to be completed, you should wait until the “Installation Wizard has completed” screen to appear
- In the “Installation Wizard has completed” screen, click “Finish”

-
- Note: that you must restart BizTalk Server machine to finish the FP1 installation process. Click “Yes” to restart the server.

Once the restart is complete, you will be able to see and use the new following features:
- Deployment:
- Deploy with VSTS – Enable Continuous Integration to automatically deploy and update applications using Visual Studio Team Services (VSTS)
- New management APIs – Manage your environment remotely using the new REST APIs with full Swagger support
- Analytics:
- Application Insights – Tap into the power of Azure for tracking valuable application performance and to better understand your workflow
- Leverage operational data – View operational data from anywhere and with any device using Power BI
- Runtime:
- Support for Always Encrypted – Use the WCF-SQL adapter to connect to SQL Server secure Always Encrypted columns
- Advanced Scheduling – Set up advanced schedules using the new capabilities with Feature Pack 1
Author: Sandro Pereira
Sandro Pereira lives in Portugal and works as a consultant at DevScope. In the past years, he has been working on implementing Integration scenarios both on-premises and cloud for various clients, each with different scenarios from a technical point of view, size, and criticality, using Microsoft Azure, Microsoft BizTalk Server and different technologies like AS2, EDI, RosettaNet, SAP, TIBCO etc. He is a regular blogger, international speaker, and technical reviewer of several BizTalk books all focused on Integration. He is also the author of the book “BizTalk Mapping Patterns & Best Practices”. He has been awarded MVP since 2011 for his contributions to the integration community. View all posts by Sandro Pereira
by Sandro Pereira | Apr 21, 2017 | BizTalk Community Blogs via Syndication
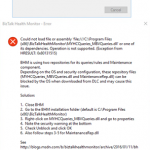
This BHM load error regarding to MYHCQueries_MBVQueries.dll, that can may also occurs with MaintenanceRep.dll, is a very well-known problem/annoying issue that occurs after we install BizTalk Health Monitor or update it to a new version that will apply in all BizTalk versions (BizTalk Server 2016, 2013 R2, 2013 or 2010) and SO (Windows 10, Windows Server 2016, 2012 R2, 2012 and so on):
Could not load assembly file ‘file:///C:Program files (x86)BizTalkHealthMonitorMYHCQueries_MBVQueries.dll’ or one of its dependencies. Operation is not supported. (Exception from HRESULT: 0x80131515)

CAUSE
That is one of that times that BizTalk Server team did a great job. Not only throw the error but they also explain the problem and the solution to solve it.
This error when BHM tries to load the repository files downloaded from the Microsoft Download Center (DLC). BHM is using two repositories for this configuration, these repository files (MYHCQueries_MBVQueries.dll and MaintenanceRep.dll) can be blocked by OS when downloading from DLC and may cause this issue.
Solution
Again, the solution to this problem is also explained in the error window:
- Close BHM
- Go to BHM installation folder
- The default path is C:Program files (x86)BizTalkHealthMonitor
- Right-click in MYHCQueries_MBVQueries.dll and select “Properties” option

- You may see that the security warning at the bottom of the windows saying: “The file came from another computer and might be blocked to help protect this computer”
- Check “Unblock” option and click “OK”

- Do the same steps for “MaintenanceRep.dll”
Once you have unblocked both files, you should no longer see the security warning when you go back into their properties and if you try to execute BHM again all the above-mentioned errors related to loading repositories should be resolved.
You may also find more details about this issue directly from BizTalk Health Monitor blog: BHM v3.2 – Errors While Loading Repositories.
Note:
- If you have not yet installed BHM, you can also follow the above steps on the unzipped package prior to installing BHM.
Author: Sandro Pereira
Sandro Pereira lives in Portugal and works as a consultant at DevScope. In the past years, he has been working on implementing Integration scenarios both on-premises and cloud for various clients, each with different scenarios from a technical point of view, size, and criticality, using Microsoft Azure, Microsoft BizTalk Server and different technologies like AS2, EDI, RosettaNet, SAP, TIBCO etc. He is a regular blogger, international speaker, and technical reviewer of several BizTalk books all focused on Integration. He is also the author of the book “BizTalk Mapping Patterns & Best Practices”. He has been awarded MVP since 2011 for his contributions to the integration community. View all posts by Sandro Pereira
by Sandro Pereira | Mar 5, 2017 | BizTalk Community Blogs via Syndication
Introduction
The BizTalk Scheduled Task Adapter is an In-Process receive adapter that executes a prescribed task on a daily, weekly or monthly schedule. The adapter is configured entirely within BizTalk, all configurations are stored within the SSODB and can be exported and imported via binding files.
The schedule capabilities are similar to those available with the Windows Scheduled Task Service.
Four simple tasks are included in this version:
- XmlStringStreamProvider – generates a BizTalk message from a configured XML string
- FileStreamProvider – generates a BizTalk message from the contents of a file
- HttpDownload – generates a BizTalk message from data downloaded from a website
- SQLStreamProvider – generates a BizTalk message from the contents of a SQL Query (similar to the old SQL adapter)
Custom tasks can be created. Any .NET class that implements the appropriate interface can be scheduled.
Release History
This adapter is available since BizTalk Server 2004.
- Release 6.0: release on March 1, 2017, by Sandro Pereira, this adapter was tested to work on BizTalk Server 2016. Compiled in .NET Framework 4.6
- Release 5.0: release on February 18, 2015, by Sandro Pereira, this adapter was tested to work on BizTalk Server 2013 R2. Compiled in .NET Framework 4.5
- Release 4.0: release on June 12, 2012, by Sandro Pereira, this adapter was tested to work on BizTalk Server 2010. Compiled in .NET Framework 4.0
- Release 3.0: release on Aug 10, 2010, by Greg Forsythe, this adapter was tested to work on BizTalk Server 2009. Compiled in .NET Framework 2.0
- Release 2.0: last release on Apr 20, 2008, by Greg Forsythe, this adapter works with BizTalk Server 2006 and BizTalk Server 2006 R2. Compiled in .NET Framework 2.0
- Release 1.02: last release on Apr 20, 2008, by Greg Forsythe, this adapter works with BizTalk Server 2004, BizTalk Server 2006 and BizTalk Server 2006 R2. Compiled in .NET Framework 1.1
Requirements
The BizTalk Scheduled Task Adapter v6.0 will work with:
- BizTalk Server 2016
- .NET Framework 4.6
How to install BizTalk Scheduled Task Adapter
To install the adapter you need to run “ScheduledTaskAdapter.msi”.
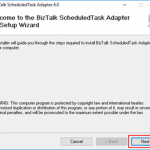
- In the “Welcome” screen, click “Next”.

- In the “Select Installation Folder” screen, you must set the installation locations were you what to install the adapter and then click “Next”.

- In the “Confirm Installation” screen, click “Next”, then it will appear the installation progress
- Assuming all goes well, the “Installation Complete” screen will appear. Click “Close” to finish the installation process.

The setup will install the following assemblies in the selected folder (The default folder is: C:Program Files (x86)BizTalk ScheduledTask Adapter 6.0):
- BizTalk Scheduled Task Adapter.pdf (Installation manual)
- Biztalk.Adapter.ScheduledTaskProperties.dll
- Calendar.Schedules.dll
- Microsoft.BizTalk.CommonSettings.dll
- Microsoft.BizTalk.SqmFramework.dll
- ScheduledTaskAdapter.Admin.dll
- ScheduledTaskAdapter.dll
- ScheduledTaskAdapter.TaskComponents.dll
- stdole.dll
The setup will add the following assemblies to the Global Assembly Cache (GAC)
- Biztalk.Adapter.ScheduledTaskProperties.dll
- Calendar.Schedules.dll
- ScheduledTaskAdapter.dll
- ScheduledTaskAdapter.Admin.dll
- ScheduledTaskAdapter.TaskComponents.dll
The setup will add the following registry key:
- HKEY_CLASSES_ROOTCLSID{7A4BDD2A-3063-4f57-A108-DEA05DEB417E}
Post-Installation
Register the Adapter with BizTalk
As it happens with all adapters that we installed on our BizTalk Servers before we can begin to use it we need to register or configure the adapter. To accomplish that we need to:
- Open BizTalk Administration Console
- In the console left tree, expand “BizTalk Server Administration –> BizTalk Group –> Platform Settings” and then “Adapters”
- Right-click on “Adapters” and add a new adapter by selecting the option “New –> Adapter”

- In the “Adapter Properties” window
- Set the name of the adapter: Name = Schedule
- In the adapter combo box, select the option: Schedule
- Set the description of the adapter: “BizTalk Scheduled Task Adapter. The schedule capabilities are similar to those available with the Windows Scheduled Task Service.” (this property is optional but I would suggest to always be filled)

- Note: This configuration requires that you restart the host instance associated with the adapter. At this moment, click “Ok” to continue the configuration process.

- [Optional] By default, the Receive Handler configured for the BizTalk Scheduled Task Adapter will be the default Host configured in the environment, that normally is “BizTalkServerApplication”. We can change this behavior by:
- In the BizTalk Server Administration Console, expand “BizTalk Server Administration”, expand “BizTalk Group”, expand “Platform Settings”, and then expand “Adapters”.
- In the expanded adapter list, right-click the Schedule adapter and then select the option “New –> Receive Handler”

- In the Schedule – Adapter Handle Properties” dialog box, on the General tab, in the Host Name list, select the host with which the adapter handler will be associated. And then click “Ok”

- Again, at this point, a pop-up will appear notifying that this configuration requires that you restart the host instances associated with the adapter. At this moment, click “Ok” to finish the configuration process.

- To finish this configuration process, in the BizTalk Server Administration console tree, expand BizTalk Server Administration, expand the BizTalk group, click Platform Settings, and then click Host Instances.
- In the details pane, select host instance(s) you want to restart, right-click and then click “Restart”.
Using the adapter Context Properties (Optional)
To utilize the Scheduled Task adapter’s context properties within a filter or orchestration the Biztalk.Adapter.ScheduledTaskProperties.dll must be deployed into the BizTalkMgmtDb.
This can be achieved using the Biztalk Deployment Wizard or equivalent tool.
Note: This step is optional; you only need to do this if you want to use Scheduled Task adapter’s context properties within a filter or orchestration.
As previously mentioned, you can deploy Biztalk.Adapter.ScheduledTaskProperties.dll in various ways; I suggest that you do the following steps:
- Open BizTalk Administration Console
- In the console left tree, expand “BizTalk Server Administration –> BizTalk Group” and then “Applications”
- Right-click on “Applications” and add a new application by selecting the option “New –> Application”

- In the “Adapter Properties” window
- Set the name of the application: BizTalk.Global
- Set the description of the application: “Application that contains common resources to several applications” (this property is optional but I would suggest to always be filled)

- Expand the application created previous and select the option “Resources”
- Right-click and add a new BizTalk resource by selecting the option “New –> BizTalk Assemblies…”

- In the “Add Resources” window select “Add…” button and from the installation directory select the DLL “Biztalk.Adapter.ScheduledTaskProperties.dll” (You can find this DLL on the adapter installation folder, by default, C:Program Files (x86)BizTalk ScheduledTask Adapter 6.0)
- And select the options: “Overwrite all”, “Add to the global assembly cache on add resource (gacutil)” and “Add to the global assembly cache on MSI file install (gacutil)”

Author: Sandro Pereira
Sandro Pereira lives in Portugal and works as a consultant at DevScope. In the past years, he has been working on implementing Integration scenarios both on-premises and cloud for various clients, each with different scenarios from a technical point of view, size, and criticality, using Microsoft Azure, Microsoft BizTalk Server and different technologies like AS2, EDI, RosettaNet, SAP, TIBCO etc. He is a regular blogger, international speaker, and technical reviewer of several BizTalk books all focused on Integration. He is also the author of the book “BizTalk Mapping Patterns & Best Practices”. He has been awarded MVP since 2011 for his contributions to the integration community. View all posts by Sandro Pereira
by Rene Brauwers | Mar 23, 2013 | BizTalk Community Blogs via Syndication
As most of you, I downloaded the final pieces of BizTalk Server 2013 as soon as it was available on MSDN. Once I downloaded it, I decided to setup a clean BizTalk 2013 Development Machine. This post will highlight the issues I encountered during installation and configuration and how I resolved them.
First of a brief highlight of my machine (Single-Server) configuration
* Windows Server 2012
* SQL Server 2013
* One instance for BizTalk MessageBoxDb
* One instance for all other BizTalk databases
* Visual Studio 2012
* BizTalk Server 2013
* Server Memory 8GB
* Disk Space 40Gb
Below the issues I encountered and how I resolved them.
Issue #1: Installing BizTalk Server
Error encountered: Missing file ‘MSVCP100.dll’
Resolution
- Download and install Microsoft Visual C++ 2010 Redistributable Package (both x64 as x86)
Issue #2: BizTalk Configuration – BAM Tools
Error encountered: Could not install BAM Tools
Resolution
- install SQL Server 2005 Notification Services
x64 – http://download.microsoft.com/download/4/4/D/44DBDE61-B385-4FC2-A67D-48053B8F9FAD/SQLServer2005_NS_x64.msi
x86 – http://download.microsoft.com/download/4/4/D/44DBDE61-B385-4FC2-A67D-48053B8F9FAD/SQLServer2005_NS.msi
- set up database to use database-mail
- configure BAM Alerts
Issue #3: BizTalk Configuration – BAM Portal
Error encountered: Could not install BAM Portal -> error with regards to “BAM Management Web Service User”
Error thrown: “Attempted to read or write protected memory. This is often an indication that other memory is corrupt.”
Actual exception: Log indicated ‘Cannot alter the role ‘NSSubscriberAdmin’, because it does not exist or you do not have permission.’
Resolution
- Manually Add NSSubscriberAdmin DatabaseRole to BAM Alert Application Database
END Result
Well this was a quick post, but I hope that it might help you out; if you encounter the same issues
Cheers
René
by Rene Brauwers | Sep 19, 2011 | BizTalk Community Blogs via Syndication
Last week during the BUILD conference a developer preview of Both Windows 8 and Windows Server 8 was released. Once released I’ve decided to give it a go and install and perform a basic configuration (without BAM / EDI) of BizTalk Server 2010 on Windows 8 (note: not Windows Server 8).
Below a list of issues I encountered and how to resolve these issues.
Prerequisites
Obtain the Windows 8 developer preview build
Obtain Microsoft BizTalk Server 2010
Ensure that you have a dedicated server available with SQL Server 2008R2.
Hook up your Windows 8 to machine to your Active Directory (this way you can use your AD BizTalk service accounts etc.)
Environment
Encountered Issues while installing
Well to be perfectly honest the only issue I encountered during installation of BizTalk Server 2010 was the fact that I got about 10+ windows update screens which all prompted me to go and install the .Net Framework 3.5.1 Features; well I closed all the windows except for one and let windows update continue.
Note: For the BizTalk pre-requisites I simple pointed to the cab file , which I already downloaded previously.
Encountered Issues while configuring
Configuring BizTalk Server 2010 was a bit more of a challenge although everything up to ‘Configuring the BizTalk Server Runtime’ went off without any problems.
However once it was time to configure the runtime it gave me a an exception informing me that the server could not communicate with the SSO and that it might have to do with the Distributed Transaction Coordinator; Well this was not the issue, as I had configured it on both servers (on the SQL Server box and on the BizTalk Box).
So next stop was looking into the windows services and then especially the Enterprise Single Sign On Service; well the service was up and running. So I stopped and started it and tried to configure the BizTalk Server Runtime once again; however I still got the same error.
Next stop going back to the windows services and this time
I tried an elevated account on the Enterprise Single Sign On Service; but hey you guessed it; still got the same error.
So; not giving up I went back to the Enterprise Single Sign On service and put everything back to it’s original state (that is use the dedicated sso service account). Well once I tried to start the service again it suddenly gave me an error indicating that there were some RPC issues… Hmmm, so I went and had a look at that particular service and noticed that it was up and running. Restarting it did not throw any other exceptions and that’s when I noticed that the service ‘RpcLocator Service’ was not running. Bingo! Enabling this service resolved the SSO issue and I was able to further configure BizTalk Server 2010.
Conclusion
BizTalk 2010 can be installed and configured on the Windows 8 Developer Preview Release; however before installing and configuring ensure that
You’ve configured the Distributed Transaction Coordinator on both the SQL Server Box as well as the Windows 8 Box
Ensure that the ‘RpcLocator Service’ is up and running.
Please note: So far I’ve only installed and configured BizTalk 2010 on Windows 8. I’ve not actually played around with sample applications etc.
Screenshots:
BizTalk Administrator ‘Pinned’ to Metro
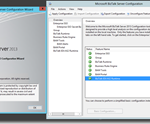
BizTalk Server Configuration
BizTalk Administrator Console
Cheers
René
by stephen-w-thomas | Nov 8, 2005 | Stephen's BizTalk and Integration Blog
Well, after about 10 tries on a freshly built Windows XP SP2 laptop I was finally able to get the CTP build of BizTalk Server 2006 installed and configured. I had installed it before with no problems. For some reason, this new image of Windows just did not want to cooperate.
The problem I ran into was with the configuration of the user groups. I received this error:
Failed to check if BizTalk Application Users is a valid domain group.
This seemed odd, since this is a stand alone laptop. It is not a member of any domain. I was putting my user name for the Biztalk configuration as “biztalkuser”. I noticed in SQL 2005, the user name was listed as ComputerName\biztalkuser. I tired that and it worked. So, keep this in mind that you might have to use your computer name with your user name for configuring Biztalk 2006 even if you are not on a domain.
Don’t get me wrong, the overall installation process is orders of magnitude better in BizTalk 2006 then is was in 2004.
Also, the CTP release of the Oracle Data Base Adapter, Oracle Apps Adapter, PeopleSoft Adapter, and Siebel Adapter are included with the download. They are NOT installed automatically. You need to run the Microsoft BizTalk Adapters.MSI located in the LOBAdapters folder. Then, you need to register each adapter inside Biztalk Admin.
Oh, one more thing. If you download the installation guide for the CTP build, the default path is \Program Files\BizTalk Server 2006. This is not the same location as the server program files.
Best of luck.
Update: Well, after getting some great feedback from Microsoft directly on my installation problem it looks as though the problem was a full event log? Yep, that’s what the logs said.
So, if you have this type of issue with the CTP build try clearing your event log and trying again.
On a side note, it is STRONGLY recommended NOT to prefix your user name with the computer name for a single computer installation.
by stephen-w-thomas | Jun 21, 2005 | Stephen's BizTalk and Integration Blog
Have you seen this error when installing BizTalk 2004?
Failed to deploy BizTalk system assembly “C:\Program Files\Microsoft BizTalk Server 2004\Microsoft.BizTalk.GlobalPropertySchemas.dll”.
Unspecified exception: An error occurred while enlisting in a distributed transaction.
I ran into this a few weeks ago when trying to install BizTalk 2004 on a Windows 2003 Server with SP1 preloaded and using a remote SQL Server.
It appears that like Windows XP SP2, Windows SP1 changes some DTC settings. This does not affect BizTalk when SQL is running locally of course.
After working with Microsoft Support for about 2 days. It turned out that the fix is rather quit easy. In our case, we had some other issues that made it seem much more complex then it was.
To correct this problem, go to Component Services, My Computer Properties, DTC tab, and then Security Configurations (bottom left).
1. Follow the standard BizTalk Installation instructions for setting up DTC.
2. Under Client and Administration, make sure “Allow Remote Clients” is checked.
3. Under Transaction Manager Communication, make sure “No Authentication Required” is checked
The end result was changes to two registry settings:
HKEY_LOCAL_MACHINE\SOFTWARE\Microsoft
\MSDTC\AllowOnlySecureRpcCalls is now 0
HKEY_LOCAL_MACHINE\SOFTWARE\Microsoft
\MSDTC\TurnOffRpcSecurity is now 1
The UI now looked like this:


