by Bill Chesnut | Aug 22, 2018 | BizTalk Community Blogs via Syndication
By Bill Chesnut
This is the third post in a multi part series on the features of Azure API Management.
As with the previous posts where I demonstrated publishing a SOAP Services with pass-through and SOAP to REST, this time I am going to demonstrate how you can connect Azure API Management to Azure Application Insights, to monitor the call to APIM and the dependent APIs. This post will not go into how or why to use Azure Application Insights, just how to configure APIM to use it.
By connecting APIM to Application Insights, information from APIM sent to Application Insights will include the request and response from APIM, the backend request and response and any Exception information. This will give end-to-end monitoring capabilities to the APIs that are being exposed in APIM if those APIs are also using Application Insights for monitoring.
As with any telemetry gathering system, there are some performance implications, APIM has recently added the ability to control this with a much finer grain as we will see later in the configuration screens.
To get started with Application Insights for APIM, you will need an Application Insights instance, I am not going to cover how to create that in this blog post, but you can find the instructions here: https://docs.microsoft.com/en-us/azure/api-management/api-management-howto-app-insights
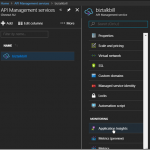
Once the Application Insights instance has been created (you can also use an existing instance if you want), lets connect Application Insights to APIM, go to the ‘Application Insights’ tab in the Azure Portal for APIM.

Then Click ‘+ Add’

Select the instance of Application Insight that you want to configure, optionally add a description and Click ‘Create’

You can have multiple instances of Application Insights connected to APIM, now we need to configure how this instance of Application Insights is used, it can be the default for all APIs in APIM or just used for specific APIs, to use it as the default instance, Click ‘APIs’, Click ‘All APIs’, Click Settings and to enable Click the ‘Enable’ check box

Configure the destination (instance of Application Insights), Sampling (there are some performance implication with the sampling %, see the this link – https://docs.microsoft.com/en-us/azure/api-management/api-management-howto-app-insights#performance-implications-and-log-sampling ), Always log errors (recommended) and First bytes of body (if necessary). Click ‘Save’

The Advanced Options allow you to control which Request are logged and headers and body logging

If you do not want to use the same instance of Application Insights for all APIs, you can select the API and configure Application Insights just like above for the particular APIs

Now lets open Application Insights, Click ‘Search’, then in the Search, Click ‘Refresh’, the results are empty since we have not made any calls to the API yet. If this was an existing instance of Application Insight, there may already be some telemetry from the other services

Now lets go back to APIM and run some tests, Select and Operation, enter the required data (in this case, an invalid URL to see the exception processing) and Click ‘Send’

The result is a 500 Internal Server Error

Switch to Application Insights and Click ‘Refresh’, There is now data in Application Insights, 2 Request, 2 Trace, 1 Exception and 1 Dependency.

For this particular API, Application Insights is also setup on the API, so we can have end-to-end Application Insights information. Click on one of the entries to get the details

The details for the Request are contained in the view above and you can see the related Application Insights entries on the left and the particular details for the request on the right. If we want to get more details on the Exception, other than the 500 Response code we see in this entry, click on the Exception entry on the left

By configuring Application Insights for APIM, the full end-to-end flow of requests can be seen, the percentage of requests that are captured in Application Insights depends on your sampling, in a Development or Testing environment you can set this to 100% but in Production environments if the APIs are very active this may introduce too much overhead and require a lower sampling rate to prevent performance degradation.
Hopefully this has given you a quick demonstration on how to connect Application Insight to APIM.
Cross Posted on http://www.sixpivot.com.au

by Bill Chesnut | Aug 5, 2018 | BizTalk Community Blogs via Syndication
By Bill Chesnut
This is the second post in a multi part series on the features of Azure API Management.
As with the previous post where I demonstrated publishing a SOAP Services with pass-through, this time I am going to demonstrate publishing the same SOAP Service as REST, using the SOAP to REST feature of API Management, I consider this feature very important to APIM, in the past many of my clients have built intermediate services using either BizTalk or .Net.
For this blog post I am going to demonstrate how you publish a BizTalk SOAP service as REST in APIM. With APIM you can publish SOAP services by importing the WSDL (this can be either via the URL or by uploading the WSDL file), In APIM Click the “API” menu item on the left, then Click “WSDL”

In this demonstration I am going to use an uploaded file, this is the WSDL from a BizTalk orchestration exposed as a WCF Request/Response Service, it only has a single operation ‘submit”. I am using an uploaded file because the BizTalk server is hosted in an Azure Virtual Machine and I have changed the URL to reflect the DNS name of the Virtual Machine. I could have also changed the name in APIM after the WSDL was imported. Select “SOAP to REST” and configure as shown and click “Create”

Once the WSDL import is complete, we can now see the API and it’s operations, now let click settings to look at the API settings, this is where we can change the URL to the BizTalk Server hosting our SOAP Service. Click the “submit” operation, then click the “policy editor”

Now look at the policy that does the transformation from REST/JSON to SOAP/XML.

Inbound

Outbound

Now lets click the “Test” menu, this is where we can test our API Operation, before we release them to our consumers

APIM fills in all the details to test the API, notice that the payload for the API is JSON, this is because we chose SOAP to REST, SOAP services are XML based, but the above policy we looked at does the conversion from JSON to XML. Click “try it”

You can now see the results of our call to the BizTalk hosted SOAP Service, the results are in JSON again the policy is doing the conversion, now lets click the “trace” tab, this will give us everything that has taken place in APIM as part of our call to the BizTalk SOAP service. You can notice that the policy has set the SOAPAction and converted the JSON body to XML

The Policy for the SOAP to REST feature is using Liquid Template Language to do the JSON to XML and XML to JSON transforms, these templates can be use to transform from JSON to XML, XML to JSON, XML to XML and JSON to JSON, this allow not only the scenario for SOAP to REST, but the ability to manipulate both inbound and outbound payload for maximum flexibility.
Hopefully this has given you a quick demonstration on how to expose your SOAP Services as REST with APIM.
Cross Posted on http://www.sixpivot.com.au
by Bill Chesnut | Jul 31, 2018 | BizTalk Community Blogs via Syndication
By Bill Chesnut
This is the first post in a multi part series on the features of Azure API Management.
When companies embark on a migration to Azure, they tend to have lots of legacy application, when they start using Azure API Management (APIM), they also want to expose some of these legacy applications, that is where the SOAP pass-through feature of APIM helps out. This feature allow you to publish these SOAP services in APIM.
For this blog post I am going to demonstrate how you publish a BizTalk SOAP service in APIM. With APIM you can publish SOAP services by importing the WSDL (this can be either via the URL or by uploading the WSDL file), In APIM Click the “API” menu item on the left, then Click “WSDL”

In this demonstration I am going to use an uploaded file, this is the WSDL from a BizTalk orchestration exposed as a WCF Request/Response Service, it only has a single operation ‘submit”. I am using an uploaded file because the BizTalk server is hosted in an Azure Virtual Machine and I have changed the URL to reflect the DNS name of the Virtual Machine. I could have also changed the name in APIM after the WSDL was imported. Configure as shown and click “Create”

Once the WSDL import is complete, we can now see the API and it’s operations, now let click “Settings” to look at the API settings, this is where we can change the URL to the BizTalk Server hosting our SOAP Service, instead of inside the WSDL file as I have done.

Now lets click the “Test” tab, this is where we can test our API Operation, before we release them to our consumers

APIM Fills in all the details to test the API, notice that the payload for the API is XML, this is because we chose SOAP pass-through, SOAP services are XML based. Click “Send”

You can now see the results of our call to the BizTalk hosted SOAP Service, the results are in XML, now lets click the “Trace” tab, this will give us everything that has taken place in APIM as part of our call to the BizTalk SOAP service. Scroll down to see the full Trace.

Hopefully this has given you a quick demonstration on how to expose your SOAP Services with APIM.
Cross Posted on http://www.sixpivot.com.au

by Dan Toomey | Mar 30, 2018 | BizTalk Community Blogs via Syndication
 Last Saturday I had the great privilege of organising and hosting the 2nd annual Global Integration Bootcamp in Brisbane. This was a free event hosted by 15 communities around the globe, including four in Australia and one in New Zealand!
It’s a lot of work to put on these events, but it’s worth it when you see a whole bunch of dedicated professionals give up part of their weekend because they are enthusiastic to learn about Microsoft’s awesome integration capabilities.
The day’s agenda concentrated on Integration Platform as a Service (iPaaS) offerings in Microsoft Azure. It was a packed schedule with both presentations and hands-on labs:
It wasn’t all work… we had some delicious morning tea, lunch and afternoon tea catered by Artisan’s Café & Catering, and there was a bit of swag to give away as well thanks to Microsoft and also Mexia (who generously sponsored the event).
 Overall, feedback was good and most attendees were appreciative of what they learned. The slide decks for most of the presentations are available online and linked above, and the labs are available here if you would like to have a go.
I’d like to thank my colleagues Susie, Lee and Adam for stepping up into the speaker slots and giving me a couple of much needed breaks! I’d also like to thank Joern Staby for helping out with the lab proctoring and also writing an excellent post-event article.
Finally, I be remiss in not mentioning the global sponsors who were responsible for getting this world-wide event off of the ground and providing the lab materials:
- Martin Abbott
- Glenn Colpaert
- Steef-Jan Wiggers
- Tomasso Groenendijk
- Eldert Grootenboer
- Sven Van den brande
- Gijs in ‘t Veld
- Rob Fox
Really looking forward to next year’s event!

by Sandro Pereira | Sep 6, 2017 | BizTalk Community Blogs via Syndication
Sometimes the best option to create a REST API and provide something for to the partners to try it out (documentation or starting to developer their side), especially if the requirements are not completely defined, is not to start coding your backend API, which takes more time to develop and which sometimes will be subjected to constant changes, becoming in many cases an inglorious work and a complete waste of time (… sometimes) but instead to prototype your API in your frontend system. So in this post, I will address the question: How to mock responses in API Management?
API Management provides different, powerful and easy ways to mock your API’s to return static or dynamic sample responses even when there is no functional backends service capable of providing them. Mocking can be very useful in several scenarios like:
- Create proof of concepts or demos
- Test Driven Development approach: when the API façade is designed first and the backend implementation comes later or is worked upon in parallel.
- When the backend is temporarily not operational.
- When a specific operation is not yet implemented.
- And so on…
Despite being pretty simple to set up a mock, at the moment there are several ways to archive this in API Management, some of them more simple and static and others more complex and dynamic. So, let’s see all the options.
Options 1) Using the return-response policy in the “old” Publisher portal
Using the return-response policy, it would halt the execution of the API pipeline (… if it exists) and return a response code as specified. You can also send an optional set of headers and a body to the caller.

(Picture from https://www.youtube.com/watch?v=SDyUw93hx1w)
Note: One of the beautiful things on using this policy, comparing with the mock-response policy that we will describe in option 3, is that the mock can be implemented in a very dynamic way if you combine this policy with expressions.
To accomplish that we need to:
- Access to the “old” Publisher portal, by accessing you API Management resource in Azure Portal and then click “Publisher portal” button

- On the Publisher portal, select the option “Policies” from the left menu

-
- Note: Policies can be configured globally or at the scope of a Product, API or Operation.
- The next step is to define the scope of the policy, in our sample, we will be selecting a particular operation. To do that you need to select you API from the “API” drop box and then the specific operation from the “Operation” drop box.
- And then on the “Policy definition” click “ADD POLICY”

- Add a return-response policy in the inbound section by:
- Focus the cursor in the inbound section and then from the Policy statements toolbox click in the option

-
- TIP: When mocking, the policy should always be used in the inbound section to prevent an unnecessary call to the backend.
- This will add the default template format of the policy to the policy definition, that you will need to set up according to your needs:

- To simplify our case, we just need to return a 200-status code with a static JSON response and for that, we need to apply the following policy:
<return-response response-variable-name="existing response variable">
     <set-status code="200" reason="OK" />
     <set-header name="Content-Type" exists-action="override">
         <value>application/json</value>
     </set-header>
     <set-body>{
                 "success": true,
                 "data": {
                    "cards": [
                       {
                          "id": 28,
                          "Name": "Sandro Pereira"
                       },
                       {
                          "id": 56,
                          "Name": "Carolina Pereira"
                       },
                       {
                          "id": 89,
                          "Name": "José Pereira"
                       }
                    ]
                 }
     }</set-body>
</return-response>
- Save the policy to take effect next time a call is made to the operation.
Of course, this policy can be used in many different ways, for example, if you only want to return a 200 OK without body response, you can use an abbreviated version of the policy that will be represented like this:
<return-response/>
But as I told you earlier that this also can be very dynamic as you can see in the “Mocking response in Azure API Management” tutorial provided by Microsoft where they are mocking an “Add two integers” operation in which the policy will look like this:
<return-response response-variable-name="existing response variable">
     <set-status code="200" reason="OK" />
     <set-header name="Content-Type" exists-action="override">
         <value>application/json</value>
     </set-header>
     <set-body>{
          "success": true,
          "data": "@((Convert.ToInt32(context.Request.Url.Query.GetValueOrDefault("a", "0")) + Convert.ToInt32(context.Request.Url.Query.GetValueOrDefault("b", "0"))).ToString())"
     }</set-body>
</return-response>
Here, I am taking the actual query parameters provided in the request and implementing the all the operation logic of my backend API dynamically inside my policy… pretty cool!
Options 2) Using the return-response policy in the Azure Portal.
This second option is exactly the same as the previous one, but instead of doing in the “old” Publisher portal, we will accomplish the same goal using the “new” API Management capabilities/functionalities embedded in the Azure portal.
To accomplish that you need to:
- Access your API Management resource in Azure Portal and then click “APIs” option under “API Management” section from the left menu

- Select the API from the API list, then from the operation list select the correct operation and then click the edit button on the “Inbound processing” policies

- Click in “</> Code View” to view or edit your policies as explained earlier in the first option

- You will find the same experience as the “old” Publisher portal while editing the rules

Both option 1 and 2 are the same, the only difference between them is that in the first option we are using the Publisher portal (this portal still exists because not all functionalities have yet been migrated for the Azure Portal) and in the second we are using the Azure Portal UI.
Options 3) Using the Mock-Response policy
The first two options, that in fact use the same rule are very useful in several distinct scenarios, especially if you want to implement some intelligence (dynamic responses) in you mock.
But what if you want to combine your mocking cases against our API specifications that we used while creating our operations? Fortunately for us, Microsoft released a few months ago a new policy to perform this task in an easier way and you can now use the Mock-Response policy to achieve this effect and it is fully supported through the UI in the Azure Portal.
Note: this policy can also be used in the “old” Publisher portal but I will not address that.
TIP: Once again, you can apply this policy to every section, but its typical usage scenario is on the inbound path to provide a response instead of the backend service and also to prevent unnecessary calls to the backend.
To configure this policy from the Azure Portal you need to:
- Access your API Management instance, under “API Management” section click “APIs”, select the API from the API list, then from the operation list select the correct operation and then click the edit button on the “Inbound processing” policies to open the Inbound processing editor

- You will now notice that a tab titled “Mocking” is available, in which you can configure the desired static response back to your caller by:
- Selecting the “Static responses” option
- And what response status should be returned by configuring the “API Management will return the following response” drop box

Are you wondering where you can define the response?
If you look at the description of this policy in the documentation it says: “… as the name implies, is used to mock APIs and operations. It aborts normal pipeline execution and returns a mocked response to the caller. The policy always tries to return responses of highest fidelity. It prefers response content examples, whenever available. It generates sample responses from schemas, when schemas are provided and examples are not. If neither examples or schemas are found, responses with no content are returned.”
So, in other words, when designing the operation specification:
- if you provide expected response types and samples:

-
- The mock-response policy will take this sample response that you defined as the response to be delivered to the caller
Note: If there are already response status codes, with or without content types, examples and schemas defined, configured on that particular operation (as shown in the figure above), these HTTP status codes will be listed at the top of the “API Management will return the following response” drop box on the mocking section.

- if you instead provide a response schema instead of samples, the mock-response policy will generate a sample response from the schema provided
- If you don’t define samples or schemas, the policy will return a 200 OK response with no content return.
Normally, the policy template (or signature) is:
<mock-response status-code="code" content-type="media type"/>
However, as similar with the return-response policy, you can use an abbreviated version of the policy that looks like this:
<mock-response/>
And again, it will return a 200 OK status code and the response body will be based on an example or schema, if provided for this status code. The first content type found will be used and if no example or schema is found, a response with no content will be returned.
Conclusion
Both mock-response and return-response policies can be used on API Management for prototyping your API frontend. Although at first glance they may have similar behaviors, both policies have advantages and disadvantages and can be used in different scenarios/context.
But I will probably say for mocking propose I will use or advice to use the mock-response policy just because it is simpler and will take advantage from the API specification to generate the mock response which also “force” the developers (or admins in charge of your frontend) to properly document the APIs.
Author: Sandro Pereira
Sandro Pereira lives in Portugal and works as a consultant at DevScope. In the past years, he has been working on implementing Integration scenarios both on-premises and cloud for various clients, each with different scenarios from a technical point of view, size, and criticality, using Microsoft Azure, Microsoft BizTalk Server and different technologies like AS2, EDI, RosettaNet, SAP, TIBCO etc. He is a regular blogger, international speaker, and technical reviewer of several BizTalk books all focused on Integration. He is also the author of the book “BizTalk Mapping Patterns & Best Practices”. He has been awarded MVP since 2011 for his contributions to the integration community. View all posts by Sandro Pereira
by Sandro Pereira | Aug 28, 2017 | BizTalk Community Blogs via Syndication
I have been working with API Management (APIM) for a long time, not only playing around with POC and testing new features but actually working and implementing real solutions for clients. I also delivered several API Management talks here in Portugal but I realize that I never wrote a blog post about this topic. That will change today hehe.
OpenAPI Specification (formerly Swagger Specification) is an API description format for REST APIs. An OpenAPI file allows you to describe your entire API, including:
- Available endpoints (/users) and operations on each endpoint (GET /users, POST /users)
- Operation parameters Input and output for each operation
- Authentication methods
- Contact information, license, terms of use and other information.
API specifications can be written in YAML or JSON. The format is easy to learn and is both human-readable and machine-readable.
This specification is widely used these days, especially in the Microsoft community, but unfortunately, not all of them use it and there are still quite a few APIs that do not expose any kind of specification/documentation like Swagger, WADL or even WSDL (this last for web services).
For REST APIs, I have seen several suppliers/partners use Postman Collections to easily test their APIs by emulating request but also to document the APIs by adding a name and descriptions to requests, sample requests, headers, and other metadata. Performing unit tests in all the operations and sharing them inside their teams.
Postman Collections are groups of requests that can be run together as a series of requests, against a corresponding environment. Using scripts, you can build integration test suites, pass data between API requests, and build workflows that mirror your actual use case of APIs.

See how to create a Postman Collection here: Creating collections
I have to say, I love Postman but I never used it for that propose, although it is an excellent tool, in my opinion, I believe that to document an API it has some limitations.
And in one of my recent projects the partner delivered me a Postman Collection as a way of documenting their REST API which led me to a “small” problem:
- I didn’t want to replicate or manually expose the API inside the API Management…
- and the API Management by default doesn’t allow me to import a Postman Collection
So, how can I import a Postman collection into my Azure API Management?
Fortunately for us, there are several free tools that allow you to convert (or transform) a postman collection (1.0 – 2.0) to formats of your choice that in our case Swagger. And one of these tools is APIMATIC.
For that you just need to:
- Access APIMATIC API Transformer page: https://apimatic.io/transformer
- Upload your Postman collection file description
- Provide a File Description URL
- And select the desired output format, in our case we selected “Swagger v2.0 (JSON)”

- And finally, click “Convert Now”
The output file will be automatically downloaded into your machine.

Now that I have my swagger file, I can now access my API Management in the Azure Portal and then:
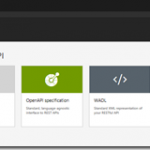
- From the left pane, select “Add API” and then select “OpenAPI specification” option

- Import the file I had created previously in the APIMATIC web tool and click “Create”

It probably doesn’t do everything for you, you may need to optimize the query parameters or the URL template parameters, but at least this approach will do 90% of the work for you:

This approach saved me several working hours on the task of exposing the Partner API in my API Management Portal.
Author: Sandro Pereira
Sandro Pereira lives in Portugal and works as a consultant at DevScope. In the past years, he has been working on implementing Integration scenarios both on-premises and cloud for various clients, each with different scenarios from a technical point of view, size, and criticality, using Microsoft Azure, Microsoft BizTalk Server and different technologies like AS2, EDI, RosettaNet, SAP, TIBCO etc. He is a regular blogger, international speaker, and technical reviewer of several BizTalk books all focused on Integration. He is also the author of the book “BizTalk Mapping Patterns & Best Practices”. He has been awarded MVP since 2011 for his contributions to the integration community. View all posts by Sandro Pereira
by mbrimble | Feb 7, 2017 | BizTalk Community Blogs via Syndication
February 8, 2017
No comments yet.
RSS feed for comments on this post. TrackBack URI


