This is the twenty-seventh in a series of blog posts I’m doing on the VS 2010 and .NET 4 release.
Today’s blog post continues on from the Debugging Tips post I did last week, and covers some useful searching and navigation tips/tricks you can take advantage of within Visual Studio. These tips were ones that my friend Scott Cate (who has blogged dozens of great VS tips and tricks here) recently recommended to me as good tips that most developers using Visual Studio don’t seem to know about (even though most have been in the product for awhile).
Hopefully this post will help you discover them if you aren’t already taking advantage of them. They are all easy to learn, and can help save you a bunch of time.
Ctrl + i – Incremental Search
Most developers using Visual Studio are familiar with the “Find dialog” that you can launch by pressing the “Ctrl + F” key within the IDE. A surprisingly large number of developers, though, aren’t familiar with the “Incremental Search” capability within Visual Studio. This enables you to search within your current document, and enables you to do so without having to bring up a dialog.
Using Incremental Search
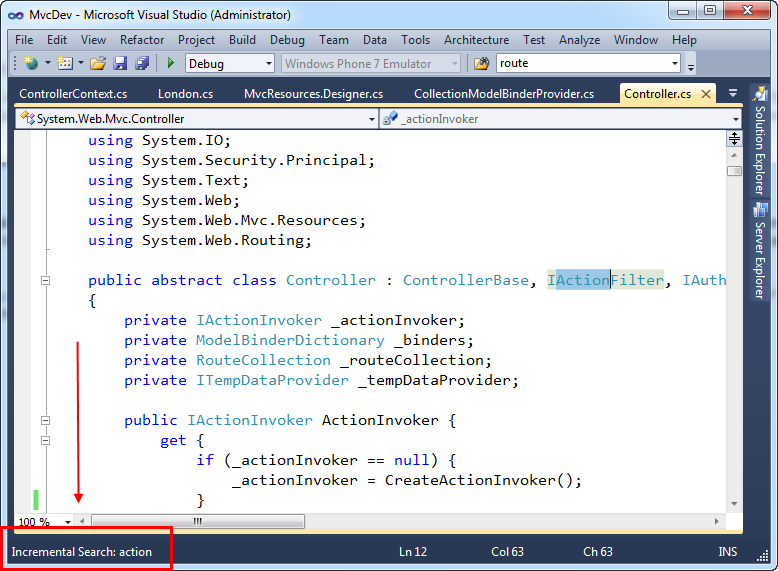
To enable incremental search, just type “Ctrl + i” within the editor. This will subtly change your cursor, and cause your status bar at the bottom left of the IDE to change to “Incremental search: (search term)” – you can then type the search term you are searching for and the editor will search for it from the current source location you are on (no dialog required).
Below we did an incremental search for the term “action” and VS highlighted the first usage it found within the file:
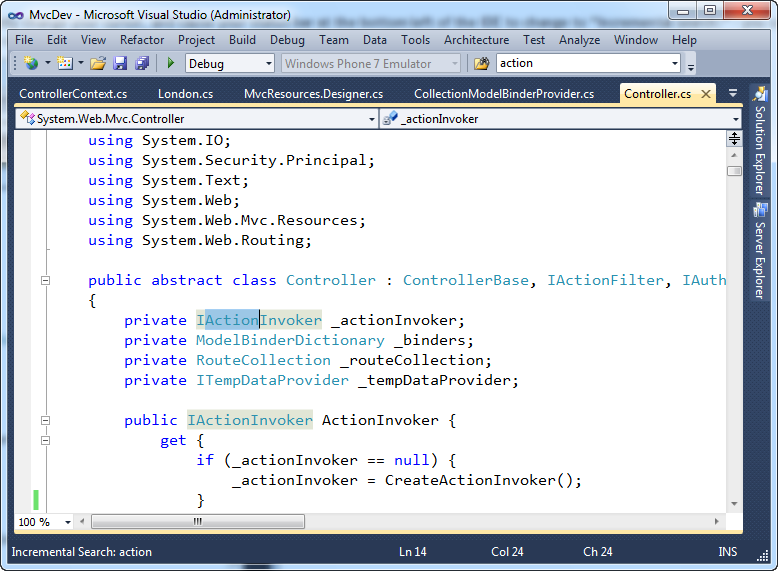
We can then press “Ctrl + i” again to find the next usage of the same term (and continue this repeatedly):
Pressing “Ctrl + Shift + i” will reverse direction on the search, and allow us to skip backwards.
You can press the “Esc” key at any point to escape out of incremental search. More details on incremental search can be found here.
F3 and Shift+F3 – Find Using Previous Search Term
One neat tip to know about incremental search is that after you press the ESC key to escape out of it, it will add the term you searched for to the find stack within the IDE. The search term you used will show up within the “find” drop-down within the VS "standard toolbar:
You can always press the F3 key within Visual Studio to repeat the last performed search at a later point. This is particularly useful for scenarios where you search for something, make a code change, and then want to continue from that point in the code. Just press F3 and you’ll repeat the last search (in this case “action”) from that new point in the document – no need to re-type it.
Pressing “Shift + F3” will do a reverse search (from the current cursor location in the editor) of the last search term used. You can easily toggle using F3/Shift+F3 to search forward and backwards within your document.
Ctrl + F3 – Find Using Current Selection
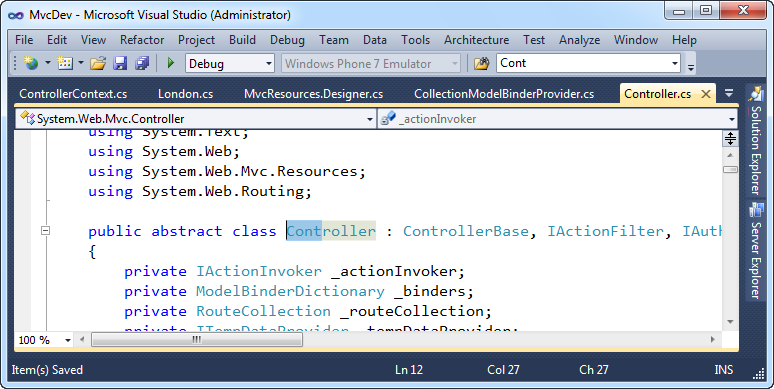
Another neat searching trick that you can use to avoid having to type your search term is to simply highlight a word (or part of a word) within the code editor, and then press “Ctrl + F3” to search for the next usage of it within the current file:
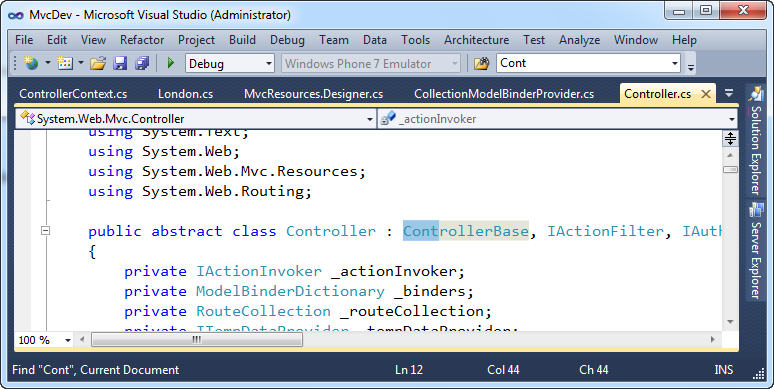
Pressing “Ctrl + F3” will search for the next instance of the text you have highlighted – allowing you to avoid having to type it:
Like before, you can use “Ctrl + Shift + F3” to perform a reverse search if you so choose, to search backwards within the document.
Ctrl + Shift + F – Find in Solution
Sometimes you want to search across your entire solution.
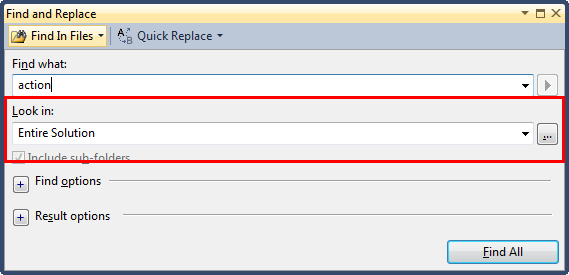
“Ctrl + F” will bring up the find dialog and default it to search within the current document. “Shift + Ctrl + F” will bring up the find dialog and default it to instead search across the entire solution:
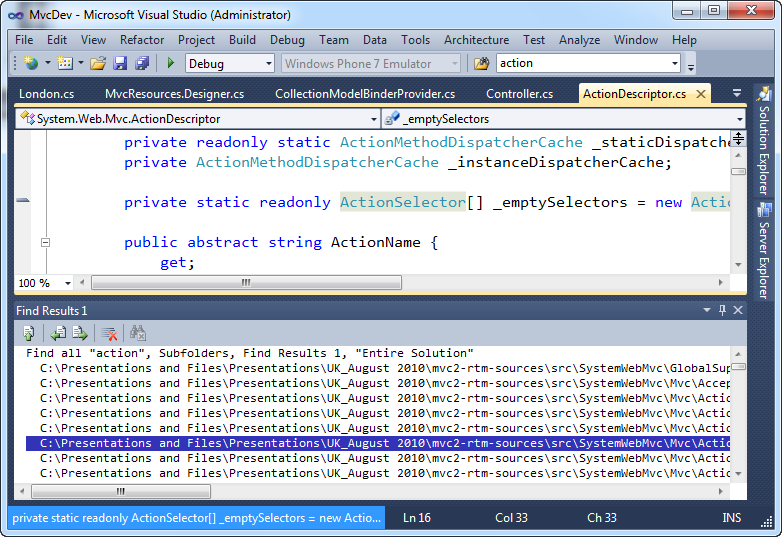
Doing a search like this will bring up the “Find Results” window within the IDE and allow you to navigate to each found instance of the term:
You can double-click each item in the “Find Results” window to navigate to that instance of the search term you searched for.
One tip a lot of people don’t know about is the ability to press “F8” or “Shift + F8” to navigate to the next/previous instance of that search term in the list. This can make navigating through them much faster/easier, and avoid you having to use the mouse.
Shift + F12 – Find Usages
Most developers using Visual Studio know how to highlight a type and press F12 to “go to definition”. This will bring up the definition of a class/type, and is a useful way to navigate to where it is defined.
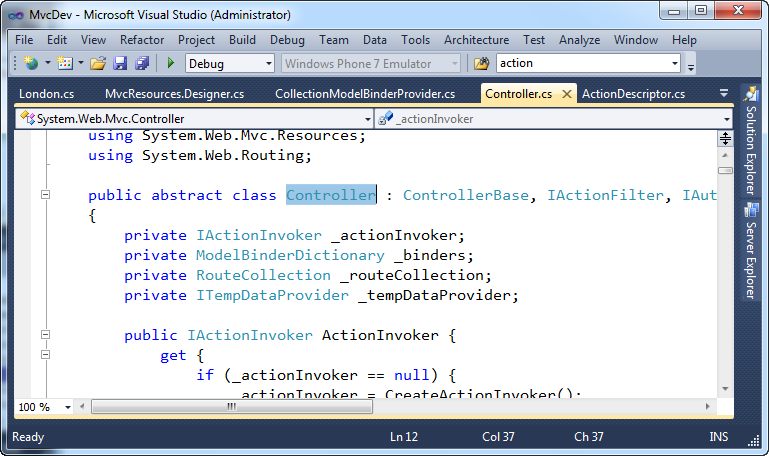
Many developers don’t know about “Shift + F12” – which brings up all usages of a particular type. This enables you to quickly see how a particular type is used. To take advantage of it, simply select or move the cursor onto a type and press “Shift + F12”:
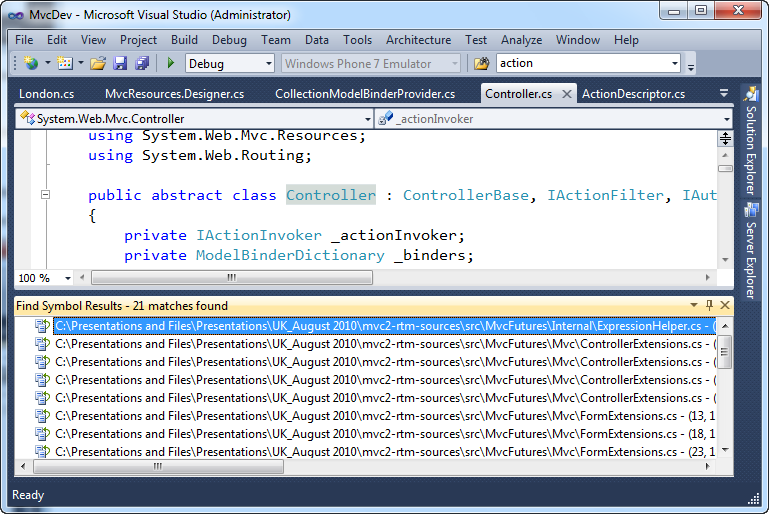
This will then bring up a “Find Symbol Results” window that list all usages of this type within the current solution:
Like with the previous tip, you can use “F8” and “Shift F8” to navigate forward/backward within each item within the list.
Ctrl + Minus and Shift + Ctrl + Minus – Navigate Backward/Forward
Have you ever navigated to a different code file, looked at something, and then wanted to navigate back to where you came from? For example, you use F12 to “go to definition” and then want to return back to the code that used it?
A feature that a lot of people don’t know about in VS is the “Navigate Backwards” keystroke – “Ctrl + (minus key)”. This will navigate to the previous document/location on the navigation stack.
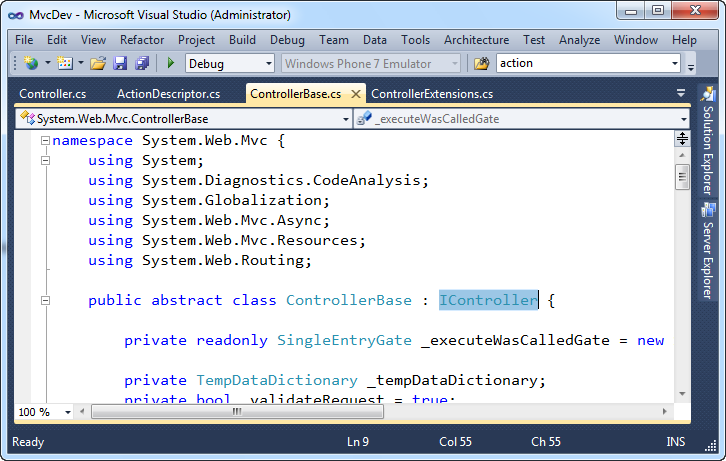
To see this in action, try selecting a type in Visual Studio. Below I’ve selected the “IController” interface:
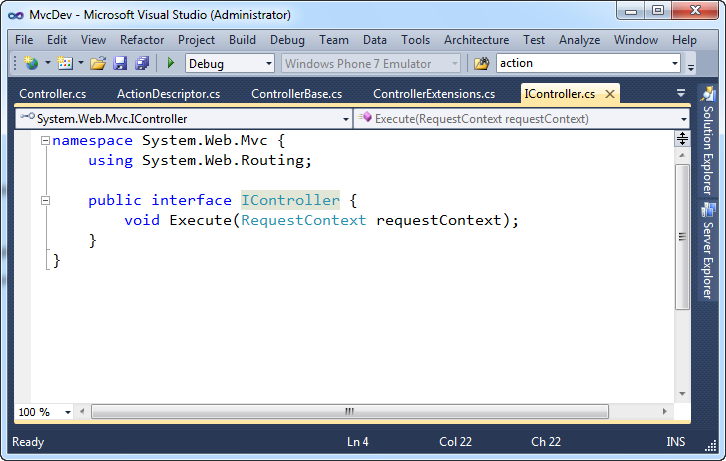
Press F12 to navigate to the definition of it. This opens up a new editor window with the source of the selected type:
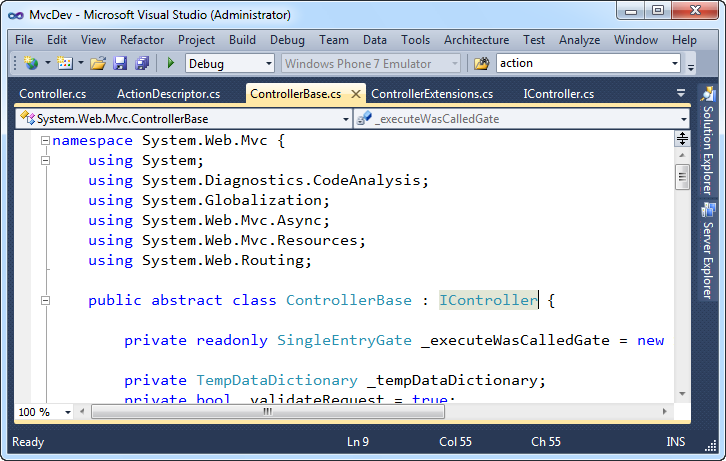
Now to jump back to where we came from, press “Ctrl + (minus key)” and VS will take us back to where we were:
If you want to move forward in the navigation stack (which in this case would take us back to the IController.cs file), then press the “Shift + Ctrl + (minus key)”.
Sara Ford has a good blog post that talks more about this feature, and explains the conditions when a new location is pushed onto the navigation stack.
Ctrl + Alt + (down arrow) – Navigate to an Open File
Ever have a ton of files open within the IDE, and want an easy way to navigate between them?
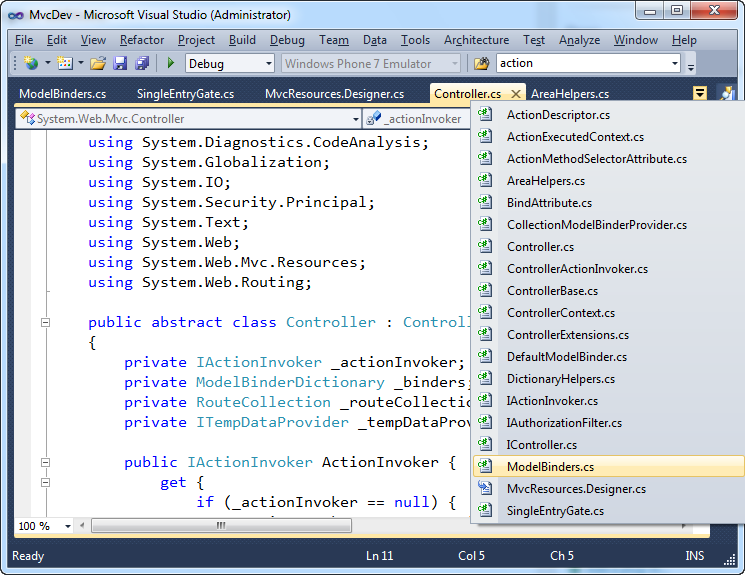
One useful key sequence you can use is “Ctrl + Alt + (down arrow)” – this will cause a drop-down to appear within VS that lists all open files within it:
You can use the arrow keys to select the file you want to navigate to – or better yet just start typing the file-name and Visual Studio will highlight it for you within the list. For example, above I typed “Mo” and Visual Studio highlighted “ModelBinder.cs”. Pressing the “enter” key will navigate me to that file:
This provides a nice, convenient, way to navigate between files without having to use the mouse or take your hands off the keyboard. And remember that “Ctrl + (minus)” can be used to navigate you back to where you came from.
Navigate To, View Call Hierarchy, and Highlight References Features
Visual Studio 2010 brings with it a bunch of new code navigation and searching features – including the new “Navigate To” dialog, “View Call Hierarchy” feature and Highlighted References Feature.
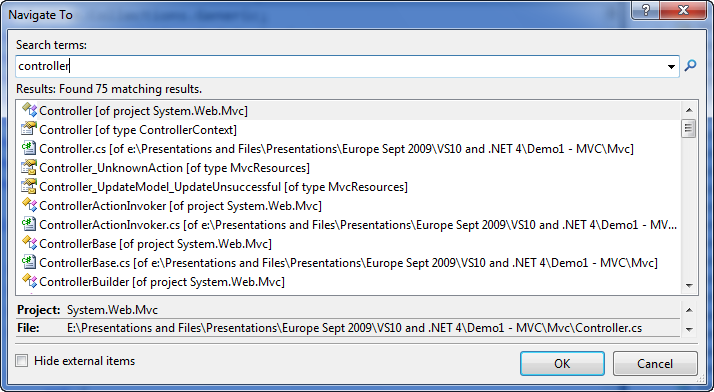
I previously blogged about these three new VS 2010 features here. If you haven’t already read this post and explored these capabilities, I highly recommend doing so – they are some great additions.
Other Editor Improvements
There are a ton of other code editor improvements in VS 2010 – many of them ones I’ve blogged about before. Here are links to a few of my previous VS 2010 editor blog posts:
- Improved C#/VB code Intellisense Support
- Improved JavaScript code Intellisense Support
- Box Selection and Multi-Line Editing Support
- ASP.NET, HTML and JavaScript Snippet Support
Also check out the other blog posts I’ve done in this VS 2010 and .NET 4 Improvements series.
Summary
Most of the above features have actually been in Visual Studio for several releases – but are ones that a surprising number of developers don’t know about. Hopefully this blog post helps provide a convenient way to get started with them if you didn’t already know they existed. If you need help remembering the keystrokes – print out a copy of the VS 2010 Keybindings Poster and keep it near your monitor.
To learn even more cool Visual Studio tips/tricks, subscribe to Scott Cate’s excellent Visual Studio Tips blog series (which is already up to 83 awesome tips and tricks). Also subscribe to Sara Ford’s blog – she has an awesome set of tips/tricks that go back years.
Hope this helps,
Scott
P.S. In addition to blogging, I am also now using Twitter for quick updates and to share links. Follow me at: twitter.com/scottgu
