by Rene Brauwers | May 30, 2011 | BizTalk Community Blogs via Syndication
So, finally we’ve reached the part in which we will actually install, configure and cluster BizTalk Server 2010. As mentioned in my previous posts; I assume you’ve followed all steps mentioned in the previous posts. Okay let’s get started!
Verify that MSDTC is configured
Before we can go ahead with the actual installation, we need to make sure that we’ve configured our MSDTC correctly. In order to do so we will need the following tool dtcping.exe, which can be downloaded here. Once you’ve downloaded dtcping, copy it over to all servers involved, in my case that would be
- SQL001
- SQL002
- BTS001
- BTS002
Time Saver Tip: Locally install dtcping.exe (it’s actually an self-extracting archive) and copy only the dtcping.exe application to your servers
Next we will start pinging all servers, and we will do this using the following matrix
| Main Server |
Partner DTC Server |
|
| BTS001 |
SQL001 |
Ensure that BizTalk node one is Active and SQL node one is Active |
| BTS001 |
SQL002 |
Ensure that BizTalk node one is Active and SQL node two is Active (perform a failover) |
| BTS002 |
SQL002 |
Ensure that BizTalk node two (perform a failover) is Active and SQL node one is Active |
| BTS002 |
SQL001 |
Ensure that BizTalk node one is Active and SQL node two is Active (perform a failover) |
BTS001 vs SQL001
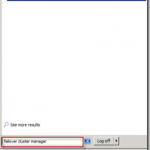
Logon to your main BizTalk node (in my case BTS001) and open the ‘Failover Cluster Manager’ do this by going to start and in the search box type ‘Failover Cluster Manager’ then hit ‘enter’
Ensure that your main BizTalk node is currently the owner
Now logon to your main SQL Server Node (in my case SQL001) and open the ‘Failover Cluster Manager’ do this by going to start and in the search box type ‘Failover Cluster Manager’ then hit ‘enter’
Ensure that your main BizTalk node is currently the owner Now go back to your main BizTalk Node (BTS001), and browse to the location in which you copied dtcping.exe and start it. The MSDTC Simulation screen will pop up, now enter the SQL Server Cluster Name in the box ‘Remote Server Name’, in my case that would be SQL2008.
Now go back to your main SQL Server Node (SQL001), and browse to the location in which you copied dtcping.exe and start it. The MSDTC Simulation screen will pop up, now enter the BTS Server Cluster Name in the box ‘Remote Server Name’, in my case that would be BTS2010.
Now go back to your main BizTalk Node (BTS001) and in the MSDTC Simulation windows. Click on the ‘PING’ button. Once you’ve clicked that button; ‘hurry’ over to your main SQL Server Node (SQL001) and in the MSDTC Simulation windows. Click on the ‘PING’ button. If everything goes right, you should see the following results in the MSDTC Simulation Window.
BTS001
Please refer to following log file for details:
C:UsersAdministrator.LABDownloadsBTS0013924.log
Invoking RPC method on SQL2008
RPC test is successful
++++++++++++RPC test completed+++++++++++++++
Please start PING from SQL2008 to complete the test
Please send following LOG to Microsoft for analysis:
Partner LOG: SQL0014040.log
My LOG: BTS0013924.log
++++++++++++Start Reverse Bind Test+++++++++++++
Received Bind call from SQL001
Trying Reverse Bind to SQL001
Reverse Binding success: BTS001–>SQL001
++++++++++++Reverse Bind Test ENDED++++++++++
++++++++++++Start DTC Binding Test +++++++++++++
Trying Bind to SQL001
Received reverse bind call from SQL001
Binding success: BTS001–>SQL001
++++++++++++DTC Binding Test END+++++++++++++
SQL001
++++++++++++Validating Remote Computer Name++++++++++++
Please refer to following log file for details:
C:UsersAdministrator.LABDownloadsSQL0014040.log
Please send following LOG to Microsoft for analysis:
Partner LOG: BTS0013924.log
My LOG: SQL0014040.log
Invoking RPC method on BTS2010
RPC test is successful
++++++++++++RPC test completed+++++++++++++++
++++++++++++Start DTC Binding Test +++++++++++++
Trying Bind to BTS001
Received reverse bind call from BTS001
Binding success: SQL001–>BTS001
++++++++++++DTC Binding Test END+++++++++++++
++++++++++++Start Reverse Bind Test+++++++++++++
Received Bind call from BTS001
Trying Reverse Bind to BTS001
Reverse Binding success: SQL001–>BTS001
++++++++++++Reverse Bind Test ENDED++++++++++
Please note; in case of an error.
- Ensure that MSDTC is configured correctly! (see previous blog posts)
- Ensure that your Firewall is turned of for your Domain Profile and Private Profile! (see previous blog posts)
Close both DTCPing applications once done.
Perform a manual Failover of the SQL Server
Logon to your main SQL Server node (in my case SQL001) and open the ‘Failover Cluster Manager’ do this by going to start and in the search box type ‘Failover Cluster Manager’ then hit ‘enter’ The Failover Cluster Manager windows will appear; in this window ‘right-click’ on your SQL Server Cluster Service and select ‘Move this service or application to another node’ –> ‘1 – Move to Node SQL002’
Confirm this action.
At this point you will failover your SQLCluster to your second node. Before continuing validate this, by checking the ‘Current Owner’
BTS001 vs SQL002
Now repeat the same steps as mentioned in the previous chapter BTS001 vs SQL001, the only difference now is; that you will start dtcping on your second SQL node (SQL002).
Perform a manual Failover of the BizTalk Server
Logon to your main BizTalk Server node (in my case BTS001) and open the ‘Failover Cluster Manager’ do this by going to start and in the search box type ‘Failover Cluster Manager’ then hit ‘enter’ The Failover Cluster Manager windows will appear; in this window ‘right-click’ on your BizTalk Server Cluster Service and select ‘Move this service or application to another node’ –> ‘1 – Move to Node BTS002’
Confirm this action.
At this point you will failover your BizTalk Cluster to your second node. Before continuing validate this, by checking the ‘Current Owner’
BTS002 vs SQL002
Now repeat the same steps as mentioned in the previous chapter BTS001 vs SQL001, the only difference now is; that you will start dtcping on your second BizTalk node, and your second SQL node (SQL002).
Perform a manual Failover of the SQL Server.
Logon to your main SQL Server node (in my case SQL001) and open the ‘Failover Cluster Manager’ do this by going to start and in the search box type ‘Failover Cluster Manager’ then hit ‘enter’ The Failover Cluster Manager windows will appear; in this window ‘right-click’ on your SQL Server Cluster Service and select ‘Move this service or application to another node’ –> ‘1 – Move to Node SQL001’. Confirm this change and validate that the SQL001 node is once again the ‘Current Owner’
BTS002 vs SQL001
Now repeat the same steps as mentioned in the previous chapter BTS001 vs SQL001, the only difference now is; that you will start dtcping on your second BizTalk node, and your main SQL node (SQL001).
Perform a manual Failover of the BizTalk Server
Logon to your main BizTalk Server node (in my case BTS001) and open the ‘Failover Cluster Manager’ do this by going to start and in the search box type ‘Failover Cluster Manager’ then hit ‘enter’ The Failover Cluster Manager windows will appear; in this window ‘right-click’ on your BizTalk Server Cluster Service and select ‘Move this service or application to another node’ –> ‘1 – Move to Node BTS001’. Confirm this change and validate that the BTS001 node is once again the ‘Current Owner’
Almost there!
Congratulations, at this point we have validated our MSDTC configuration and now we are almost ready for the actual BizTalk Installation.
Installing BizTalk
The steps mentioned below, need to be performed on both BizTalk servers, in my case BTS001 and BTS002
Time Saver Tip: You can install both servers simultaneously. However note that this can not be done when we are configuring BizTalk.
Prerequisites
Well before we can proceed with the installation we need to install 2 more pre-requisites if we want to install BAM and EDI functionality on our BizTalk servers as well. These prerequisites are:
- Microsoft SQL Server Data Transformation Services (DTS 2008) with SP1 or higher
- Microsoft Office Excel 2010
Installing Microsoft Office Excel 2010
Make sure that you’ve mounted your BizTalk Server 2010 Installation ISO file, this can be easily done from within the Hyper-V Manager. Simply ‘Right-Click’ on the BizTalk server in question and select ‘Settings’ Go to ‘IDE Controller 1’ and mount your media (see screenshot below)
Once you’ve mounted the Microsoft Office 2010 DVD, run the installer. On the ‘Choose the installation you want screen’ select ‘Customize’ Now only install Microsoft Excel, you’re screen should look similar to the following screenshot:
Once done select ‘Install Now’ and finally ‘Close’ the installation.
and select ‘New Installation or add features to an existing installation’
Installing Microsoft SQL Server Data Transformation Services (DTS 2008)
Well we’re almost done, but we need to install ‘Microsoft SQL Server Data Transformation Services (DTS 2008) with SP1 or higher, if we want to configure and use BAM functionality. So let’s do this now.
Make sure that you’ve mounted your BizTalk Server 2010 Installation ISO file, this can be easily done from within the Hyper-V Manager. Simply ‘Right-Click’ on the BizTalk server in question and select ‘Settings’
Go to ‘IDE Controller 1’ and mount your media (see screenshot below)
Once you’ve mounted the SQL Server 2008 R2 DVD, run the installer and select ‘New Installation or add features to an existing installation’
Follow the onscreen instructions. Once you reach the ‘Setup Role’ screen select ‘SQL Server Feature Installation’. Once done select ‘Next’
On the ‘Feature Selection’ screen ensure to check the following features
- Client Tools Connectivity
- Management Tools – Basic
- Management Tools – Complete
Click ‘next’ and follow the onscreen instructions.
BizTalk 2010
Now logon to one of the servers on which you want to install BizTalk, in my case I will start off with BTS001.
Make sure that you’ve mounted your BizTalk Server 2010 Installation ISO file, this can be easily done from within the Hyper-V Manager. Simply ‘Right-Click’ on the BizTalk server in question and select ‘Settings’ Go to ‘IDE Controller 1’ and mount your media (see screenshot below)
(Repeat these steps for your second BizTalk Server)
Start the installation, by running ‘Setup.exe’ from the BizTalk Installation DVD. An installation screen will appear, in this screen select ‘Install Microsoft BizTalk Server 2010’.
On the Customer Information Screen, enter the required information and press ‘next’
Accept the License agreement and press ‘Next’
Choose whether you want to participate in the ‘Customer Experience Improvement Program’ and press ‘Next’
On the ‘Component Installation’ screen, check all items you can and press ‘Next’
I was able to check all with exception of; Developer Tools and SDK, MQSeries Agent, Windows Sharepoint Services Adapter as I did not install the pre-requisites for them.
On the ‘Redistributable Prerequisites’ screen, select your preferred option. I’ve selected ‘Automatically install the redistributable prerequisites from a CAB file’ which I downloaded previously (click here) and press ‘Next’
On the ‘Summary Screen’ press ‘Install’
Installation will now start, during the installation you will be prompted for ‘Updates’, choose the preferred option and press ‘next’
Click finish to Quit the installation and ensure that the option ‘Launch BizTalk Server Configuration’ is not checked.
Installing Microsoft BizTalk Adapters
The steps mentioned below, need to be performed on both BizTalk servers, in my case BTS001 and BTS002 Continue the installation, by running ‘Setup.exe’ from the BizTalk Installation DVD. An installation screen will appear, in this screen select ‘Install Microsoft BizTalk Adapters’.
A new window will appear, select ‘Step 1: Install Microsoft WCF Lob Adapter SDK’ and follow the onscreen instructions.
When you reach the ‘Choose Setup Type’ screen, select ‘Complete’
Click on ‘Install’
Installation will now start, during the installation you will be prompted for ‘Updates’, choose the preferred option and press ‘Ok’
Click ‘Finish’
On the ‘Adapter Installation Window’, note the warning which can be ignored and select ‘Step 2: Install Microsoft BizTalk Adapter Pack’
Follow the onscreen instruction and once you reach the ‘Choose Setup Type’ screen, select ‘Complete’ .
Click on ‘Install’
Installation will now start, during the installation you will be prompted for ‘Updates’, choose the preferred option and press ‘Ok’
Another window will pop up, asking if you want to join ‘The Customer Experience Improvement Program’; select either option and press ‘ok’
Click on ‘Finish’
On the ‘Adapter Installation Window’, select ‘Step 3: Install Microsoft BizTalk Adapter Pack (x64)’ and follow the onscreen instructions. I will not list them again as they are similar to the previous instructions.
On the ‘Adapter Installation Window’, select ‘Step 4: Install Microsoft BizTalk Adapters for Enterprise Applications’ and follow the onscreen instructions. I will not list them again as they are similar to the previous instructions.(when asked for the Setup type; select ‘Complete’
During the installation of step 4, you might get a few warnings, indicating that an adapter was already installed. Just press ‘Ok’ and continue. At this point you installed all adapters, so press ‘Exit’
Note: We will not install the ‘Microsoft AppFabric Connect’ feature; in a later blog post however I might get back to this Before we can proceed with configuring BizTalk Server, we need to epeat the above mentioned steps on your other BizTalk Server node (my case BTS002)
Configuring BizTalk on the Main Node
Once you’ve installed BizTalk on both servers. Logon to your main BizTalk Node, and click on ‘Start’ –> ‘All Programs’ –> ‘Microsoft BizTalk Server 2010’ –> ‘BizTalk Server Configuration’
On the ‘Microsoft BizTalk Server 2010 Configuration’ screen, select ‘Custom Configuration’, fill out
- The Database server name (point it to your SQL Cluster!), in my case ‘SQL2008BIZTALK2010’
- Enter the username and password for the BizTalk Untrusted Service, in my case ‘LABsrvc-bts-untrusted’
Once done, press Configure.
Enterprise SSO Configuration
At this point the main configuration screen will appear. Select ‘Enterprise SSO’
Select ‘Enable Enterprise Single Sign-On on this computer’ and select ‘Create a new SSO System’
Now, add the correct Service Accounts and Windows Accounts; in my case:
- Enterprise Single Sign-On Service Account: LABsrvc-bts-sso
- SSO Administrator(s) group: LABSSO Administrators
- SSO Affiliate Administrator(s)
Note the warning: Ignore this warning, as it is most likely a ‘refreshing issue’ as it states that I am using a local SSO Administrator group, which I am not
Select ‘Enterprise Single Sign-On Secret Backup’
Enter the details and store the backup file on a Secure Place. I’ve used the Clustered Disk named’ ‘Data_Store’
Now Click on ‘Apply Configuration’
Verify the settings on the ‘Summary Screen’ and press ‘Next’
Click Finish
Group Configuration
Select ‘Group’
Check ‘Enable BizTalk Server Group on this Computer’ and select ‘Create a new BizTalk Group’
Now, add the correct BizTalk Administrative Roles; in my case:
- BizTalk Administrators Group: LABBizTalk Server Administrators
- BizTalk Operators Group: LABBizTalk Server Operators
- BizTalk B2B Operators Group: LABBizTalk Server B2B Operators
Now Click on ‘Apply Configuration’
Verify the settings on the ‘Summary Screen’ and press ‘Next’
Click Finish
BizTalk Runtime Configuration
Select ‘BizTalk Runtime’
Check ‘Register the BizTalk Server runtime components’
Check ‘Create In-Process Host and Instance’.
For Host Name enter: Processing_Host
Check ‘Create Isolated Host and Instance’ and check ‘Trusted’ right below it
For Isolated Host name enter: Isolated_Host
Ensure that both 32-bit only checkboxes are checked
Now, assign the correct Windows Services and Groups ; in my case:
- BizTalk Host Instance Account: LABsrvc-bts-untrusted
- Biztalk Isolated Host Instance Account: LABsrvc-bts-trusted
- Biztalk Host Users Group: LABBizTalk Applications Users
- Biztalk Isolated Host Users Group: LABBizTalk Isolated Host Users
Now Click on ‘Apply Configuration’
Verify the settings on the ‘Summary Screen’ and press ‘Next’
Click Finish
Business Rules Engine Configuration
Select ‘Business Rules Engine’
Check ‘Enable Business Rules Engine on this computer’
Now, add the correct Windows Service; in my case:
- Rule Engine Update Service : LABsrvc-bts-rule-engine
Now Click on ‘Apply Configuration’
Verify the settings on the ‘Summary Screen’ and press ‘Next’
Click Finish
BAM Tools Configuration
Select ‘Bam Tools’
Check ‘Enable Business Activity Monitoring tools’
Now, add the correct ‘Server Name (SQL Cluster); in my case: SQL2008BIZTALK2010
Now Click on ‘Apply Configuration’
Verify the settings on the ‘Summary Screen’ and press ‘Next’
Click Finish
BAM Alerts Configuration
We will skip these for now.
In a future post I might come back to these and configure it. However in case you need it installation is quite straight forward, you only need to make sure to install the pre-requisites
BAM Portal Configuration
Select ‘Bam Portal’
Check ‘Enable BAM Portal’
Now, add the correct Windows Service Accounts ; in my case:
- BAM Management Web Service user: LABsrvc-bts-bam
- BAM Application Pool Account: LABsrvc-bts-bam-ap
Next add the correct Windows Group; in my case:
BAM Portal Users: LABDomain Users
Finally select the BAM Portal Web site, in my case
Bam Portal Web Site: Default Web Site
Now Click on ‘Apply Configuration’
Verify the settings on the ‘Summary Screen’ and press ‘Next’
Click Finish
BizTalk EDI/AS2 Runtime Configuration
Select ‘BizTalk EDI/AS2 Runtime’
Check all options.
Now Click on ‘Apply Configuration’
Verify the settings on the ‘Summary Screen’ and press ‘Next’
Click Finish
Export the configuration
Now click on Export Configuration
Save it the file (I’ve saved it on a cluster disk)
Configuring BizTalk on the Second Node
Before we start with configuring BizTalk on the Second Node, we will first perform a failover of the BizTalk Cluster such that all resources are available to our second node. Logon to your second BizTalk Node (in my case BTS002) and open the ‘Failover Cluster Manager’ do this by going to start and in the search box type ‘Failover Cluster Manager’ then hit ‘enter’
Ensure that the main BizTalk node (BTS001) is the current owner
Now fail this cluster over, so that the second node becomes the owner. ‘Right-click’ on your BizTalk Server Cluster Service and select ‘Move this service or application to another node’ –> ‘1 – Move to Node BTS002’
Confirm this action
Verify once all resources are back online that current owner is the Second BizTalk Node (BTS002).
Now click click on ‘Start’ –> ‘All Programs’ –> ‘Microsoft BizTalk Server 2010’ –> ‘BizTalk Server Configuration’
On the ‘Microsoft BizTalk Server 2010 Configuration’ screen, select ‘Custom Configuration’, fill out
- The Database server name (point it to your SQL Cluster!), in my case ‘SQL2008BIZTALK2010’
- Enter the username and password for the BizTalk Untrusted Service, in my case ‘LABsrvc-bts-untrusted’
Once done, press Configure.
Enterprise SSO Configuration
At this point the main configuration screen will appear. Select ‘Enterprise SSO’
Select ‘Enable Enterprise Single Sign-On on this computer’ and select ‘Join an existing SSO system’
Now, verify that the configurations are correct (should point to the same database as mentioned in the previous chapter) and add the correct Service Accounts; in my case:
- Enterprise Single Sign-On Service Account: LABsrvc-bts-sso
Now Click on ‘Apply Configuration’, verify the settings on the ‘Summary Screen’ ,press ‘Next’ followed by ‘Finish’
Group Configuration
Select ‘Group’
Check ‘Enable BizTalk Server Group on this Computer’ and select ‘Join an existing BizTalk Group’ and verify that the configurations are correct (should point to the same databases as mentioned in the previous chapter)
Now Click on ‘Apply Configuration’, verify the settings on the ‘Summary Screen’ ,press ‘Next’ followed by ‘Finish’
BizTalk Runtime Configuration
Select ‘BizTalk Runtime’
Check ‘Register the BizTalk Server runtime components’
Check ‘Create In-Process Host and Instance’.
For Host Name enter: Processing_Host (ignore warning)
Check ‘Create Isolated Host and Instance’ and check ‘Trusted’ right below it
For Isolated Host name enter: Isolated_Host (Ignore the warning)
Ensure that both 32-bit only checkboxes are checked
Now, assign the correct Windows Services and Groups ; in my case:
- BizTalk Host Instance Account: LABsrvc-bts-untrusted
- Biztalk Isolated Host Instance Account: LABsrvc-bts-trusted
- Biztalk Host Users Group: LABBizTalk Applications Users
- Biztalk Isolated Host Users Group: LABBizTalk Isolated Host Users
Now Click on ‘Apply Configuration’, Verify the settings on the ‘Summary Screen’ ,press ‘Next’ and end with ‘Finish’
Business Rules Engine Configuration
Select ‘Business Rules Engine’
Check ‘Enable Business Rules Engine on this computer’ and verify that the configurations are correct (should point to the same databases and should use the correct account as mentioned in the previous chapter)
Now Click on ‘Apply Configuration’. Verify the settings on the ‘Summary Screen’ ,press ‘Next’ and end with ‘Finish’
BAM Tools Configuration
Select ‘Bam Tools’
Check ‘Enable Business Activity Monitoring tools’ and verify that the configurations are correct (should point to the same databases as mentioned in the previous chapter)
Now Click on ‘Apply Configuration’. Verify the settings on the ‘Summary Screen’ ,press ‘Next’ and end with ‘Finish’
BAM Alerts Configuration
We will skip these for now.
In a future post I might come back to these and configure it. However in case you need it installation is quite straight forward, you only need to make sure to install the pre-requisites
BAM Portal Configuration
Select ‘Bam Portal’
Check ‘Enable BAM Portal’
Now Click on ‘Apply Configuration’. Verify the settings on the ‘Summary Screen’ ,press ‘Next’ and end with ‘Finish’
BizTalk EDI/AS2 Runtime Configuration
Select ‘BizTalk EDI/AS2 Runtime’
Check ‘Enable BizTalk EDI/AS2 Runtime on this computer; (other options are greyed out).
Now Click on ‘Apply Configuration’. Verify the settings on the ‘Summary Screen’ ,press ‘Next’ and end with ‘Finish’
Export the configuration
Now click on Export Configuration
Save it the file (I’ve saved it on a cluster disk)
Failover Back to your main BizTalk Node
Open the ‘Failover Cluster Manager’ do this by going to start and in the search box type ‘Failover Cluster Manager’ then hit ‘enter’
Ensure that the main BizTalk node (BTS002) is the current owner
Now fail this cluster over, so that the second node becomes the owner. ‘Right-click’ on your BizTalk Server Cluster Service and select ‘Move this service or application to another node’ –> ‘1 – Move to Node BTS001’
Confirm this action
Verify once all resources are back online that current owner is the Main BizTalk Node (BTS001).
Setting Up BizTalk
We’ll now that we’ve installed and configured BizTalk it’s time to finish up our BizTalk Cluster.
Clustering our Single Sign On Service
Ensure you’re logged on to the BizTalk Server node which is currently the owner; in my case this is BTS002. Once logged open up one of the best editors in the world called notepad. In notepad copy and paste the following code
<sso>
<globalInfo>
<secretServer>SSOCLUSTER</secretServer>
</globalInfo>
</sso>
change the SSOCLUSTER value in the <secretServer> xml-tag to the name of your BizTalk Server Cluster. In my case this would be ‘BTS2010’
Save this file to disk (I saved it to c:tmp) and name it ‘SSO_Secret_Server.xml’
Once stored open up a command prompt do this by going to start and typing ‘CMD’ into the search box followed by hitting ‘Enter’
A command prompt box will open; At this command prompt, change to the Enterprise SSO installation folder. In my case I typed “c:Program FilesCommon FilesEnterprise Single Sign-On”
Now enter the following command ‘ssomanage –updatedb <SSO_Secret_Server.xml location> (my case ssomanage –updatedb “c:tmpSSO_Secret_Server.xml”) hit ‘enter’ and once done close the window.
Open the ‘Failover Cluster Manager’ do this by going to start and in the search box type ‘Failover Cluster Manager’ then hit ‘enter’
In the ‘Failover Cluster Manager’ right click on your BizTalk Cluster Service (in my case BTS2010) and select ‘Add a resource’ –> ‘4 – Generic Service’
On the ‘Select Service window’, select ‘Enterprise Single Sign On Service’ and press ‘Next’
On the ‘Confirmation’ screen press ‘Next’
On the ‘Summary’ screen press ‘Finish’
Now in the main pane; you will see that the ‘Enterprise Single Sign-On Service’ is added as a resource.
Right click on it and select ‘properties’
On the ‘General’ Tab; ensure to check ‘Use Network Name for computer name’
Confirm this action by click ‘Yes’
Click on ‘Ok’ on the ‘Information Screen’
Go to the ‘Dependencies’ Tab, add the following depended resources and once done press ‘apply’
- name (in my case BTS2010)
- dtc resource (in my case MSDTC-BTS2010)
Now start the SSO resource by right-clicking on it and selecting ‘Bring this resource online’
Once this resource is online, right click on the BizTalk Cluster Service and select ‘Move this service or application to another node’ –> ‘1 – Move to node BTS002’
Confirm the action
Now log on to the BizTalk node you just failed over to (in my base BTS002). On that server open a command prompt do this by going to start and typing ‘CMD’ into the search box followed by hitting ‘Enter’
A command prompt box will open; At this command prompt, change to the Enterprise SSO installation folder. In my case I typed “c:Program FilesCommon FilesEnterprise Single Sign-On”
Now enter the following command ‘ssoconfig –restoresecret <RestoreFile (Backup of your SSO Secret you saved earlier)> (my case ssoconfig –restoresecret “f:SSO SecretSSO7884.bak”)
Hit enter,and enter the Secret Password and hit enter
You should see the following message
In case you receive an adapter, ensure that you followed all steps as mentioned above!
Modify the BizTalk Application Configuration
In order to optimize the throughput with regards to HTTP based send ports, we need to add a configuration section to both our BTSNTSvc.exe.config and BTSNTSvc64.exe.config files which can be found in the installation directory if BizTalk. (in my case “C:Program Files (x86)Microsoft BizTalk Server 2010”) So open-up windows explorer and browse to your BizTalk installation directory and upon BTSNTSvc.exe.config by right clicking it and selecting ‘open with…’ –> ‘notepad’ (if notepad is not visible, select ‘Choose default program… and select then notepad’)
Now add the following code section just above the </configuration> closing tag and save the file.
<system.net>
<connectionManagement>
<add address="*" maxconnection="25" />
</connectionManagement>
</system.net>
Once done, your file should look something like this:
One of the standard settings which come with a BizTalk Installation is the setting which indicated the maximum connections allowed for HTTP based send adapters. This setting is by default set to Now repeat this step for the BTSNTSvc64.exe.config Once done, log on to your other BizTalk server and repeat the above mentioned steps.
Adding BizTalk Hosts
At this point we are ready to finally open up the BizTalk Administrator and finish our BizTalk Cluster So let’s get Started. First of all log on to your active BizTalk Node and open the BizTalk Administrator Console. You can find it by going to ‘Start’ –> ‘All Programs’ –> ‘Microsoft BizTalk Server 2010’ and clicking on ‘BizTalk Server Administrator’
In the BizTalk Server Administration Console, expand the ‘BizTalk Server Node’, expand ‘BizTalk Group’, expand ‘Platform Settings’ and select ‘Hosts’
In the main pane, you should now see two Hosts (these hosts have been created while we configured BizTalk earlier on).
We now will add a few more hosts, beings
- Send_Host
- Receive_Host
- Tracking_Host
- Legacy_Host
- x64_Host
Adding a new host is quite simple; just right-click on the main pane and select ‘New’ –> ‘Host’
On the Host Properties screen, change/add the following properties. Once done click on ‘Ok
Name: Send_Host Type: In_Process Options: 32-bit only Track Windows group: <add your BizTalk Application Users Group>
On the Host Properties screen, change/add the following properties. Once done click on ‘Apply’
Name: Receive_Host Type: In_Process Options: 32-bit only Windows group: <add your BizTalk Application Users Group>
On the Host Properties screen, change/add the following properties. Once done click on ‘Ok’
Name: Tracking_Host Type: In_Process Options: 32-bit only and Check Allow Host Tracking Windows group: <add your BizTalk Application Users Group>
On the Host Properties screen, change/add the following properties. Once done click on ‘Ok’
Name: Legacy_Host Type: In_Process Options: 32-bit only Windows group: <add your BizTalk Application Users Group>
On the Host Properties screen, change/add the following properties. Once done click on ‘Ok’
Name: x64_Host Type: In_Process Options: 32-bit only DO NOT CHECK! Windows group: <add your BizTalk Application Users Group>
Now double click on the ‘Processing Host’ and remove the check in front of ‘Allow Host Tracking’ and click ok.
A warning pops up indicating that a restart is required of the associated host instances, press ‘Ok’.
Adding BizTalk Host-Instances
First of all log on to your active BizTalk Node and open the BizTalk Administrator Console. You can find it by going to ‘Start’ –> ‘All Programs’ –> ‘Microsoft BizTalk Server 2010’ and clicking on ‘BizTalk Server Administrator’
In the BizTalk Server Administration Console, expand the ‘BizTalk Server Node’, expand ‘BizTalk Group’, expand ‘Platform Settings’ and select ‘Host Instances’
You should see, four host-instances; and you should notice that we have 2 exactly the same host instances on both BizTalk Server instances.
Adding a new host instance is quite simple; just right-click on the main pane and select ‘New’ –> ‘Host Instance’
On the Host Instance Properties screen, select the following:
Host Name: Legacy_Host Server: BTS001
Now click on ‘Configure’
On the ‘Logon Credentials’ screens enter the details of the windows service account you want this host instance to execute with (the Untrusted BizTalk Service Account in AD), in my case this will be LABsrcv-bts-untrusted. Once done press ‘OK’ and once more ‘OK’
Now repeat the above steps, but this time on the ‘Host Instance Properties’ screen select ‘BTS002’ for the server propery
Note: Don’t forgot to hit configure and enter the service credentials
Repeat the above mentioned steps for the remaining other hosts, being:
- Tracking_Host
- Send_Host
- Receive_Host
- x64_Host
Once done, your main pane should look similar to the image below
Adding the correct Host Instances to the Adapters
First of all log on to your active BizTalk Node and open the BizTalk Administrator Console. You can find it by going to ‘Start’ –> ‘All Programs’ –> ‘Microsoft BizTalk Server 2010’ and clicking on ‘BizTalk Server Administrator’
In the BizTalk Server Administration Console, expand the ‘BizTalk Server Node’, expand ‘BizTalk Group’, expand ‘Platform Settings’ and expand the ‘Adapters’ node
Click on the ‘File’ Adapter, and then right-click in the main-pane and select ‘New’ –> ‘Send Handler’
On the ‘File – Adapter Handler Properties’ For Host name select Send_Host and ensure to check ‘Make this the default Handler’. Once done press ‘Ok’
A warning will pop-up, just read it and click “ok”
Right-click in the main-pane once more and select ‘New’ –> ‘Receive Handler’
On the ‘File – Adapter Handler Properties’ For Host name select ‘Recieve_Host’. Once done press ‘Ok’
A warning will pop-up, just read it and click “ok”
In the main-pane right click on ‘Processing_Host’ for the direction ‘Send’ and select ‘Delete’
Confirm the ‘Deletion’ by selecting ‘Yes’
Note the ‘warning’ and press ‘Ok’
In the main-pane right click on ‘Processing_Host’ for the direction ‘Receive’ and select ‘Delete’
Confirm the ‘Deletion’ by selecting ‘Yes’
Note the ‘warning’ and press ‘Ok’
Now repeat the above steps for the following adapters, but note the host_names as listed below
| Adapter |
Send Host Name |
Receive Host Name |
Remarks |
| FTP |
Legacy_Host (make default) |
Legacy_Host |
Delete Processing_Host entries |
| HTTP |
Send_Host (make default) |
No change |
Delete Processing_Host entries |
| MQSeries |
Send_Host (make default) |
Receive_Host |
Delete Processing_Host entries |
| MSMQ |
Send_Host (make default) |
Receive_Host |
Delete Processing_Host entries |
| POP3 |
Not Applicable |
Legacy_Host |
Delete Processing_Host entries |
| SMTP |
Legacy_Host (make default) |
Not Applicable |
Delete Processing_Host entries |
| SOAP |
Legacy_Host (make default) |
No Change |
Delete Processing_Host entries |
| SQL |
|
|
Can’t delete Receive Processing_Host entries as they are used (see note below) |
| WCF-BasicHTTP |
Send_Host (make default) |
No Change |
Delete Processing_Host entries |
| WCF-Custom |
Send_Host (make default) |
Receive_Host |
Delete Processing_Host entries |
| WCF-CustomIsolated |
Not Applicable |
No Change |
|
| WCF-NetMsmq |
Send_Host (make default) |
Receive_Host |
Delete Processing_Host entries |
| WCF-NetNamedPipe |
Send_Host (make default) |
Receive_Host |
Delete Processing_Host entries |
| WCF-NetTcp |
Send_Host (make default) |
Receive_Host |
Delete Processing_Host entries |
| WCF-WSHttp |
Send_Host (make default) |
No Change |
Delete Processing_Host entries |
| Windows SharePoint Services |
Send_Host (make default) |
No Change |
Delete Processing_Host entries |
Note: In order to delete the Receive Processing_Host, we first need to change the binding of the receive locations of the ‘Biztalk EDI Application’, in order to do so. Click on ‘Applications’ –> <All Artifacts>’ –> and select ‘Receive Locations’.
Perform the following actions for all receive locations visible in the main pane Double click receive-location and change the Receive handler to: Receive_Host and click ‘Ok’
Now go back to the SQL Adapter and delete the ‘Processing Host’
Clustering BizTalk Server Hosts
At this point we are almost done with our tasks in the BizTalk Server Administration Console. The one thing which we now need to do is actually cluster the hosts. In the BizTalk Administration Console, click on the Hosts node
Perform the following actions for all hosts, with exception of the Isolated_Host Right Click on a host and select ‘Cluster’
Select the Cluster Resource Group to use, in my case ‘BTS2010’
Select ‘Ok’ Once you’re done; you should see the that the ‘Clustered’ Column says yes for all hosts except for the ‘Isolated Host’ as out Isolated Host can not be clustered (but we’ve taken care of this in a previous step when we’ve clustered IIS )
At this point we are almost done, we only need to verify everything in our Cluster Failover Manager and add some dependencies.
Verifying our BizTalk Cluster Resources and adding dependencies
At this point we are almost done, we only need to verify everything in our Cluster Failover Manager and some dependencies to the just clustered hosts Open the ‘Failover Cluster Manager’ do this by going to start and in the search box type ‘Failover Cluster Manager’ then hit ‘enter’
In the Failover Cluster Manager, select your BizTalk Cluster Service and notice all the BTSSvc$…. resources added
Well, for all these resources we will add a few dependencies. So let’s get started. ‘Right Click’ on the first BTSSvc$… resource and select ‘properties’
On the properties screen select the ‘Dependencies’ Tab and add the following dependencies and once done click ‘Ok’
- MSDTC (in my case ‘MSDTC-BTS2010’)
- Enterprise Single Sign-On Service
Repeat the above mentioned step, for all other BTSSvc$… resources.
Closing note
Congratulations, at this point you’ve created a complete BizTalk High Availability Environment. Well it took some time and effort, but hey you accomplished it 🙂 and that at least deserves a congratulation. So what’s up next you might be wondering, well most likely I won’t be posting a new article pretty soon as I am currently involved in reviewing one of the upcoming BizTalk 2010 books and this takes up more time than I initially expected 🙂 But hey, isn’t that with all the things we ‘developers’ do 😉 Anyway, if you have any suggestions on future article with regards to BizTalk, Programming in general or anything else; well just drop me a note [email protected] or try to contact me on Twitter (ReneBrauwers). Well it has been a pleasure and it took me quite some time (avg 10hrs per post) to put all these posts together so I really hope that one of these posts or all have or can help you in anyway. If you have any questions or feedback please feel free to leave a comment and I’ll try to address them. So until the next time and don’t forget to check back regularly for new posts (or even better just follow me in Twitter as I’ll tweet whenever there is a new blogpost 🙂 Cheers René
by Rene Brauwers | May 13, 2011 | BizTalk Community Blogs via Syndication
Part 5 covered setting up our SQL-Server Cluster, so now it’s time to do the same but this time for our BizTalk 2010 Server environment.
Once again this post assumes you’ve followed all steps mentioned in the previous posts. All right let’s get on with it
Please note the following with regards to MSMQ: http://technet.microsoft.com/en-us/library/cc730960.aspx
In case you’ve already installed the MSMQ feature as instructed in part 4, please uninstall the MSMQ feature and then apply the AD modifications as mentioned here: http://technet.microsoft.com/en-us/library/cc730960.aspx . . Once done, add the MSMQ feature again as mentioned in part 4. Sorry for the inconvenience, but this part was unintended left out in the original part 4 (The current version of Part 4 has been updated)
Preparing our BizTalk Cluster
Before we can actually start with Clustering BizTalk Server, we need to perform all kinds of other things, like:
- Verifying if all required Roles and Features have been installed
- Verifying that we’ve configured the Firewall properly
- Configure IIS
- Configure the local Microsoft Distributed Transaction Coordinator
- Add Storage using iSCSI
Once these steps are done, we will create our BizTalk Cluster Group.
Verifying the required Server Roles and Features
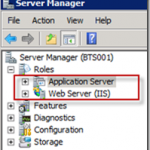
Logon to your first server on which BizTalk will be installed, in my case that would be BTS001. Once logged on; open the ‘server manager’ and expand the Roles node and ensure you’ve added the following roles:
- Application Server
- Web Server (IIS)
Now select ‘Application Server’ and in the main pane in the Server Manager scroll down to the Role Services. In total you should see that 13 role services are installed.
if you’re missing any of the role-services mentioned above, add them by clicking on the ‘Add Role Services’
Once double-checked, select the ‘Web Server (IIS) role and in the main pane in the Server Manager scroll down to the Role Services. In total you should see that 36 role services are installed
if you’re missing any of the role-services mentioned above, add them by clicking on the ‘Add Role Services’
Once verified, expand the Features node in the Server Manager and select ‘features’. Ensure that you have the features as mentioned below in the image installed.
if you’re missing any of the features as mentioned above, add them by clicking on the ‘Add Features’
Verifying that we’ve configured the Firewall properly
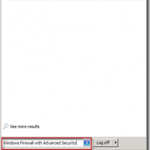
Open up the windows firewall, by going to Start and in the search box simple type: ‘Windows Firewall with Advanced Security’ followed by hitting ‘enter’
Within the MMC-Snap in, click on ‘Windows Firewall Properties’
A window will appear. Go to the first tab named ‘Domain Profile’ and ensure the firewall state is set to ‘Off’. If not turn it ‘Off’
Go to the second tab named ‘Private Profile’ and ensure the firewall state is set to ‘Off’. If not turn it ‘Off’
Configuring IIS
Go back to the Server manager, expand Roles –> Web Server (IIS) and select the ‘Internet Information Services (IIS) Manager’
The Internet Information Services (IIS) Manager will appear in the main pain. Expand the Server Node and select Application Pools.
In the Actions pane, click on the ‘Set Application Pool Defaults…’
Change the following settings and once done click on ‘ok’:
- Net Framework Version: v4.0 (if this version is not available; stop your horses and go fetch the .Net 4.0 Framework here)
- Enable 32-Bit Applications: True
In the actions, select ‘Add Application Pool…’
Now we will add an application pool, which will be dedicated to BizTalk. In order to do so, enter a descriptive name (I’ve used BizTalkApplicationPool). Once done click on ‘ok’
In the main pane, right click on the newly created Application Pool and select ‘Advanced Settings’
Select the ‘Identity item’, and click on the ‘…’
Select ‘Custom Account’ and click on the ‘Set…’ button.
Fill out the details and use trusted BizTalk Service account you’ve set up earlier in Active Directory (in my case ‘[email protected]’) Once done, click ‘ok’, and once more ‘ok’.
Your screen should look similar to the picture shown below. Once verified, click ‘ok’
Configure the local Microsoft Distributed Transaction Coordinator
go to start and type into the search box ‘Component Services’ and hit enter.
the Component Services MMC snap in will open; now extend the ‘Component Service’ node, do the same for the node ‘Computers’ and ‘My Computer’
Expand the ‘Distributed Transaction Coordinator’ , right click on ‘local DTC’ and select ‘properties’
Within the Properties window go the the ‘Security Tab’
On this tab, check (enable) the following item:
- Network DTC Access
- Allow Inbound
- Allow Outbound
- No Authentication Required
- Enable XA Transactions
- Enable SNA LU 6.2 Transactions
Click on ‘Ok, a message box will appear stating that the MSDTC service needs to be stopped and started. Click on Yes
Close the Component Services Snap in.
Add Storage which will be used within our BizTalk Cluster.
First verify that we’ve set-up our link with our Fileserver. Do this by clicking on Start and in the search box type ‘iSCSI Initiator’ and hit ‘enter’ (a pop-up might appear, just click ‘ok’)
In the ‘iSCSI Initiator Properties’ screen, go to the ‘Discovery’ tab and click on ‘Discover Portal…’
Type in the DNS name of your File Server (in my case that is ‘EUROPOORT’) and press ‘ok’
Now click on the ‘Targets’ tab and checking the status
The status should say ‘Inactive’, in order to use this Target we have to Connect to it. Do so by Clicking on the ‘Connect’ button.
A popup will appear, check the setting and press ‘ok’
You should now be connected to the File Server. Once verified, press ‘ok’
Go back to your ‘Server Manager’, expand the ‘Storage’ node and select ‘Disk Management’
At this point you should notice several disks which are not online.
If they are ‘offline’ bring them ‘online’ by right clicking on a disk and selecting ‘Online’ (repeat this step for all offline disks)
You now should have the availability of your additional storage devices.
Once done, repeat all the steps mentioned above starting with ‘Verifying the required Server Roles and Features’ on your other BizTalk server (in my case this would be BTS002)
Creating our BizTalk Cluster Group
Well at this point we are still not quite ready to install BizTalk and to Cluster BizTalk. Before we can actually start with this, we need to perform the following actions:
- Verify our Cluster
- Create our BizTalk Cluster group
- Cluster IIS and add it to our BizTalk Cluster group
- Cluster MSDTC and add it our BizTalk Cluster group
- Cluster MSMQ and add it to our BizTalk Cluster group
Once these steps are done, we will install Biztalk, configure BizTalk and last but not least Cluster BizTalk.
Verify our Cluster
Log on to your ‘Master’ Server on which you want to install BizTalk. In my case that would be BTS001.
Go to start and in the search box type ‘Failover Cluster Manager’ and then hit ‘enter’
In your Failover Cluster Manager, first click on ‘Validate a configuration’
On the ‘Before you begin’ screen, press ‘next’
Now Enter the server names (or browse) which you want to be part of your cluster. In my case that would be ‘BTS001 and BTS002’ and then select ‘Next’
on the ‘Testing Options’ screen, select the ‘Run all tests’ option and select ‘next’
Confirm the settings and then select ‘Next’
Once the validation has completed, it should show a summary which should not include any warnings. Examine the report (View Report) click on Finish.
Create our BizTalk Cluster group
From within your ‘Failover Cluster Manager’ select the ‘Create a Cluster’ link
On the ‘Before you begin’ screen, press ‘next’
Now Enter the server names (or browse) which you want to be part of your cluster. In my case that would be ‘BTS001 and BTS002’ and then select ‘Next’
On the ‘Access Point for Administering the Cluster’ enter a Cluster name, and a designated IP Address and click ‘next’ once done.
I’ve used the following:
Cluster Name: CLUSTER_BIZTALK
IP Address: 192.168.8.32
Confirm your settings and then click ‘next’
On the ‘Summary’ screen, press ‘Finish’
Configure Cluster Quorum Settings
Open up the ‘Cluster Manager’, right click on your cluster node (my case: CLUSTER_BIZTALK ) and select ‘More Actions’ –> ‘Configure Cluster Quorum Setting’
On the ‘Select Quorum Configuration’ screen, select the option ‘Node and File Share Majority’ and press ‘Next’
On the ‘Configure File Share Witness’ screen, browse to your Shared ‘Wittness’ Folder which you’ve created earlier (see previous part). In my case I’ve selected the folder ‘Majority_BTS’ on the EUROPOORT server. Once done press ‘Ok’ and then ‘Next’
Conform the settings and press ‘next’
On the ‘Summary’ screen, press ‘Finish’
Add storage as a disk resource in your Cluster
Open up the ‘Cluster Manager’, expend the CLUSTER_BIZTALK node and right click on Storage and select ‘Add a disk’
A list of available disks will appear, ensure that they are all selected and press ‘ok’
Now for each disk add a logical name, this is done by right clicking on a disk and selecting ‘properties’
Change the Resource Name to a logical Name; I’ve set it up as follow
Cluster_Disk 1 – DTC_STORE
Cluster_Disk 2 – MSMQ_STORE
Cluster_Disk 3 – FILE_STORE
Create our BizTalk Cluster Resource
Go back to the ‘Failover Cluster Manager’ and expand your created Cluster (my case: CLUSTER_BIZTALK) and right click on ‘Services and Applications’ and select ‘Configure a Service or Application…’
On the ‘Select Service or Application’ screen, select ‘Other Server’ and then press ‘next’
On the ‘Client Access Point’ screen, fill out the actual name of your BizTalk Cluster Name and assign it an IP and once done press ‘Next’. I’ve used the following settings:
Name: BTS2010
IP: 192.168.8.33
On the ‘Select Storage’ screen, add the required DATA Stores and press ‘Next’
On the ‘Confirmation’ screen, review the settings and press ‘Next’
On the ‘Summary’ screen, press ‘Finish’
In the ‘Failover Cluster Manager’ right-click your newly created ‘BizTalk Cluster Resource’ and select ‘properties’
On the ‘Properties’ screen, ensure to Check your main server as being the ‘Preferred owner’; in my case this is BTS001. Once done click ‘ok’.
Cluster IIS and add it to our BizTalk Cluster Resource
At this point we’ve created our BizTalk Cluster Group and BizTalk Cluster Resource. The later one will actually host all services required for our BizTalk Failover Cluster.
Now it is time to add those cluster resources which are required in our BizTalk Failover Cluster.
The first cluster resource we will add to our BizTalk Cluster Group will be the IIS. As we are not using a NLB, we have to perform a few tricks which enable us at least to Cluster out to use BizTalk Web Application and our BizTalk Application Pool. The next steps will explain how to achieve this.
Adding HTTP Response Header
Go back to the Server manager, expand Roles –> Web Server (IIS) and select the ‘Internet Information Services (IIS) Manager’
The Internet Information Services (IIS) Manager will appear in the main pain. Expand the Server Node and select the ‘Server Name’ (in my case BTS001)
In the main pane, go to the IIS Section and double click on ‘HTTP Response Headers’
In the actions pane, click on ‘Add..’
The ‘Add Custom HTTP Response Header’ windows will appear. In this window we will add a custom header which will ensure that all trafic redirected to our BizTalk Cluster Group will point to the Localhost. In my case I filled out the following information. Once done press ok.
Name: BTS2010
Value: http://localhost
Now go to your second server (in my case BTS002) and perform the above mentioned step ‘Adding HTTP Response Header’. Once done; return to your main server (BTS001)
Create a Generic-Script resource for IIS Clustering
On your main server (BTS001), open your nest friend ‘Notepad’ and copy and paste the following code to it:
'<begin script sample>
'This script provides high availability for IIS websites
'By default, it monitors the "Default Web Site" and "DefaultAppPool"
'To monitor another web site, change the SITE_NAME below
'To monitor another application pool, change the APP_POOL_NAME below
'More thorough and application-specific health monitoring logic can be added to the script if needed
Option Explicit
DIM SITE_NAME
DIM APP_POOL_NAME
Dim START_WEB_SITE
Dim START_APP_POOL
Dim SITES_SECTION_NAME
Dim APPLICATION_POOLS_SECTION_NAME
Dim CONFIG_APPHOST_ROOT
Dim STOP_WEB_SITE
'Note:
'Replace this with the site and application pool you want to configure high availability for
'Make sure that the same web site and application pool in the script exist on all cluster nodes. Note that the names are case-sensitive.
SITE_NAME = "Default Web Site"
APP_POOL_NAME = "DefaultAppPool"
START_WEB_SITE = 0
START_APP_POOL = 0
STOP_WEB_SITE = 1
SITES_SECTION_NAME = "system.applicationHost/sites"
APPLICATION_POOLS_SECTION_NAME = "system.applicationHost/applicationPools"
CONFIG_APPHOST_ROOT = "MACHINE/WEBROOT/APPHOST"
'Helper script functions
'Find the index of the website on this node
Function FindSiteIndex(collection, siteName)
Dim i
FindSiteIndex = -1
For i = 0 To (CInt(collection.Count) - 1)
If collection.Item(i).GetPropertyByName("name").Value = siteName Then
FindSiteIndex = i
Exit For
End If
Next
End Function
'Find the index of the application pool on this node
Function FindAppPoolIndex(collection, appPoolName)
Dim i
FindAppPoolIndex = -1
For i = 0 To (CInt(collection.Count) - 1)
If collection.Item(i).GetPropertyByName("name").Value = appPoolName Then
FindAppPoolIndex = i
Exit For
End If
Next
End Function
'Get the state of the website
Function GetWebSiteState(adminManager, siteName)
Dim sitesSection, sitesSectionCollection, siteSection, index, siteMethods, startMethod, executeMethod
Set sitesSection = adminManager.GetAdminSection(SITES_SECTION_NAME, CONFIG_APPHOST_ROOT)
Set sitesSectionCollection = sitesSection.Collection
index = FindSiteIndex(sitesSectionCollection, siteName)
If index = -1 Then
GetWebSiteState = -1
End If
Set siteSection = sitesSectionCollection(index)
GetWebSiteState = siteSection.GetPropertyByName("state").Value
End Function
'Get the state of the ApplicationPool
Function GetAppPoolState(adminManager, appPool)
Dim configSection, index, appPoolState
set configSection = adminManager.GetAdminSection(APPLICATION_POOLS_SECTION_NAME, CONFIG_APPHOST_ROOT)
index = FindAppPoolIndex(configSection.Collection, appPool)
If index = -1 Then
GetAppPoolState = -1
End If
GetAppPoolState = configSection.Collection.Item(index).GetPropertyByName("state").Value
End Function
'Start the w3svc service on this node
Function StartW3SVC()
Dim objWmiProvider
Dim objService
Dim strServiceState
Dim response
'Check to see if the service is running
set objWmiProvider = GetObject("winmgmts:/root/cimv2")
set objService = objWmiProvider.get("win32_service='w3svc'")
strServiceState = objService.state
If ucase(strServiceState) = "RUNNING" Then
StartW3SVC = True
Else
'If the service is not running, try to start it
response = objService.StartService()
'response = 0 or 10 indicates that the request to start was accepted
If ( response <> 0 ) and ( response <> 10 ) Then
StartW3SVC = False
Else
StartW3SVC = True
End If
End If
End Function
'Start the application pool for the website
Function StartAppPool()
Dim ahwriter, appPoolsSection, appPoolsCollection, index, appPool, appPoolMethods, startMethod, callStartMethod
Set ahwriter = CreateObject("Microsoft.ApplicationHost.WritableAdminManager")
Set appPoolsSection = ahwriter.GetAdminSection(APPLICATION_POOLS_SECTION_NAME, CONFIG_APPHOST_ROOT)
Set appPoolsCollection = appPoolsSection.Collection
index = FindAppPoolIndex(appPoolsCollection, APP_POOL_NAME)
Set appPool = appPoolsCollection.Item(index)
'See if it is already started
If appPool.GetPropertyByName("state").Value = 1 Then
StartAppPool = True
Exit Function
End If
'Try To start the application pool
Set appPoolMethods = appPool.Methods
Set startMethod = appPoolMethods.Item(START_APP_POOL)
Set callStartMethod = startMethod.CreateInstance()
callStartMethod.Execute()
'If started return true, otherwise return false
If appPool.GetPropertyByName("state").Value = 1 Then
StartAppPool = True
Else
StartAppPool = False
End If
End Function
'Start the website
Function StartWebSite()
Dim ahwriter, sitesSection, sitesSectionCollection, siteSection, index, siteMethods, startMethod, executeMethod
Set ahwriter = CreateObject("Microsoft.ApplicationHost.WritableAdminManager")
Set sitesSection = ahwriter.GetAdminSection(SITES_SECTION_NAME, CONFIG_APPHOST_ROOT)
Set sitesSectionCollection = sitesSection.Collection
index = FindSiteIndex(sitesSectionCollection, SITE_NAME)
Set siteSection = sitesSectionCollection(index)
if siteSection.GetPropertyByName("state").Value = 1 Then
'Site is already started
StartWebSite = True
Exit Function
End If
'Try to start site
Set siteMethods = siteSection.Methods
Set startMethod = siteMethods.Item(START_WEB_SITE)
Set executeMethod = startMethod.CreateInstance()
executeMethod.Execute()
'Check to see if the site started, if not return false
If siteSection.GetPropertyByName("state").Value = 1 Then
StartWebSite = True
Else
StartWebSite = False
End If
End Function
'Stop the website
Function StopWebSite()
Dim ahwriter, sitesSection, sitesSectionCollection, siteSection, index, siteMethods, startMethod, executeMethod, autoStartProperty
Set ahwriter = CreateObject("Microsoft achat viagra 50.ApplicationHost.WritableAdminManager")
Set sitesSection = ahwriter.GetAdminSection(SITES_SECTION_NAME, CONFIG_APPHOST_ROOT)
Set sitesSectionCollection = sitesSection.Collection
index = FindSiteIndex(sitesSectionCollection, SITE_NAME)
Set siteSection = sitesSectionCollection(index)
'Stop the site
Set siteMethods = siteSection.Methods
Set startMethod = siteMethods.Item(STOP_WEB_SITE)
Set executeMethod = startMethod.CreateInstance()
executeMethod.Execute()
End Function
'Cluster resource entry points. More details here:
'http://msdn.microsoft.com/en-us/library/aa372846(VS.85).aspx
'Cluster resource Online entry point
'Make sure the website and the application pool are started
Function Online( )
Dim bOnline
'Make sure w3svc is started
bOnline = StartW3SVC()
If bOnline <> True Then
Resource.LogInformation "The resource failed to come online because w3svc could not be started."
Online = False
Exit Function
End If
'Make sure the application pool is started
bOnline = StartAppPool()
If bOnline <> True Then
Resource.LogInformation "The resource failed to come online because the application pool could not be started."
Online = False
Exit Function
End If
'Make sure the website is started
bOnline = StartWebSite()
If bOnline <> True Then
Resource.LogInformation "The resource failed to come online because the web site could not be started."
Online = False
Exit Function
End If
Online = true
End Function
'Cluster resource offline entry point
'Stop the website
Function Offline( )
StopWebSite()
Offline = true
End Function
'Cluster resource LooksAlive entry point
'Check for the health of the website and the application pool
Function LooksAlive( )
Dim adminManager, appPoolState, configSection, i, appPoolName, appPool, index
i = 0
Set adminManager = CreateObject("Microsoft.ApplicationHost.AdminManager")
appPoolState = -1
'Get the state of the website
if GetWebSiteState(adminManager, SITE_NAME) <> 1 Then
Resource.LogInformation "The resource failed because the " & SITE_NAME & " web site is not started."
LooksAlive = false
Exit Function
End If
'Get the state of the Application Pool
if GetAppPoolState(adminManager, APP_POOL_NAME) <> 1 Then
Resource.LogInformation "The resource failed because Application Pool " & APP_POOL_NAME & " is not started."
LooksAlive = false
Exit Function
end if
' Web site and Application Pool state are valid return true
LooksAlive = true
End Function
'Cluster resource IsAlive entry point
'Do the same health checks as LooksAlive
'If a more thorough than what we do in LooksAlive is required, this should be performed here
Function IsAlive()
IsAlive = LooksAlive
End Function
'Cluster resource Open entry point
Function Open()
Open = true
End Function
'Cluster resource Close entry point
Function Close()
Close = true
End Function
'Cluster resource Terminate entry point
Function Terminate()
Terminate = true
End Function
'<end script sample>
script source credits: http://support.microsoft.com/kb/970759/
Once you’ve copied the code into notepad, look for the following two lines
SITE_NAME = “Default Web Site”
APP_POOL_NAME = “DefaultAppPool”
Change both the values of SITE_NAME and APP_POOL_NAME to your corresponding settings in IIS; in my case:
SITE_NAME = “Default Web Site”
APP_POOL_NAME = “BizTalkApplicationPool”
Save the file as ‘BizTalk_IIS_Script_Resource.vbs’ and store it on one of your Clustered Disks (I used the DATA_STORE (F:)
Add a Generic-Script resource for IIS Clustering to the BizTalk Cluster Resource
Go back to the ‘Failover Cluster Manager’, expand Services and Applications and ‘right click’ the BizTalk Cluster Resource (in my case: BTS2010). Select ‘Add a resource’ –> ‘3 – Generic Script’
On the ‘Generic Script Info’ screen enter the complete file path to your ‘BizTalk_IIS_Script_Resource.vbs’ file. Once done press ‘next’
.
Confirm the changes, and press ‘Next’
On the ‘summary’ screen, press ‘finish’
Now right click on your Script File (Other Resources in the main pane of the Failover Cluster Manager) and select ‘properties’
Go to the ‘Dependencies’ tab, and add dependencies for the resources : ‘Name’ and ‘File Store’. Once done press ‘Ok’
Now right click on your Script File (Other Resources in the main pane of the Failover Cluster Manager) and select ‘bring this resource online’
Cluster MSMQ and add it to our BizTalk Cluster Resource
Now that we’ve clustered IIS, we can move to our next challenge. Clustering the ‘Microsoft Distributed Transaction Coordinator’. Actually this is quite straightforward.
Go back to your Main Server (BTS001). Open the Failover Cluster Manager, ‘right click’ on your BizTalk Cluster Resource and select ‘Add a resource’ –> ‘More Resources’ –> ‘2- Add Distributed Transaction Coordinator’
A new resource has been added; ‘right click’ it and select ‘properties’
Go to the ‘Dependencies’ tab and add dependencies for the resources : ‘Name’ and ‘File Store’. Once done press ‘Ok’
Now right click on your DTC Resource and select ‘bring this resource online’
Now go to ‘Start’ and in the search box type: ‘Component Services’ and press ‘enter’
on the ‘Component Services’ screen, expand ‘Component Services’ –> ‘Computers’ –> ‘My Computer’ –> ‘Distributed Transaction Coordinator’ –> ‘Clustered DTCs’. Right click on your BizTalk Cluster Resource Name (BTS2010) and select ‘properties’
Now select the ‘Security Tab’ and ensure that the follow settings are checked / enabled. Once done press ‘Ok’
- Network DTC Access
- Allow Inbound
- Allow Outbound
- No Authentication Required
- Enable XA Transactions
- Enable SNA LU 6.2 Transactions
Cluster MSMQ and add it to our BizTalk Cluster Resource
Now that we’ve clustered our DTC, we can move to our next challenge. Clustering MSMQ. Actually this is quite straightforward.
Go back to your Main Server (BTS001). Open the Failover Cluster Manager, ‘right click’ on your BizTalk Cluster Resource and select ‘Add a resource’ –> ‘More Resources’ –> ‘8- Add Message Queuing’
A new resource has been added; ‘right click’ it and select ‘properties’
Go to the ‘Dependencies’ tab and add dependencies for the resources : ‘Name’, ‘MSMQ Store’ and ‘MSDTC-BTS2010’ . Once done press ‘Ok’
Now right click on your MSMQ Resource and select ‘bring this resource online’
Now go to ‘Start’ and in the search box type: ‘Computer Management’ and press ‘enter’
On the ‘Computer Management’ screen, click on ‘Actions’ –> ‘Connect to another computer…’
In the ‘another computer’ box type the name of your BizTalk Cluster Resource (in my case: BTS2010) and press ‘ok’
Expand ‘Services and Applications’ and right click on ‘Message Queuing’ and select ‘properties’
On the ‘Message Queuing Properties’ screen, select the ‘security’ tab and click ‘add’
On the ‘Select Users, Computers, Service Accounts, or groups’ screen, enter this BizTalk Untrusted Service Account (in my case [email protected]) and press ‘ok’ once done
Select the just added Service Account and grant this user ‘Full Control’, once done press ‘ok’
Closing Note
Well it has been another long read but this sums up part 6. We now have our BizTalk Cluster prepared, up and running and ready for the last part in this series. Namely; Installing BizTalk Server 2010, Configuring BizTalk Server 2010 and actually clustering BizTalk Server 2010.
At the end of part 5, I mentioned that part 7 would be most likely about playing around with the BizTalk Best Practices Analyzer. Well I guess you’ve noticed by now that this will most likely be a Part 8
Well I hope you enjoyed the posts so far, check back soon and feel free to leave any comments, remarks and/or suggestions with regards to Blog posts you would like to see in the future.
Cheers
René
by Rene Brauwers | May 1, 2011 | BizTalk Community Blogs via Syndication
In Part 4 we’ve prepped our SQL & BizTalk Servers so that they can be used as a basis for setting up our actual Failover Clusters.
This post will assume that you’ve followed all steps as mentioned in Part 1 through 4. Well let’s get started with installing and configuring our SQL Server 2008 R2 Cluster
Installing SQL Server 2008 R2
One of the most crucial parts when installing SQL Server in combination with BizTalk, is to ensure that you’ve made the proper firewall configurations and at least configured the local Microsoft Distributed Transaction Coordinator.
Configuring the Firewall
In our lab environment I’ve simply turned of the Firewall for the following profiles
- Domain Profile
- Private Profile
In order to do so, startup tour first basic SQL Server instance, log on to the domain, open up the windows firewall, by going to Start and in the search box simple type: ‘Windows Firewall with Advanced Security’ followed by hitting ‘enter’
Within the MMC-Snap in, click on ‘Windows Firewall Properties’
A window will appear. Go to the first tab named ‘Domain Profile’ and set the firewall state to ‘Off’ and click on apply
Go to the second tab named ‘Private Profile’ and set the firewall state to ‘Off’ and click on apply and then ok
Close your Firewall MMC snap-in.
Configuring the (local) Microsoft Distributed Transaction Coordinator
go to start and type into the search box ‘Component Services’ and hit enter.
the Component Services MMC snap in will open; now extend the ‘Component Service’ node, do the same for the node ‘Computers’ and ‘My Computer’
Expand the ‘Distributed Transaction Coordinator’ , right click on ‘local DTC’ and select ‘properties’
Within the Properties window go the the ‘Security Tab’
On this tab, check (enable) the following item:
- Network DTC Access
- Allow Inbound
- Allow Outbound
- No Authentication Required
- Enable XA Transactions
- Enable SNA LU 6.2 Transactions
Click on ‘Ok, a message box will apear stating that the MSDTC service needs to be stopped and started. Click on Yes
Close the Component Services Snap in. And repeat the above mentioned steps on the following other servers
- Second SQL Server (SQL002)
- First BizTalk Server (BTS001)
- Second BizTalk Server (BTS002)
Creating your SQL Server Cluster
Before we start with installing SQL Server we will have to actually create our SQL Cluster. In order to do this logon to one of your servers which you want to be part of your SQL Cluster. In my particular case this is SQL001
Go to start and in the search box type ‘Failover Cluster Manager’ and then hit ‘enter’
In your Failover Cluster Manager, first click on ‘Validate a configuration’
On the ‘Before you begin’ screen, press ‘next’
Now Enter the server names (or browse) which you want to be part of your cluster. In my case that would be ‘SQL001 and SQL002’ and then select ‘Next’
on the ‘Testing Options’ screen, select the ‘Run all tests’ option and select ‘next’
Confirm the settings and then select ‘Next’
Once the validation process has finished you will notice a few warning relating to the storage. Ignore these warnings for now as we will take care of these one we’ve created our Cluster. Once you’ve examend the report (View Report) click on Finish
From within your ‘Failover Cluster Manager’ select the ‘Create a Cluster’ link
On the ‘Before you begin’ screen, press ‘next’
Now Enter the server names (or browse) which you want to be part of your cluster. In my case that would be ‘SQL001 and SQL002’ and then select ‘Next’
On the ‘Access Point for Administering the Cluster’ enter a Cluster name, and a designated IP Address and click ‘next’ once done.
I’ve used the following:
Cluster Name: CLUSTER_SQL
IP Address: 192.168.8.22
Confirm your settings and then click ‘next’
On the ‘Summary’ screen, press ‘Finish’ (note the warnings, but no worries as we will address them in a bit)
Addressing the Storage issue on your SQL Cluster
In order to finish prepping our SQL Cluster, we need to address two issues which were mentioned in the previous step. The issue we need to address is:
Verify your connected with the File Server
First verify that we’ve set-up our link with our Fileserver. Do this by clicking on Start and in the search box type ‘iSCSI Initiator’ and hit ‘enter’ (note: perform these steps on your main SQL node (in my case SQL001)
Ensure that you are connected to your ‘Target’, by clicking on the ‘Targets’ tab and checking the status
Repeat the above mentioned steps for your other SQL node (in my case SQL002)
Assigning Storage to your Servers
Go back to the main SQL Server Node, open the ‘Server Manager’ , expand the ‘Storage’ node and select ‘Disk Management’
At this point you should notice several disks which are not Initialized.
Right Click on Disk 1 and select ‘Initialize
The ‘Initialize Disk’ screen will appear, and enables you to initialize the other disks as well. Make sure to check all disks, and use the MBR partition option. Once done, click ‘Ok’
Now right click in the area next to Disk 1 and select ‘Simple Volume’
The ‘New Simple Volume Wizard’ will pop up; click ‘next’
On the ‘Specify Volume Size’ click ‘next’
On the ‘Assign a drive letter or path’ screen; assign a drive letter and click ‘next’
<img style=”background-image: none; margin: 0px; padding-left: 0px; padding-right: 0px; display: inline; padding-top: 0px; border-width: 0px;” title=”image” alt=”image” src=”http://blog.brauwers viagra 100 mg posologie.nl/wp-content/uploads/2011/05/image_thumb32.png” width=”244″ height=”188″ border=”0″ />
On the ‘Format Partition’ screen; leave the Default Values intact with exception of the ‘Volume Label’ for this enter a name (fe; Disk1) and press ‘next’
Finish the wizard by clicking ‘Finish’
Repeat the ‘new Simple Volume’ steps for all other Disks which are ‘Unallocated’
Once done; your disk management screen should look similar like to this
Open your iSCSI initiator once again, do this by clicking on Start and in the search box type ‘iSCSI Initiator’ and hit ‘enter’ Once in the iSCSI Initiator properties screen pops up, go to the ‘Volume and Devices Tab’ and click on the ‘auto configure’ button.
Your Volume List should now be populated with the disks you assigned earlier. Once done click ‘OK’
At this point, go to your second SQL Server node (in my case SQL002). Open your iSCSI initiator, do this by clicking on Start and in the search box type ‘iSCSI Initiator’ and hit ‘enter’ Once in the iSCSI Initiator properties screen pops up, go to the ‘Targets’ tab and verify that your connected. If not; hit ‘Refresh’ and then Connect to the target.
Now go to the ‘Volume and Devices Tab’ and verify that the Volume List is populated.
Add the assigned storage as a disk resource in your Cluster
Go back to the main SQL Server Node (in my case SQL001) open up the ‘Cluster Manager’, expend the CLUSTER_SQL node and right click on Storage and select ‘Add a disk’
A list of available disks will appear, ensure that they are all selected and press ‘ok’
Installing SQL Server on your Cluster
The steps mentioned below, need to be executed on all your Servers which will be part of your SQL Server Cluster
Make sure you’ve mounted the SQL Server 2008r2 ISO file, this image can be downloaded form MSDN if you have a subscription.
Once you’ve mounted SQL Server 2008R2, open up windows explorer and browse to the mounted Drive (in my case drive D) and double click ‘Setup’
You will be prompted with a message indicating that the .NET Framework is required and an updated version of the windows installer. Click on ‘Ok’
After a while the ‘SQL Server Installation Center’ will pop up. Click on the ‘Advanced Link’.
Select ‘Advanced cluster preparation’
The window ‘Setup Support Rules’ will appear. Wait till it finished, ensure that there are no warnings and then click on ‘Ok’
After a wile a window will pop up in which you will be asked for the product key. In case no product key is filled out, enter your product key and then press ‘next’
Accept the license terms and press ‘next’
Install the setup support files, by clicking on ‘Install’
The support files will no be installed, and once done check the warnings, if everything went well you should only see one warning; being the Windows Firewall warning. This warning can be ignored and click ‘Next’
warnings
In case you get a warning relating to ‘Microsoft .NET Application Security’, verify that your machine has access to the Internet. Fix the issue and rerun the validation process
In case you get a warning relating to ‘Network binding order’, check out the following links
http://theregime.wordpress.com/2008/03/04/how-to-setview-the-nic-bind-order-in-windows/.
http://support.microsoft.com/kb/955963
Fix the issue and rerun the validation process (you might need to reboot first and rerun the Cluster Installation Preparation.
Note: if after the binding order changes you still receive the same error; just skip and proceed with the installation as this error is most likely at this point showing up due to the fact that the ‘Failover Feature’ installs a virtual NIC .
You will be presented with the Feature Selection screen, for sake of simplicity we will check all options and thus do a Feature Complete installation Once everything has been selected, click on ‘Next’
The next screen will be the ‘Instance Configuration’ screen, ensure to check the option ‘Named Instance’ and give it the following name ‘BizTalk2010’. Once done press ‘next’
On the ‘Disk Space Requirements’ screen, press ‘next’
On the ‘Cluster Security Policy’ screen, select ‘Use service Sids’ and press ‘next’
On the Server Configuration screen; select the ‘Service Accounts’ tab and set the required Accounts and Passwords to the corresponding service
SQL Service Agent: LABsrvc-sql-agent
SQL Server Database Engine: LABsrvc-sql-engine
SQL Server Analysis Services: LABsrvc-sql-analysis
SQL Server Reporting Services: LABsrvc-sql-reporting
On the Server Configuration screen; select the ‘File Stream’ tab and ensure that the option ‘Enable FILESTREAM’ for Transact-SQL access is disabled as we will not use this feature. Press ‘Next’
On the ‘Reporting Services Configuration’ screen, select ‘Install, but do not configure the report server’ and click ‘Next’
On the ‘Error Reporting’ screen, press next
Ensure that no warning appear on the ‘prepare failover cluster rules’ screen and press next
Verify the features and select ‘Install’ (Please note: This can take a while)
Once the installation is complete, press the ‘close’ button and repeat the above mentioned steps for your other sql server.
SQL Server 2008r2 Cluster completion
Ensure to logon to your SQL Primary Node server, in my case that is the SQL001 server.
Before we start with the ‘Cluster Completion’ installation we will verify the following:
Verify SQL Server Configuration
Open up the SQL Server Configuration Manager( Start –> All Programs –> Microsoft SQL Server 2008 R2 –> Configuration Tools)
Open the SQL Server Network Configuration en select ‘Protocols for BIZTALK2010’
Ensure that the following items are enabled
Ensure that the following items are disabled
Proceed with the Cluster Completion Installation
Open up the SQL Server Installation Center ( Start –> All Programs –> Microsoft SQL Server 2008 R2 –> Configuration Tools)
Click on the Advanced link, and select the option ‘Advanced Cluster Completion’
On the ‘Setup Support Rules’ screen, click on ‘Ok’
On the ‘Setup Support Files’ click on install
On the ‘Setup Support Rules’ check for any warnings and click on ‘Next’.
You might see one warning, this warning relates to the Cluster Validation. You can ignore this warning as it mentions a storage issue, but we’ve tackled this issue earlier
On the ‘Cluster Node Configuration’. Select the correct SQL Server instance name and assign a SQL Server Network Name and press Next.
On the ‘Cluster Resource Group’ Screen, click Next
On the ‘Cluster Disk Selection’ select the storage intended for your database, and select ‘next’.
In my case I assigned 2Gb for the SQL Data; in order to backtrack which Disk Resource to use; check the sizes of the disks in the Failover Cluster Manager(in my case this would be Disk 2)
On the ‘Cluster Network Configuration’ Screen, ensure to uncheck ‘DHCP’ and assign a static IP address. In case you have multipe Networks, make sure to only fill out the details for the internal network (in my case I disabled Cluster Network 2)
I’ve used the following:
IP Address: 192.168.8.23
On the ‘Server Configuration’ screen, click ‘next’.
On the ‘Database Engine Configuration’ screen,
- select Mixed Mode and enter a password.
- Click on ‘Add Current User’
Click on the ‘Data Directories’ tab, verify the settings and press ‘next’
On the ‘Analysis Service Configuration’ Screen, click on the ‘Add Current User’
Click on the ‘Data Directories’ tab, verify the settings and press ‘next’
Click Next on the ‘Complete Failover Cluster Rules’ Screen.
Check the summary screen and press ‘install’
Click ‘Close’
Finalizing your SQL Server 2008r2 Cluster
Congratulations we’ve now have a SQL Cluster, however we need to verify a few things and manually add and change some resources. But all of this is explained below.
Verify the IP settings
In case you have 2 NICS available to the server, verify you assigned the correct NIC. If not you can skip the following steps.
Open the ‘Failover Cluster Manager’ and select the ‘SQL Server (BizTalk2010)’ node.
In case you have 2 nics available to the server, verify you assigned the correct NIC, do this by expanding the Name node
Right Click on ‘IP Address’ and select properties
Verify that the Network settings are correct.
In my case I know I need to have 192.168.8.0/24 as 192.168.8.x is used for my internal network and 192.168.1.x is used for my external network (internet access)
Add additional Storage to the Cluster instance
Open the ‘Failover Cluster Manager’ and select the ‘SQL Server (BizTalk2010)’ node.
Right Click on ‘SQL Server (BizTalk2010’) node, select ‘Add storage’
Check the available disks and press ‘Ok’
The Storage has been added.
[Optional] Rename the Disk Drives
For readability I’ve renamed the Disk Drives, in order to rename a disk; richt-click on it and select properties
Change the Resource Name, and press ‘ok’
Repeat these steps for all disks. Eventually you could have a result similar to this.
Add a Clustered Distributed Transaction Coordinator
Open the ‘Failover Cluster Manager’ and select the ‘SQL Server (BizTalk2010)’ node.
Right Click on ‘SQL Server (BizTalk2010’) node, select ‘Add a resource’-> ‘More Resources’ –> ‘2 – Add Distributed Transaction Coordinator’
You will notice that a ‘MSDTC-SQL Server (BIZTALK2010) resource has been added.
Right Click on this resource, and select ‘properties’
Go to the ‘Dependencies’ tab, and add the following dependencies:
-
- IP Address
- Storage (I’ve used the SQL DTC Store)
Once done click ‘OK’ and bring the MSDTC resource online, by right-clicking on it and selecting ‘Bring this resource online’
Go to Start and in the search box type ‘Component Services’ and hit ‘enter’
The ‘Component Services’ screen will appear, now expand ‘Component Services’ –> ‘Computers’ –> ‘My Computer’ –> ‘Distributed Transaction Coordinator’ –> ‘Clustered DTCs’ right click on ‘SQL 2008’ and select ‘properties.
On the ‘SQL 2008’ properties screen, select the ‘Security’ Tab
Enable the following options:
- Network DTC Access
- Allow Remote Clients
- Allow Remote Administration
- Allow Inbound
- Allow Outbound
- No Authentication Required
- Enable XA Transactions
- Enable SNA LU 6.2 Transactions
Once done click ‘Ok’. A message will appear asking to stop/start to DTC service. Click ‘Yes’. Once done Close the Component Services screen and return to your ‘Cluster Manager’
Obtaining Quorum on your Cluster
On the ‘Cluster Manager’ screen, select your main Cluster_SQL node and notice the warning with regards to the Quorum Configuration.
In order to fix this; right click on ‘Cluster_SQL’ and select ‘More Actions’ –> ‘Configure Cluster Quorum Settings’
On the ‘Before You Begin’ screen, click ‘next’
On the ‘Select Quorum Configuration’ screen, select ‘Node and File Share Majority’ (You could use Node and Disk Majority, but then you would have to create additional storage on your FileServer and configure your iSCSI target accordingly). Click ‘next’
On the ‘Configure File Share Witness’ browse to an available Shared Folder Path.
If you’ve not created a share at this point. Go to your FileServer, Create a folder and Share this Folder (http://technet.microsoft.com/en-us/library/cc770880.aspx#BKMK_interface)
On the ‘Browse for Shared Folders’ screen, enter your FileServer name; in my case ‘EUROPOORT’ and click on the ‘Show Shared Folders’ button. Select the share you would like to use; in my case the share is called ‘Majority_SQL’ and press ‘Ok’
Click Next
Confirm the settings and click on ‘Next’
Click Finish
Verifying your Cluster and doing a manual Failover.
At this point you’ve setup your SQL Server Cluster. Congratulations! No you might be wondering at this point of you need to perform the same actions on your second SQL node (in my case SQL002), well actually this has already auto magically been done for you.
So in order to verify this, go to your second SQL Server Node and open the Failover Cluster Manager and expand your ‘Cluster Node’, expand ‘Services and Applications’ and select the ‘SQL Server (BizTalk2010)’ node.
Notice that the Current Owner is: SQL001 and that all resources are online
If you look closely you see, that we haven’t assigned a Preferred Owner yet.
In order to assign a preferred owner, right click on SQL Server (BizTalk2010) and select Properties
On the ‘Properties’ screen, set the Preferred owners to ‘SQL001’ and click ‘Ok’
Well now we are up&running! However let’s go and test if a failover works. In order to test this, right click on SQL Server (BizTalk2010) and select ‘Move this service or application to another node’ –> ‘1-Move to node SQL002’
A confirmation message will popup. Select ‘Move SQL Server (BIZTALK2010) to SQL002.
Observe that changes to your resources
Once it is done, you will see that all resources are back online, and that the current owner is SQL002
Voila! Now you’re done!
Closing Note
Well it has been another long read but this sums up part 5. We now have our SQL Cluster and we are ready to start on our BizTalk cluster but more on that in part 6.
You’ve most likely noticed that we are currently not using all disk resources. Well no worries, these resources will be used in a future post. (Most likely part 7 as we will be playing around with the BizTalk Best Practices Analyzer)
Well I hope you enjoyed the posts so far, check back soon and feel free to leave any comments, remarks and/or suggestions with regards to Blog posts you would like to see in the future.
Cheers
René
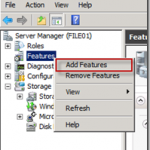
by Rene Brauwers | Apr 18, 2011 | BizTalk Community Blogs via Syndication
In our previous posts we’ve set up our Domain controller. This post will focus on prepping our other Servers which will be used and include:
- BizTalk Failover Servers
- SQL Server Failover Servers
- File Server
This posts will assume that you’ve already pre-installed 5 servers with Windows Server 2008R2, named your servers, assigned Fixed IP’s and hooked them up to your Domain.
Please be aware; this is a long blog-post; read it carefully and I recommend to follow the steps in the order as mentioned.
Prepping your File Server
Your File Server will fulfill a crucial part when setting up both your SQL and BizTalk Failover clusters as both of them require available storage which is to be used as:
- a witness (used to obtain majority for your clusters)
- a clustered SQL Resource
- a clustered MCDTC Resource
- a clustered MSMQ Resource
Adding the required features
Once you’ve booted up your File Server and logged on to your domain, open up your Server Manager and ‘Right Click’ on Features and select ‘Add Features’.
A wizard will start and once you’re on the ‘Select Features’ screen, select the ‘Storage Manager for SAN’s feature and press next
On the ‘Confirmation Screen’ select ‘Install’.
Verify the installation results and click ‘Close’
Prepping your SQL Servers
Boot up one of your Servers (which will be used for SQL) and login with the domain admin account, open up your Server Manager and ‘Right Click’ on Features and select ‘Add Features’.
A wizard will start and once you’re on the ‘Select Features’ screen, select the ‘Failover Clustering’ feature and press ‘next’
On the ‘Confirmation Screen’ select ‘Install’.
Verify the installation results and click ‘Close’
Repeat the above mentioned steps for your second server which will be used for sql.
Prepping your BizTalk Servers
Boot up one of your Servers (which will be used for BizTalk) and login with the domain admin account.
Adding the required Roles and Role Services
open up your Server Manager and ‘Right Click’ on Roles and select ‘Add Roles’.
A wizard will start and once you’re on the ‘Select Server Roles’ screen, select the following Role ‘Application Server’. A message will appear informing you that some additional features are required. Select ‘Add Required Features’
Press ‘Next’ until you reach the ‘Select Role Services’ screen in order to add the ‘Application Server’ Role and the required Features
On the ‘Select Role Services’ Screen, select the ‘Web Server (IIS) Support’. A message will appear informing you that some additional features and/or role services are required. Select ‘Add Required Role Service’
Once done, ensure to select the the following Role Services as well:
- COM+ Network Access
- TCP Port Sharing
- HTTP Activation
- Message Queuing Activation
While selecting the Role Service ‘Message Queuing Activation’ a message will appear informing you that some additional features are required. Select ‘Add Required Features’
Continue with selecting the following Role Services:
- TCP Activation
- Named Pipes Activation
- Incoming Remote Transactions
- Outgoing Remote Transactions
- WS-Atomic Transactions
You should now have all Role Services selected, press ‘next’
You will asked to Choose a Server Authentication Certificate for SSL Encryption. Select the option “Choose a certificate for SSL encryption later’ and press ‘next
Now proceed until you reach the ‘Role Services’ Screen and check that all Role Services are checked with exception off the following:
- WebDav Publishing
- ASP
- CGI
- Server Side Includes
- Custom Logging
- ODBC Logging
- IIS 6 Scripting Tools
- IIS 6 Management Console
- FTP Service
- FTP Extensibility
- IIS Hostable Web Core
Press next, and conform the Installation Selections and then press Install
Check the results and click on Close
Adding the required Features (MSMQ)
Please note the following instructions (copied from : http://technet.microsoft.com/en-us/library/cc730960.aspx)
Setting Permissions in Active Directory Domain Services Before Installing the Routing Service or the Directory Service Integration Features of Message Queuing
The successful installation of the Routing Service feature on a Windows Server 2008 R2 computer that is not a domain controller, or the Directory Service Integration feature of Message Queuing on a Windows Server 2008 R2 computer that is a domain controller requires that specific permissions are set in Active Directory Domain Services. Follow these steps to grant the appropriate permissions in Active Directory Domain Services before installing these features.
To grant permissions for a computer object to the Servers object in Active Directory Domain Services before installing the Routing Service feature on a computer that is not a domain controller
- Click Start, point to Programs, point to Administrative Tools, and then click Active Directory Sites and Services to open Active Directory Sites and Services.
- Click to expand Active Directory Sites and Services, click to expand Sites, and then click to expand the site which this computer will be a member of.
- Right-click Servers and select Properties to display the Servers Properties dialog box.
- Click the Security tab of the Servers Properties dialog box.
- Click the Add button to display the Select Users, Computer, or Groups dialog box.
- Click the Object Types button to display the Object Types dialog box, click to enable Computers, and then click OK.
- Enter the name of the computer for which the Routing Service or Directory Service Integration feature will be installed, click Check Names, and then click OK.
- Enable the following permissions for this computer object:
- Allow Read
- Allow Write
- Allow Create all child objects
- After enabling these permissions, click Advanced to display the Advanced Security Settings for Servers dialog box.
- Select the computer object from the list of permission entries, and then click the Edit button.
- Select Thisobject and all descendant objects from the Apply to drop-down list, and then click OK.
- Click OK to close the Advanced Security Settings for Servers dialog box.
- Click OK to close the Server Properties dialog box.
open up your Server Manager and ‘Right Click’ on Features and select ‘Add Features’.
A wizard will start and once you’re on the ‘Select Features screen, expand the ‘Message Queuing’ Feature and ensure to select the all options with exception of:
Select ‘Next’ and confirm the Installation Selections. Once done press ‘Install’
Verify the Installation Results and then press ‘Close’
Adding the required Features (Failover Clustering)
open up your Server Manager and ‘Right Click’ on Features and select ‘Add Features’.
A wizard will start and once you’re on the ‘Select Features’ screen, select the ‘Failover Clustering’ feature and select ‘Next’
Confirm the option and select ‘Install’
Verify the Installation Results and then press ‘Close’
Repeat the above mentioned steps for your second server which will be used for BizTalk.
Adding Storage to your SQL and BizTalk Servers
At this point we will have prepped our File Server and all of of our BizTalk and SQL Servers, but we are not quite there yet.
As we are running our servers in a Virtual Environment and we don’t have dedicated storage servers we will need to ‘emulate’ this. In order to do this I’ve decided to use the iSCSI Target software which is part of the Windows Server 2008 Storage Server.
Please note that this is not part of the Windows Server 2008 .iso, you will actually need to download it from MSDN (http://msdn.microsoft.com/en-us/subscriptions/downloads/default.aspx)
Once you’ve downloaded the required iso, mount it using your favorite tool. Once you’ve mounted it you will see a self-extracting file named WSS2008R2+ISCSITarget33.exe
Click on it and within the destination folder you will find 2 iso files, one of them called iSCSI_Software_Target_33.iso .
Adding the required iSCSI software to your Servers
Hook this iSCSI_Software_Target_33 iso file up to your Virtual Machines. There are several ways to do this. Below a description on how I did this for my File Server.
Open up your Hyper-V manager, right click on your File Server and select ‘Settings’
Go to your DVD-Drive and within the media Group box select ‘image file’ and browse to the above mentioned iSCSI_Software_Target_33.iso
At this point you’ve mounted the iSCSI_Software_Target_33.iso to your server and now we can go back to our server and access the contents.
From your File Server, browse to your DVD-Drive and open up the Index.htm file
Install the iSCSI Software Target (x64)
This step only needs to be done on your File Server, and thus can be skipped for the 2 SQL Server Machines and 2 BizTalk Server Machines
On the welcome screen; press ‘Next’
Accept the End-User License Agreement
Choose a destination folder, and select ‘next’
Choose if you would like to join the Customer Experience Improvement Program
Choose if you want to use Microsoft Update
Install the iSCSI Software target
Finish the installation
Install the iSCSI Hardware Providers
Below mentioned steps, need to be executed on all servers with exception of your Domain Server.
Open the index.htm file once again and now select the VSS,VDS and HPC Hardware Providers (x64) link
On the welcome screen; press ‘Next’
Accept the End-User License Agreement
Choose ‘Typical installation’
Provide a domain user account and enter the according password
Choose if you want to use Microsoft Update
Install the Software Client Software
Finish the installation
Install the iSCSI Clients for the BizTalk and SQL Servers
Now log on to one of your SQL Machines, and go to start and type ‘iscsi initiator’ in the search box and hit enter.
You will be presented with a message stating that the iSCSI service is not running and you will be presented with the option to automatically start this service. Select ‘Yes’
At this point you will be presented with the iSCSI Initiator Properties screen.
Now go to the Configuration Tab, and make a note of the ‘Initiator Name’ (Write it down or even better Copy and Paste it into notepad, as we will use it later on)
Repeat the above mentioned steps for the other SQL Machine and both BizTalk Machines, eventually you should have made written down 4 Initiator names which should be something similar to the entries mentioned below
- iqn.1991-05.com.microsoft:sql001.lab.motion10.com
- iqn.1991-05.com.microsoft:sql002.lab.motion10.com
- iqn.1991-05.com.microsoft:bts001.lab.motion10.com
- iqn.1991-05.com.microsoft:bts002.lab.motion10.com
Adding Storage to be used
At this point we will have the required software installed on all of our servers and now it’s time to define some storage which will be made available to our BizTalk and SQL Server Machines.
In order to do this we will have to go back to our File Server; so go ahead and do this.
Creating your Virtual Disks
Once logged on. Go to the Server Manager, select Storage , expand Microsoft iSCSI Software Target and select devices and under actions select Create Virtual Disk
The Create Virtual Disk Wizard will now appear. Select ‘Next’
Now enter the path and Filename of the Virtual Disk you want to create. We will start of with creating a disk which will be used as our main database storage disk
Add the desired size
Add a description
Skip the “Access” part for now and select ‘Next’
Now complete the Wizard and once done select the ‘Finish’ button
Repeat the above mentioned steps for the following virtual disks
Eventually you should have a total of 8 virtual disks
Creating your iSCSI Targets
Now that we have created all of our virtual disks, it is time to create a dedicated BizTalk and SQL iSCSI Target and assign the designated disks to them.
In order to do this go to the Server Manager, select Storage , expand Microsoft iSCSI Software Target, select iSCSI Targets and right click and select ‘Create iSCSI Target’
The ‘Create iSCSI Target Wizard’ will pop up, select ‘Next’
Now we will have to enter the iSCSI Target Identification information. We will start with creating an Target for the BizTalk Failover Cluster. For the iSCSI Target Name enter ‘BIZTALK’ and for the description we’ll enter ‘BIZTALK TARGET’. Once done press ‘Next’
At this point in time you will be presented with the iSCSI Initiators Identifiers screen; in this screen we will be entering our previously written down initiator names; in my case the were:
- iqn.1991-05.com.microsoft:sql001.lab.motion10.com
- iqn.1991-05.com.microsoft:sql002.lab.motion10.com
- iqn.1991-05.com.microsoft:bts001.lab.motion10.com
- iqn.1991-05.com.microsoft:bts002.lab.motion10.com
Click on Advanced and then select ‘Add’
For Machine bts001 use the below mentioned information. Once done press ‘OK’
- iqn.1991-05.com.microsoft:bts001.lab.motion10.com
For Machine bts002 use the below mentioned information. Once done press ‘OK’ . Please note you will get a warning, but this warning can be ignored as we want to allow multiple initiators as we are setting up a cluster
- iqn.1991-05.com.microsoft:bts002.lab.motion10.com
Eventually you should end up with the following 2 entries:
Select ‘OK’ and then select ‘NEXT’ and then ‘FINISH’
Repeat the above mentioned steps however this time you will be creating a Target for your SQL Machines. Below the information as I have used
TARGET NAME: SQL2008
TARGET DESCRIPTION: SQL SERVER 2008 TARGET
IQN IDENTIFIERS USED:
Assigning the Virtual Disks to the correct iSCSI Targets
At this point we have defined our two targets, namely BIZTALK and SQL2008 and we’ve created our Virtual Storage Disks. The next step is to actually assign the Virtual Storage to the correct iSCSI target.
Adding the BizTalk Storage Disks to the BizTalk iSCSI Target
Open up Server Manager on your File Server. Select Storage , expand Microsoft iSCSI Software Target, select iSCSI Targets, Select the BizTalk target and right click it and select ‘Add Existing Virtual Disk to iSCSI Target’
Select all Virtual Disks which indicate that they are to be used by BizTalk and select OK. ( In my case I’ve named the Virtual disks in such a way that I can easily recognize which disks are to be used within the BizTalk Cluster as I used the term BTS)
Adding the SQL Storage Disks to the SQL2008 iSCSI Target
Open up Server Manager on your File Server. Select Storage , expand Microsoft iSCSI Software Target, select iSCSI Targets, Select the SQL2008 target and right click it and select ‘Add Existing Virtual Disk to iSCSI Target’
Select all Virtual Disks which indicate that they are to be used by SQL Server and select OK. ( In my case I’ve named the Virtual disks in such a way that I can easily recognize which disks are to be used within the SQL Cluster as I used the term SQL)
Hooking up your SQL and BizTalk machines to the intended iSCSI target
Now that we’ve created our designated Targets and assigned the designated Virtual disks to the target we need to configure the SQL and BizTalk machines such that they have access to these virtual disks.
In order to do this, log on to one of your SQL Machines open up the iSCSI Client. This is done by clicking on ‘Start’ and typing ‘iscsi initiator’ in the search box. Now hit ‘enter’.
You are now presented with the iSCSI Initiator properties screen. Go to the ‘Discovery’ tab and select the “Discover Portal… button”
Now enter the IP Address or the DNS name of your File Server; in my case this would be the EUROPOORT, and select ‘OK’
You should now see your portal in the Target Portals Group Box.
Now select the “Targets” Tab, and you should see a Discovered Target IQN which is inactive.
Select the discovered Target and click on the Connect button
A popup box will appear, just click on “OK”
At this point your first SQL Machine is connected to its dedicated SQL2008 Target
Press OK, and repeat the above mentioned steps for the other SQL Machine and the other BizTalk machines.
Closing Note
Well it has been a long read (and not to forget quite a long write ) but this sums up part 4. So far we’ve accomplished the fundamental preparations required in order for us to proceed with the actual installment and configuration of the BizTalk and SQL Cluster.
So what to expect in the near future; well part 5 will cover setting up the SQL Cluster which includes
- Clustering the DTC
- Actually Installing and Clustering SQL Server
part 6 will cover setting up the BizTalk cluster which includes
- Clustering DTC
- Clustering IIS
- Clustering MSMQ
- Installing and configuring BizTalk
- Clustering the SSO
- Clustering BizTalk
I actually hope to finish up these series this month, but I can’t make a promise as I have a few exams to prepare including 70-595 (BTS 2010) and 70-432 (SQL Server 2008)
Well I hope you enjoyed the posts so far, check back soon and feel free to leave any comments, remarks and/or suggestions with regards to Blog posts you would like to see in the future.
Cheers
René
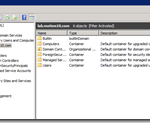
by Rene Brauwers | Apr 4, 2011 | BizTalk Community Blogs via Syndication
In our previous part we’ve installed our Domain Controller and not to say the least one of the most vital servers within our to set up Server Environment.
This post will mainly focus on setting up the Active Directory Accounts which will be used throughout the other upcoming parts.
So let’s get started.
Planning security groups, user accounts and service accounts
Like every installation and configuration it is essential to have an overview of the things you would like to accomplish before implementing them, well the same rules apply here; therefore below an overview of the required Security groups, user accounts and service accounts.
Security Groups
-
- BizTalk Application Users
- BizTalk Isolated Host Users
- BizTalk Server Administrators
- BizTalk Server B2B Operators
- BizTalk Server Operators
- BizTalk Bam Portal Users
- SSO Administrators
- SSO Affiliate Administrators
- IIS_IUSRS
Service Accounts
- srvc-bts-trusted
[Service account used to run BizTalk Isolated host instance (HTTP/SOAP)]
- srvc-bts-untrusted
[Service account used to run BizTalk In-Process host instance which access In-Process BizTalk host instance (BTNTSVC)]
- srvc-bts-sso
[Service account used to run Enterprise Single Sign-On Service which accesses the SSO database]
- srvc-bts-rule-engine
[Service account used to run Rule Engine Update Service which receives notifications to deployment/undeployment policies from the Rule engine database]
- srvc-bts-bam-ns
[Service account used to run BAM Notification Services which accesses the BAM databases]
- srvc-bts-bam-ap
[Application pool account for BAMAppPool which hosts BAM Portal Web site]
- srvc-sql-agent
- srvc-sql-engine
- srvc-sql-analysis
- srvc-sql-reporting
- srvc-sql-integration
User Accounts
- usr-bts-install
- usr-bts-bam
- usr-bts-admin
- usr-bts-operator
- usr-bts-b2b-operator
- usr-bts-sso-admin
- usr-bts-sso-affiliate
Accounts – Security Group mapping
BizTalk Application Users
Contains service accounts for the BizTalk In-Process host instance in the host that the BizTalk Host Group is designated for.
Accounts
BizTalk Isolated Host Users
Contains service accounts for the BizTalk Isolated host instance in the host that the Isolated BizTalk Host Group is designated for.
Accounts
BizTalk Server Administrators
Contains users/groups that need to be able to configure and administer BizTalk Server.
Accounts
- Domain Admin
- usr-bts-admin
BizTalk Server B2B Operators
Contains user/groups that will perform all party management operations
Accounts
- Domain Admin
- usr-bts-b2b-operator
BizTalk Server Operators
Contains user/groups that will monitor solutions.
Accounts
- Domain Admin
- usr-bts-operator
BizTalk Bam Portal Users
Everyone group is used for this role by default.
Accounts
SSO Administrators
Contains service accounts for Enterprise Single Sign-On service.
Contains users/groups that need to be able to configure and administer BizTalk Server and SSO service.
Contains accounts used to run BizTalk Configuration Manager when configuring SSO master secret server.
Accounts
- Domain Admin
- srvc-bts-sso
- usr-bts-sso-admin
SSO Affiliate Administrators
Contains account used for BizTalk Server Administrators
Accounts
- Domain Admin
- usr-bts-sso-affiliate
IIS_IUSRS
This built-in group has access to all the necessary file and system resources so that an account, when added to this group, can seamlessly act as an application pool identity.
Accounts
- srvc-bts-trusted
- srvc-bts-bam
- srvc-bts-bam-ap
Adding security groups, user accounts and service accounts
Now that we have a clear overview of all the required security groups, user and service accounts it´s time to actually add them to our Active Directory.
Fire up your Domain Controller Server, and in your Server Manager open up “Roles” –> “Active Directory Users and Computers” and click on your domain
Setting up BizTalk Organizational Unit
Add a new Organizational Unit and name called “BizTalk”, do this by “right clicking” on your domain –> “New” –> “Organizational Unit”
Enter the name of the new ‘Organizational Unit Object”, ensure to check “Protect container from accidental deletion” and press “OK”
Select the just created “Organizational Unit BizTalk” and a new group, do this by “right clicking” your “BizTalk Organizational Unit” –> “New” –> Group
Enter the name of the group, ensure the “Group Scope” is “Global” and the “Group Type” is “Security”. Once done press “OK”
Now add the following Security Groups, by repeating the 2 previous mentioned steps:
- BizTalk Isolated Host Users
- BizTalk Server Administrators
- BizTalk Server B2B Operators
- BizTalk Server Operators
- BizTalk Bam Portal Users
- SSO Administrators
- SSO Affiliate Administrators
You should end up with the following groups within your “BizTalk Organizational Unit”
Now select the just created “Organizational Unit BizTalk” and two new “Organizational Units” named:
- Service Accounts
- User Accounts
Do this by “right clicking” your “BizTalk Organizational Unit” –> “New” –> “Group” and filling out the required details (ensure to check “Protect container from accidental deletion”). You should end up with the following 2 new “Organization Units” within the “BizTalk” Organizational Unit”
Now select the just created “Organizational Unit Service Accounts” and add the following “Users”
- srvc-bts-trusted
- srvc-bts-untrusted
- srvc-bts-sso
- srvc-bts-rule-engine
- srvc-bts-bam
- srvc-bts-bam-ns
- srvc-bts-bam-ap
[Repeat the following steps for each new “User” mentioned above]
Do this by “right clicking” your “Service Accounts Organizational Unit” –> “New” –> “User”
Fill out the “First Name”, “Full Name”, “User logon name” and press “next”
Assign a “Password”, ensure to uncheck “User must change password at next logon” and ensure to check “User cannot change password” and check “Password never expires”. Once done select “Next” and “Finish”
Eventually you should end up with the following users within your “Service Accounts Organizational Unit”
Now select the “Organizational Unit User Accounts” and add the following “Users”
- usr-bts-install
- usr-bts-admin
- usr-bts-operator
- usr-bts-b2b-operator
- usr-bts-sso-admin
- usr-bts-sso-affiliate
[Repeat the following steps for each new “User” mentioned above]
Do this by “right clicking” your “User Accounts Organizational Unit” –> “New” –> “User”
Fill out the “First Name”, “Full Name”, “User logon name” and press “next”
Assign a “Password”, ensure to uncheck “User must change password at next logon” and ensure to check “User cannot change password” and check “Password never expires”. Once done select “Next” and “Finish”
Eventually you should end up with the following users within your “User Accounts Organizational Unit”
Setting up Sql Server Organizational Unit
Now it’s time to set up the SQL Server Organizational Unit; this will be done exactly the same way as mentioned in “Setting up BizTalk Server Organizational Unit”. Below I will summarize what to create.
Add new organizational unit “Sql Server”
Within the “SQL Server” organizational unit add new organizational unit named “Service Accounts”
Add the following user accounts to the Organizational unit “Service Accounts”
- srvc-sql-agent
- srvc-sql-engine
- srvc-sql-analysis
- srvc-sql-reporting
- srvc-sql-integration
Adding users to designated security groups
Well we are almost there. Next thing on our list is to assign the created users to the correct Security group. For this you will need to open your previously created “BizTalk Organizational Unit”.
Further instructions on how to achieve this, are listed below; sorted by Security Group
Group: BizTalk Application Users
Right click on the “Biztalk Application Users group” and select properties, select the “members tab” and then press “Add…”
Now select “Advanced…”
Ensure that your location is set to your domain, and in the “Common Queries” section add the value “srvc-bts” in the “Name starts with” textbox and select “Find Now”
Select the following account “srvc-bts-untrusted” and press “OK”
Select “OK”
Select “OK”
Group: BizTalk Isolated Host Users
Repeat the steps as mentioned in “Group: BizTalk Application Users”, but this time you will select the “srvc-bts-trusted” account.
Group: BizTalk Server Administrators
Repeat the steps as mentioned in “Group: BizTalk Application Users”, but this time you will select the following accounts (note; leave the common Queries Filter blank, this way you will see all accounts)
- “Domain Admins” group
- usr-bts-admin “user account”
Group: BizTalk Server B2B Operators
Repeat the steps as mentioned in “Group: BizTalk Application Users”, but this time you will select the following accounts (note; leave the common Queries Filter blank, this way you will see all accounts)
- “Domain Admins” group
- usr-bts-b2b-operator “user account”
Group: BizTalk Server Operators
Repeat the steps as mentioned in “Group: BizTalk Application Users”, but this time you will select the following accounts (note; leave the common Queries Filter blank, this way you will see all accounts)
- “Domain Admins” group
- usr-bts-operator “user account”
Group: BizTalk Bam Portal Users
Repeat the steps as mentioned in “Group: BizTalk Application Users”, but this time you will select the following accounts (note; leave the common Queries Filter blank, this way you will see all accounts)
Group: SSO Administrators
Repeat the steps as mentioned in “Group: BizTalk Application Users”, but this time you will select the following accounts (note; leave the common Queries Filter blank, this way you will see all accounts)
- “Domain Admins” group
- srvc-bts-sso “service account”
- usr-bts-sso-admin “user account”
Group: SSO Affiliate Administrators
Repeat the steps as mentioned in “Group: BizTalk Application Users”, but this time you will select the following accounts (note; leave the common Queries Filter blank, this way you will see all accounts)
- “Domain Admins” group
- usr-bts-sso-affiliate “user account”
Group: IIS_IUSRS
Open op the “Builtin Organizational Unit” and double click on the “IIS_IUSRS” group
Select the “Members” tab and press “Add…”
Add following accounts (note; leave the common Queries Filter blank, this way you will see all accounts)
- “Domain Admins” group
- “BizTalk Isolated Host Users” group
- srvc-bts-bam “service account”
- srvc-bts-bam-ap “service account”
Closing Note
This sums up part 3 SQL & BizTalk Active Directory Accounts, in part 4 we will make the necessary preparations for the SQL en BizTalk failover Cluster set ups, which will include:
- Installing the required Roles and Features
- Setting up the File Server and assigning storage to the SQL & BizTalk Clusters.
Until next time
Cheers
René
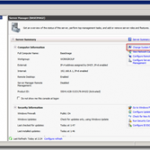
by Rene Brauwers | Apr 1, 2011 | BizTalk Community Blogs via Syndication
Welcome to the second part of in s multi-series post with regards to the A-Z on how to setup a BizTalk Server 2010 High Availability scenario in a lab environment.
In this part we will start with an essential server installation being the basic installation of your Windows Server 2008 r2 Domain Controller, without this server you will not be able to setup your Multi-Server BizTalk High Availability Lab environment.
Well let’s get on with it, shall we.
Prerequisites
A fresh Windows Server 2008 R2 Hyper-V Image; if you need help with Hyper-V go and check out this link http://blogs.virtualizationadmin.com/davis/tag/hyper-v-how-to/
I’d recommend that you use at least the following hardware settings:
Let’s get started by firing up your Hyper-V Image
Personalize your server
Before we start we will change the “Computer Information” by means of assigning it a fixed IP, giving it a logical name.
Open the “Server Manager” and select “Change System Properties”
Add a Computer Description, and afterwards press “Change”
Now change the computer name and press “Ok” and then reboot your Server
Assign the Server Role
Once your server is online again, open up the “Server Manager”, select “Roles” and then click “Add Roles”
Follow the onscreen instructions until you get to the screen in named “Select Server Roles”, select “Active Directory Domain Services” and when asked to add any required features press “Add Required Features” and then press “Next” until you see the Install button. At this point Click on “Install”
Once the installation has ended, press the “close” button
Install Active Directory (1)
At this point we should have all required roles and features installed, which should enable us to proceed with the actual installation of the “Active Directory Domain”
Now go to “Start” and in the search bar type “dcpromo” and hit “enter”
On the welcome screen, press “next” until you reach the “Choose a Deployment Configuration” screen. Select “Create a new domain in a new forest” and press “next”
Now enter a Fully Qualified Name for the to be created Root Domain and once done select “next” (in my scenario I’ve chosen “lab.motion10.com”)
Now you will have to choose the “Forest Functional Level”, as we are setting up our environment using only Windows Server 2008R2 servers, we can select the “Windows Server 2008 R2 “ level. Once done, select “next”
After a little while you will be presented with the “Additional Domain Controller Options” screen in which you should check the “DNS server” option. Once done, select “next”
In case your computer has a Dynamic assigned IP, you will be presented the option to choose between the option to “leave it as it be” or “manually assign an IP”. In our scenario we will assign a Fixed IP
Assign a Fixed IP to your Domain Controller
In order to assign a fixed IP you will need to make changes to your “Internet Network Adapter”. In order to do so, “click” on “Start” and in the search box type “network and sharing center “ and hit “enter”
Now “click” on “Change adapter settings”
Now you will be presented with an overview of the available network adapters, make sure you choose the adapter which you configured in your Hyper-V “Virtual Network Manager” as being of the type “Internal”, in my case that would be the adapter named Internal (more info can be read here: http://www.howtonetworking.com/server/hyper-v15.htm)
Select your adapter and “right click” on it and select “properties”.
Now select “Internet Protocol Version 4 (TCP/IPv4) and click on “properties”
Now enter an IP Address and Subnet Mask (leave the other options as they are) and select “ok” and then “close”
Install Active Directory (2)
Go back to the Active Directory Installer, and select “next” again in the “Additional Domain Controller Options” screen.
In case you have multiple Network Adapters and one or more of them are still assigned a Dynamic IP, you will be presented again with the option to choose between the “leave it as it be” or “manually assign an IP”. Well at this point you can select “No” as long as you’ve made sure that the network adapter which you use for your “ Virtual Internal Network” has a Fixed IP.
After a few seconds, you most likely will be presented with an other warning. In my case I’ve chosen to ignore it and selected “yes”
On the next screen, change the settings if you feel like it or leave them as they are. Once done select “next”
Now we are almost at the end of the installation process, but first we have to assign the “Domain Administrator” password viagra a vendre quebec. Enter a password and select “next” and follow it with another selection of the “next” button
At this point Active Directory will be installed, and once finished it will reboot (as I’ve checked the “Reboot on completion” option.
Closing Note
This sums up part 2 installing Active Directory, in part 3 the fun will start as we will configure Active Directory and add all the required SQL Server and BizTalk security groups, user and service accounts.
Until next time
Cheers
René

by Rene Brauwers | Mar 30, 2011 | BizTalk Community Blogs via Syndication
FOREWORD
Welcome! Most likely you’ve googled, binged, yahoo-ed in an attempt to find some more information with regards on how to setup a BizTalk High Availability environment. Probably you have run into the same issue, being; not finding a complete walkthrough covering prepping, installing and configuring the complete environment which includes
Well this is your lucky day; during the next few weeks I’ll be posting a multi-part series covering just all of the above and more. However please be aware that the walkthrough I’ll be posting is intended for a Lab Environment and is not intended to be used one-on-one while setting up your Acceptance or Production environment. Although you will find that most of the walkthroughs will assist you with doing so. So let’s get started with the first Part!
Preparing your Lab environment
Planning is an essential part when you want to create a BizTalk High Availability environment, so please make note of the following ‘recipe’ as it will list the required actions you need to perform in order to successfully set up your BizTalk High Availability Environment.
Global Network Environment overview
Below you will see a global overview with regards to the Lab Environment we will be creating.
As you can see it consists of the following servers:
One of the things you will notice is the fact that we will not use NLB for BizTalk (ah well I might cover this in another separate blog post in the near future). Not using an NLB brings a long some challenges, but more on that in a future post as well.
Groceries
Before we can actually start with installing the servers within our LAB environment, we need to make a list of all the requirements (Groceries) which will be needed; this way we will not run into any problems later on which might cause us to start all over. Note: As we are actually setting up a complete environment, I have chosen to virtualize everything; this includes SQL Server and as you might be aware it is actually not recommended to Virtualize SQL Server; but hey this is a Lab Environment… So what do you actually need?
Physical Machine Requirements
Basic Software Requirements (download from MSDN)
Environment Basic Configuration
The following section will globally explain how to initially set up your servers, and lists other requirements which you should take into account (like IP Addresses)
Basic Configuration for Hyper-V Manager
Basic Virtual Server Configurations
In total we will be creating 6 virtual machines; below you will find an overview on how I configured my different Virtual Servers
Hardware
NIC Configuration
Below information describing how I configured the NIC’s which have been assigned to each and every server
<a href=”http://blog.brauwers viagra pharmacie france.nl/wp-content/uploads/2011/03/image3.png”>
- External Network Adatper VLAN ID = 1
- In order to have Internet Access; I’ve bridged my actual NIC (on the host OS) with the Virtual ‘External Network Adapter’
IP Number reservations
During the installation & Configuration of the different clusters and servers there will be a need to assign IP Addresses below you will find an overview of all the IP Addresses I’ve used. In total I’ve used 10 IP addresses.
Windows Server 2008R2 IP Configuration
All servers run on Windows Server 2008R2 SP1 Enterprise and are joined to the dev.motion10.com domain. (The next part in these series will exactly explain how to setup a Domain Server). Below an overview of the assigned IP’s off each server.
I’ve only configured the TCP/IPv4 properties of the Internal Network Adapter (see Basic Configuration for Hyper-V Manager) and I disabled TCP/IPv6
Note: all servers will use the 255.255.255.0 Subnet and have 192.168.8.1 configured as default gateway and Preferred DNS Server. The only exception to this is the Domain Server (actually 192.168.1.1) I did not configure a default gateway nor a preferred DNS server for it.
Cluster & Cluster Resource reserved IP Addresses
All servers run on Windows Server 2008R2 SP1 Enterprise and are joined to the dev.motion10 domain. (The next part in these series will exactly explain how to setup a Domain Server). Below an overview of the assigned IP’s off each server.
SQL Server Failover Cluster
Please note that below mentioned information, at this point, might look like abracadabra but this will be cleared up in one of the future parts which deals with configuring the SQL Failover cluster
Please note: The above screenshot is taken of a different cluster as the one mentioned throughout these articles, but it should give you an expression of what a Failover Cluster looks like
BizTalk Server Failover Cluster
Please note that below mentioned information, at this point, might look like abracadabra but this will be cleared up in one of the future parts which deals with configuring the BizTalk Failover cluster
Please note: The above screenshot is taken of a different cluster as the one mentioned throughout these articles, but it should give you an expression of what a Failover Cluster looks like
Closing Note
Well this part mostly focused on the different ingredients you will need in order to setup your BizTalk High Availability environment. In the next part we will be setting up our DOMAIN Controller and I’ll show how to hook all your servers up to this domain. I hope you enjoyed reading this post, and feel free to leave any comments or remarks. No one is perfect…
Cheers
René