by Rene Brauwers | May 13, 2011 | BizTalk Community Blogs via Syndication
Part 5 covered setting up our SQL-Server Cluster, so now it’s time to do the same but this time for our BizTalk 2010 Server environment.
Once again this post assumes you’ve followed all steps mentioned in the previous posts. All right let’s get on with it
Please note the following with regards to MSMQ: http://technet.microsoft.com/en-us/library/cc730960.aspx
In case you’ve already installed the MSMQ feature as instructed in part 4, please uninstall the MSMQ feature and then apply the AD modifications as mentioned here: http://technet.microsoft.com/en-us/library/cc730960.aspx . . Once done, add the MSMQ feature again as mentioned in part 4. Sorry for the inconvenience, but this part was unintended left out in the original part 4 (The current version of Part 4 has been updated)
Preparing our BizTalk Cluster
Before we can actually start with Clustering BizTalk Server, we need to perform all kinds of other things, like:
- Verifying if all required Roles and Features have been installed
- Verifying that we’ve configured the Firewall properly
- Configure IIS
- Configure the local Microsoft Distributed Transaction Coordinator
- Add Storage using iSCSI
Once these steps are done, we will create our BizTalk Cluster Group.
Verifying the required Server Roles and Features
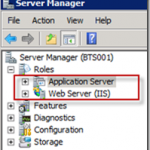
Logon to your first server on which BizTalk will be installed, in my case that would be BTS001. Once logged on; open the ‘server manager’ and expand the Roles node and ensure you’ve added the following roles:
- Application Server
- Web Server (IIS)
Now select ‘Application Server’ and in the main pane in the Server Manager scroll down to the Role Services. In total you should see that 13 role services are installed.
if you’re missing any of the role-services mentioned above, add them by clicking on the ‘Add Role Services’
Once double-checked, select the ‘Web Server (IIS) role and in the main pane in the Server Manager scroll down to the Role Services. In total you should see that 36 role services are installed
if you’re missing any of the role-services mentioned above, add them by clicking on the ‘Add Role Services’
Once verified, expand the Features node in the Server Manager and select ‘features’. Ensure that you have the features as mentioned below in the image installed.
if you’re missing any of the features as mentioned above, add them by clicking on the ‘Add Features’
Verifying that we’ve configured the Firewall properly
Open up the windows firewall, by going to Start and in the search box simple type: ‘Windows Firewall with Advanced Security’ followed by hitting ‘enter’
Within the MMC-Snap in, click on ‘Windows Firewall Properties’
A window will appear. Go to the first tab named ‘Domain Profile’ and ensure the firewall state is set to ‘Off’. If not turn it ‘Off’
Go to the second tab named ‘Private Profile’ and ensure the firewall state is set to ‘Off’. If not turn it ‘Off’
Configuring IIS
Go back to the Server manager, expand Roles –> Web Server (IIS) and select the ‘Internet Information Services (IIS) Manager’
The Internet Information Services (IIS) Manager will appear in the main pain. Expand the Server Node and select Application Pools.
In the Actions pane, click on the ‘Set Application Pool Defaults…’
Change the following settings and once done click on ‘ok’:
- Net Framework Version: v4.0 (if this version is not available; stop your horses and go fetch the .Net 4.0 Framework here)
- Enable 32-Bit Applications: True
In the actions, select ‘Add Application Pool…’
Now we will add an application pool, which will be dedicated to BizTalk. In order to do so, enter a descriptive name (I’ve used BizTalkApplicationPool). Once done click on ‘ok’
In the main pane, right click on the newly created Application Pool and select ‘Advanced Settings’
Select the ‘Identity item’, and click on the ‘…’
Select ‘Custom Account’ and click on the ‘Set…’ button.
Fill out the details and use trusted BizTalk Service account you’ve set up earlier in Active Directory (in my case ‘[email protected]’) Once done, click ‘ok’, and once more ‘ok’.
Your screen should look similar to the picture shown below. Once verified, click ‘ok’
Configure the local Microsoft Distributed Transaction Coordinator
go to start and type into the search box ‘Component Services’ and hit enter.
the Component Services MMC snap in will open; now extend the ‘Component Service’ node, do the same for the node ‘Computers’ and ‘My Computer’
Expand the ‘Distributed Transaction Coordinator’ , right click on ‘local DTC’ and select ‘properties’
Within the Properties window go the the ‘Security Tab’
On this tab, check (enable) the following item:
- Network DTC Access
- Allow Inbound
- Allow Outbound
- No Authentication Required
- Enable XA Transactions
- Enable SNA LU 6.2 Transactions
Click on ‘Ok, a message box will appear stating that the MSDTC service needs to be stopped and started. Click on Yes
Close the Component Services Snap in.
Add Storage which will be used within our BizTalk Cluster.
First verify that we’ve set-up our link with our Fileserver. Do this by clicking on Start and in the search box type ‘iSCSI Initiator’ and hit ‘enter’ (a pop-up might appear, just click ‘ok’)
In the ‘iSCSI Initiator Properties’ screen, go to the ‘Discovery’ tab and click on ‘Discover Portal…’
Type in the DNS name of your File Server (in my case that is ‘EUROPOORT’) and press ‘ok’
Now click on the ‘Targets’ tab and checking the status
The status should say ‘Inactive’, in order to use this Target we have to Connect to it. Do so by Clicking on the ‘Connect’ button.
A popup will appear, check the setting and press ‘ok’
You should now be connected to the File Server. Once verified, press ‘ok’
Go back to your ‘Server Manager’, expand the ‘Storage’ node and select ‘Disk Management’
At this point you should notice several disks which are not online.
If they are ‘offline’ bring them ‘online’ by right clicking on a disk and selecting ‘Online’ (repeat this step for all offline disks)
You now should have the availability of your additional storage devices.
Once done, repeat all the steps mentioned above starting with ‘Verifying the required Server Roles and Features’ on your other BizTalk server (in my case this would be BTS002)
Creating our BizTalk Cluster Group
Well at this point we are still not quite ready to install BizTalk and to Cluster BizTalk. Before we can actually start with this, we need to perform the following actions:
- Verify our Cluster
- Create our BizTalk Cluster group
- Cluster IIS and add it to our BizTalk Cluster group
- Cluster MSDTC and add it our BizTalk Cluster group
- Cluster MSMQ and add it to our BizTalk Cluster group
Once these steps are done, we will install Biztalk, configure BizTalk and last but not least Cluster BizTalk.
Verify our Cluster
Log on to your ‘Master’ Server on which you want to install BizTalk. In my case that would be BTS001.
Go to start and in the search box type ‘Failover Cluster Manager’ and then hit ‘enter’
In your Failover Cluster Manager, first click on ‘Validate a configuration’
On the ‘Before you begin’ screen, press ‘next’
Now Enter the server names (or browse) which you want to be part of your cluster. In my case that would be ‘BTS001 and BTS002’ and then select ‘Next’
on the ‘Testing Options’ screen, select the ‘Run all tests’ option and select ‘next’
Confirm the settings and then select ‘Next’
Once the validation has completed, it should show a summary which should not include any warnings. Examine the report (View Report) click on Finish.
Create our BizTalk Cluster group
From within your ‘Failover Cluster Manager’ select the ‘Create a Cluster’ link
On the ‘Before you begin’ screen, press ‘next’
Now Enter the server names (or browse) which you want to be part of your cluster. In my case that would be ‘BTS001 and BTS002’ and then select ‘Next’
On the ‘Access Point for Administering the Cluster’ enter a Cluster name, and a designated IP Address and click ‘next’ once done.
I’ve used the following:
Cluster Name: CLUSTER_BIZTALK
IP Address: 192.168.8.32
Confirm your settings and then click ‘next’
On the ‘Summary’ screen, press ‘Finish’
Configure Cluster Quorum Settings
Open up the ‘Cluster Manager’, right click on your cluster node (my case: CLUSTER_BIZTALK ) and select ‘More Actions’ –> ‘Configure Cluster Quorum Setting’
On the ‘Select Quorum Configuration’ screen, select the option ‘Node and File Share Majority’ and press ‘Next’
On the ‘Configure File Share Witness’ screen, browse to your Shared ‘Wittness’ Folder which you’ve created earlier (see previous part). In my case I’ve selected the folder ‘Majority_BTS’ on the EUROPOORT server. Once done press ‘Ok’ and then ‘Next’
Conform the settings and press ‘next’
On the ‘Summary’ screen, press ‘Finish’
Add storage as a disk resource in your Cluster
Open up the ‘Cluster Manager’, expend the CLUSTER_BIZTALK node and right click on Storage and select ‘Add a disk’
A list of available disks will appear, ensure that they are all selected and press ‘ok’
Now for each disk add a logical name, this is done by right clicking on a disk and selecting ‘properties’
Change the Resource Name to a logical Name; I’ve set it up as follow
Cluster_Disk 1 – DTC_STORE
Cluster_Disk 2 – MSMQ_STORE
Cluster_Disk 3 – FILE_STORE
Create our BizTalk Cluster Resource
Go back to the ‘Failover Cluster Manager’ and expand your created Cluster (my case: CLUSTER_BIZTALK) and right click on ‘Services and Applications’ and select ‘Configure a Service or Application…’
On the ‘Select Service or Application’ screen, select ‘Other Server’ and then press ‘next’
On the ‘Client Access Point’ screen, fill out the actual name of your BizTalk Cluster Name and assign it an IP and once done press ‘Next’. I’ve used the following settings:
Name: BTS2010
IP: 192.168.8.33
On the ‘Select Storage’ screen, add the required DATA Stores and press ‘Next’
On the ‘Confirmation’ screen, review the settings and press ‘Next’
On the ‘Summary’ screen, press ‘Finish’
In the ‘Failover Cluster Manager’ right-click your newly created ‘BizTalk Cluster Resource’ and select ‘properties’
On the ‘Properties’ screen, ensure to Check your main server as being the ‘Preferred owner’; in my case this is BTS001. Once done click ‘ok’.
Cluster IIS and add it to our BizTalk Cluster Resource
At this point we’ve created our BizTalk Cluster Group and BizTalk Cluster Resource. The later one will actually host all services required for our BizTalk Failover Cluster.
Now it is time to add those cluster resources which are required in our BizTalk Failover Cluster.
The first cluster resource we will add to our BizTalk Cluster Group will be the IIS. As we are not using a NLB, we have to perform a few tricks which enable us at least to Cluster out to use BizTalk Web Application and our BizTalk Application Pool. The next steps will explain how to achieve this.
Adding HTTP Response Header
Go back to the Server manager, expand Roles –> Web Server (IIS) and select the ‘Internet Information Services (IIS) Manager’
The Internet Information Services (IIS) Manager will appear in the main pain. Expand the Server Node and select the ‘Server Name’ (in my case BTS001)
In the main pane, go to the IIS Section and double click on ‘HTTP Response Headers’
In the actions pane, click on ‘Add..’
The ‘Add Custom HTTP Response Header’ windows will appear. In this window we will add a custom header which will ensure that all trafic redirected to our BizTalk Cluster Group will point to the Localhost. In my case I filled out the following information. Once done press ok.
Name: BTS2010
Value: http://localhost
Now go to your second server (in my case BTS002) and perform the above mentioned step ‘Adding HTTP Response Header’. Once done; return to your main server (BTS001)
Create a Generic-Script resource for IIS Clustering
On your main server (BTS001), open your nest friend ‘Notepad’ and copy and paste the following code to it:
'<begin script sample>
'This script provides high availability for IIS websites
'By default, it monitors the "Default Web Site" and "DefaultAppPool"
'To monitor another web site, change the SITE_NAME below
'To monitor another application pool, change the APP_POOL_NAME below
'More thorough and application-specific health monitoring logic can be added to the script if needed
Option Explicit
DIM SITE_NAME
DIM APP_POOL_NAME
Dim START_WEB_SITE
Dim START_APP_POOL
Dim SITES_SECTION_NAME
Dim APPLICATION_POOLS_SECTION_NAME
Dim CONFIG_APPHOST_ROOT
Dim STOP_WEB_SITE
'Note:
'Replace this with the site and application pool you want to configure high availability for
'Make sure that the same web site and application pool in the script exist on all cluster nodes. Note that the names are case-sensitive.
SITE_NAME = "Default Web Site"
APP_POOL_NAME = "DefaultAppPool"
START_WEB_SITE = 0
START_APP_POOL = 0
STOP_WEB_SITE = 1
SITES_SECTION_NAME = "system.applicationHost/sites"
APPLICATION_POOLS_SECTION_NAME = "system.applicationHost/applicationPools"
CONFIG_APPHOST_ROOT = "MACHINE/WEBROOT/APPHOST"
'Helper script functions
'Find the index of the website on this node
Function FindSiteIndex(collection, siteName)
Dim i
FindSiteIndex = -1
For i = 0 To (CInt(collection.Count) - 1)
If collection.Item(i).GetPropertyByName("name").Value = siteName Then
FindSiteIndex = i
Exit For
End If
Next
End Function
'Find the index of the application pool on this node
Function FindAppPoolIndex(collection, appPoolName)
Dim i
FindAppPoolIndex = -1
For i = 0 To (CInt(collection.Count) - 1)
If collection.Item(i).GetPropertyByName("name").Value = appPoolName Then
FindAppPoolIndex = i
Exit For
End If
Next
End Function
'Get the state of the website
Function GetWebSiteState(adminManager, siteName)
Dim sitesSection, sitesSectionCollection, siteSection, index, siteMethods, startMethod, executeMethod
Set sitesSection = adminManager.GetAdminSection(SITES_SECTION_NAME, CONFIG_APPHOST_ROOT)
Set sitesSectionCollection = sitesSection.Collection
index = FindSiteIndex(sitesSectionCollection, siteName)
If index = -1 Then
GetWebSiteState = -1
End If
Set siteSection = sitesSectionCollection(index)
GetWebSiteState = siteSection.GetPropertyByName("state").Value
End Function
'Get the state of the ApplicationPool
Function GetAppPoolState(adminManager, appPool)
Dim configSection, index, appPoolState
set configSection = adminManager.GetAdminSection(APPLICATION_POOLS_SECTION_NAME, CONFIG_APPHOST_ROOT)
index = FindAppPoolIndex(configSection.Collection, appPool)
If index = -1 Then
GetAppPoolState = -1
End If
GetAppPoolState = configSection.Collection.Item(index).GetPropertyByName("state").Value
End Function
'Start the w3svc service on this node
Function StartW3SVC()
Dim objWmiProvider
Dim objService
Dim strServiceState
Dim response
'Check to see if the service is running
set objWmiProvider = GetObject("winmgmts:/root/cimv2")
set objService = objWmiProvider.get("win32_service='w3svc'")
strServiceState = objService.state
If ucase(strServiceState) = "RUNNING" Then
StartW3SVC = True
Else
'If the service is not running, try to start it
response = objService.StartService()
'response = 0 or 10 indicates that the request to start was accepted
If ( response <> 0 ) and ( response <> 10 ) Then
StartW3SVC = False
Else
StartW3SVC = True
End If
End If
End Function
'Start the application pool for the website
Function StartAppPool()
Dim ahwriter, appPoolsSection, appPoolsCollection, index, appPool, appPoolMethods, startMethod, callStartMethod
Set ahwriter = CreateObject("Microsoft.ApplicationHost.WritableAdminManager")
Set appPoolsSection = ahwriter.GetAdminSection(APPLICATION_POOLS_SECTION_NAME, CONFIG_APPHOST_ROOT)
Set appPoolsCollection = appPoolsSection.Collection
index = FindAppPoolIndex(appPoolsCollection, APP_POOL_NAME)
Set appPool = appPoolsCollection.Item(index)
'See if it is already started
If appPool.GetPropertyByName("state").Value = 1 Then
StartAppPool = True
Exit Function
End If
'Try To start the application pool
Set appPoolMethods = appPool.Methods
Set startMethod = appPoolMethods.Item(START_APP_POOL)
Set callStartMethod = startMethod.CreateInstance()
callStartMethod.Execute()
'If started return true, otherwise return false
If appPool.GetPropertyByName("state").Value = 1 Then
StartAppPool = True
Else
StartAppPool = False
End If
End Function
'Start the website
Function StartWebSite()
Dim ahwriter, sitesSection, sitesSectionCollection, siteSection, index, siteMethods, startMethod, executeMethod
Set ahwriter = CreateObject("Microsoft.ApplicationHost.WritableAdminManager")
Set sitesSection = ahwriter.GetAdminSection(SITES_SECTION_NAME, CONFIG_APPHOST_ROOT)
Set sitesSectionCollection = sitesSection.Collection
index = FindSiteIndex(sitesSectionCollection, SITE_NAME)
Set siteSection = sitesSectionCollection(index)
if siteSection.GetPropertyByName("state").Value = 1 Then
'Site is already started
StartWebSite = True
Exit Function
End If
'Try to start site
Set siteMethods = siteSection.Methods
Set startMethod = siteMethods.Item(START_WEB_SITE)
Set executeMethod = startMethod.CreateInstance()
executeMethod.Execute()
'Check to see if the site started, if not return false
If siteSection.GetPropertyByName("state").Value = 1 Then
StartWebSite = True
Else
StartWebSite = False
End If
End Function
'Stop the website
Function StopWebSite()
Dim ahwriter, sitesSection, sitesSectionCollection, siteSection, index, siteMethods, startMethod, executeMethod, autoStartProperty
Set ahwriter = CreateObject("Microsoft achat viagra 50.ApplicationHost.WritableAdminManager")
Set sitesSection = ahwriter.GetAdminSection(SITES_SECTION_NAME, CONFIG_APPHOST_ROOT)
Set sitesSectionCollection = sitesSection.Collection
index = FindSiteIndex(sitesSectionCollection, SITE_NAME)
Set siteSection = sitesSectionCollection(index)
'Stop the site
Set siteMethods = siteSection.Methods
Set startMethod = siteMethods.Item(STOP_WEB_SITE)
Set executeMethod = startMethod.CreateInstance()
executeMethod.Execute()
End Function
'Cluster resource entry points. More details here:
'http://msdn.microsoft.com/en-us/library/aa372846(VS.85).aspx
'Cluster resource Online entry point
'Make sure the website and the application pool are started
Function Online( )
Dim bOnline
'Make sure w3svc is started
bOnline = StartW3SVC()
If bOnline <> True Then
Resource.LogInformation "The resource failed to come online because w3svc could not be started."
Online = False
Exit Function
End If
'Make sure the application pool is started
bOnline = StartAppPool()
If bOnline <> True Then
Resource.LogInformation "The resource failed to come online because the application pool could not be started."
Online = False
Exit Function
End If
'Make sure the website is started
bOnline = StartWebSite()
If bOnline <> True Then
Resource.LogInformation "The resource failed to come online because the web site could not be started."
Online = False
Exit Function
End If
Online = true
End Function
'Cluster resource offline entry point
'Stop the website
Function Offline( )
StopWebSite()
Offline = true
End Function
'Cluster resource LooksAlive entry point
'Check for the health of the website and the application pool
Function LooksAlive( )
Dim adminManager, appPoolState, configSection, i, appPoolName, appPool, index
i = 0
Set adminManager = CreateObject("Microsoft.ApplicationHost.AdminManager")
appPoolState = -1
'Get the state of the website
if GetWebSiteState(adminManager, SITE_NAME) <> 1 Then
Resource.LogInformation "The resource failed because the " & SITE_NAME & " web site is not started."
LooksAlive = false
Exit Function
End If
'Get the state of the Application Pool
if GetAppPoolState(adminManager, APP_POOL_NAME) <> 1 Then
Resource.LogInformation "The resource failed because Application Pool " & APP_POOL_NAME & " is not started."
LooksAlive = false
Exit Function
end if
' Web site and Application Pool state are valid return true
LooksAlive = true
End Function
'Cluster resource IsAlive entry point
'Do the same health checks as LooksAlive
'If a more thorough than what we do in LooksAlive is required, this should be performed here
Function IsAlive()
IsAlive = LooksAlive
End Function
'Cluster resource Open entry point
Function Open()
Open = true
End Function
'Cluster resource Close entry point
Function Close()
Close = true
End Function
'Cluster resource Terminate entry point
Function Terminate()
Terminate = true
End Function
'<end script sample>
script source credits: http://support.microsoft.com/kb/970759/
Once you’ve copied the code into notepad, look for the following two lines
SITE_NAME = “Default Web Site”
APP_POOL_NAME = “DefaultAppPool”
Change both the values of SITE_NAME and APP_POOL_NAME to your corresponding settings in IIS; in my case:
SITE_NAME = “Default Web Site”
APP_POOL_NAME = “BizTalkApplicationPool”
Save the file as ‘BizTalk_IIS_Script_Resource.vbs’ and store it on one of your Clustered Disks (I used the DATA_STORE (F:)
Add a Generic-Script resource for IIS Clustering to the BizTalk Cluster Resource
Go back to the ‘Failover Cluster Manager’, expand Services and Applications and ‘right click’ the BizTalk Cluster Resource (in my case: BTS2010). Select ‘Add a resource’ –> ‘3 – Generic Script’
On the ‘Generic Script Info’ screen enter the complete file path to your ‘BizTalk_IIS_Script_Resource.vbs’ file. Once done press ‘next’
.
Confirm the changes, and press ‘Next’
On the ‘summary’ screen, press ‘finish’
Now right click on your Script File (Other Resources in the main pane of the Failover Cluster Manager) and select ‘properties’
Go to the ‘Dependencies’ tab, and add dependencies for the resources : ‘Name’ and ‘File Store’. Once done press ‘Ok’
Now right click on your Script File (Other Resources in the main pane of the Failover Cluster Manager) and select ‘bring this resource online’
Cluster MSMQ and add it to our BizTalk Cluster Resource
Now that we’ve clustered IIS, we can move to our next challenge. Clustering the ‘Microsoft Distributed Transaction Coordinator’. Actually this is quite straightforward.
Go back to your Main Server (BTS001). Open the Failover Cluster Manager, ‘right click’ on your BizTalk Cluster Resource and select ‘Add a resource’ –> ‘More Resources’ –> ‘2- Add Distributed Transaction Coordinator’
A new resource has been added; ‘right click’ it and select ‘properties’
Go to the ‘Dependencies’ tab and add dependencies for the resources : ‘Name’ and ‘File Store’. Once done press ‘Ok’
Now right click on your DTC Resource and select ‘bring this resource online’
Now go to ‘Start’ and in the search box type: ‘Component Services’ and press ‘enter’
on the ‘Component Services’ screen, expand ‘Component Services’ –> ‘Computers’ –> ‘My Computer’ –> ‘Distributed Transaction Coordinator’ –> ‘Clustered DTCs’. Right click on your BizTalk Cluster Resource Name (BTS2010) and select ‘properties’
Now select the ‘Security Tab’ and ensure that the follow settings are checked / enabled. Once done press ‘Ok’
- Network DTC Access
- Allow Inbound
- Allow Outbound
- No Authentication Required
- Enable XA Transactions
- Enable SNA LU 6.2 Transactions
Cluster MSMQ and add it to our BizTalk Cluster Resource
Now that we’ve clustered our DTC, we can move to our next challenge. Clustering MSMQ. Actually this is quite straightforward.
Go back to your Main Server (BTS001). Open the Failover Cluster Manager, ‘right click’ on your BizTalk Cluster Resource and select ‘Add a resource’ –> ‘More Resources’ –> ‘8- Add Message Queuing’
A new resource has been added; ‘right click’ it and select ‘properties’
Go to the ‘Dependencies’ tab and add dependencies for the resources : ‘Name’, ‘MSMQ Store’ and ‘MSDTC-BTS2010’ . Once done press ‘Ok’
Now right click on your MSMQ Resource and select ‘bring this resource online’
Now go to ‘Start’ and in the search box type: ‘Computer Management’ and press ‘enter’
On the ‘Computer Management’ screen, click on ‘Actions’ –> ‘Connect to another computer…’
In the ‘another computer’ box type the name of your BizTalk Cluster Resource (in my case: BTS2010) and press ‘ok’
Expand ‘Services and Applications’ and right click on ‘Message Queuing’ and select ‘properties’
On the ‘Message Queuing Properties’ screen, select the ‘security’ tab and click ‘add’
On the ‘Select Users, Computers, Service Accounts, or groups’ screen, enter this BizTalk Untrusted Service Account (in my case [email protected]) and press ‘ok’ once done
Select the just added Service Account and grant this user ‘Full Control’, once done press ‘ok’
Closing Note
Well it has been another long read but this sums up part 6. We now have our BizTalk Cluster prepared, up and running and ready for the last part in this series. Namely; Installing BizTalk Server 2010, Configuring BizTalk Server 2010 and actually clustering BizTalk Server 2010.
At the end of part 5, I mentioned that part 7 would be most likely about playing around with the BizTalk Best Practices Analyzer. Well I guess you’ve noticed by now that this will most likely be a Part 8
Well I hope you enjoyed the posts so far, check back soon and feel free to leave any comments, remarks and/or suggestions with regards to Blog posts you would like to see in the future.
Cheers
René


