Reminder, FREE Azure Discovery Event in Los Angeles is this Thursday Dec 16
It’s not too late, you can still get in.
Please see my previous post for complete details. Hope to see you there!
It’s not too late, you can still get in.
Please see my previous post for complete details. Hope to see you there!
Process data, commonly accessed from OPC or a process historian such as OSIsoft PI, is well suited for analysis using StreamInsight – being time-series data with data values from a range of sensors. In this post, I’ll walk through a couple of simple patterns for working with process data (not that these patterns are isolated to process data).
To follow along, the LINQ query for this example is here (if you haven’t used LINQPad with StreamInsight yet, follow the directions here to get up and running).
The general case for collecting process data is that of a range of sensors (temperature, pressure, humidity, flow, etc) connected to process control equipment (Programmable Logic Controllers, or PLC’s, SCADA systems, etc) that in turn relay the information upstream to process historians (or provide a direct data gathering interface, through OPC or a similar protocol).
The reason I mention this level of detail has to do with how process data typically arrives – in a single or mixed stream. That is to say as connections to these embedded devices tends to be ‘expensive’ we want to minimize connections and communication and pull multiple data values over a single connection, often emitted as a single CepStream<T> in StreamInsight (rather than having, for example, temperature and humidity information coming from two different data sources, in two different streams). This is why I have intermingled data types in my examples below, and why the query patterns usually start out with creating different virtual streams based on a data type.
For these examples, let’s consider a representative process control data type with some simple fields
Next, assume that the Id field uses an “asset.sensor” naming convention (i.e. Station1.Temperature, and Station1.Windspeed). Also assume that the data updates are not guaranteed to be synchronized (i.e. the underlying PLC may not report updates to temperature and humidity at the same time, nor on the same schedule). For the first query, we want to create a query that answers the question:
“What is the current wind chill factor” (or is it a dry cold – the opposite side of the coin from the humidex)
Which breaks down to answering these questions:
Let’s start by examining the first question. Whenever we see a question involving latest value, we need to take a series of point or interval events and convert them into a signal (refer to Point to Signal conversion on MSDN).
This is a timeline representation of what we’re looking to do. We need to:
For the purposes of this example, assume that all temperature are in F, and the wind speed is in mph.
This LINQ snippet implements step one and two, giving us the joined result of the last known values for each sub-stream:
Now that we have the correlated temperature and wind speed in a single event, we can go ahead and calculate the wind chill factor for each data update. The algorithm we’ll use, as defined by the National Weather Service is
with T being the e.Temperature value, and V being the wind speed factor. We add this to the projection as
And observe the calculated results.
This query pattern will work for any data source wherein you need to work off of and synchronize the “last known value” for a given set or subset of data. Note that if you are guaranteed to have synchronized timestamps on incoming data the point to signal conversion steps are not necessary before performing the join (as the timestamps of the incoming events already have the appropriate overlap).
On Thanksgiving day while I was running in the snow I had an idea – what if you could create an Operation Behavior that would allow WCF to cache the result of a service call in Windows Server AppFabric Cache?
Download WCF AppFabric Caching Caching Sample Behavior
So I created a sample application that does this by implementing an attribute that implements IOperationBehavior and IOperationInvoker along with a Service Behavior that supports AppFabric Caching. I wanted to make this work with AppFabric Caching but not require you to to have AppFabric caching running when developing or testing the service. The solution I came up with was to look for a Service Extension that implements IServiceCache. If I find it, I use it. Otherwise I create a local cache using System.Runtime.MemoryCache.
To ask for caching on a service you can either add it to your contract or request it in config.
   [ServiceContract]
    public interface ISampleService
    {
        [OperationContract]
        [CacheResult(Minutes=2)]
        SampleData GetSampleData(SampleDataRequest request);
    }
To request caching in your config
<system.servicemodel>
<extensions>
<behaviorextensions>
<add type="Microsoft.ServiceModel.Samples.Caching.AppFabric.AppFabricCacheElement, Microsoft.ServiceModel.Samples.Caching.AppFabric, Version=1.0.0.0, Culture=neutral, PublicKeyToken=null" name="appFabricCachingBehavior" />
</behaviorextensions>
</extensions>
<behaviors>
<servicebehaviors>
<behavior name="">
<servicemetadata httpgetenabled="true" />
<servicedebug includeexceptiondetailinfaults="true" />
<appfabriccachingbehavior />
</behavior>
</servicebehaviors>
</behaviors>
<servicehostingenvironment multiplesitebindingsenabled="true" />
</system.servicemodel>
The sample includes unit tests that demonstrate how you can setup parameters for cache keys and complex types. Hope you like it!
Today (12/13/2010) the Windows Azure platform AppFabric has updated the IP Ranges on which the AppFabric nodes are hosted. If your firewall restricts outbound traffic, you will need to perform the additional step of opening your outbound TCP Ports and IP Addresses for these nodes. Please see the 1/28/2010 “ Additional Data Centers for Windows Azure platform AppFabric” posted which was updated today to include the new set of IP Addresses.
A little over a month ago we launched our new WCF Web Apis on Codeplex. Since then a bunch of folks in the community (and some internal folks) have been posting about their own explorations / thoughts of the new bits. it’s great to see the work that they are doing! I am going to start aggregating these and periodically (I am not committing to a cadence but am aiming for monthly) post pointers to whatever I find. Appreciate any suggestions to the format.
Apparently, I was lucky to be in the first batch of beta participants for the 3 new Azure beta programs:
This post will demonstrate how to upload a virtual hard disk to the Azure storage and how to configure it to run it as your own instance(s) in the cloud.
I was very happy with Windows Virtual PC. It was lightweight, free and pretty stable. It allowed us, developers, to use it on our laptops on the road, at our customers, in the office. But there is one important thing: Virtual PC does not support a 64-bit OS on a guest system. And that became a big problem with the introduction of Windows Server 2008 R2; that operating system is only available in 64-bit, which makes sense.
Because of this, we needed an alternative:
So, I decided to use VMWare for the creation of my virtual machines for Azure.
To leverage the full capabilities of the VM Roles, it would be better to use Hyper-V though, since that allows the usage of differencing disks, which would be a big timesaver for incremental updates to a virtual machine image. But for now, I’ve used VMWare, since I didn’t have a physical Hyper-V server available.
I took the following steps to create the Virtual machine.
Please make sure that the firewall windows service is enabled (see ’Things to know’ at the end of this post)
There are some specificities with VM Roles that are different from a typical hosting/IaaS solution. I discussed some of these in my previous post: Hosting BizTalk Server on Azure VM Role. One of the important things to know is that the machine name of the Virtual Machine is changed and assigned at runtime by the Azure Fabric controller. This makes sense, since it is possible to configure multiple instances for a VM Role.
To make the virtual machine ready for these actions, the machine needs to be ’sysprepped’. This is a typical action that is taken when creating a base image for a machine. It provides a different SID and name for the machine.
The VHD file now needs to be uploaded. For this, the Azure SDK 1.3 comes with a command-line tool: CSUPLOAD. Using this tool, we can upload the VHD to our Azure subscription.
On my virtual machine (locally), I had disabled the Windows Firewall service. Because of that, the installation of the Windows Azure Integration Components failed with the following exception (copying it here for bing/google search):
Product: Windows Azure VM Role Integration Components — Error 1720. There is a problem with this Windows Installer package. A script required for this install to complete could not be run. Contact your support personnel or package vendor. Custom action InstallScriptAction script error -2147023143, : Line 81, Column 5,
After I enabled the Windows firewall service again, things worked smooth again.
It is not supported to install the Windows Azure SDK inside a VM intended for use with VM role. The Windows Azure SDK and the Integration Components are mutually exclusive.
Unfortunately there seems to be no support to use Startup tasks in VMRoles. So startup tasks will have to be ’embedded’ in the Virtual Machine startup process. This might change after the beta, off course.
Again, just as with the Azure Connect, I was very surprised by the simplicity of the process of getting things to work. Off course, it takes more time, because of the preparation and the upload, but besides that, things looks solid and stable.
Things that I hope to see soon:
Great stuff.
Sam Vanhoutte, Codit
Earlier today the ASP.NET team shipped the final release candidate (RC2) for ASP.NET MVC 3. You can download and install it here.
Today’s RC2 release is the near-final release of ASP.NET MVC 3, and is a true “release candidate” in that we are hoping to not make any more code changes with it. We are publishing it today so that people can do final testing with it, let us know if they find any last minute “showstoppers”, and start updating their apps to use it. We will officially ship the final ASP.NET MVC 3 “RTM” build in January.
Today’s ASP.NET MVC 3 RC2 release works with both the shipping version of Visual Studio 2010 / Visual Web Developer 2010 Express, as well as the newly released VS 2010 SP1 Beta.
This means that you do not need to install VS 2010 SP1 (or the SP1 beta) in order to use ASP.NET MVC 3. It works just fine with the shipping Visual Studio 2010. I’ll do a blog post next week, though, about some of the nice additional feature goodies that come with VS 2010 SP1 (including IIS Express and SQL CE support within VS) which make the dev experience for both ASP.NET Web Forms and ASP.NET MVC even better.
Today’s ASP.NET MVC 3 RC2 build contains many bug fixes and performance optimizations. Our latest performance tests indicate that ASP.NET MVC 3 is now faster than ASP.NET MVC 2, and that existing ASP.NET MVC applications will experience a slight performance increase when updated to run using ASP.NET MVC 3.
In addition to bug fixes and performance optimizations, today’s RC2 build contains a number of last-minute feature tweaks and “fit-n-finish” changes for the new ASP.NET MVC 3 features. The feedback and suggestions we’ve received during the public previews has been invaluable in guiding these final tweaks, and we really appreciate people’s support in sending this feedback our way.
Below is a short-list of some of the feature changes/tweaks made between last month’s ASP.NET MVC 3 RC release and today’s ASP.NET MVC 3 RC2 release:
jQuery updates and addition of jQuery UI
The default ASP.NET MVC 3 project templates have been updated to include jQuery 1.4.4 and jQuery Validation 1.7.
We are also excited to announce today that we are including jQuery UI within our default ASP.NET project templates going forward. jQuery UI provides a powerful set of additional UI widgets and capabilities. It will be added by default to your project’s \scripts folder when you create new ASP.NET MVC 3 projects.
Improved View Scaffolding
The T4 templates used for scaffolding views with the Add-View dialog now generates views that use Html.EditorFor instead of helpers such as Html.TextBoxFor. This change enables you to optionally annotate models with metadata (using data annotation attributes) to better customize the output of your UI at runtime.
The Add View scaffolding also supports improved detection and usage of primary key information on models (including support for naming conventions like ID, ProductID, etc). For example: the Add View dialog box uses this information to ensure that the primary key value is not scaffold as an editable form field, and that links between views are auto-generated correctly with primary key information.
The default Edit and Create templates also now include references to the jQuery scripts needed for client validation. Scaffold form views now support client-side validation by default (no extra steps required). Client-side validation with ASP.NET MVC 3 is also done using an unobtrusive javascript approach – making pages fast and clean.
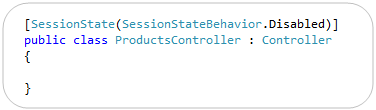
[ControllerSessionState] -> [SessionState]
ASP.NET MVC 3 adds support for session-less controllers. With the initial RC you used a [ControllerSessionState] attribute to specify this. We shortened this in RC2 to just be [SessionState]:

Note that in addition to turning off session state, you can also set it to be read-only (which is useful for webfarm scenarios where you are reading but not updating session state on a particular request).
[SkipRequestValidation] -> [AllowHtml]
ASP.NET MVC includes built-in support to protect against HTML and Cross-Site Script Injection Attacks, and will throw an error by default if someone tries to post HTML content as input. Developers need to explicitly indicate that this is allowed (and that they’ve hopefully built their app to securely support it) in order to enable it.
With ASP.NET MVC 3, we are also now supporting a new attribute that you can apply to properties of models/viewmodels to indicate that HTML input is enabled, which enables much more granular protection in a DRY way. In last month’s RC release this attribute was named [SkipRequestValidation]. With RC2 we renamed it to [AllowHtml] to make it more intuitive:

Setting the above [AllowHtml] attribute on a model/viewmodel will cause ASP.NET MVC 3 to turn off HTML injection protection when model binding just that property.
Html.Raw() helper method
The new Razor view engine introduced with ASP.NET MVC 3 automatically HTML encodes output by default. This helps provide an additional level of protection against HTML and Script injection attacks.
With RC2 we are adding a Html.Raw() helper method that you can use to explicitly indicate that you do not want to HTML encode your output, and instead want to render the content “as-is”:

ViewModel/View -> ViewBag
ASP.NET MVC has (since V1) supported a ViewData[] dictionary within Controllers and Views that enables developers to pass information from a Controller to a View in a late-bound way. This approach can be used instead of, or in combination with, a strongly-typed model class. The below code demonstrates a common use case – where a strongly typed Product model is passed to the view in addition to two late-bound variables via the ViewData[] dictionary:

With ASP.NET MVC 3 we are introducing a new API that takes advantage of the dynamic type support within .NET 4 to set/retrieve these values. It allows you to use standard “dot” notation to specify any number of additional variables to be passed, and does not require that you create a strongly-typed class to do so.
With earlier previews of ASP.NET MVC 3 we exposed this API using a dynamic property called “ViewModel” on the Controller base class, and with a dynamic property called “View” within view templates. A lot of people found the fact that there were two different names confusing, and several also said that using the name ViewModel was confusing in this context – since often you create strongly-typed ViewModel classes in ASP.NET MVC, and they do not use this API.
With RC2 we are exposing a dynamic property that has the same name – ViewBag – within both Controllers and Views. It is a dynamic collection that allows you to pass additional bits of data from your controller to your view template to help generate a response. Below is an example of how we could use it to pass a time-stamp message as well as a list of all categories to our view template:

Below is an example of how our view template (which is strongly-typed to expect a Product class as its model) can use the two extra bits of information we passed in our ViewBag to generate the response. In particular, notice how we are using the list of categories passed in the dynamic ViewBag collection to generate a dropdownlist of friendly category names to help set the CategoryID property of our Product object.

The above Controller/View combination will then generate an HTML response like below.

Output Caching Improvements
ASP.NET MVC 3’s output caching system no longer requires you to specify a VaryByParam property when declaring an [OutputCache] attribute on a Controller action method. MVC3 now automatically varies the output cached entries when you have explicit parameters on your action method – allowing you to cleanly enable output caching on actions using code like below:

In addition to supporting full page output caching, ASP.NET MVC 3 also supports partial-page caching – which allows you to cache a region of output and re-use it across multiple requests or controllers. The [OutputCache] behavior for partial-page caching was updated with RC2 so that sub-content cached entries are varied based on input parameters as opposed to the URL structure of the top-level request – which makes caching scenarios both easier and more powerful than the behavior in the previous RC.
@model declaration does not add whitespace
In earlier previews, the strongly-typed @model declaration at the top of a Razor view added a blank line to the rendered HTML output. This has been fixed so that the declaration does not introduce whitespace.
Changed "Html.ValidationMessage" Method to Display the First Useful Error Message
The behavior of the Html.ValidationMessage() helper was updated to show the first useful error message instead of simply displaying the first error.
During model binding, the ModelState dictionary can be populated from multiple sources with error messages about the property, including from the model itself (if it implements IValidatableObject), from validation attributes applied to the property, and from exceptions thrown while the property is being accessed.
When the Html.ValidationMessage() method displays a validation message, it now skips model-state entries that include an exception, because these are generally not intended for the end user. Instead, the method looks for the first validation message that is not associated with an exception and displays that message. If no such message is found, it defaults to a generic error message that is associated with the first exception.
RemoteAttribute “Fields” -> “AdditionalFields”
ASP.NET MVC 3 includes built-in remote validation support with its validation infrastructure. This means that the client-side validation script library used by ASP.NET MVC 3 can automatically call back to controllers you expose on the server to determine whether an input element is indeed valid as the user is editing the form (allowing you to provide real-time validation updates).
You can accomplish this by decorating a model/viewmodel property with a [Remote] attribute that specifies the controller/action that should be invoked to remotely validate it. With the RC this attribute had a “Fields” property that could be used to specify additional input elements that should be sent from the client to the server to help with the validation logic. To improve the clarity of what this property does we have renamed it to “AdditionalFields” with today’s RC2 release.
ViewResult.Model and ViewResult.ViewBag Properties
The ViewResult class now exposes both a “Model” and “ViewBag” property off of it. This makes it easier to unit test Controllers that return views, and avoids you having to access the Model via the ViewResult.ViewData.Model property.
You can download and install the ASP.NET MVC 3 RC2 build here. It can be installed on top of the previous ASP.NET MVC 3 RC release (it should just replace the bits as part of its setup).
The one component that will not be updated by the above setup (if you already have it installed) is the NuGet Package Manager. If you already have NuGet installed, please go to the Visual Studio Extensions Manager (via the Tools -> Extensions menu option) and click on the “Updates” tab. You should see NuGet listed there – please click the “Update” button next to it to have VS update the extension to today’s release.
If you do not have NuGet installed (and did not install the ASP.NET MVC RC build), then NuGet will be installed as part of your ASP.NET MVC 3 setup, and you do not need to take any additional steps to make it work.
We are really close to the final ASP.NET MVC 3 release, and will deliver the final “RTM” build of it next month. It has been only a little over 7 months since ASP.NET MVC 2 shipped, and I’m pretty amazed by the huge number of new features, improvements, and refinements that the team has been able to add with this release (Razor, Unobtrusive JavaScript, NuGet, Dependency Injection, Output Caching, and a lot, lot more). I’ll be doing a number of blog posts over the next few weeks talking about many of them in more depth.
Hope this helps,
Scott
P.S. In addition to blogging, I am also now using Twitter for quick updates and to share links. Follow me at: twitter.com/scottgu

Microsoft have released today two important cumulative update packages. They follow the same approach of cumulative updates that have been successful with SQL Server and BizTalk Server 2006 R2 SP1 for a while now. The first is the Cumulative Update Package 1 for BizTalk Server 2009 (KB 2429050). It contains 60 fixes with 55 applying […]![]()
A number of customers are choosing to use Entity Framework with Microsoft SQL Azure, and rightfully so. Entity Framework provides an abstraction above the database so that queries are developed using the business model or conceptual model and queries are executed using the richness of LINQ to Entities. SQL Azure is a cloud-based database based upon SQL Server which provides reliability and elasticity for database applications. And, the Entity Framework supports SQL Azure, both the designer and the provider runtime can be used against either a SQL Server database on premise or in the cloud.
But these same customers are describing connectivity drops, classified as general network issues, and are asking for the best practice to handle such network issues between SQL Azure instances and clients utilizing Entity Framework. In fact, SQL Azure has a whole host of reasons to terminate a connection including but not exclusive to resource shortages and other transient conditions. Similar issues apply when using ADO.NET; networks can be unreliable and are often suspect to sporadic fits resulting in dropped TCP connections. There are a number of blog posts, such as ‘SQL Azure: Connection Management in SQL Azure’ and ‘Best Practices for Handling Transient Conditions in SQL Azure Client Applications’, which provide connection fault handling guidance and even a framework for creating retry policies with SQL Azure client. Neither article is fully comprehensive regarding the Entity Framework aspects. The purpose of this blog posting is to fill in the details and discussion points for the many developer options to handle and recover from intermittent connectivity drops when using Entity Framework.
It is well known that the creation and teardown of database connections to SQL Server is expensive, thus ADO.NET uses connection pools as an optimization strategy to limit the cost of the database connection creation and teardown operations. The connection pool maintains a group of all physical connections to the database and when clients such as Entity Framework request a connection, ADO.NET provides the next available connection from the pool. The opposite occurs when clients close a connection – the connection is put back into the pool. What is less understood is that the connection pooler will remove connections from the pool only after an idle period OR after the pooler detects that the connection with the server has been severed. But the pooler can only detect severed connections after an attempt has been made to issue a command against the server. This means that clients such as Entity Framework could potentially draw a severed or invalid connection from the pool. With high latency and volatile networks, this happens on a more frequent basis. The invalid connections are removed from the pool only after the connection is closed. Alternatively the client can flush all of the connections using ClearAllPools or ClearPool methods. See MSDN article ‘SQL Server Connection Pooling’ for a more verbose description of the concepts.
The Entity Framework provider abstracts most if not all of the facets from executing a query against the backend store, from establishment of the connection, to the retrieval of the data and materialization of the POCO or EntityObjects. Nevertheless it does provide access to the underlying store connection through the Connection property of the System.Data.Objects.ObjectContext.
The ObjectContext wraps the underlying System.Data.SqlClient.SqlConnection to the SQL Server database by using an instance of the System.Data.EntityClient.EntityConnection class. The EntityConnection class exposes a read/write StoreConnection property which is essentially the underlying SqlConnection to the SQL Azure instance. That mouthful simply says that we have a mechanism upon which to read the current state of a connection and assign the store connection if so desired. Since we have access to the database connection, we can most certainly catch exceptions thrown when the network transport has failed and retry our operations per a given retry policy.
One subtlety which requires a touch of clarification, take the code snippet below. In this example the connection was explicitly opened on the context. The explicit opening of the connection is a way of informing EF not to open and reopen the connection on each command. Had I not opened the connection in this way, EF would implicitly open and close a database connection for each query within the scope of the context. We will leverage this knowledge in the connection retry scenarios that follow.
using (AdventureWorksLTAZ2008R2Entities dc = new AdventureWorksLTAZ2008R2Entities())
{
    dc.Connection.Open();
    // ...
}
Let’s take the following code as an example. How many connections are drawn from the pool? The answer is two, one for the retrieval of the customer and another for the retrieval of the address. This means that if implemented in this general way, Entity Framework will use a new connection for every query it executes against the backend data store given the scope of the current ObjectContext. It pulls a connection for the pool, submits the query against the database and closes the connection for each LINQ query. You can see this by running SQL Profiler on an instance of SQL Server as shown in the table below the query.
using (AdventureWorksLTAZ2008R2Entities dc = new AdventureWorksLTAZ2008R2Entities())
{
    int cId = 29485;
    Customer c1 = (from x in dc.Customers
                   where x.CustomerID == cId
                   select x).First();

    Address ad1 = (from x in dc.Addresses
                   from y in dc.CustomerAddresses
                   where y.CustomerID == cId && x.AddressID == y.AddressID
                   select x).FirstOrDefault();
}
|
Audit Login |
|
RPC:Completed |
|
exec sp_executesql N’SELECT TOP (1) |
|
|
Audit Logout |
|
RPC:Completed |
| exec sp_reset_connection | |
|
Audit Login |
|
RPC:Completed |
|
exec sp_executesql N’SELECT |
|
|
Audit Logout |
But there is an interesting facet to the code above, the connection to the database was not explicitly created. The EntityConnection was transparently created by the Entity Framework when the AdventureWorksLTAZ2008R2Entities ObjectContext was instantiated and the StoreConnection property or actual SqlConnection state is set to closed. Only after the LINQ query is executed by the EF provider is the connection opened and the query submitted to SQL Server. The state of the inner connection changes to closed and the connection placed back into the pool once the results have been successfully retrieved.
In this example, we have two places in which a transient network error or invalid connection in the pool could affect the query and cause a System.Data.EntityException, for the retrieval of the customer and for the retrieval of the address. The inner exception of the EntityException is of type System.Data.SqlClient.SqlException and it contains the actual SQL Server error code for the exception.
A policy can be applied to wrap the LINQ queries to catch the EntityException and retry the query given the particular metrics of the policy. The retry policy in the code below utilizes the Transient Conditions Handling Framework described in the blog written by my teammate Valery. This blog provides a very comprehensive selection of retry policies which will properly handle the thrown exceptions. The basic principle is to support a number of retries with increasing periods of wait between each subsequent retry (i.e. a backoff algorithm). In this case we abort the operation after 10 attempts with a wait periods of 100ms, 200ms… up to 1 second.
using Microsoft.AppFabricCAT.Samples.Azure.TransientFaultHandling;
using Microsoft.AppFabricCAT.Samples.Azure.TransientFaultHandling.SqlAzure;
using (AdventureWorksLTAZ2008R2Entities dc = new AdventureWorksLTAZ2008R2Entities())
{
    int cId = 29485;
    int MaxRetries = 10;
    int DelayMS = 100;

    RetryPolicy policy = new RetryPolicy<SqlAzureTransientErrorDetectionStrategy>(MaxRetries, TimeSpan.FromMilliseconds(DelayMS));

    Customer c1 = policy.ExecuteAction<Customer>(() =>
                  (from x in dc.Customers
                   where x.CustomerID == cId
                   select x).First());

    Address ad1 = policy.ExecuteAction<Address>(() =>
                  (from x in dc.Addresses
                   from y in dc.CustomerAddresses
                   where y.CustomerID == cId && x.AddressID == y.AddressID
                   select x).FirstOrDefault());
}
This retry policy approach is not without its challenges, particularly in regards to the developer experience. The Func delegates require that a type be passed in, something that is somewhat cumbersome when using anonymous types because the return type must be set to an object type. This means that the developer must cast the object to the anonymous type to make use of it, a sample of which is shown below. I created a CastHelper class for that purpose.
public static class CastHelper
{
    public static T Cast<T>(object obj, T type)
    {
        return (T)obj;
    }
}
var c1 = policy.ExecuteAction<object>(() =>
              (from x in dc.Customers
               where x.CustomerID == cId
               select new { x.CustomerID, x.FirstName, x.LastName }).First());

var anon = CastHelper.Cast(c1, new { CustomerID = -1, FirstName = "", LastName = "" });
Case #2 expands the previous case to include a transaction scope. The dynamics of the sample changes because a System.Transactions.TransactionScope object is used to ensure data consistency of all scoped queries using an ambient transaction context which is automatically managed for the developer. But from the trace shown below we still observe the typical pattern of Audit Logout events with the SQL Transaction Begin and End events. This begs the question: How can we have a local transaction (non-distributed) if our data access code spans multiple connections? Well, in this case we are not truly spanning multiple physical connections because every connection drawn from pool is based upon the proper connection string and, for those enlisted in a transaction, the thread context. We can imagine the connection pool subdivided into subdivisions based upon individual transaction contexts and the connection string. In this way, pulling a connection from the pool guarantees that we are not attempting to enlist in a distributed transaction.
The net result: We cannot implement our retry policies at the query or SaveChanges level and still maintain the ACID properties of the transaction. The retry policies must be implemented against the entire transactional scope as shown below. Note that if you do attempt to place retry logic against the individual queries and a network glitch occurs, be assured than an EntityException will be thrown having an inner SqlException with a message of “MSDTC on Server “xxx” is unavailable”, SQL Azure does not support distributed transactions. Nevertheless, this is not SQL Azure specific problem. The error is non-recoverable at the query statement level; it is all or nothing with transactions.
using (AdventureWorksLTAZ2008R2Entities dc = new AdventureWorksLTAZ2008R2Entities())
{
    int MaxRetries = 10;
    int DelayMS = 100;

    RetryPolicy policy = new RetryPolicy<SqlAzureTransientErrorDetectionStrategy>(MaxRetries, TimeSpan.FromMilliseconds(DelayMS));
    TransactionOptions tso = new TransactionOptions();
    tso.IsolationLevel = IsolationLevel.ReadCommitted;
    policy.ExecuteAction(() =>
    {
        using (TransactionScope ts = new TransactionScope(TransactionScopeOption.Required, tso))
        {
            int cId = 29485;

            Customer c1 = (from x in dc.Customers
                           where x.CustomerID == cId
                           select x).First();

            Address ad1 = (from x in dc.Addresses
                           from y in dc.CustomerAddresses
                           where y.CustomerID == cId && x.AddressID == y.AddressID
                           select x).FirstOrDefault();

            string firstName = c1.FirstName;
            c1.FirstName = c1.LastName;
            c1.LastName = firstName;

            dc.SaveChanges();

            string addressLine1 = ad1.AddressLine1;
            ad1.AddressLine1 = ad1.AddressLine2 == null ? "dummy data" : ad1.AddressLine2;
            ad1.AddressLine2 = addressLine1;
            dc.SaveChanges();

            ts.Complete();
        }
    });
}
| SQL Transaction |
0 – Begin |
| RPC:Completed |
exec sp_executesql N’SELECT TOP (1) |
| Audit Logout | |
| RPC:Completed | exec sp_reset_connection |
| RPC:Completed |
exec sp_executesql N’SELECT |
| Audit Logout | |
| RPC:Completed | exec sp_reset_connection |
| RPC:Completed |
exec sp_executesql N’update [SalesLT].[Customer] |
| Audit Logout | |
| RPC:Completed | exec sp_reset_connection |
| RPC:Completed |
exec sp_executesql N’update [SalesLT].[Address] |
| Audit Logout | |
| RPC:Completed | exec sp_reset_connection |
| SQL Transaction | 1 – End |
| Audit Logout |
If your scenario is such that the EF queries return very quickly, which is the most typical pattern, then it probably suffices to employ a retry policy solely at the connection level. If other words, only retry when a connection fails to open. The premise is that if the client application acquires a valid connection, no other network related errors will occur while during the execution of my queries. If an error does occur, the application can catch the exception and resubmit as it would in a traditional non-cloud based implementation. Besides, this tactic offers the least invasive solution because as you will from the code sample below, we only have to implement the retry policy in one spot. The remainder of the EF code works the same as if it was executing against an on premise SQL Server.
Remember earlier we stated that the ‘validity’ of a connection is only determined after a command is issued against the server. So conceivably to ensure a valid connection, one must attempt to open a connection and submit a command to the database. If an exception is thrown, the connection is close and thus removed from the pool. There is an associated overhead to opening and submitting a command just to check the validity of a connection and for this reason the ADO.NET connection pool elects not to perform this on behalf of the client application.
The tactic is to implement the OnContextCreated partial method of the models context which is called each time a new context is instantiated. In this partial method, employ a retry policy which opens a connection, submits a dummy query and handles exceptions with proper closure of invalid connections. In this way, the pool is ‘cleansed’ of all connections that have disconnected due to network glitches or idle expirations. The tradeoffs are obvious, the additional round trip to the SQL Azure database and the possible delay while the OnContextCreated method closes invalid connections.
partial void OnContextCreated()
{
    int MaxRetries = 10;
    int DelayMS = 100;

    RetryPolicy policy = new RetryPolicy<SqlAzureTransientErrorDetectionStrategy>(MaxRetries, TimeSpan.FromMilliseconds(DelayMS));
    policy.ExecuteAction(() =>
    {
        try
        {
            string ss = Connection.ConnectionString;
            Connection.Open();
            var storeConnection = (SqlConnection)((EntityConnection)Connection).StoreConnection;
            new SqlCommand("declare @i int", storeConnection).ExecuteNonQuery();
            // throw new ApplicationException("Test only");
        }
        catch (Exception e)
        {
            Connection.Close();
            throw e;
        }
    }
    );
}
| RPC:Completed | exec sp_executesql N’declare @i int; set @i = @ix’,N’@ix int’,@ix=1 |
| RPC:Completed |
exec sp_executesql N’SELECT TOP (1) |
| RPC:Completed |
exec sp_executesql N’SELECT |
| Audit Logout |
The sample above submits a lightweight batch to the database, the only overhead to the database is the time to execution of the RPC statement. All looks good, but there is one important fact that may catch you. From the profiler trace we observe that the same connection is used for each query database query. This is by design and as discussed early, i.e. when a connection is explicitly opened by the developer it tells EF not to open/reopen a connection for each command. The series of Audit Login/Logout events to retrieve the customer entity or address entity are not submitted as we saw in Case #1 and #2. This means we cannot implement a retry policy for each individual query like I showed earlier. Since the EntityConnection has been assigned to the ObjectContext, EF takes the position that you really truly want to use one connection for all of your queries within the scope of that context. Retrying a query on an invalid or closed connection can never work, a System.Data.EntityCommandExecutionException will be thrown with an inner SqlException contains the message for the error.
Three cases were examined. Retry policies with/without a transaction scope and an implementation of OnContextCreated. The first two cases apply if you wish to introduce retry policies on all of your queries, in or out of a TransactionScope. You may find justification in this approach if your EF queries are apt to become throttled by SQL Azure which manifests itself during execution. The programming paradigms while not overly complex do require more work on the part of the developer. Applying a retry policy in the OnContextCreated method provides slimmer coverage but offers the best bang for the effort. In the majority of cases, network related exceptions tend to reveal themselves just after the connection is retrieved from the pool, thus a policy implemented right after the connection is opened should prove sufficient for those cases where database queries are expected to return quickly.
Authored By: James Podgorski
Review By: Valery Mizonov, Mark Simms, Faisal Mohamood

The latest BizTalk 2009 cumulative update (CU) rollup hotfix pack has been released. This is the first installment for BizTalk 2009. Here is the Microsoft KB article: http://support.microsoft.com/kb/2429050. This includes numerous VS development environment fixes and a wide assortment of adapter support updates. This rollup pack also includes support for the HIPAA 5010 EDI schemas. […]![]()