In my previous update, I discussed my intention to release a new major version of my stencils. However, I’ve opted for a gradual approach, releasing minor updates along the way. This way, it becomes easier for me because I don’t need to spend long periods allocated to this task, and at the same time, all of you can start enjoying these new icons.
Keeping my promise, I’m presenting another update. I hope it meets your expectations! If you have any specific requests, don’t hesitate to share them with me.
What’s new in this version? (for now)
The main goal of this release was to provide the new icons present in the Azure Portal, on the Power Platform, and new existing Services. In this version, the changes and additions are:
New stencil packages: Additional stencil packages were incorporated into this project to enhance the discoverability of shapes:
MIS Azure Integration Services: this file contains shapes related to Azure Integration Service and messaging.
MIS Microsoft Fabric: this file contains shapes related to Microsoft Fabric – This was actually a request made by a community member. And credits to Sam Debruyn for these Microsoft SVG files. I only had the work to “convert” them into proper Visio stencils.
Move some shapes: I reorganized and relocated certain shapes to other files within this package.
SVG Files: Add new SVG files;
Special Highlights: API Center, Policy fragments, Event Grid, Event Grid: Namespace, Partner namespaces and Partner registrations or APIM Schemas
Microsoft Integration, Azure, Power Platform, Office 365, and much more Stencils Pack
Microsoft Integration, Azure, Power Platform, Office 365, and much more Stencils Pack it’s a Visio package that contains fully resizable Visio shapes (symbols/icons) that will help you to visually represent On-premise, Cloud or Hybrid Integration and Enterprise architectures scenarios (BizTalk Server, API Management, Logic Apps, Service Bus, Event Hub…), solutions diagrams and features or systems that use Microsoft Azure and related cloud and on-premises technologies in Visio 2016/2013:
BizTalk Server
Microsoft Azure
Integration
Integration Service Environments (ISE)
Logic Apps and Azure App Service in general (API Apps, Web Apps, and Mobile Apps)
Azure API Management
Messaging: Event Hubs, Event Grid, Service Bus, …
Azure IoT and Docker
AI, Machine Learning, Stream Analytics, Data Factory, Data Pipelines
SQL Server, DocumentDB, CosmosDB, MySQL, …
and so on
Microsoft Power Platform
Microsoft Flow
PowerApps
Power BI
Office365, SharePoint,…
DevOps and PowerShell
Security and Governance
And much more…
… and now non-related Microsoft technologies like:
SAP Stencils
The Microsoft Integration Stencils Pack is composed of 29 files:
Microsoft Integration Stencils
MIS Additional or Support Stencils
MIS AI and Machine Learning Stencils
MIS Apps and Systems Logo Stencils
MIS Azure Additional or Support Stencils
MIS Azure Integration Services
MIS Azure Mono Color
MIS Azure Old Versions
MIS Azure Others Stencils
MIS Azure Stencils
MIS Buildings Stencils
MIS Databases and Analytics Stencils
MIS Deprecated Stencils
MIS Developer Stencils
MIS Devices Stencils
MIS Files Stencils
MIS Generic Stencils
MIS Infrastructure Stencils
MIS Integration Fun
MIS Integration Patterns Stencils
MIS IoT Devices Stencils
MIS Microsoft Fabric
MIS Office365
MIS Power BI Stencils
MIS PowerApps and Flows Stencils
MIS SAP Stencils
MIS Security and Governance
MIS Servers (HEX) Stencils
MIS Users and Roles Stencils
You can use and resize without losing quality.
Download
You can download Microsoft Integration, Azure, BAPI, Office 365, and much more Stencils Pack for Visio from GitHub here:
Hope you find this helpful! So, if you liked the content or found it helpful and want to help me write more content, you can buy (or help buy) my son a Star Wars Lego!
Author: Sandro Pereira
Sandro Pereira lives in Portugal and works as a consultant at DevScope. In the past years, he has been working on implementing Integration scenarios both on-premises and cloud for various clients, each with different scenarios from a technical point of view, size, and criticality, using Microsoft Azure, Microsoft BizTalk Server and different technologies like AS2, EDI, RosettaNet, SAP, TIBCO etc.
He is a regular blogger, international speaker, and technical reviewer of several BizTalk books all focused on Integration. He is also the author of the book “BizTalk Mapping Patterns & Best Practices”. He has been awarded MVP since 2011 for his contributions to the integration community.
View all posts by Sandro Pereira
The book states: “Boost your productivity by implementing best practices for automating repeating desktop processes.”, adding that no special IT knowledge is needed for this book. And I have to say that is 100% true. It is a remarkably user-friendly book that covers a wide range of essential topics about implementing Robotic Process Automation with Power Automate Desktop.
I sincerely recommend this book to individuals interested in this area or technology in general. This book will be a run pup for you or your team to understand the basics of RPA, from integrating with local programs, processes, or web browsers, even without you needing any programming knowledge! It is well-written, easy to follow and navigate, and with excellent illustrations.
I haven’t read a book about technology that held me to the end for a long time. I was curious to see what came next, and although I have a lot of knowledge in Power Automate, I never invested much in RPA, so I learned a lot from this book. Congratulations to the author!
Democratizing RPA with Power Automate Desktop Book Description
Whether you want to organize simple files or perform more complex consolidations between different Office programs and remote-control applications that don’t allow outside access, Power Automate Desktop helps meet these challenges. This book explains how to leverage this workflow automation platform by explaining the underlying RPA concepts step-by-step.
You’ll start with simple flows that can be easily recorded and further processed using the built-in recorder. Later, you’ll learn how to use the more advanced actions to automate folder and file management and enable Office programs to interact with each other. You’ll also get to grips with integrating desktop flows into different cloud environments and further enhance their value using AI. As you progress, you’ll understand how flows can run unattended, how they are managed in the Power Platform, and key concepts such as creating, modifying, debugging, and error-handling UI flows. Finally, the book will guide you to use Process Automation Designer (PAD) with your frequently used desktop systems to automate routine tasks.
By the end of this book, you’ll have become a Power Automate Desktop expert, automating both professional and personal tasks.
What you will learn
Master RPA with Power Automate Desktop to commence your debut workflow.
Grasp all essential product concepts such as UI flow creation and modification, debugging, and error handling.
Use PAD to automate tasks with the frequently used systems on your desktop.
Attain proficiency in configuring flows that run unattended to achieve seamless automation.
Discover how to use AI to enrich your flows with insights from different AI models.
Explore how to integrate a workflow in a broader cloud context.
Who is this book for
Whether you’re a home user looking to automate simple tasks on your workstation or a business user or citizen developer seeking to automate more complex rule-based processes, this book will help you overcome the challenge. No knowledge of a programming language is required. Still, in the more advanced chapters, a general understanding of information technology, including basic programming language structures, protocols, and cloud concepts, will be helpful.
Table of Contents
Getting Started with Power Automate Desktop
Using Power Automate Desktop and Creating First Flow
Editing and Debugging UI Flows
Basic Structure Elements and Flow Control
Variables, UI Elements, and Images
Actions for UI Automation
Automate Your Desktop and Workstation
Automating Standard Business Applications
Leveraging Cloud Services and Power Platform
Leveraging Artificial Intelligence
Working with APIs and Services
PAD Enterprise Best Practices
Where can you order the book?
You can order the book and find the complete table of contents on the Packt Website or Amazon.
Hope you find this helpful! So, if you liked the content or found it useful and want to help me write more, you can buy (or help buy) my son a Star Wars Lego!
Author: Sandro Pereira
Sandro Pereira lives in Portugal and works as a consultant at DevScope. In the past years, he has been working on implementing Integration scenarios both on-premises and cloud for various clients, each with different scenarios from a technical point of view, size, and criticality, using Microsoft Azure, Microsoft BizTalk Server and different technologies like AS2, EDI, RosettaNet, SAP, TIBCO etc.
He is a regular blogger, international speaker, and technical reviewer of several BizTalk books all focused on Integration. He is also the author of the book “BizTalk Mapping Patterns & Best Practices”. He has been awarded MVP since 2011 for his contributions to the integration community.
View all posts by Sandro Pereira
The last time I released a new version of my stencil, it was on January 26 of 2022. A long time ago indeed, so it is fair to say that I do need to release a new major version of my stencils, and that will be a long work and process. However, I decided to do this task progressively and release minor updates during this “journey”. This way, it becomes easier for me because I don’t need to spend long periods allocated to this task, and at the same time, all of you can start enjoying these new icons.
What’s new in this version? (for now)
The main goal of this release was to provide the new icons present in the Azure Portal, on the Power Platform, and new existing Services. In this version, the changes and additions are:
New shapes: New shapes added on MIS Databases and Analytics Stencils, MIS Azure Additional or Support Stencils, Microsoft Integration Stencils, MIS Azure Stencils, and MIS Power Platform Stencils;
SVG Files: Add new SVG files;
Special Highlights: Microsoft Fabric and the new Logic App Data Mapper
Microsoft Integration, Azure, Power Platform, Office 365, and much more Stencils Pack
Microsoft Integration, Azure, Power Platform, Office 365, and much more Stencils Pack it’s a Visio package that contains fully resizable Visio shapes (symbols/icons) that will help you to visually represent On-premise, Cloud or Hybrid Integration and Enterprise architectures scenarios (BizTalk Server, API Management, Logic Apps, Service Bus, Event Hub…), solutions diagrams and features or systems that use Microsoft Azure and related cloud and on-premises technologies in Visio 2016/2013:
BizTalk Server
Microsoft Azure
Integration
Integration Service Environments (ISE)
Logic Apps and Azure App Service in general (API Apps, Web Apps, and Mobile Apps)
Azure API Management
Messaging: Event Hubs, Event Grid, Service Bus, …
Azure IoT and Docker
AI, Machine Learning, Stream Analytics, Data Factory, Data Pipelines
SQL Server, DocumentDB, CosmosDB, MySQL, …
and so on
Microsoft Power Platform
Microsoft Flow
PowerApps
Power BI
Office365, SharePoint,…
DevOps and PowerShell
Security and Governance
And much more…
… and now non-related Microsoft technologies like:
SAP Stencils
The Microsoft Integration Stencils Pack is composed of 27 files:
Microsoft Integration Stencils
MIS Additional or Support Stencils
MIS AI and Machine Learning Stencils
MIS Apps and Systems Logo Stencils
MIS Azure Additional or Support Stencils
MIS Azure Mono Color
MIS Azure Old Versions
MIS Azure Others Stencils
MIS Azure Stencils
MIS Buildings Stencils
MIS Databases and Analytics Stencils
MIS Deprecated Stencils
MIS Developer Stencils
MIS Devices Stencils
MIS Files Stencils
MIS Generic Stencils
MIS Infrastructure Stencils
MIS Integration Fun
MIS Integration Patterns Stencils
MIS IoT Devices Stencils
MIS Office365
MIS Power BI Stencils
MIS PowerApps and Flows Stencils
MIS SAP Stencils
MIS Security and Governance
MIS Servers (HEX) Stencils
MIS Users and Roles Stencils
That you can use and resize without losing quality, in particular, the new shapes.
Download
You can download Microsoft Integration, Azure, BAPI, Office 365, and much more Stencils Pack for Visio from GitHub here:
Hope you find this helpful! So, if you liked the content or found it helpful and want to help me write more content, you can buy (or help buy) my son a Star Wars Lego!
Author: Sandro Pereira
Sandro Pereira lives in Portugal and works as a consultant at DevScope. In the past years, he has been working on implementing Integration scenarios both on-premises and cloud for various clients, each with different scenarios from a technical point of view, size, and criticality, using Microsoft Azure, Microsoft BizTalk Server and different technologies like AS2, EDI, RosettaNet, SAP, TIBCO etc.
He is a regular blogger, international speaker, and technical reviewer of several BizTalk books all focused on Integration. He is also the author of the book “BizTalk Mapping Patterns & Best Practices”. He has been awarded MVP since 2011 for his contributions to the integration community.
View all posts by Sandro Pereira
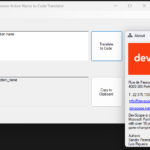
Yesterday I designed the idea and the main layout of a simple tool to translate Action Names or Trigger names from Logic App Design to Code View equivalent and gave free freedom to my team to implement it. Diogo Formosinho created a .NET Core application, the tool we published yesterday: Logic App/Power Automate Action Name to Code Translator Tool.
On the other hand, Luis Rigueira decided to go more old school and create a simple .NET Framework Windows Application. Both do the same and have almost the same look and feel. The main difference is that one is built on top of .NET Core, and the other on top of .NET Framework 4.7.2.
Once again, the major problem is that when we need to use the name of the Actions inside Expressions, many times, we need to replace the spaces of the action or trigger name with underscores. If we see the Code View or peek at the code of the action, we will see that all spaces are indeed replaced by _ (underscores). And this is sometimes a time-consuming and annoying task. This tool is so simple and stupid, and I love it! It is a tool that will improve productivity for Logic App Developers!
This second version of the tool is a Windows Application built in .NET Framework 4.7.2. and you can download, for free, the here:
Download
Hope you find this useful! So, if you liked the content or found it useful and want to help me write more content, you can buy (or help buy) my son a Star Wars Lego!
Author: Sandro Pereira
Sandro Pereira lives in Portugal and works as a consultant at DevScope. In the past years, he has been working on implementing Integration scenarios both on-premises and cloud for various clients, each with different scenarios from a technical point of view, size, and criticality, using Microsoft Azure, Microsoft BizTalk Server and different technologies like AS2, EDI, RosettaNet, SAP, TIBCO etc.
He is a regular blogger, international speaker, and technical reviewer of several BizTalk books all focused on Integration. He is also the author of the book “BizTalk Mapping Patterns & Best Practices”. He has been awarded MVP since 2011 for his contributions to the integration community.
View all posts by Sandro Pereira
This tool goes directly to my top favorite tools for a simple reason. It saves me from the annoying work of renaming the Action names every time I need to use them in an expression! It is a time saver!
The triggers or action names inside the Logic App or Power Automate workflow are not the same as we see in the Logic App Designer and behind the scenes on the code view. On the Logic App Designer, the trigger or action name allows you to provide a name between a minimum of 1 and a maximum of 80 characters. Contrary to what happens in Power Automates, you can use all types of characters. In the Logic App, the name of the actions (or triggers) cannot contain any control characters or any of the following symbols:
‘
<
>
%
&
?
/
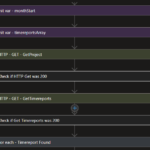
One of the characters you can use, both in Logic App and Power Automate, is the space as you can see in the picture:
HTTP – GET – GetProject
Check if HTTP Get was 200
HTTP – GET – GetTimereports
and many others
The problem is that when we need to use them inside Expressions, the spaces of the action or trigger name need to be replaced by underscores. If we see the Code View or peek at the code of the action, we will see that all spaces are indeed replaced by _ (underscores)
If we use the tokens (dynamic content window) to set up these values/configurations, the Logic App designer is smart enough to replace the spaces with underscores. However:
if we are using them inside Expressions, sometimes we need to set up these names manually.
If we go to Code View and try to search for an action, then we need to remember to replace the spaces with underscores.
Trust me that this is just an annoying and time-consuming task after a while. For this reason, my team and I decided to create a simple and basic tool that translates the action name that you provide by its equivalent in the Code View.
It is simple and stupid, and I love it!
Download
This first version of the tool is a Windows Application built in .NET Core. and you can download, for free, the here:
Hope you find this useful! So, if you liked the content or found it useful and want to help me write more content, you can buy (or help buy) my son a Star Wars Lego!
Author: Sandro Pereira
Sandro Pereira lives in Portugal and works as a consultant at DevScope. In the past years, he has been working on implementing Integration scenarios both on-premises and cloud for various clients, each with different scenarios from a technical point of view, size, and criticality, using Microsoft Azure, Microsoft BizTalk Server and different technologies like AS2, EDI, RosettaNet, SAP, TIBCO etc.
He is a regular blogger, international speaker, and technical reviewer of several BizTalk books all focused on Integration. He is also the author of the book “BizTalk Mapping Patterns & Best Practices”. He has been awarded MVP since 2011 for his contributions to the integration community.
View all posts by Sandro Pereira
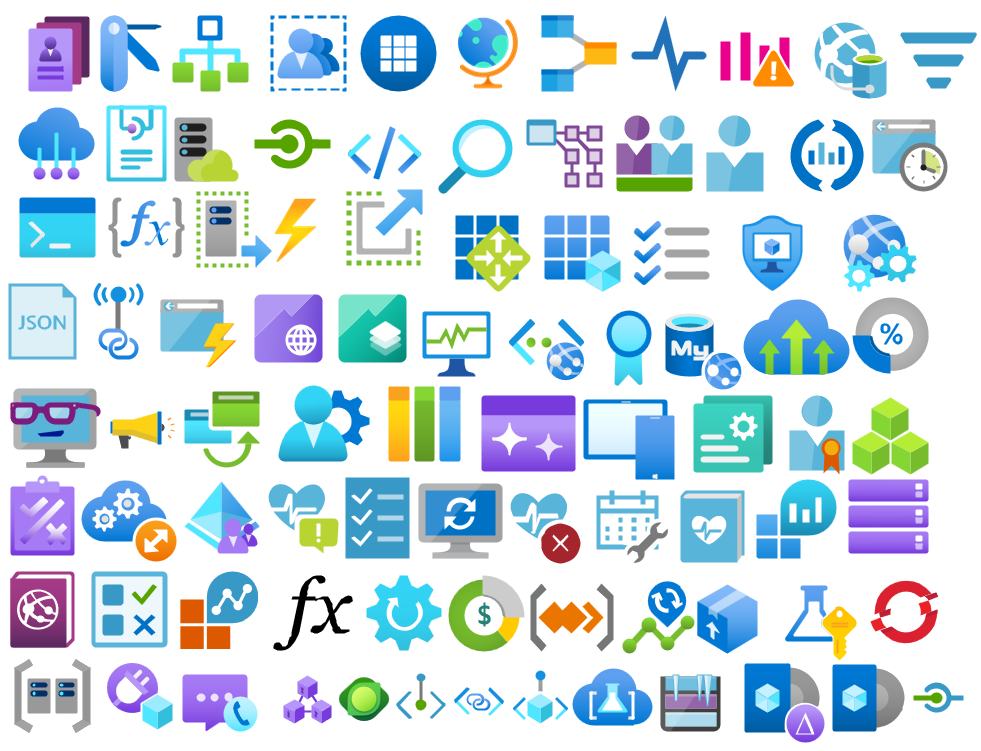
The full 7.3 version is complete with the release of v.7.3.1. This was a massive work of adding new shapes of new services that appear on Azure and changing the existing one with the new version of the shapes. Work is done and I hope you enjoy it!
What’s new in this version?
This is the list of changes and additions present in this release:
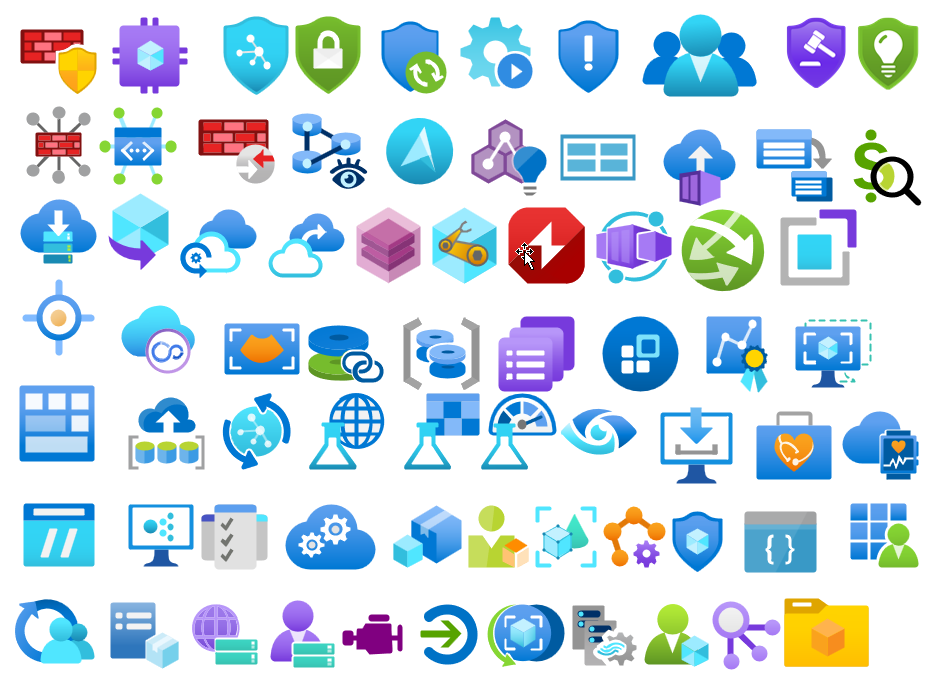
New shapes on MIS Azure Stencils, MIS Azure Additional or Support Stencils, MIS Developer Stencils, and MIS Security and Governance packages: add a considerable amount of new shapes of new services that appear on Azure has both changing the existing one with their new layout.
Move old versions of the shape layout to MIS Azure Old Versions package.
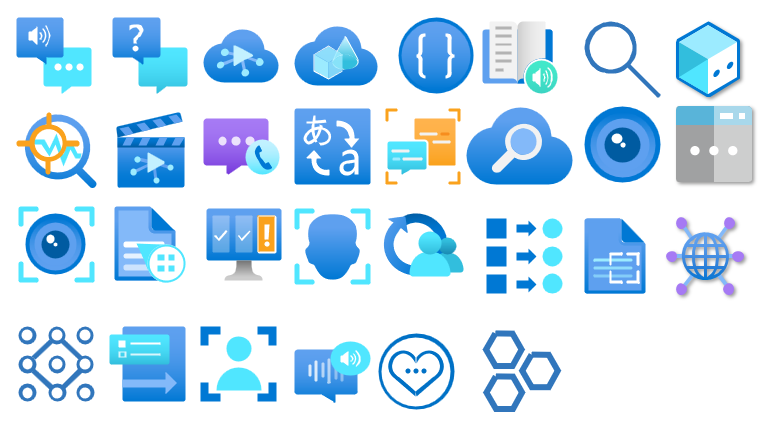
New shapes on MIS AI and Machine Learning Stencils: several new shapes add it to this package with several Cognitive Services.
New shapes on Microsoft Integration Stencils: some new shapes add it to this package describing Schemas, Maps, Aggrements, Partners, Assemblies and so on.
Lock the aspect ratio of the new stencil icons: This was a requested made that can be very handly to protects against accidental resizing with another shape aspect.
SVG files: new SVG files added.
Microsoft Integration, Azure, Power Platform, Office 365 and much more Stencils Pack
Microsoft Integration, Azure, Power Platform, Office 365 and much more Stencils Pack it’s a Visio package that contains fully resizable Visio shapes (symbols/icons) that will help you to visually represent On-premise, Cloud or Hybrid Integration and Enterprise architectures scenarios (BizTalk Server, API Management, Logic Apps, Service Bus, Event Hub…), solutions diagrams and features or systems that use Microsoft Azure and related cloud and on-premises technologies in Visio 2016/2013:
BizTalk Server
Microsoft Azure
Integration
Integration Service Environments (ISE)
Logic Apps and Azure App Service in general (API Apps, Web Apps, and Mobile Apps)
Azure API Management
Messaging: Event Hubs, Event Grid, Service Bus, …
Azure IoT and Docker
AI, Machine Learning, Stream Analytics, Data Factory, Data Pipelines
SQL Server, DocumentDB, CosmosDB, MySQL, …
and so on
Microsoft Power Platform
Microsoft Flow
PowerApps
Power BI
Office365, SharePoint,…
DevOps and PowerShell
Security and Governance
And much more…
… and now non-related Microsoft technologies like:
SAP Stencils
The Microsoft Integration Stencils Pack is composed of 28 files:
Microsoft Integration Stencils
MIS Additional or Support Stencils
MIS AI and Machine Learning Stencils
MIS Apps and Systems Logo Stencils
MIS Azure Additional or Support Stencils
MIS Azure Black and Gray
MIS Azure Old Versions
MIS Azure Stencils
MIS Black and Cyan
MIS Buildings Stencils
MIS Databases and Analytics Stencils
MIS Deprecated Stencils
MIS Developer Stencils
MIS Devices Stencils
MIS Files and Message Types Stencils
MIS Generic Stencils
MIS Infrastructure and Networking Stencils
MIS Integration Fun
MIS Integration Patterns Stencils
MIS IoT Stencils
MIS Office, Office 365 and Dynamics 365
MIS Power BI Stencils
MIS Power Platform Stencils
MIS SAP Stencils
MIS Security and Governance
MIS Servers (Hexagonal) Stencils
MIS Users and Roles Stencils
MIS API Connectors
Organisational Stencils
That you can use and resize without losing quality, in particular, the new shapes.
Download
You can download Microsoft Integration, Azure, BAPI, Office 365 and much more Stencils Pack for Visio from GitHub Here:
The full 7.3.0 version is not yet complete, but I decided to release it in small pieces instead of taking a long time to make all the planned changes and being the Azure part that will require the most work.
What’s new in this version?
This is the list of changes and additions present in this release:
New shapes on MIS: Office, Office 365 and Dynamics 365 package: add some new Dynamic 365 shapes like Dataverse, SCM Warehousing, Project Timesheet, Return To School orReturn To Work, and several new Office/Office 365 shapes.
Remove API Connectors shapes from MIS: Power Platform package: there goal was to simplify this package and migrate that stencils to a dedicated package, since there are more then 600 connectors. Also these connectores are common to Power Automate, Power Apps and Logic Apps.
Create a new package MIS: API Connectors: This package will provide stencils to all connectors currently provided for Microsoft Power Automate, Microsoft Power Apps, and Azure Logic Apps.
Lock the aspect ratio of the new stencil icons: This was a requested made that can be very handly to protects against accidental resizing with another shape aspect.
SVG files: new SVG files added.
Microsoft Integration, Azure, Power Platform, Office 365 and much more Stencils Pack
Microsoft Integration, Azure, Power Platform, Office 365 and much more Stencils Pack it’s a Visio package that contains fully resizable Visio shapes (symbols/icons) that will help you to visually represent On-premise, Cloud or Hybrid Integration and Enterprise architectures scenarios (BizTalk Server, API Management, Logic Apps, Service Bus, Event Hub…), solutions diagrams and features or systems that use Microsoft Azure and related cloud and on-premises technologies in Visio 2016/2013:
BizTalk Server
Microsoft Azure
Integration
Integration Service Environments (ISE)
Logic Apps and Azure App Service in general (API Apps, Web Apps, and Mobile Apps)
Azure API Management
Messaging: Event Hubs, Event Grid, Service Bus, …
Azure IoT and Docker
AI, Machine Learning, Stream Analytics, Data Factory, Data Pipelines
SQL Server, DocumentDB, CosmosDB, MySQL, …
and so on
Microsoft Power Platform
Microsoft Flow
PowerApps
Power BI
Office365, SharePoint,…
DevOps and PowerShell
Security and Governance
And much more…
… and now non-related Microsoft technologies like:
SAP Stencils
The Microsoft Integration Stencils Pack is composed of 27 files:
Microsoft Integration Stencils
MIS Additional or Support Stencils
MIS AI and Machine Learning Stencils
MIS Apps and Systems Logo Stencils
MIS Azure Additional or Support Stencils
MIS Azure Black and Gray
MIS Azure Old Versions
MIS Azure Stencils
MIS Black and Cyan
MIS Buildings Stencils
MIS Databases and Analytics Stencils
MIS Deprecated Stencils
MIS Developer Stencils
MIS Devices Stencils
MIS Files and Message Types Stencils
MIS Generic Stencils
MIS Infrastructure and Networking Stencils
MIS Integration Fun
MIS Integration Patterns Stencils
MIS IoT Stencils
MIS Office, Office 365 and Dynamics 365
MIS Power BI Stencils
MIS Power Platform Stencils
MIS SAP Stencils
MIS Security and Governance
MIS Servers (Hexagonal) Stencils
MIS Users and Roles Stencils
Organisational Stencils
That you can use and resize without losing quality, in particular, the new shapes.
Download
You can download Microsoft Integration, Azure, BAPI, Office 365 and much more Stencils Pack for Visio from GitHub Here:
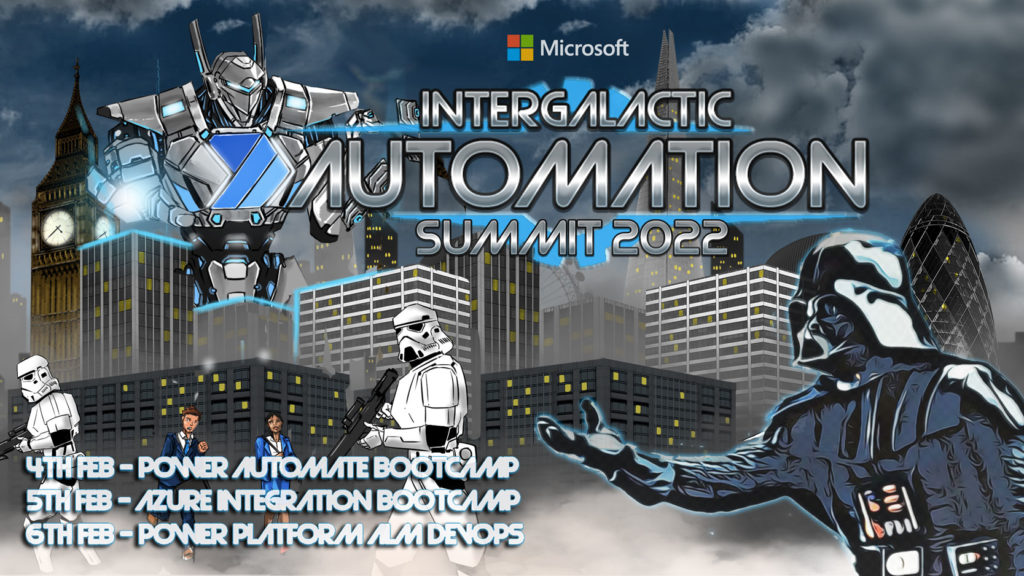
As part of the Intergalactic Automation Summit 2022 online event organized by the Power Community that is taking place between 4-6th February 2022:
4th Feb- Power Automate Bootcamp
5th Feb- Azure Integration Bootcamp
6th Feb- Power Platform ALM DevOps
All of these events are free! And you can register here.
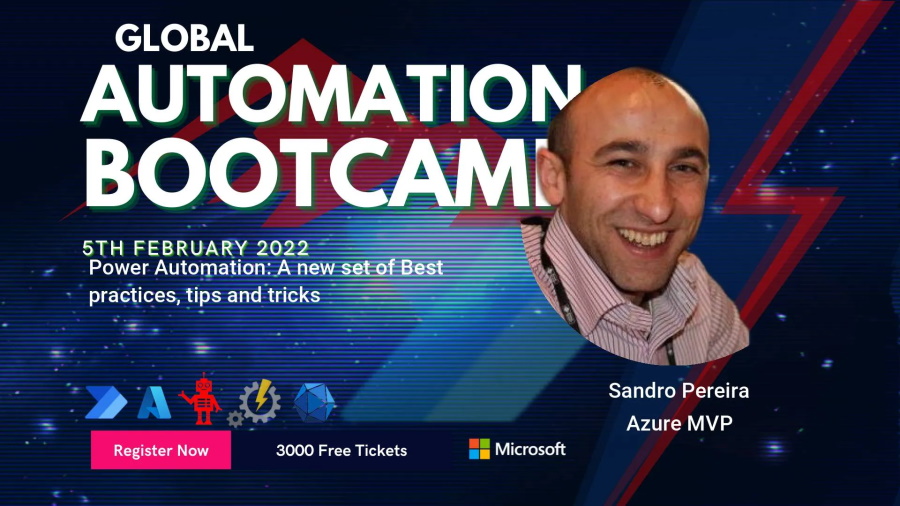
I choose to submit a session to the Power Automate Bootcamp, and I’m honored to be accepted as a guest speaker on a session about Power Automation: A new set of Best practices, tips and tricks. My session will take place at 05:00 pm according to GMT/UTC.
Power Automation: A new set of Best practices, tips and tricks
As I mentioned before, my session will be all about best practices and small tips and tricks that we can apply to our Power Automate flows. For those reasons, I would like to invite you to join me at the Power Automate Bootcamp virtual event on Friday, February 4, 2022.
Session name: Power Automation: A new set of Best practices, tips and tricks
Abstract: A brand new set of tips and tricks and best practices that you should know for being more productive and building more reliable and effective Power Automate flows. This is not an introduction session anymore. Instead, this session will go through a list of 10 new best practices, tips, and tricks addressing advanced topics like deployment, dynamic connectors configurations, etc.
Join us and reserve your presence at the Power Automate Bootcamp virtual event on Friday, February 4, 2022, it is free!
As part of the Intergalactic Automation Summit 2022 online event organized by the Power Community that is taking place between 4-6th February 2022:
4th Feb- Power Automate Bootcamp
5th Feb- Azure Integration Bootcamp
6th Feb- Power Platform ALM DevOps
All of these events are free! And you can register here.
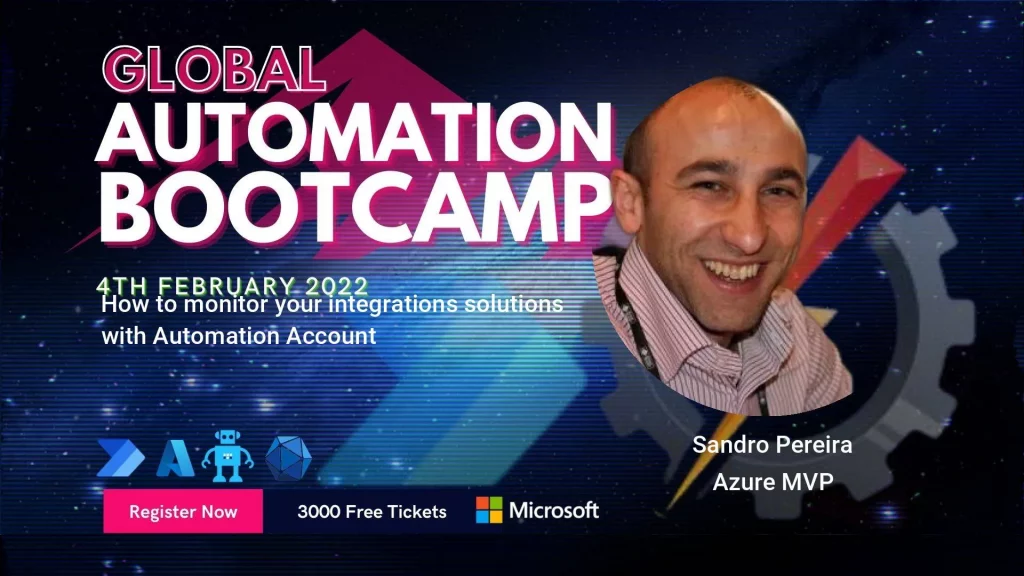
I choose to submit a session to the Global Automation Bootcamp, and I’m honored to be accepted as a guest speaker on a session about How to monitor your integrations solutions with Automation Account. My session will take place at 05:00 pm according to GMT/UTC.
How to monitor your integrations solutions with Automation Account
In this session, we will address how you can monitor your integrations solutions using Azure Integration Account running PowerShell Runbooks and Logic Apps to notify inconsistencies in your solutions. For those reasons, I would like to invite you to join me at the Global Automation Bootcamp virtual event on Friday, February 4, 2022.
Session name: How to monitor your integrations solutions with Automation Account
Abstract: In this session, we will address how you can monitor your integrations solutions using Azure Integration Account running PowerShell Runbooks and Logic Apps to notify inconsistencies in your solutions.
Join us and reserve your presence at the Global Automation Bootcamp virtual event on Friday, February 4, 2022, it is free!
Today, we are going over another real scenario, this time from one of our PowerBI Robots clients. For those unfamiliar with it, PowerBI Robots is part of DevScope’s suite of products for Microsoft Power BI. It automatically takes high-resolution screenshots of your reports and dashboards and sends them anywhere to an unlimited number of recipients (any users and any devices), regardless of being in your organization or even having a Power BI account.
Challenge
The COVID-19 pandemic massified remote work, and one of our PowerBI Robots clients asked us for a way to start receiving high-resolution screenshots of their reports and dashboards. On top of the devices at the client’s facilities (mainly TVs), these screenshots should also be available on a Microsoft Teams Channel where they could be seen by all users with access to it. PowerBI Robots allows users to “share” high-resolution screenshots of Power BI reports and dashboards in many ways, but it didn’t have this capability out-of-the-box, so we proactively introduced it using Azure Integration Services
This proof-of-concept will explain how you can extend the product’s features by making use of PowerBI Robots’ out-of-the-box ability to send a JSON message to an HTTP endpoint and then using Azure Integration Services such as Azure Blog Storage, Azure File Storage, Logic Apps, or even Power Platform features like Power Automate to share these report or dashboard images on platforms like Teams, SharePoint or virtually everywhere.
Create Blob Storage
In theory, we could send an image in base64 directly to Teams, but the problem is that messages on Teams have a size limit of approximately 28KB. This encompasses all HTML elements such as text, images, links, tables, mentions, and so on. If the message exceeds 28KB, the action will fail with an error stating: “Request Entity too large“.
To avoid and bypass this limitation, we have to use an additional Azure component to store the Power BI report images provided by PowerBI Robots. And to do that, we can choose from among resources such as:
Azure Blob Storage: Azure Blob storage is a feature of Microsoft Azure. It allows users to store large amounts of unstructured data on Microsoft’s data storage platform. In this case, Blob stands for Binary Large Object, which includes objects such as images and multimedia files.
Azure File Storage: Azure Files is an Azure File Storage service you can use to create file-sharing in the cloud. It is based on the Server Message Block (SMB) protocol and enables you to access files remotely or on-premises via API through encrypted communications.
Or even a SharePoint library, where you can store images and many other types of files.
We chose to use blob storage for its simplicity and low cost for this POC.
To start, let’s explain the structure of Azure Blob storage. It has three types of resources:
The storage Account
A container in the storage account
A blob
If you don’t have a Storage Account yet, the first step is to create one, and for that, you need to:
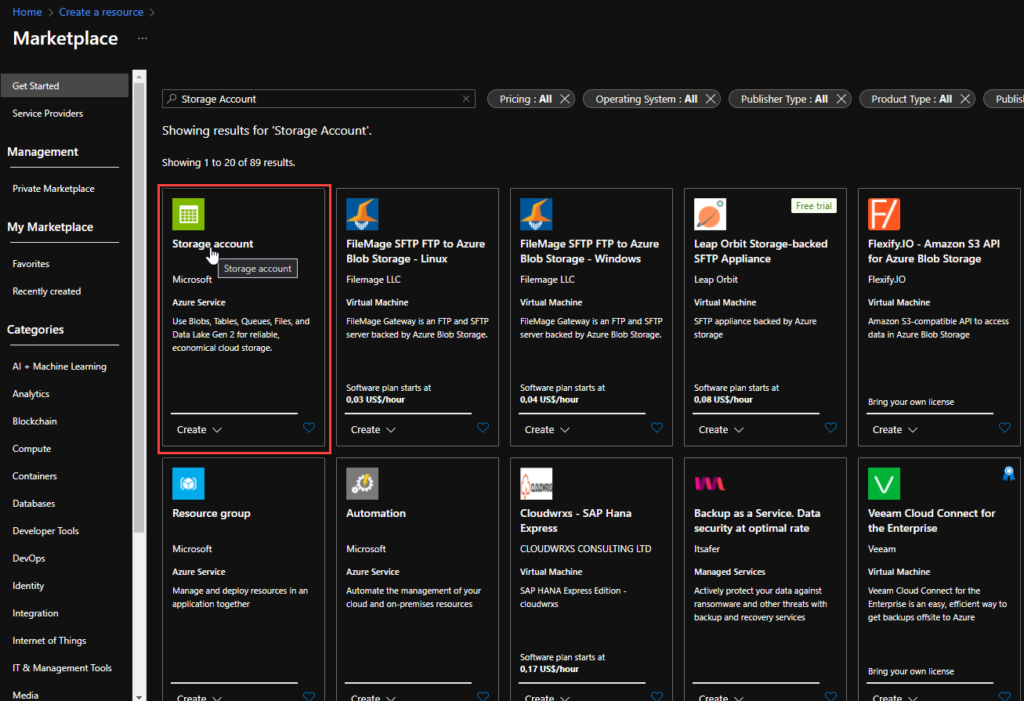
From the Azure portal menu or the Home page, select Create a resource.
On the Create a resource page, on the search type Storage account and from the list, select Storage account and click Create.
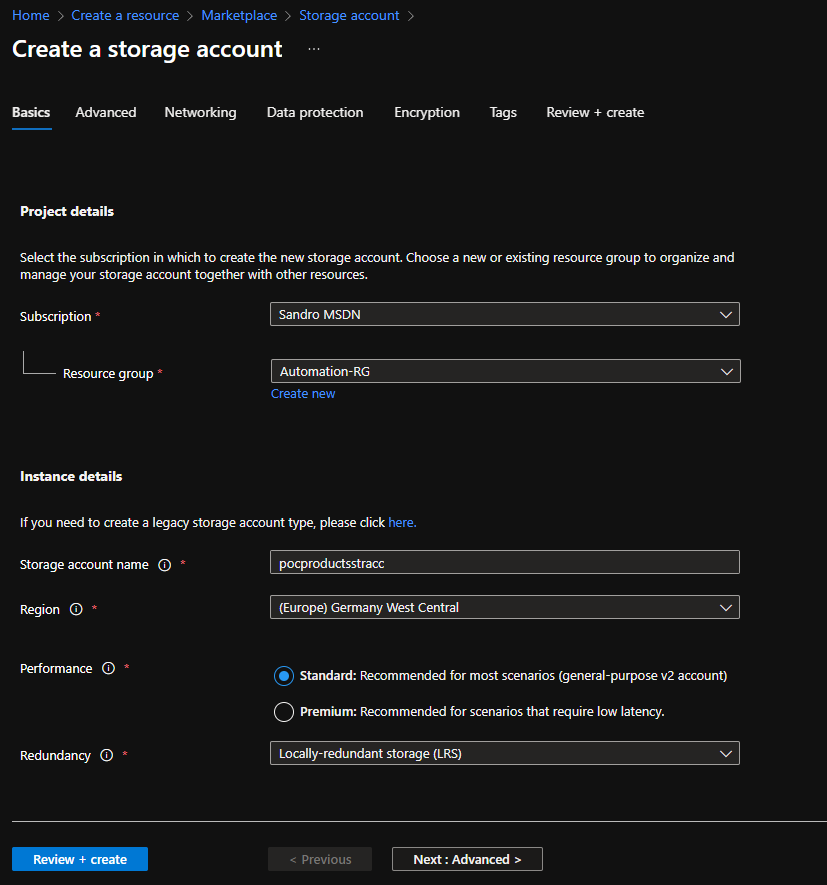
On the Create a storage account Basics page, you should provide the essential information for your storage account. After you complete the Basics tab, you can choose to further customize your new storage account by setting options on the other tabs, or you can select Review + create to accept the default options and proceed to validate and create the account:
Project details
Subscription: Select the subscription under which this new function app is created.
Resource Group: Select an existing Resource Group or create a new one in which your function app will be created.
Instance details
Storage account name: Choose a unique name for your storage account.
Storage account names must be between 3 and 24 characters in length and may contain numbers and lowercase letters only.
Region: Choose a region near you or near other services your functions access.
Note: Not all regions are supported for all types of storage accounts or redundancy configurations
Performance: Standard or Premium Select
Standard performance for general-purpose v2 storage accounts (default). This type of account is recommended by Microsoft for most scenarios.
Select Premium for scenarios requiring low latency.
Redundancy: Select your desired redundancy configuration.
Now that we have the storage account created, we need to create our Blob Container. And for that we need:
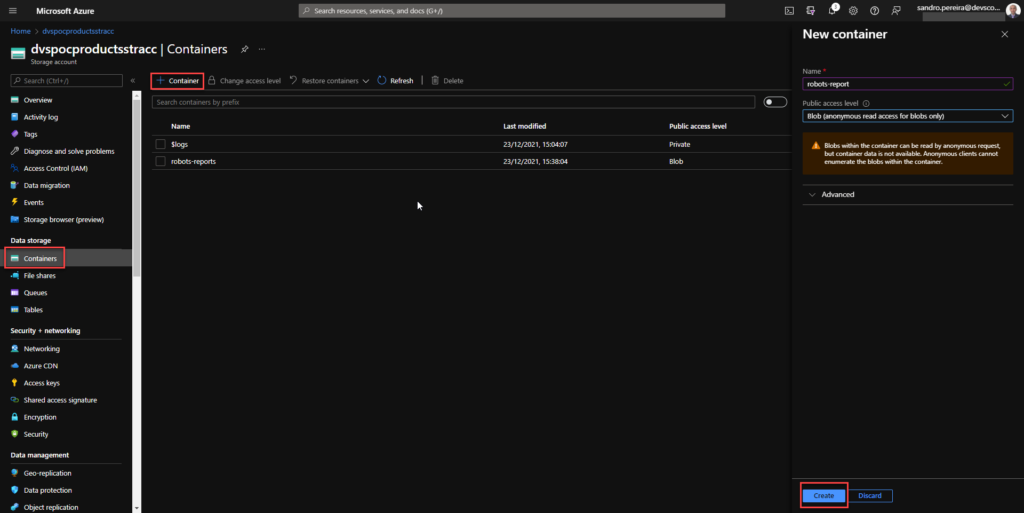
In the left menu for the storage account, scroll to the Data storage section, then select Containers.
On the Containers page, click on + Container button.
From the New Container window:
Enter a name for your new container. You can use numbers, lowercase letters, and dash (-) characters.
Select the public access level to Blob (anonymous read access for blobs only).
Blobs within the container can be read by anonymous request, but container data is not available. Anonymous clients cannot enumerate the blobs within the container.
Click Create to create the container.
Create a Logic App
PowerBI Robots is capable of sending a JSON request with all the information regarding a configured playlist:
To receive and process requests from PowerBI Robots, we decided to use and create a Logic App, which is a cloud-based platform for creating and running automated workflows that integrate your apps, data, services, and systems. To simplify the solution, we will also use the Azure Portal to create the Logic App.
From the Azure portal menu or the Home page, select Create a resource.
In the Create a resource page, select Integration > Logic App.
On the Create Logic App Basics page, use the following Logic App settings:
Subscription: Select the subscription under which this new Logic App is created.
Resource Group: Select an existing Resource Group or create a new one in which your Logic app will be created.
Type: The logic app resource type and billing model for your resource. In this case, we will be using Consumption.
Consumption: This logic app resource type runs in global, multi-tenant Azure Logic Apps and uses the Consumption billing model.
Standard: This logic app resource type runs in single-tenant Azure Logic Apps and uses the Standard billing model.
Logic App name: Your Logic App resource name. The name must be unique across regions.
Region: The Azure datacenter region where to store your app’s information. Choose a region near you or near other services your Logic app access.
Enable log analytics: Change this option only when you want to enable diagnostic logging. The default value in No.
When you’re ready, select Review + Create. Then, on the validation page, confirm the details you provided, and select Create.
After Azure successfully deploys your app, select Go to resource. Or, find and choose your Logic App resource by typing the name in the Azure search box.
Under Templates, select Blank Logic App. After selecting the template, the designer now shows an empty workflow surface.
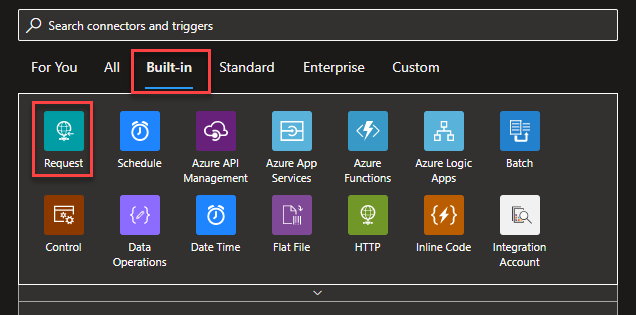
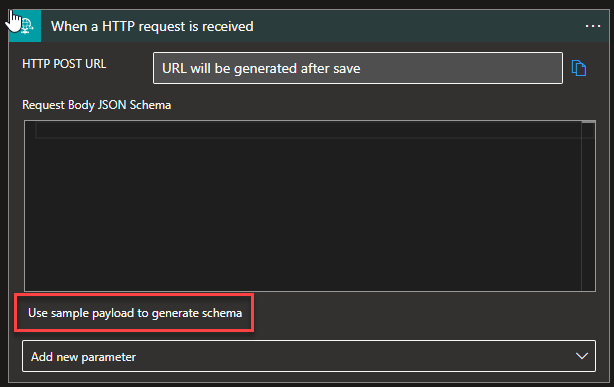
In the workflow designer, under the search box, select Built-In. Then, from the Triggers list, select the Request trigger, When a HTTP request is received.
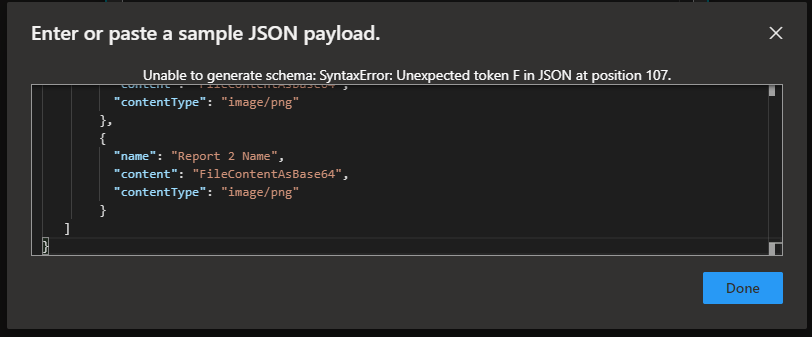
For us to tokenize the values of the message we are receiving from the PowerBI Robots, we can, on the Request trigger, click on Use sample payload to generate schema
And copy the JSON message provided earlier to the Enter or paste a sample JSON payload window and then click Done.
Under the Request trigger, select New step.
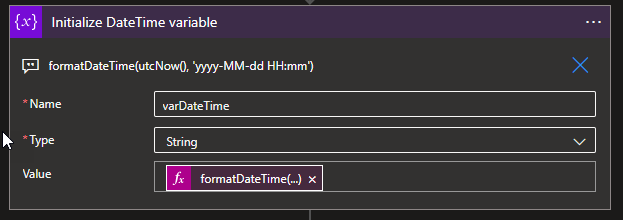
Select New step. In the search box, enter Variables, and from the result panel select the Variables, and choose the Initialize variable action and provide the following information:
Name: varDateTime
Type: String
Value: Select Expression and add the following expression formatDateTime(utcNow(), ‘yyyy-MM-dd HH:mm’)
Note: this variable will be used later in the business process to provide the data in a clear format on the message to be sent to the Teams channel.
Under the Request trigger, select New step.
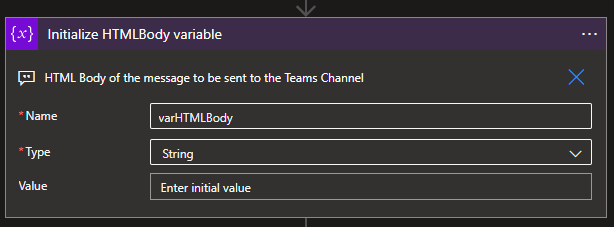
Select New step. In the search box, enter Variables, and from the result panel select the Variables, and choose the Initialize variable action and provide the following information:
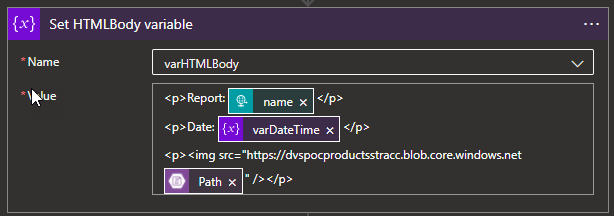
Name: varHTMLBody
Type: String
Value: (Empty)
Note: this variable will be used later in the business process to dynamically generate the message to be sent to the Teams channel in an HTML format.
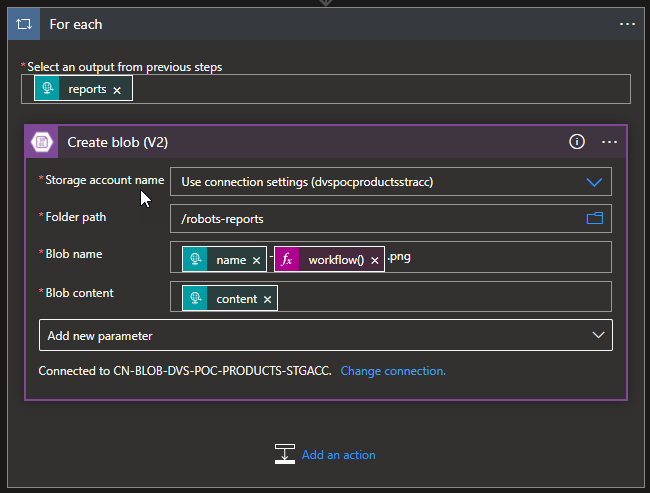
Select New step. In the search box, enter Blob, and from the result panel select the Azure Blob Storage and choose the Create blob (v2)action.
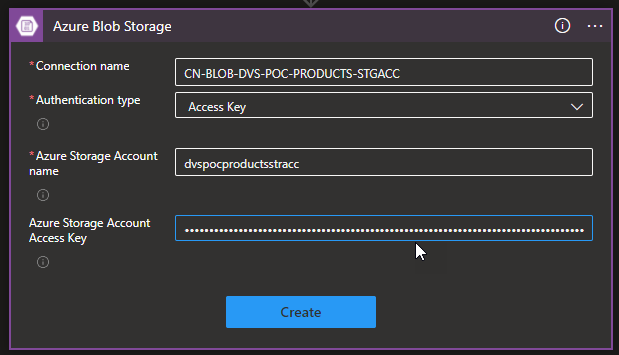
If you don’t have yet a connection create you first need to create the connection by setting the following configurations and then click Create:
Connection name: Display connection name
Authentication type: the connector supports a variety of authentication types. In this POC, we will be using Access Key.
Azure Storage Account name: Name of the storage account the connector we create above. We will be using dvspocproductsstracc.
Azure Storage Account Access Key: Specify a valid primary/secondary storage account access key. You can get these values on the Access keys option under the Security + networking section on your storage account.
Then provide the following information:
Storage account name: Select from the dropdown list the storage account. The default should be Use connection settings (dvspocproductsrracc)
Folder path: navigate to the folder /robots-reports
Blob name: Dynamic set the name of the file to be created. To avoid overlap we decide to use the unique workflow id of the message as part of the name of the report we receive on the source message:
Blob content: the Base64 content we receive on the source message.
Note: by setting the name or the content on the Create blob action, this will automatically add a For Each loop statement on our business flow since these fields can occur multiple times inside the source message. And this is correct and what we want.
Select New step. In the search box, enter Variables, and from the result panel select the Variables, and choose the Set variable action and provide the following information:
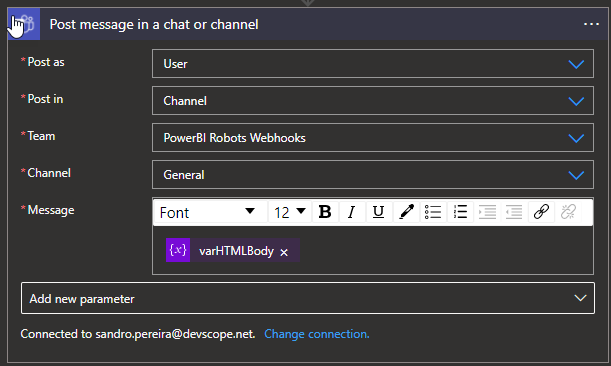
And finally, select New step. In the search box, enter Teams, and choose from the result panel the Microsoft Teams, choose the Post message in a chat or channel action and provide the following information:
Post as: Select User
Post in: Select Channel
Team: Select the Team, in our case PowerBI Robots Webhooks
Channel: Select the Team channel, in our case General
Message: place the message we create above by using the varHTMLBody
Note: if you don’t have yet created a Teams Connector, you need to Sign in using the account that will be making these notifications.
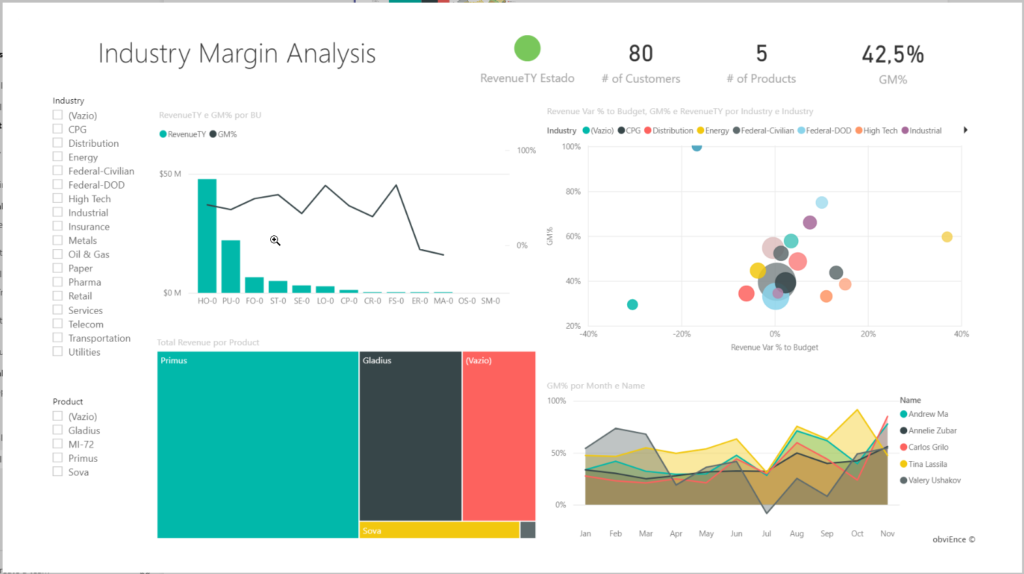
As a result, once we receive a new request from the PowerBI Robots, will be a fancy message on teams with a thumbnail of the report:
You can click on it and see it in full size:
More About PowerBI Robots?
PowerBI Robots automatically takes screenshots of your Microsoft Power BI dashboards and reports and sends them anywhere, to an unlimited number of recipients. Simply tell PowerBI when and where you want your BI data, and it will take care of delivering it on time.