This is the fifth post in my series on Integration of Things. In this post I showed how you can send messages from a Raspberry Pi 2 into a Service Bus Queue, and in our previous blogpost we have set up a library for connecting to an Azure SQL database. Today I will explain how we can use a WebJob to retrieve the messages from the queue and send them to our database. The code for this blogpost can be found here.
A WebJob is a simple way to set up a background job, which can process continuously or on a schedule. WebJobs differ from a cloud service (which we discussed in this blogpost) as it gives you get less fine-grained control over your processing environment, making it a more true PaaS service.
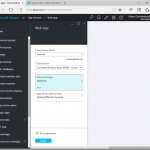
We will need a Web App to host our WebJob, so lets create one in the Azure Portal. You can create a new Web App by going to App Services, and selecting New.
To simplify our deployment later on, we will download the publish profile for our Web App once it has been created.
Next we will create a new project for our WebJob, so be sure to install the Azure WebJob SDK if you don’t have it yet.
Once the project has been created, start by going to the App.Config, and setting the connection strings for the dashboard and storage. This should both be set to the connection string for the Azure Storage account we created in this blogpost, and should be in the format DefaultEndpointsProtocol=https;AccountName=NAME;AccountKey=KEY. Both the name and the key can be found in the settings of the storage account.
We will also need to set the connection string for our Service Bus Queue, for which we will need a Shared Access Key with Manage permissions, as as required by the WebJob’s job host.
And finally, we will also need to add the connection string to our Azure SQL database, which we will use from our Entity Framework library to communicate with the database.
<connectionStrings> <add name="AzureWebJobsDashboard" connectionString="DefaultEndpointsProtocol=https;AccountName=eldertiot;AccountKey=xxxxxxxxxxxxxxxxxxxxxxxxxxxxx" /> <add name="AzureWebJobsStorage" connectionString="DefaultEndpointsProtocol=https;AccountName=eldertiot;AccountKey=xxxxxxxxxxxxxxxxxxxxxxxxxxxxx" /> <add name="AzureWebJobsServiceBus" connectionString="Endpoint=sb://eldertiot.servicebus.windows.net/;SharedAccessKeyName=administrationconsole;SharedAccessKey=xxxxxxxxxxxxxxxxxxxxxxxxxxxxx" /> <add name="IoTDatabaseContext" connectionString="Server=tcp:eldertiot.database.windows.net,1433;Database=eldertiot;User ID=Eldert@eldertiot;Password=xxxxxxxxxxxxxxx;Encrypt=True;TrustServerCertificate=False;Connection Timeout=30;" providerName="System.Data.SqlClient"/> </connectionStrings> |
We also have to add the AzureWebJobsDashboard connection string to the Application settings of the Web App in the Azure portal, so the logs can be stored in your storage.
By default a trigger is added to the WebJob for storage queues, however as we want to work with a Service Bus Queue, we will need to add the Microsoft.Azure.WebJob.ServiceBus NuGet package to our project.
Now that we have all configuration in place, we’ll go and implement the code in our WebJob. Open up the Functions class which was created with inside your WebJob project. We will change the trigger type to ServiceBusTrigger so we can get triggers from our Service Bus Queue, using the queue we created in this blogpost. As we are using a Service Bus trigger, we will also need to change the type of the message to be a BrokeredMessage instead of a string. When we have received the message, we will save its contents to the database, using the library we created in my previous blogpost.
using System; using System.IO; using Eldert.IoT.Data.DataTypes; using Microsoft.Azure.WebJobs; using Microsoft.ServiceBus.Messaging; namespace Eldert.IoT.Azure.ServiceBusQueueProcessor { public class Functions { private static readonly IoTDatabaseContext database = new IoTDatabaseContext(); /// <summary> /// This function will get triggered/executed when a new message is written on an Azure Service Bus Queue. /// </summary> public static void ProcessQueueMessage([ServiceBusTrigger("queueerrorsandwarnings")] BrokeredMessage message, TextWriter log) { try { log.WriteLine($"Processing message: {message.Properties["exceptionmessage"]} Ship: {message.Properties["ship"]}"); // Add the message we received from our queue to the database database.ErrorAndWarningsEntries.Add(new ErrorAndWarning() { CreatedDateTime = DateTime.Parse(message.Properties["time"].ToString()), ShipName = message.Properties["ship"].ToString(), Message = message.Properties["exceptionmessage"].ToString() }); // Save changes in the database database.SaveChanges(); } catch (Exception exception) { log.WriteLine($"Exception in ProcessQueueMessage: {exception}"); } } } } |
Next we will update the Program class, as we will need to register our Service Bus extension in the configuration of our job host.
using Microsoft.Azure.WebJobs; namespace Eldert.IoT.Azure.ServiceBusQueueProcessor { // To learn more about Microsoft Azure WebJobs SDK, please see http://go.microsoft.com/fwlink/?LinkID=320976 class Program { // Please set the following connection strings in app.config for this WebJob to run: // AzureWebJobsDashboard and AzureWebJobsStorage static void Main() { // Create job host configuration var config = new JobHostConfiguration(); // Tell configuration we want to use Azure Service Bus config.UseServiceBus(); // Add the configuration to the job host var host = new JobHost(config); // The following code ensures that the WebJob will be running continuously host.RunAndBlock(); } } } |
Now that our code is completed, we can publish the WebJob to Azure. Right-click the project, and select Publish as Azure WebJob.
Provide a name for the WebJob, and make sure it’s set to run continuously, as we will want to process messages as soon as they come into our queue.
We will use the publish profile we exported earlier to set up publishing.
Review the settings, but as we are using a publish profile, these should allready be correct.
Wait for the application to be published, you can check the activity monitor to keep track of its progress.
When it’s done, we can see the WebJob in our Azure Portal.
By clicking on the Logs URI we will be able to check the logging for our WebJob. Here you will find the invocations of our function, as well as output of the status of our WebJob. To check if our job is actually working, we will create an exception message using Service Bus Explorer. Open up the application, and connect to our Service Bus Namespace (remember to use the RootManageAccessKey). Now right-click on the queue, and select Send Messages. A composer will now open up, where we can set the message to be sent. As we sent everything in our properties, we can set a random message in the Message Text (can not be empty, as it will give issues when sending, this is a restriction of Service Bus Explorer), and add Message properties for the exceptionmessage, ship and time.
Click Start to send the message, when the message has been sent we will go back to the portal. We will now see the invocation we just did, and can open it to show the output.
Lets open up the SQL Server Object Explorer in Visual Studio and connect to our database we created in the previous blogpost. We will now see the table for errors and warnings has indeed been automatically created by our migration, and the data we just sent to it is in the table.
Code