This is a new post in the IoT Hub series. Previously we have seen how to administrate our devices, send messages from the device and from the cloud. Now that we have all this data flowing through our systems, it is time to help our users to actually work with this data.
Going back to the scenario we set in the first post of the series, we are receiving the telemetry readings from our ships, and getting alerts in case of high temperature. In the samples we have been using console apps for our communications between the systems, but in a real-life scenario you will probably want a better and easier interface. In the shipping business, Dynamics CRM is already widely used, and so it would benefit the business if they can use this product for their IoT solutions as well. Luckily they can, by using Microsoft Dynamics 365 for Field Service in combination with the Connected Field Service solution.

Setting Up Connected Field Service
To start working with the connected field service solution, first we will set up a 30 day trial for Dynamics 365 for Field Service. Just remember you will need an organizational Microsoft account to sign up for Dynamics 365. If you do not have one, you can create a <your-tenant>.onmicrosoft.com account in your Azure Active Directory for this purpose. If you already have your own Dynamics 365 environment, you can skip to installing the connected field service.
Create Dynamics 365 Environment
We will start by setting up Dynamics 365. In this post, we will be using a trial account, but if you already have an account you could of course also use that one. Go to the Dynamics 365 trial registration site, and click on Sign in to use an organizational account to login.
 Sign in to Dynamics 365
  Use an organizational account to sign in
Once signed in, confirm that you want to sign up for the free trial.
 Confirm the free trial
  Your trial has been accepted
Now that we have created our free trial, we will have to assign licenses to our users. Open the Subscriptions blade under Billing and choose to assign licenses to your users.
 Assign licenses to users
You will get an overview of all your users. Select the users for which you want to assign the licenses, and click Edit product licenses.
 Choose users to assign licenses
Add the licenses to the users we just selected.
 Add licenses to users
Choose the trial license we just created. This will also add the connected Office 365 licenses.
 Assign Dynamics 365 trial licenses
Now that we have assigned the Dynamics 365 licenses, we can finish our setup. Go to Admin Centers in the menu, and select Dynamics 365.
Go to Dynamics 365 admin center
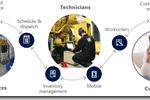
As we are interested in the field service, select this scenario, and complete the setup. The field service scenario will customize our Dynamics 365 instance, to include components like scheduling of technicians, inventory management, work orders and more, which in a shipping company would be used to keep track of repairs, maintenance, etc.
 Select Field service
Once we have completed our Dynamics 365 setup, it will be shown in the browser. The address of the page will be in the format <yourtenant>.crm4.dynamics.com. You can also change this endpoint in your Dynamics 365 admin center.
 Your Dynamics 365 environment
Security
To allow us to install the Connected Field Service solution, we will need to add ourselves to the CRM admins. To do this, within your Dynamics 365 portal (in my case https://eldertiotcrmdemoeldert.crm4.dynamics.com/) go to the Settings Tab and open security.
 Open Dynamics 365 Security
Now open the users, select your user account, and click on Promote To Admin.
 Promote your user to local admin
Install Connected Field Service Solution
Now that we have Dynamics 365 set up, it’s time to add the Connected Field Service solution, which we will use to manage and interact with our devices from Dynamics 365. Start by going to Dynamics 365 in the menu bar.
 Open Dynamics 365
This will lead us to our Dynamics home, where we can install new apps. Click on Find more apps to open the app store.
 Open the app store
Search for Connected Field Service, and click on Get it now to add it to our environment.
 Add Connected Field Service solution
Agree with the permissions, and make sure you are signed in with the correct user. The user must have a license, and permissions to install this solution.
 Accept permissions
Follow the wizard for the solution and make sure you install it into the correct environment.
 Select your Dynamics 365 environment
  Accept deployment
On the next pages accept the service agreement and the privacy statement. Make sure you deploy to the correct Dynamics 365 Organization.
Select correct organization
Now we will have to specify the Azure resources where we want to deploy our artefacts like IoT Hub, Stream Analytics etc. If you do not see a subscription, make sure your user has the correct permissions in your Azure environment to create and retrieve artefacts and subscriptions.
 Select Azure subscription and resources
The wizard will now start deploying all the Azure artefacts, and will update CRM with new screens and components. You can follow this by refreshing the screen, or coming back to the website. Once this is finished, you will need to click the Authorize button, which will set up the connection between your Azure and Dynamics 365.
 After deployment click on Authorize
This will open the Azure portal on the API connection, click on the message This connection is not authenticated to authorize the connection.
Click to authenticate  Authorize the connection
The Azure Solution
Now let’s go to the Azure portal, and see what has been installed. Open the resource group which we created in the wizard.
 Resource group for our connected field service solution
As you can see, we have a lot of new resources. I will explain the most important ones here, and their purpose in the Connected Field Service solution. After the solution has been deployed, all resources will have been setup for the data from the sample application which has been deployed with it. If you want to use your own devices, you will need to update these. This is also the place to start building your own solution, as your requirements might differ from what you get out of the box. As all these resources can be modified from the portal (except for the API Apps), customizing this solution to your own needs is very easy
IoT Hub
The IoT Hub which has been created is used for the device management and communication. It uses device to cloud messaging to receive telemetry from our devices, and cloud to device messaging to send commands to our devices. When working with your own devices, you should update them to connect with this IoT Hub.
Service Bus
Four Service Bus queues have been created, which are used for holding messages between systems.
Stream Analytics
There are several Stream Analytics jobs, which are used to process the data coming in from IoT Hub. When working with your own devices, you should update these jobs to process your own data.
- Alerts; This job reads data from IoT Hub, and references it against device rules in a blob. If the job detects it needs to send an alert to Dynamics 365, in this case a high temperature, it will write this into a Service Bus queue.
- PowerBI; This job reads all incoming telemetry data, and sends the maximum temperature per minute to PowerBI.
API Apps
Custom API Apps have been created, which will be used to translate between messages from IoT Hub and Dynamics 365.
Logic Apps
There are two Logic Apps, which serve as a communications channel between Dynamics 365 and IoT Hub. The Logic Apps use queues, API Apps and the Dynamics 365 connector to send and receive messages between these systems.
Setting Up PowerBI
PowerBI will be used to generate charts from the telemetry readings. To use this, we first need to import the reports. Start by downloading the reports, and make sure you have a PowerBI account, it is recommended to use the same user for this which you use for Dynamics 365. Open the downloaded reports file using PowerBI Desktop. The Power BI report will open with errors because it was created with a sample SQL database and user. Update the query with your SQL database and user, and then publish the report to Power BI.
 Open the downloaded report
Once opened, click on Edit Queries to change the connection to your database.
 Select Edit Queries Open Advanced Editor
Replace the source SQL server and database with the resources provisioned in your Azure resource group. The database server and database name can be found through the Azure portal.
 Update Azure SQL Server and database names
Enter the credentials of your database user when requested.
 Enter login credentials
If you get an error saying your client IP is not allowed to connect, use the Azure portal to add your client IP to the firewall on your Azure SQL Server.
Not allowed to connect  Add client IP to firewall settings
Once done, click on Close & Apply to update the report file.
Close and apply changes
Now we will publish the report to PowerBI, so we can use it from Dynamics 365. Click on the Publish button to start, and make sure to save your changes.
 Publish report to PowerBI
Sign in to your PowerBI account and wait for you report to be published.
 Sign in to PowerBI
Once published, open the link to provide your credentials.
 Publishing succeeded
Follow the link to edit your credentials, and update the credentials with your database user login.
 Sign in with database user
Now pin the tiles to a dashboard, creating one if it does not yet exist.
 Pin tiles to dashboard
Managing Devices
In this post we will be using the simulator which has been deployed along with the solution. If you want to use your own (simulated) devices, be sure to update the connections and data for the deployed services. Go to your Dynamics 365 environment, open the Field Service menu, and select Customer Assets.
Open Customer Assets
To add a new device, we will create a new asset. This asset will then be linked to a device in IoT Hub.
Create new asset
Fill in the details of the asset. Important to note here, is we need to set a Device ID. This will be the ID with which the device is registered in IoT Hub. When done, click on Save.
 Set asset details
Once the asset has been saved, you will note a new command in the command bar called Register Devices. This will register the new device in IoT Hub, and link it with our asset in Dynamics 365. Click this now.
 Register the device in IoT Hub
The device will now be registered in IoT Hub. Once this is done, the registration status will be updated to Registered. We can now start interacting with our device.
Device has been registered in IoT Hub
Receive Telemetry
Open the thermostat simulator, which was part of the deployment of the Connected Field Service solution. You can do this by going back to the deployment website and clicking Open Simulator.
 Open the simulator
This will open a new website where we can simulate a thermostat. Start by selecting the device we just created from Dynamics 365.
 Select device
Once the device has been selected, we will start seeing messages being sent. These will be sent to IoT Hub, and be placed into PowerBI, and alerts will be created if the temperature gets too high. Increase the temperature to trigger some alerts.
 Generate high temperature
Now go back to Dynamics 365, and open the Field Service dashboard.
 Open Field Service dashboard
On the dashboard we will now see a new IoT Alert. You can open this alert to see it’s details, and for example create a work order for this. In our scenario with the shipping company, this would allow us to recognize anomalies on the ships engines in near real time, and immediately take action for this, like arranging for repairs.
 Alerts are shown in Dynamics 365
Connect PowerBI
Now let’s set up Dynamics 365 to include the PowerBI graph in our assets, so we have an overview of our telemetry at all times as well. Go back to the asset we created earlier, and click the PowerBI button in the Connected Device Readings area.
 Add PowerBI tile to asset
Choose one of the tiles we previously added to the PowerBI dashboard and click save.
 Add PowerBI tile
We will now see the recent device readings in our Dynamics 365 asset. This will show up with every asset with the readings for its registered device, allowing us to keep track of all our device’s readings.
 Device readings are now integrated in Dynamics 365
Send Commands
So for the final part, we will have a look how we can send messages from Dynamics 365 to our device. Go back to the asset we created, and click on Create Command.
 Click Create Command
Give the command a name, and provide the command. This should be in JSON format, so it can be parsed by the device. As we will be using the simulator, we will just send a demo command, but for your own device this should be a command your device can understand. You can send this command to a particular device or to all your devices. Once you have filled in the fields, click on Send & Close to send the command. The command which we will be sending is as follows.
{"CommandName":"Notification","Parameters":{"Message":"Technician has been dispatched"}}
 Create and send your command
Now when we switch over to our simulator, we will see the command coming in.
 Commands are coming in
Conclusion
By using Dynamics 365 in combination with the Connected Field Service solution, we allow our users to use an environment which they are well known with, to administrate and communicate with their IoT devices. It allows them to handle alerts, dispatching technicians as soon as needed. By integrating the readings, they are always informed on the status of the devices, and by sending commands back to the device they can remotely work with the devices.
IoT Hub Blog Series
In case you missed the other articles from this IoT Hub series, take a look here.
Blog 1: Device Administration Using Azure IoT Hub
Blog 2: Implementing Device To Cloud Messaging Using IoT Hub
Blog 3: Using IoT Hub for Cloud to Device Messaging