This post was originally published here
March 5, 2019
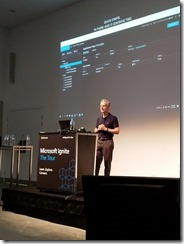
A few weeks ago I had the great privilege of presenting a 60 minute breakout session at Microsoft Ignite | The Tour in Sydney. It was thrilling to have over 200 people registered to see my topic “Seamless Deployments with Azure Service Fabric”, especially in the massive Convention Centre.
In the session I demonstrated the self-healing capabilities of Service Fabric by introducing a bug in the code and then attempting a rolling upgrade. It was impressive to see how Service Fabric detected the bug after the first node was upgraded and then immediately started rolling it back.
As you can imagine, it took a fair amount of practice to get the demo smooth and functioning within the tight time limits of the average audience attention span. (In fact, I had to learn how to tweak both the cluster and the application health check settings to shorten the interval – perhaps the subject of another blog post!) Naturally this also entailed frequently “resetting” the environment so that I could start over when things didn’t go quite as planned, or if I wanted to reset the version number. If you’ve ever worked with Service Fabric before you would know that deployments from Visual Studio (or Azure DevOps) can take a while; and undeploying an application from Service Fabric manually in the portal is painful!
For example, if I want to undeploy an application from a Service Fabric cluster in the web-based Service Fabric Explorer, I have to do the following in this order:
 Remove the service
- Remove the application
- Unregister the application type
- Remove the application package
What becomes really annoying is that each step elicits a confirmation prompt where you need to type the name of the artefact you want to remove! That gets old pretty fast.
Thankfully, there is an alternative. Service Fabric offers a number of different ways to deploy applications, including Visual Studio, Azure CLI, and PowerShell. Underneath the covers I expect these all make use of the REST API. But in my case I found the simplest and most efficient choice was PowerShell. Using the documented commands, it is easy to create a script that will deploy or undeploy your application package in seconds. And I mean seconds! It was astounding to see how quickly the undeploy script could tear down the application!
The script I created is available in my demo code on GitHub. I’ll walk through some of it here.
Pre-requisites
First, it is necessary to have the Azure PowerShell installed. This is normally included when you install the Service Fabric SDK, but you must enable execution of the scripts first.
Second, in order for the Deploy_SFApplication.ps1 script to work, you must have already packaged the application. You do this by right-clicking the Service Fabric project in Visual Studio (not the solution file!) and selecting “Package”. The path to this package is a mandatory parameter for this script. The Undeploy_SFApplication.ps1 script does not require this.
Parameters
The make the scripts reusable with the minimum amount of changes, I’ve parameterized all of the potentially variable settings:
| Parameter Name | Description | Example/Default Value |
|---|---|---|
| path | This is the path to your packaged application. (This parameter is not required for the Undeploy_SFApplication.ps1 script) | C:ReposDemosVoting_v3VotingpkgDebug |
| imageStorePath | Where you want the package stored when uploaded in Service Fabric. Typically this can be the application name, perhaps with a version. | Voting |
| appTypeName | Usually the app name with “Type” appended | VotingType |
| appName | Must be prepended with “fabric:/” | fabric:/Voting |
| appVersion | IMPORTANT! Cannot deploy the same version already existing, it will fail | 1.0.0 |
| ServerCommonName | If using your local development cluster, just “localhost”. Otherwise, if in Azure, “CLUSTER_NAME.REGION.cloudapp.azure.com” |
myCluster.australiaeast.cloudapp.azure.com |
| clusterAddress | Append the port number to the $ServerCommonName variable, usually 19000 | $(ServerCommonName):19000
resolves to: |
| thumb | The thumbprint of the certificate used for a secured cluster (not generally required for a local cluster) NOTE: The script currently sets the location of the certificate in the current user’s personal store. However this could be easily parameterized. |
https://docs.microsoft.com/en-us/dotnet/framework/wcf/feature-details/how-to-retrieve-the-thumbprint-of-a-certificate |
Script Execution Steps
First thing we do is import the appropriate module:
Import-Module "$ENV:ProgramFilesMicrosoft SDKsService FabricToolsPSModuleServiceFabricSDKServiceFabricSDK.psm1"
Then it’s simply a matter of following using the documented commands, substituting the variables as appropriate in order to:
- Connect to the cluster
- Upload the package to the package store
- Register the application type
- Create the application instance
My Deploy_SFApplication.ps1 script also prints out the application instance details as well as the associated service instance details:
The Undeploy_SFApplication.ps1 script does much the same, except in reverse of course:
- Connect to the cluster
- Remove the application instance
- Unregister the application type
- Remove the application package
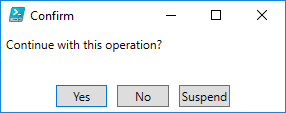
The use of the –force flag means that when you run this script you will NOT be prompted for confirmation like this:

Whilst the deployment script takes about 20 seconds for this Voting application, the undeploy script takes less than five seconds!
As mentioned previously, the scripts are freely downloadable along with the rest of the demo code on GitHub. I’m no PowerShell guru, so I’m sure there’s plenty of room for improvement. Send me a pull request if you have any suggestions! And feel free to get in touch if you have any questions.
This post was originally published on Deloitte’s Platform Engineering blog.


