This post was originally published here
So, you have installed BizTalk360 and you are eager to start using it! But, BizTalk360 is such a feature-rich product, that you might find it hard to get started and implement BizTalk360 in a proper way.
In this blog post, we will give you some tips and guidelines, which will be of help when you are setting up BizTalk360. You can also use the article if you have already set up some of the features in BizTalk360 and want to make sure that you did not miss anything important.
This blog post is separated in the following sections:
- Optimizing the BizTalk360 environment
- Benefit from automated monitoring
Optimizing the BizTalk360 environment
Once you have installed the product, there are a few things you must do, before you are able to use the product. Furthermore, you can also perform some tasks to optimize the environment. Let’s have a look at these tasks:
- Activate the license (required)
- Adding BizTalk environments to BizTalk360 (required)
- Remove unused BizTalk features from the BizTalk360 UI
- Create User Access Policies
- Create efficient dashboards
We will have a somewhat more detailed look at these tasks.
Activate the license
After finishing the installation of BizTalk360, the installer starts the product in your default browser. Once started, BizTalk360 will ask you to provide the license. If you have purchased a license, you now can provide the details of this license. Depending if the server on which BizTalk360 has been installed has internet connectivity, the process of applying the license will be a bit different.
Adding BizTalk environments to BizTalk360
After applying the license, you will be able to access the BizTalk environment, for which you purchased the license.
In case you have purchased BizTalk360 licenses for multiple BizTalk environments, there are two options on how to access these BizTalk environments from BizTalk360:
- A separate installation of BizTalk360 for each BizTalk environment
- Using one BizTalk360 instance for multiple BizTalk environments
It is totally up to you how you want to access your BizTalk environments from BizTalk360, although the two mentioned approaches both have their pros and cons. To sum up a few:
- it is handy to have multiple BizTalk environments in the same instance of BizTalk360. But, there is the risk that you think that you are stopping artefacts in your Test environment, while you were actually doing it in the Production environment
- with separate BizTalk360 instances for your BizTalk environments, it is less likely that you stop artefacts or terminate instances in the wrong environment. But, it might be hard to memorize the URL’s of the different BizTalk360 installations
If you plan to have multiple BizTalk environments in the same instance of BizTalk360, it is good to know that, to prevent confusion, you can achieve the following:
- give each environment a friendly name
- colour code each environment
Remove unused BizTalk features from the BizTalk360 UI
One of the primary design goals of BizTalk360 is to consolidate all the tools and portals you might need to operate your BizTalk environment. Just to mention a few of such portals, the product contains features to access BAM views, the ESB Exception Framework, the Business Rules Composer, EDI, etc.
However, within your organization, you might not use all these BizTalk features. Still, they show up in the BizTalk360 user interface.
Of course, you can use User Access Policies to prevent these features to show up, but then the Super User (for which no fine-grained user access policy needs to be set up) will still view these unused features.
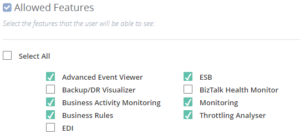
To prevent these unused features from showing up, you can simply disable them for the environment. This way, the BizTalk360 user interface is more focused on your BizTalk environment.
Create User Access Policies
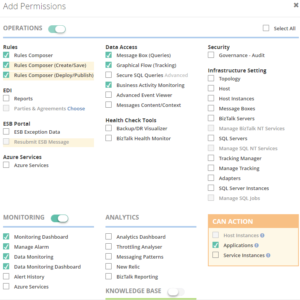
After the installation of the product, an User Access Policy has been created for the user who installed the product. However, it is likely that more people will use the product. To provide each user, which the access to BizTalk360 they need, it is best to create User Access Policies for each user.
You can start with giving your fellow BizTalk administrators access to BizTalk360. But when you feel confident, you can also give people outside the BizTalk Admin team access to the product.
With the fine-grained capabilities of the User Access policies, you can, for example, can give your:
- Support Engineers read-only access to BizTalk360
- Business users access to portals like BAM, EDI, ESB, BRE, etc.
Create efficient dashboards
The Operations Dashboard is the entry point of BizTalk360. This Dashboard can contain a different kind of widgets of which the goal is to immediately show useful information about the well-being of your BizTalk environment.
The widgets on the Operations Dashboard are fully customizable in terms of:
- number of widgets
- size of the widgets
- location of the widgets
- refresh interval of the widgets
In case the default collection of widgets does not completely fulfil your requirements, you can create Custom Widgets, enabling you for example to show the output of (BizTalk360) API calls or SQL queries.
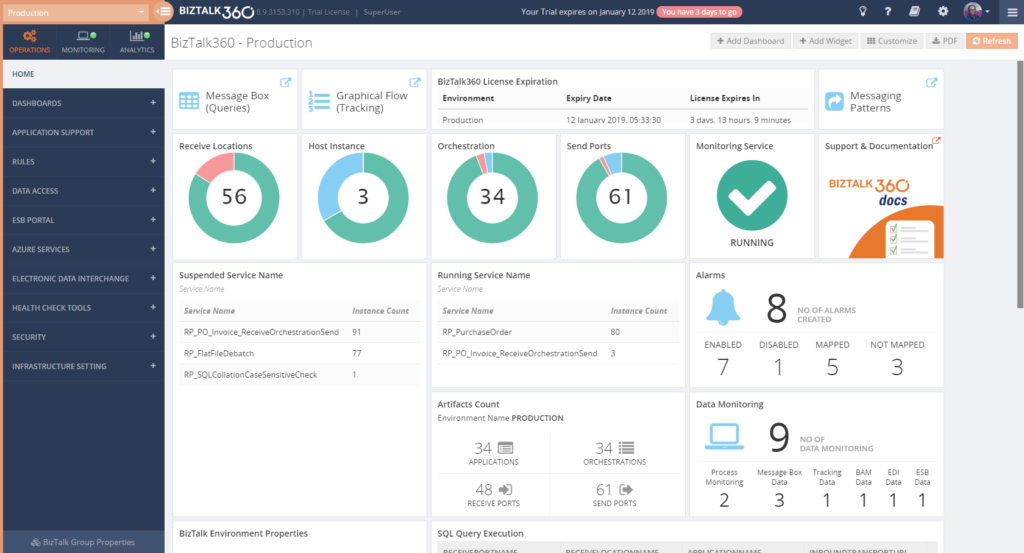 The Documentation portal contains more information on how to set up and use the Operations Dashboards. It also contains articles about creating Custom Widgets.
Benefit from automated monitoring
The main reason you purchased BizTalk360 might very well be the monitoring capabilities of the product, so you are probably interested in setting this up as soon as possible.
Setting up monitoring in BizTalk360, consists of two steps, which are:
- create Alarms – to configure HOW you want to monitor
- manage Mappings – to configure WHAT you want to monitor
Create Alarms to configure HOW you want to monitor
The first step is to create an alarm. With BizTalk360, alarms come in a few different flavours:
- Threshold alarms – for monitoring whether artefacts are in the expected state
- Health alarms – for receiving Daily check reports at configurable days/times
- Data Monitoring alarms – for monitoring the processing of messages through BizTalk
- Consolidated alarms – any combination of the 3 above mentioned alarm types
Besides stuff like giving an alarm a name and configuring how you want to be notified, depending on the alarm type, you can configure multiple other settings. So, again, with configuring these properties you are only configuring how you want to monitor.
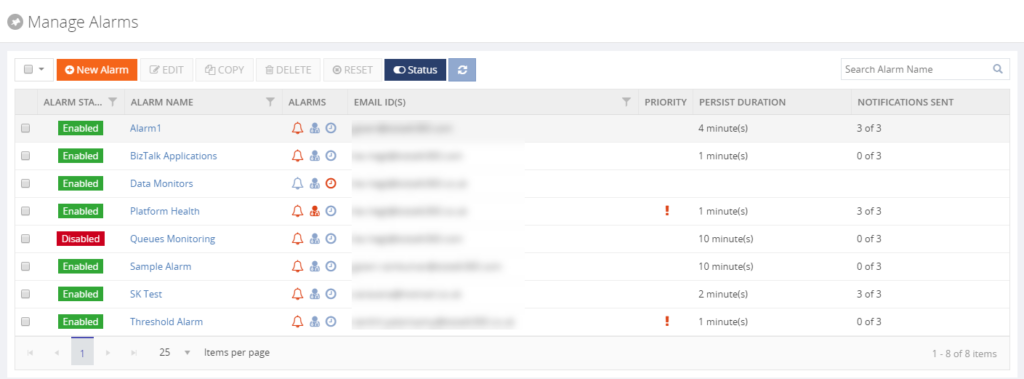
Read the Understanding Alarms article in the Documentation portal for more information about the different alarm types and on how to create an alarm.
Manage Mappings to configure WHAT you want to monitor
After creating an alarm, you will add mappings to it, to start monitoring the required artefacts. With BizTalk360, there is a huge set of artefacts you can monitor. Think of for example (this is not the full list):
- BizTalk Applications – Send Ports, Receive Locations, Orchestrations, Service instances
- Host instances – in/out process, clustered
- Host Instance Throttling – generic or detailed
- BizTalk Servers/SQL Servers – Disks, Event Logs, NT Services, CPU, Memory
- BizTalk Server Availability – via Ping or Telnet
- SQL Server Instances – SQL Server Agent Jobs, SQL Queries
- HTTP Endpoints – REST, SOAP
- FILE Endpoints – FILE, FTP, SFTP, FTPS
- Queues – MSMQ, IBM MQ, Azure ServiceBus Queues
- BizTalk Health Monitor – Critical and Non-critical Errors and Warnings
Depending on the type of the artefact, you can monitor for its state (like Stopped/Started/etc.) or Warning/Error thresholds.
Although you are completely free in how you set up monitoring, we normally recommend making a distinction between monitoring the BizTalk platform and the BizTalk applications.
- Platform alarms – these contain mappings to stuff like the Host Instances, the SQL Server Agent jobs, Host Throttling, Server resources etc.
- BizTalk Application alarms – these alarms contain mappings to BizTalk application artefacts (Receive/Send Ports, Orchestrations and Service Instances) and relevant endpoints (HTTP/HTTPS, FILE, FTP/SFTP/FTPS, etc.)
Note: Did you know that BizTalk360 has a feature which is called Auto-Correct? This feature enables you to automatically (try) to bring artefacts back to the expected state, after entering the wrong state. This feature, which can be a real time-saver, works for the following components:
- BizTalk Applications – Receive Locations, Orchestrations and Send Ports
- BizTalk Platform – Host Instances
- Windows Server – Windows NT Services
- SQL Server – SQL Server Jobs
- Microsoft Azure – Logic Apps
Read more about this feature in the Documentation portal.
Data Monitoring
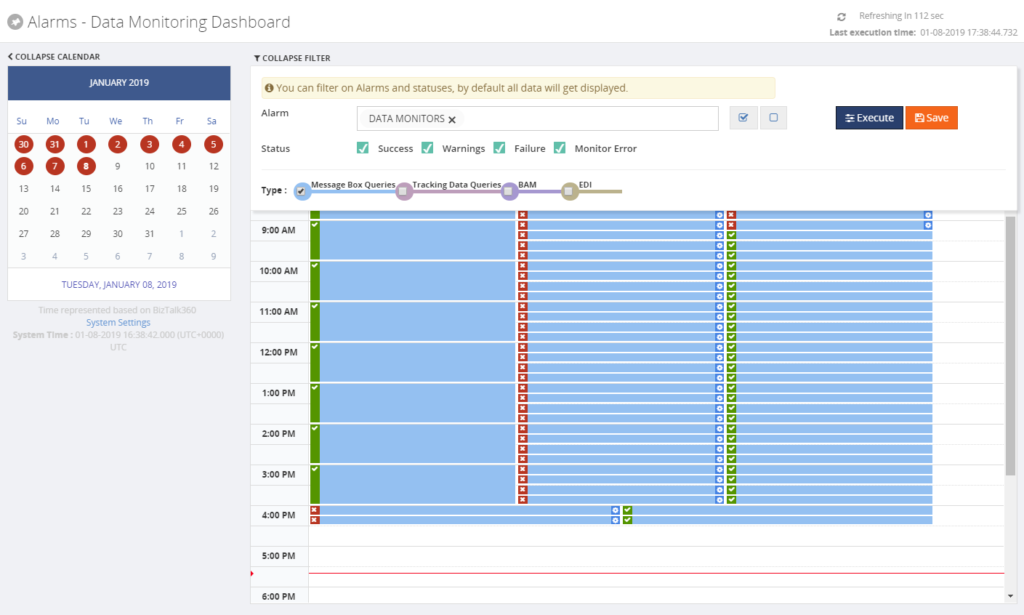
Besides artefact monitoring, BizTalk360 also allows you to monitor the processing which is taking place through BizTalk. The concept of Data Monitoring allows you to monitor activity around sources like the MessageBox, Tracking data, BAM data, EDI data, ESB data, Logic Apps and Even Log entries. Data Monitoring comes with the Data Monitoring Dashboard. This calendar-like dashboard shows the historic runs of all the configured Data Monitors. This dashboard will make it easy to address questions about whether certain processing did take place.
Without going in too much detail, with Data Monitoring you can cover scenarios like:
- monitoring whether batches you expect at a particular time, really arrive in BizTalk and become processed
- you may want to automatically terminate service instances, like Routing Failures, which you frequently receive
- you may want to automatically resume service instances because the messages could not be transmitted due to a temporary network failure
Implementing BizTalk360 can be a multi-step process
You must have noticed that, once you have purchased and installed BizTalk360, there is a lot to go for. In this blog post, we only mentioned a number of features which are considered the most important to implement after installing the product.
However, there are way too many features in the product to cover in a single blog post. Given the number of features in the product, it makes sense to make implementation of BizTalk360 a multi-step process. This way, your BizTalk360 implementation can grow with your requirements and the requirements of your organization.
We love to hear from you and we want you to take the full benefit of your purchase!
Happy administering!
