Following Sandros last post on BizTalk Server: Automation Deployment with Azure DevOps – Create a build agent, we’re going to show how to create the deployment steps, by creating the Pipeline and Release Pipeline, using a few DevOps tasks.
The standard BizTalk Deployment task does a decent job in deploying the application, but it doesn’t handle changing tokens or registering DLLs in GAC.
To deploy in multiple machines or to change your Bindings according to your environment, you have to make your file dynamic. This means, replacing your connections with variables.
Let’s start with the basic:
Creating the project and installing it in DEV
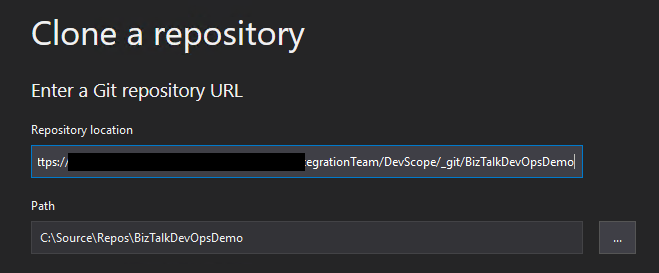
As always, it’s better to first create the DevOps repository and clone it in your machine.

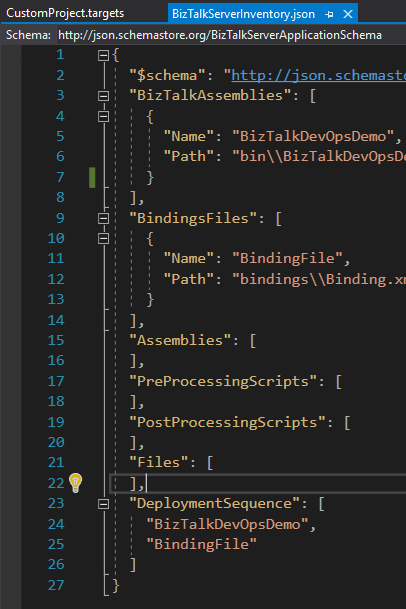
Having this created, you need to get your project working and have a Deployment Project as well. This will contain the needed DLLs and Binding files pointers to your BTS project. This will also contain the Application name to be deployed and some other configurations.
You will see that you can set the Biztalk Assemblies path as well as other Assemblies, Pre and Post processing scripts and the Deployment Sequence. This is one of the most important steps, because, as you know, it does matter in which order you deploy your BT Assemblies.
When referencing your BT projects, do make sure that the Application Project is using the same framework version as your other projects. If it’s not the same version, it will not be able to copy the DLLs to the referenced Path and will not build successfully.
Building this project will generate a ZIP file that contains all that is needed. You can try to publish it directly, after configuring the application.
The bindings file that is created with the project is just an empty template, so you’ll want to deploy your application in your Dev Environment and create those bindings. It will make a difference if you export your application bindings when it’s started and when it’s stopped, so keep that in mind.
For this example, I’m going to export the bindings with the Application fully stopped.
Your standard Bindings export will carry the ports and URIs/connections straight from the Admin console. Through a little magic, we will configure these values to be dynamic and it’s super easy.
Making your Bindings dynamic for deployment
Now you’ve exported the bindings and you want to make it ready for DevOps and to accept multiple configurations.
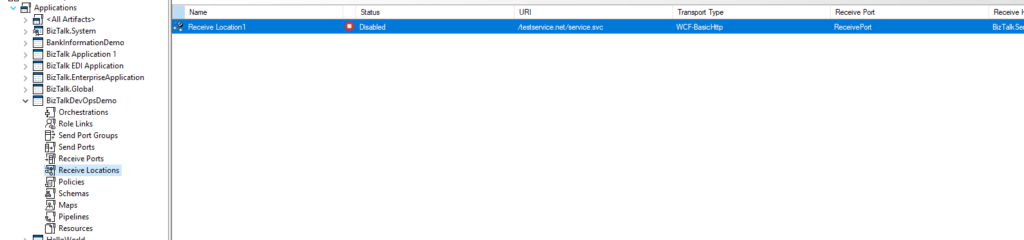
From my example, you can see that the ReceiveLocation and ReceivePort names are static. If we tokenize this, you can call it whatever you want, therefore reducing the risk of colliding with other existing ports in your end systems.
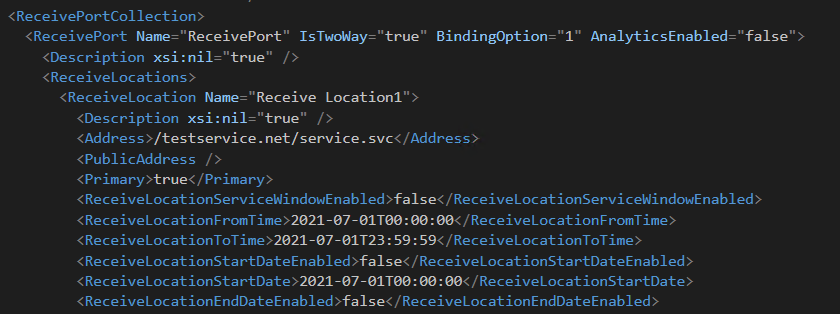
So, keeping in mind the desired token, I’m going to replace these values, ReceiveLocation address included, with a variable and token identifier. With a few magic touches, we end up with something like this:
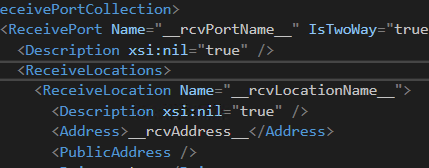
And that’s it. Of course, this is a very small and simple example, but even with a goliath project, it will still be the same pattern. You find what you want to make dynamic, tokenize it, save and upload your changes to your Repo.
Building your Pipeline and Release Pipeline
Now you have your source code in your Repository, your bindings ready for dynamic changes and you want to deploy it.
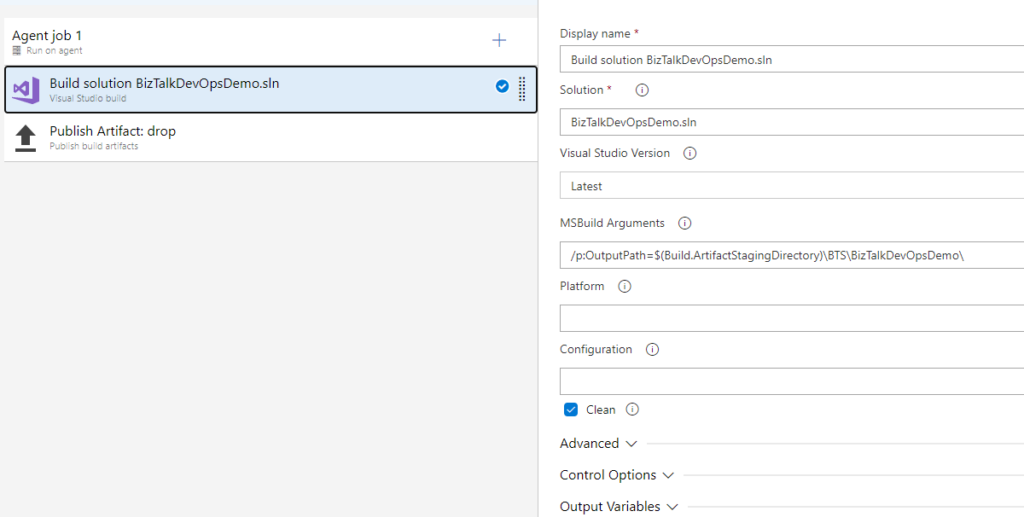
You will need to set up your build Pipeline before you can get your Release ready, so get to work.
The Pipeline itself doesn’t need to be too complicated, you just need to build your Solution, with or without the OutPath argument (I found that setting this would make my life easier in some projects) and publish the drop.
With your drop created, your Release pipeline needs the following tasks:
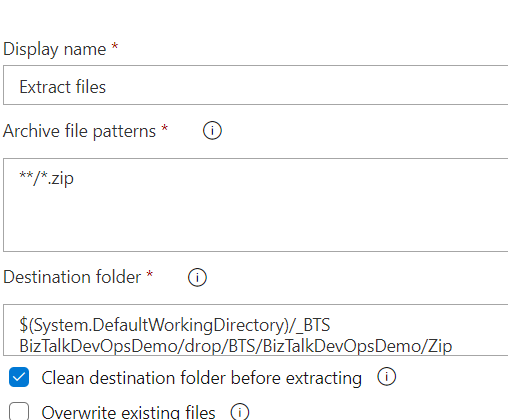
- Extract Files – to unzip your file
- Replace Tokens (a great extension by Guillaume Rouchon, more info here)
- Archive Files – to zip it back
- BizTalk Server Application Deployment – I recommend this, but you can do it with PowerShell
Extracting your file contents is straight forward, you just need to select your zip in your drop contents and a destination folder. Keep in mind that you will need to know where it lands, to zip it back.
Replacing the Tokens is just as before, you select the *.XML mask or point directly to your bindings and select the Token that it should be looking for. Remember, that the variables you define are case sensitive. You can also use a Variable Group, it is a great way of knowing your environment specific variables or common variables that your might have.
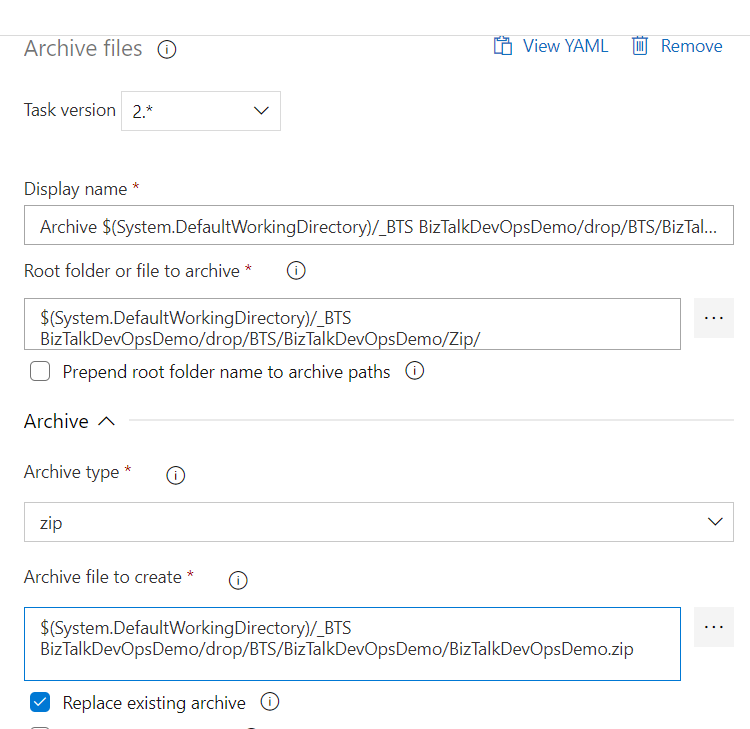
Once this is done, you can proceed to recreate the Zip file and it’s contents. The destination folder you’ve selected when Unzipping will now be the Root folder you are pointing to.
Remember to tick out the “Prepend root folder name to archive paths” option. If you keep this selected, your file will end up with a structure like “Zip / bindings” instead of just “bindings” and the deployment will fail, because it’s not the expected folder structure. Also, tick the “Replace existing archive” option, else you will create a copy and deploy the original version instead.
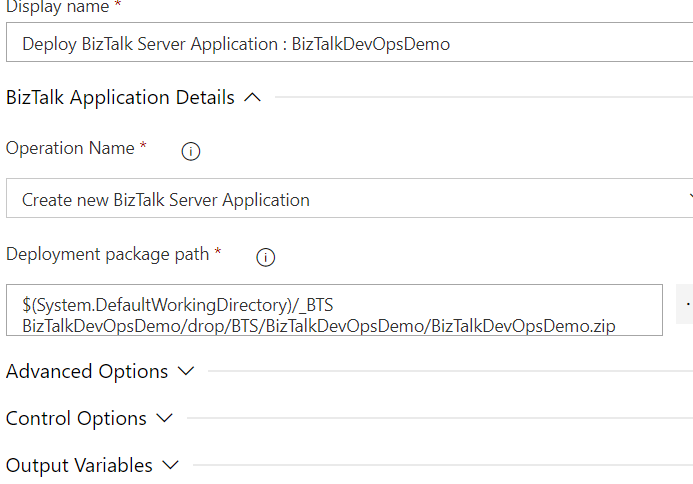
And for the final step, the Deployment Task. I chose to use the standard task instead of PowerShell, because I didn’t want to handle scripts at this point.
Select the Zip package and set the operation to Create. From what I’ve found out, this will Upsert your application, while Update will not create the app if it doesn’t exist.
And this is what you need. If you’ve set everything properly, your Release Pipeline will deploy your Application to your Server and get it up and running, with the parameters you’ve set in your bindings file.
It took a while to understand how this process worked but in the end, it turned out to be very simple and all it took was to apply the same concept we already used with the ARM deployment for Azure resources.
Happy coding!
The post BizTalk Server: Automation Deployment with Azure DevOps – Deploying the Project appeared first on SANDRO PEREIRA BIZTALK BLOG.