by shadabanwer | Feb 10, 2016 | BizTalk Community Blogs via Syndication
This post is to simply describe how to pull out all messages from the suspended instances in Production.
I’ve been recently involve in remediation work for my client, where they have 50000+ suspended messages due to target system failure and timeouts. Since the design initially do not cater to re-submit these suspended instances, I need to look for other alternative. We took a back up of the Message box and copied re-stored to other similar environment. The task was to pull out one specific schema message to re-play these suspended again in the production.
I’ve came up with a small VB script to actually pull out all messages for the particular schema from suspended instances in message box.
‘ save_messages.vbs
‘ Enter cscript save_messages.vbs with no arguments from a command prompt for usage
‘ This script needs to be run under a user account that is a member of the BizTalk Administrators
‘ group. This script needs to be run on a machine that is configured with BizTalk administration
‘ tools.
dim objBtsWmiNS, objMsg, svcinsts, inst, msg, ndx, size
Dim aryHostNames()
Dim aryObjQueues()
Dim aryHostBatchSize()
Dim strKey2Instance
Dim strQuery2Msg
Dim strServiceName
Dim strMsgType
Dim strSavePath
On Error Resume Next
Dim objArgs: Set objArgs = WScript.Arguments
If ( objArgs.Count = 0 OR objArgs.Count > 4) Then
PrintUsage()
wscript.quit 0
End If
wmiQuery = “”
‘ServiceStatus = 16 – ‘Completed With Discarded Messages’ in BizTalk Server 2004
‘ServiceStatus = 32 – ‘Suspended (not resumable)’
‘ServiceStatus = 4 – ‘Suspended (resumable)’
‘ServiceClass = 64 – ‘Routing Failure Report’
‘ErrorId = “0xC0C01B4C” – is how ‘Completed With Discarded Messages’ are exposed in BizTalk Server 2006
If (objArgs(0) = “-Z” OR objArgs(0) = “-z”) Then
wmiQuery = “select * from MSBTS_serviceinstance where ServiceStatus=16 OR ErrorId=’0xC0C01B4C’”
End If
If (objArgs(0) = “-A” or objArgs(0) = “-a”) Then
wmiQuery = “select * from MSBTS_serviceinstance where ServiceStatus=4 OR ServiceStatus=32 OR ServiceStatus=16 OR ErrorId=’0xC0C01B4C’ OR ServiceClass=64”
End If
If (objArgs(0) = “-SR” or objArgs(0) = “-sr”) Then
wmiQuery = “select * from MSBTS_serviceinstance where ServiceStatus=4 and ErrorDescription like ‘%ExceptionInformation%’”
End If
If (objArgs(0) = “-SNR” or objArgs(0) = “-snr”) Then
wmiQuery = “select * from MSBTS_serviceinstance where ServiceStatus=32”
End If
If (objArgs(0) = “-DIS” or objArgs(0) = “-dis”) Then
wmiQuery = “select * from MSBTS_serviceinstance where ServiceClass=32 AND ServiceStatus=8”
‘ServiceClass = 32 ‘Isolated Adapter
‘ServiceStatus = 8 ‘Dehydrated
End If
saveMessagesBeforeTermination = True
If ( objArgs.Count > 1) Then
strSavePath = objArgs(1)
End If
If ( objArgs.Count > 2) Then
strServiceName = objArgs(2)
End If
If ( objArgs.Count > 3) Then
strMsgType = objArgs(3)
End If
If(wmiQuery = “”) Then
PrintUsage()
wscript.quit 0
End If
wscript.echo “->Connecting to BizTalk WMI namespace”
Set objBtsWmiNS = GetObject(“WinMgmts:{impersonationLevel=impersonate, (security)}.rootMicrosoftBizTalkServer”)
If Err <> 0 Then
CheckWMIError
wscript.quit 0
End If
wscript.echo “->Getting BizTalk host collection”
Set hosts = objBtsWmiNS.ExecQuery(“select * from MSBTS_HostSetting”)
If Err <> 0 Then
CheckWMIError
wscript.quit 0
End If
hostCount = hosts.count
ReDim aryHostNames(hostCount – 1)
ReDim aryObjQueues(hostCount – 1)
ReDim aryHostBatchSize(hostCount – 1)
wscript.echo “->Retrieve BizTalk host names and loading host queues”
ndx = 0
For Each host in hosts
wscript.echo “Found host ” & host.Properties_(“Name”)
aryHostNames(ndx) = host.Properties_(“Name”)
Set aryObjQueues(ndx) = objBtsWmiNS.Get(“MSBTS_HostQueue.HostName=””” & aryHostNames(ndx) & “”””)
If Err <> 0 Then
CheckWMIError
wscript.quit 0
End If
ndx = ndx + 1
Next
wscript.echo “->Getting collection of service instances”
Set svcinsts = objBtsWmiNS.ExecQuery(wmiQuery)
‘Iterate through instances and save them in host-specific arrays.
wscript.echo “->Start iterating service instances”
totalCount = 0
For Each inst in svcinsts
If (objArgs.Count = 1 Or (objArgs.Count > 1 And strServiceName = inst.Properties_(“ServiceName”) ) ) Then
wscript.echo “Found suspended instance “”” & inst.Properties_(“ServiceName”) & “”” on host ” & inst.Properties_(“HostName”)
‘Resolve host index
For hostIdx = 0 To hostCount-1
If aryHostNames(hostIdx) = inst.Properties_(“HostName”) Then
Exit For
End If
Next
’16 is an internal service class that cannot be terminated
If 16 = inst.Properties_(“ServiceClass”) Then
wscript.echo “Skipping BizTalk internal service instances (they cannot be terminated anyway)”
Else
’64 is a routing failure report and doesn’t have messages that can be saved
If 64 = inst.Properties_(“ServiceClass”) Or 16 = inst.Properties_(“ServiceClass”) Then
saveMessagesBeforeTermination = False
End If
errorCountSavingMessages = 0
If saveMessagesBeforeTermination Then
‘wscript.echo “Build Query”
If strMsgType > “” Then
strQuery2Msg = “select * from MSBTS_MessageInstance where ServiceInstanceID=””” & inst.Properties_(“InstanceId”) & “”” and MessageType = “”” & strMsgType & “”””
Else
strQuery2Msg = “select * from MSBTS_MessageInstance where ServiceInstanceID=””” & inst.Properties_(“InstanceId”) & “”””
End if
‘wscript.echo “Query is:” & strQuery2Msg
Set msgInsts = objBtsWmiNS.ExecQuery(strQuery2Msg)
For Each msg in msgInsts
msg.SaveToFile strSavePath
If Err <> 0 Then
CheckWMIError
wscript.echo “Failed to save MSBTS_MessageInstance”
wscript.echo Err.Description & Err.Number
errorCountSavingMessages = errorCountSavingMessages + 1
Else
wscript.echo “Saved message ” & msg.Properties_(“MessageInstanceID”)
End If
Next
End If
totalCount = totalCount + 1
End If
End If
Next
‘ Delete whatever is left
For hostIdx = 0 To hostCount-1
If aryHostBatchSize(hostIdx) > 0 Then
TerminateAccumulatedInstacesForHost hostIdx
End If
Next
wscript.echo “SUCCESS> ” & totalCount & ” instances were found and attempted to be saved”
‘This subroutine deals with all errors using the WbemScripting object.
‘Error descriptions are returned to the user by printing to the console.
Sub CheckWMIError()
If Err <> 0 Then
On Error Resume Next
Dim strErrDesc: strErrDesc = Err.Description
Dim ErrNum: ErrNum = Err.Number
Dim WMIError : Set WMIError = CreateObject(“WbemScripting.SwbemLastError”)
If (TypeName(WMIError) = “Empty” ) Then
wscript.echo strErrDesc & ” (HRESULT: ” & Hex(ErrNum) & “).”
Else
wscript.echo WMIError.Description & “(HRESULT: ” & Hex(ErrNum) & “).”
Set WMIError = nothing
End If
‘wscript.quit 0
End If
End Sub
Sub PrintUsage()
wscript.echo “Usage:”
wscript.echo “cscript save_messages.vbs < -Z | -A | -DIS | -SR | -SNR > SavePath [Port/Orchestration name] [MessageType]”
wscript.echo
wscript.echo ” -Z saves all “”Zombie”” instances (e.g. completed with discarded messages)”
wscript.echo ” -A saves all suspended and zombie instances as well as all routing failure reports”
wscript.echo ” -SR saves suspended resumable instances only”
wscript.echo ” -SNR saves suspended non-resumable instances only”
wscript.echo ” -DIS saves all dehydrated ‘isolated adapter’ instances”
wscript.echo ” optionally supply the name of the orchestration or port name to filter on specific instances”
wscript.echo
wscript.echo ” Ensure that the SavePath folder exists before running as that is where it saves the instances”
wscript.echo
wscript.echo ” Example: cscript save_messages.vbs -SR D:tempSuspended PublishInvoicePaymentStatusChange http://xyz/Channel/DynamicsAX/PaymentManagement/PublishInvoicePaymentStatusChange/v1#PublishInvoicePaymentStatusChange”
wscript.echo
End Sub
This Script can be called from the below batch file
cscript save_messages-CustomCluckHA.vbs -SR “C:tempProcessor-SaveHASub_20151027” “Orchestration-TypName” “http://xyz/Assistance/Home/v1#HomeAssistAgreementChangedEvent”
After pulling out all the messages, we simply do the file drop in the production system. Our orchestrations cater for both one-way and two-way messaging patterns, so at the end it was easy.
by shadabanwer | Sep 13, 2015 | BizTalk Community Blogs via Syndication
In this post, I will demonstrate BizTalk solution deployment using BTDF and OctopusDeploy. Octopus Deploy is a friendly deployment automation system mainly for .NET developers. This post mainly describe BizTalk solution deployment using Octopus deploy.
Some of the pre-requisites are:
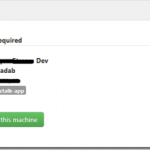
- Octopus Tentacles been installed and configure on the BT server. A “bizTalk-app” (it can be any name) role is created.
- Octopus Tentacles service running under BT Service account.
- Environments (BT Server configuration) is created and completed on the Octopus server using Octopus portal. The “green tick” confirm that octopus server can communicate with the BT Machine.

- In BTDF project Environment Settings file template, create a column named “Export_OctopusSettings.xml” before generating MSI as per below.

- Generate MSI using TFS Build. Normally the build server create incremented folders for the generated BTDF MSI. We need to copy the MSI from the drop TFS folder to the local folder on machine. To copying the MSI from the drop TFS folder to the local folder, I created the PS script following the below “Create Step Templates” step below. This script get the latest folder from the drop location and copy the MSI file to the local folder.
$TFSDropDir = $OctopusParameters[“TFSRootDir”]
$TargetFolder = $OctopusParameters[“DestinationFolder”]
if ([string]::IsNullOrEmpty($TFSDropDir)) {
Write-Host “No TFSDropDir has been specified”
Exit
}
if ([string]::IsNullOrEmpty($TargetFolder)) {
Write-Host “No TargetFolder has been specified”
Exit
}
if ( (Test-Path $TargetFolder) -eq $false) {
Write-Host “The target directory doesn’t exist. Unable to copy!”
Exit
}
if ( (Test-Path $TFSDropDir) -eq $false) {
Write-Host “The TFS Drop directory doesn’t exist. Unable to copy!”
Exit
}
$TFSCurrentBuildDir = Get-ChildItem -Path $TFSDropDir -name | Sort-Object LastAccessTime -Descending | Select-Object -First 1
$DeployMSICompletePath= “$TFSDropDir” + “$TFSCurrentBuildDir”
Write-Host “MSI Full path: $DeployMSICompletePath”
# Copy the items!
Write-Host “Copying items from $DeployMSICompletePath to $TargetFolder … please wait.”
robocopy $DeployMSICompletePath $TargetFolder
#Robocopy can success with multiple codes!
$exitcode = $LastExitCode
if($exitcode -in 0,1,2,3,4,5,6,7){
$LastExitCode = 0
}
return $LastExitCode
- “Run – Windows Installer” and “Variable – Substitute in files step” templates should be created in octopus (to create/import templates see below). You can download these templates from octopus library https://library.octopusdeploy.com/#!/listing
Steps to follow on Octopus Server.
- Create Step Templates for BTDF Deployment using the below script. You just need to Import the script using the Import button on the Step templates page. Copy the below script in the below window.

For Template please contact [email protected]
The above Json template will generate the below PS script.
For PS script please contact [email protected]
2. Save the templates and go to the Parameters tab on the same screen. All parameters can be viewed as per the below screen.

3. Navigate to created Project “Test”. Click “Process”, click “add Step”. Chose “Run – Windows Installer” from the step type.

4. Select target roles “(this is the role created during configuration of octopus tentacles”). MSI File Path “C:OctopusTest.MSI”. Click Save. If you using nuget package (.nuspec) step to extract MSI on Octopus tentacles folder, you can use the below to run the MSI.
#{Octopus.Action[Deploy Package].Output.Package.InstallationDirectoryPath}#{Octopus.Project.Name}-#{Octopus.Release.Number}.msi
5. Click “Add Step” to replace variables in the setting file using Octopus variables (mentioned below). Chose “Variables – Substitute in Files” from the step type. Parameter template files should be “C:Program Files (x86)Test for BizTalk1.0DeploymentEnvironmentSettingsSettingsFileGenerator.xml”. Click Save.

6. Click “Add Step” to create BTDF deployment. Chose “Deploy – BizTalk Application” from the step type. Below is the configuration details.

Install Directory – #{Octopus.Action[Run – Windows Installer].Output.InstallDirectory}
Package Install – #{Octopus.Action[Deploy Package].Output.Package.InstallationDirectoryPath}
Process page should look like the below.
7. Navigate to Variables. Create Variables as mentioned in the below screen. These variables can be distinguished on basis of scope. You can create many variables with the same name for different scope (or environment like TEST, QA, Prod etc).

8. Next step is to create Release. Goto Release, click create release and save. Deploy this release to the specific server and can later promote this release to other servers.

9. Click on Task Log – there is all the information including the logging of the deployment steps. The BTDF deployment logging is also in there.

BizTalk Continuation Integration Build and Deployment can be fully automated using Teamcity and Octopus, you need to install octopack to do so. At the moment, I am working with automating CI with TFS and Octopus. If someone has already done this, would love to hear from them.
Thanks,
Shadab Anwer

by shadabanwer | May 4, 2015 | BizTalk Community Blogs via Syndication
This article is to demonstrate how to skip create BizTalk Application using BTDF. By default the btdf project will call the target “DeployAppDefinition”. This target is responsible to create BizTalk Application when it is not exists in the Admin Console, otherwise it throw an error when the application is found.
In my current project we were require to only deploy the version assemblies for the particular application without removing the BT application.
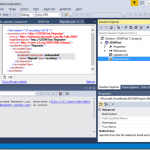
I came up with the below BTDF Project which is using the custom target to call DeployAppDefinition which checks for the existence of the application and do not remove if exists.
I need to create this variable in the property group “<SkipRemoveApp>True</ SkipRemoveApp > “ and used it in the DeployAppDefinition target.
<!– Skip BizTalk application definition –>
<Target Name=”DeployAppDefinition” Condition=”‘$( SkipRemoveApp)’ == ‘False’”>
<Exec Command=”BTSTask.exe AddApp -ApplicationName:"$(BizTalkAppName)" -Description:"$(ProjectName)"” />
<AddAppReference ApplicationName=”$(BizTalkAppName)” AppsToReference=”@(AppsToReference)” Condition=”%(Identity) == %(Identity) and ‘@(AppsToReference)’ != ”” />
</Target>
Below is the complete btdf project. Please let me know if anyone having a different approach.
<?xml version=”1.0″ encoding=”utf-8″?>
<!–
***************************************************
**** DEPLOYMENT STEPS *****************************************************************************************************
This deployment package will only add BizTalk resources to the existing application.
***************************************************************************************************************************
–>
<Project xmlns=”http://schemas.microsoft.com/developer/msbuild/2003″
DefaultTargets=”Installer”
ToolsVersion=”4.0″
TreatAsLocalProperty=”SkipUndeploy”> <!– **** Add this so this variable is accessible on this target file ****–>
<PropertyGroup>
<Configuration Condition=”‘$(Configuration)’ == ””>Debug</Configuration>
<Platform Condition=”‘$(Platform)’ == ””>x86</Platform>
<SchemaVersion>1.0</SchemaVersion>
<ProjectName>ESB.ReferenceSystems.P</ProjectName>
<ProjectVersion Condition=”‘$(ProjectVersion)’ == ””>1.1</ProjectVersion>
<ProjectVersion Condition=”‘$(ProjectVersion)’ != ””>$(ProjectVersion)</ProjectVersion>
<IncludeSchemas>False</IncludeSchemas>
<IncludeOrchestrations>False</IncludeOrchestrations>
<IncludeTransforms>False</IncludeTransforms>
<IncludePipelines>False</IncludePipelines>
<IncludeComponents>False</IncludeComponents>
<IncludePipelineComponents>False</IncludePipelineComponents>
<IncludeCustomFunctoids>False</IncludeCustomFunctoids>
<IncludeVocabAndRules>False</IncludeVocabAndRules>
<IncludeVirtualDirectories>False</IncludeVirtualDirectories>
<IncludeMessagingBindings>False</IncludeMessagingBindings>
<IncludeDeploymentTest>False</IncludeDeploymentTest>
<Includelog4net>False</Includelog4net>
<IncludeSSO>False</IncludeSSO>
<IncludeEsbItineraries>False</IncludeEsbItineraries>
<IncludeBam>False</IncludeBam>
<IncludeInstallUtilForComponents>False</IncludeInstallUtilForComponents>
<UsingMasterBindings>True</UsingMasterBindings>
<RequireXmlPreprocessDirectives>False</RequireXmlPreprocessDirectives>
<ApplyXmlEscape>True</ApplyXmlEscape>
<IncludeSettingsSpreadsheetInMsi>True</IncludeSettingsSpreadsheetInMsi>
<SkipIISReset>True</SkipIISReset>
<SkipHostInstancesRestart>False</SkipHostInstancesRestart>
<StartApplicationOnDeploy>True</StartApplicationOnDeploy>
<EnableAllReceiveLocationsOnDeploy>False</EnableAllReceiveLocationsOnDeploy>
<StartReferencedApplicationsOnDeploy>False</StartReferencedApplicationsOnDeploy>
<UseIsolatedAppDomain>False</UseIsolatedAppDomain>
<EnableBizTalkExtendedLogging>False</EnableBizTalkExtendedLogging>
<EnableBizTalkAssemblyValidation>False</EnableBizTalkAssemblyValidation>
<EnableBizTalkCorrelationValidation>False</EnableBizTalkCorrelationValidation>
<EnableBizTalkSchemaValidation>False</EnableBizTalkSchemaValidation>
<SkipAddApp>True</SkipAddApp>
</PropertyGroup>
<PropertyGroup>
<!– Properties related to building an MSI for server deployments –>
<!– BizTalk App Version Upgrade –>
<!– For each new product release to be deployed to your BizTalk servers: –>
<!– 1) Increment ProductVersion –>
<!– 2) Generate a new GUID and update ProductId with the new GUID –>
<!– This allows the new MSI to automatically uninstall (not undeploy!) the old MSI and install the new one. –>
<ProductVersion Condition=”‘$(ProductVersion)’ == ””>1.0.1</ProductVersion>
<ProductVersion Condition=”‘$(ProductVersion)’ != ””>$(ProductVersion)</ProductVersion>
<ProductId Condition=”‘$(ProductId)’ == ””>A66F460E-7B65-4330-843B-477251BF3AEC</ProductId>
<ProductId Condition=”‘$(ProductId)’ != ””>$(ProductId)</ProductId>
<!– BizTalk App Version Upgrade –>
<ProductName>ESB.ReferenceSystems.P for BizTalk</ProductName>
<Manufacturer></Manufacturer>
<PackageDescription>ESB.ReferenceSystems.P</PackageDescription>
<PackageComments>ESB.ReferenceSystems.P</PackageComments>
<!– NEVER change the ProductUpgradeCode. –>
<ProductUpgradeCode>A87DEA9B-53B5-4A30-85E3-71F5C698D203</ProductUpgradeCode>
<IsInTFSBuildMode Condition=”Exists(‘$(OutDir)$(Configuration)ESB.ReferenceSystems.P.SubmissionProcessAPI.Schemas.dll’)”>True</IsInTFSBuildMode>
</PropertyGroup>
<!– Under TFS Team Build, set CustomizableOutDir property to true in TFS 2005/2008/2010 UpgradeTemplate. –>
<!– With a workflow build, copy the default template then modify the MSBuild task for the solution build. Set OutDir to blank and –>
<!– CommandLineArguments to String.Format(“/p:SkipInvalidConfigurations=true;TeamBuildOutDir=””{0}”” {1}”, BinariesDirectory, MSBuildArguments). –>
<PropertyGroup Condition=”‘$(Configuration)’ == ‘Debug’”>
<DeploymentFrameworkTargetsPath>$(MSBuildExtensionsPath)DeploymentFrameworkForBizTalk5.0</DeploymentFrameworkTargetsPath>
<OutputPath Condition=”‘$(TeamBuildOutDir)’ == ””>binDebug</OutputPath>
<OutputPath Condition=”‘$(TeamBuildOutDir)’ != ””>$(TeamBuildOutDir)</OutputPath>
<DeployPDBsToGac>false</DeployPDBsToGac>
</PropertyGroup>
<PropertyGroup Condition=”‘$(Configuration)’ == ‘Release’”>
<DeploymentFrameworkTargetsPath>$(MSBuildExtensionsPath)DeploymentFrameworkForBizTalk5.0</DeploymentFrameworkTargetsPath>
<OutputPath Condition=”‘$(TeamBuildOutDir)’ == ””>binRelease</OutputPath>
<OutputPath Condition=”‘$(TeamBuildOutDir)’ != ””>$(TeamBuildOutDir)</OutputPath>
<DeployPDBsToGac>false</DeployPDBsToGac>
</PropertyGroup>
<PropertyGroup Condition=”‘$(Configuration)’ == ‘Server’”>
<DeploymentFrameworkTargetsPath>Framework</DeploymentFrameworkTargetsPath>
<!– Get our PDBs into the GAC so we get file/line number information in stack traces. –>
<DeployPDBsToGac>true</DeployPDBsToGac>
</PropertyGroup>
<ItemGroup>
<PropsFromEnvSettings Include=”SsoAppUserGroup;SsoAppAdminGroup” />
</ItemGroup>
<ItemGroup>
<AdditionalFiles Include=”Deployment.config”>
<LocationPath>.</LocationPath>
</AdditionalFiles>
</ItemGroup>
<ItemGroup>
<!–<AppsToRemove Include=”ESB.ReferenceSystems.P” />–>
</ItemGroup>
<!– !!! TODO !!! –>
<Import Project=”$(DeploymentFrameworkTargetsPath)BizTalkDeploymentFramework.targets” />
<!–
The Deployment Framework automatically packages most files into the server install MSI.
However, if there are special folders that you need to include in the MSI, you can
copy them to the folder $(RedistDir) in the CustomRedist target.
To include individual files, add an ItemGroup with AdditionalFiles elements.
–>
<!–
The Targets below are to enable undeploy during the TFS build when not deployed – Bill Chesnut
–>
<!– **** PRE DEPLOYMENT SECTION ******************************************************************************************–>
<!– **********************************************************************************************************************–>
<!– **** The BTDF out of the box calls this target before it deploys the application ****–>
<!– **** Set the “SkipUndeploy” to false so that we can undeploy the application before deployment ****–>
<!– **** Then call the Custom Deploy Target to add the undeployment step ****–>
<!– **********************************************************************************************************************–>
<Target Name=”CustomDeployTarget”>
<PropertyGroup>
<SkipUndeploy>false</SkipUndeploy>
</PropertyGroup>
<CallTarget Targets=”CustomDeploy” />
</Target>
<!– **********************************************************************************************************************–>
<!– **** This target is called from CustomDeployTarget ****–>
<!– **** DeployAppDefinition is an out of the box target which will skip the check for Add Application ****–>
<!– **** CustomUndeployApp is the custom target created to undeploy the application ****–>
<!– **** CustomDeployAssemblyTarget is the custom target to Add the BizTalk Assemblies ****–>
<!– **********************************************************************************************************************–>
<Target Name=”CustomDeploy” DependsOnTargets=”$(CustomDeployTargetDependsOn)” />
<PropertyGroup>
<!– CustomDeploy depends on this CustomDeployTargetDependsOn –>
<CustomDeployTargetDependsOn>
DeployAppDefinition;
CustomDeployAssemblyTarget;
</CustomDeployTargetDependsOn>
</PropertyGroup>
<!– Skip BizTalk application definition –>
<Target Name=”DeployAppDefinition” Condition=”‘$(SkipAddApp)’ == ‘False’”>
<Exec Command=”BTSTask.exe AddApp -ApplicationName:"$(BizTalkAppName)" -Description:"$(ProjectName)"” />
<AddAppReference ApplicationName=”$(BizTalkAppName)” AppsToReference=”@(AppsToReference)” Condition=”%(Identity) == %(Identity) and ‘@(AppsToReference)’ != ”” />
</Target>
<Target Name=”CustomDeployAssemblyTarget” DependsOnTargets=”$(CustomDeployAssemblyTargetDependsOn)” />
<PropertyGroup>
<!– CustomPostDeployTarget depends on this CustomPostDeployTargetDependsOn –>
<CustomDeployAssemblyTargetDependsOn>
AddBizTalkResources;
</CustomDeployAssemblyTargetDependsOn>
</PropertyGroup>
<!– **********************************************************************************************************************–>
<!– **** This target is responsible for adding all the biztalk resources into the application resources and is called ****–>
<!– **** from CustomDeployAssemblyTarget ****–>
<!– **********************************************************************************************************************–>
<Target Name=”AddBizTalkResources” DependsOnTargets=”$(AddBizTalkResourcesDependsOn)” />
<PropertyGroup>
<!– AddBizTalkResources depends on this AddBizTalkResourcesDependsOn –>
<AddBizTalkResourcesDependsOn>
AddBizTalkAssembliesToBizTalkResources;
</AddBizTalkResourcesDependsOn>
</PropertyGroup>
<!– **********************************************************************************************************************–>
<!– **** This target is responsible for adding the BizTalk assemblies into the application resources and is called ****–>
<!– **** from AddBizTalkResources ****–>
<!– **********************************************************************************************************************–>
<Target Name=”AddBizTalkAssembliesToBizTalkResources”>
<Message Text=”In AddBizTalkAssembliesToBizTalkResources.-2″/>
<Exec
Command=”BTSTask.exe AddResource -Type:BizTalkAssembly -Source:"..SubmissionProcessAPI.SchemasbinDebugESB.ReferenceSystems.P.SubmissionProcessAPI.Schemas.dll" -ApplicationName:"$(BizTalkAppName)" -Overwrite -Options:GacOnAdd,GacOnImport,GacOnInstall”
Condition=”‘$(DeployBizTalkMgmtDB)’ == ‘true’ ” />
</Target>
</Project>