Seamlessly Adding Tags to Azure Function Apps via Visual Studio: A Guide for Enhanced Resource Management
Have you ever wondered how to add tags to your Function App through Visual Studio?
Let’s break it down, but first, here’s a quick overview of how you would do it in the Azure Portal:
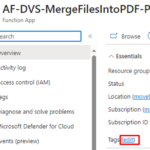
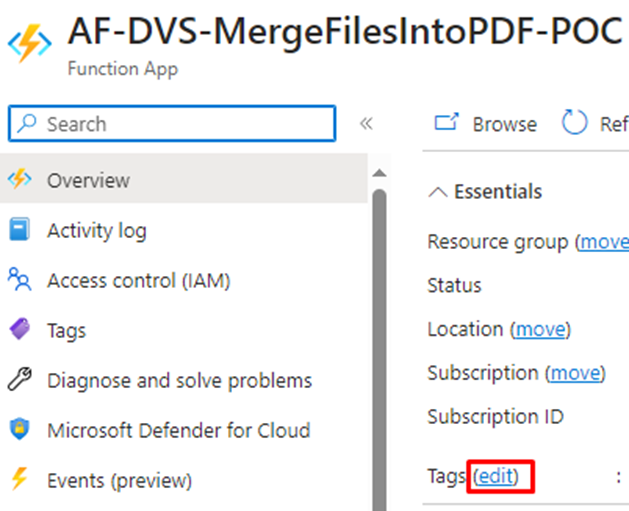
- On your Function App overview page, under the Essentials information on the left, you’ll find “Tags” with an “Edit” button next to it.
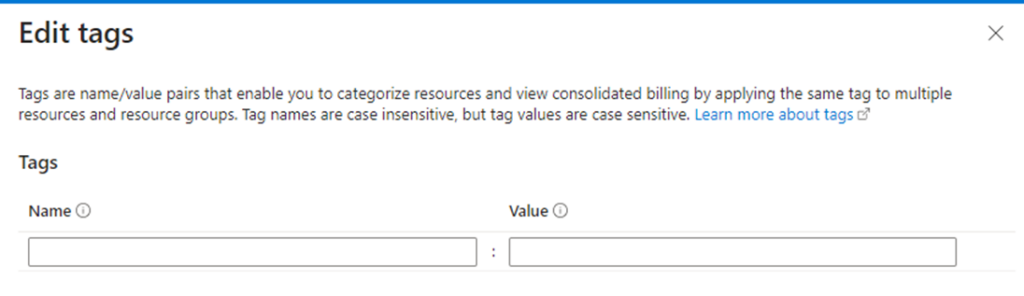
- Clicking on it allows you to add new tags to your function app. These tags essentially function as meta tags, consisting of key and value pairs, such as Name and Value.
But why do I need tags? You might be wondering.
Overall, tags offer a flexible and customizable way to manage and govern resources in Azure, enabling better organization, cost management, monitoring, and governance across your environment.
- Organization and Categorization: Tags allow you to categorize and organize resources based on different criteria, such as department, project, environment (e.g., production, development), or cost center. This makes it easier to locate and manage resources, especially in larger deployments with numerous resources.
- Cost Management: Tags can be used for cost allocation and tracking. By assigning tags to resources, you can easily identify the costs associated with specific projects, teams, or departments. This helps in budgeting, forecasting, and optimizing resource usage to control costs effectively.
- Monitoring and Reporting: Tags provide metadata that can be used for monitoring and reporting purposes. You can use tags to filter and aggregate data in monitoring tools, allowing you to gain insights into resource usage, performance, and operational trends across different categories.
- Access Control and Governance: Tags can also be leveraged for access control and governance purposes. By tagging resources based on their sensitivity, compliance requirements, or ownership, you can enforce policies, permissions, and compliance standards more effectively.
Now that we already describe the importance of tags and how you can add them from the Azure Portal, let’s dive into it with Visual Studio:
- After you’ve published your Azure Function, or if you’re working with an existing published one, head over to the Solution Explorer and right-click on your solution.
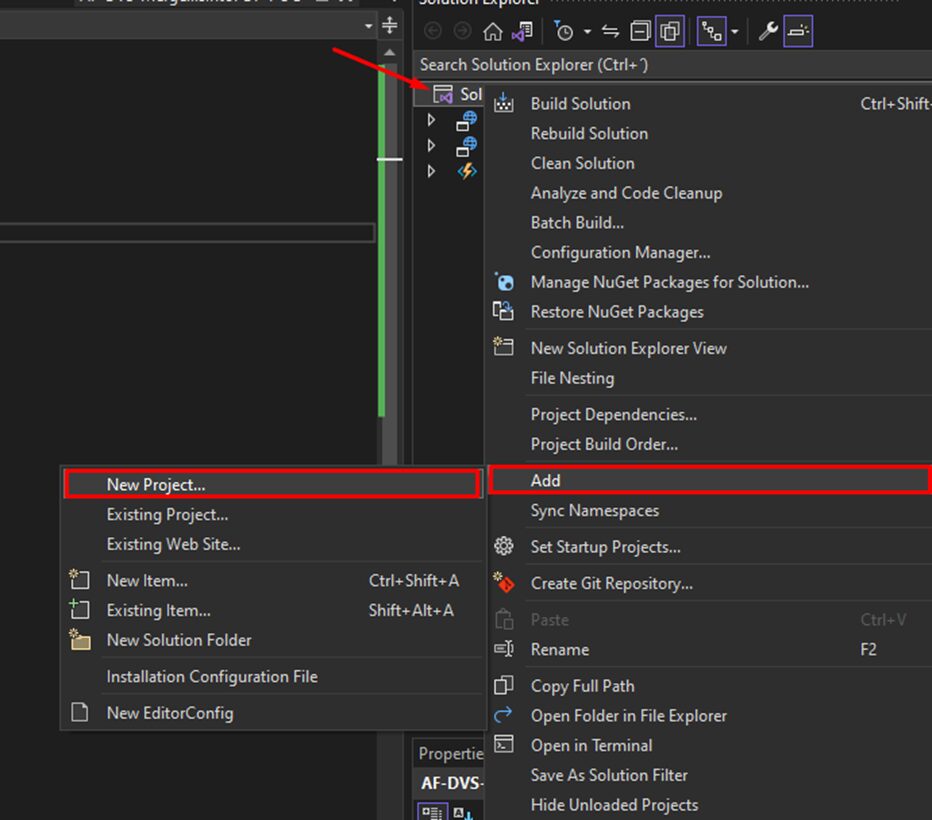
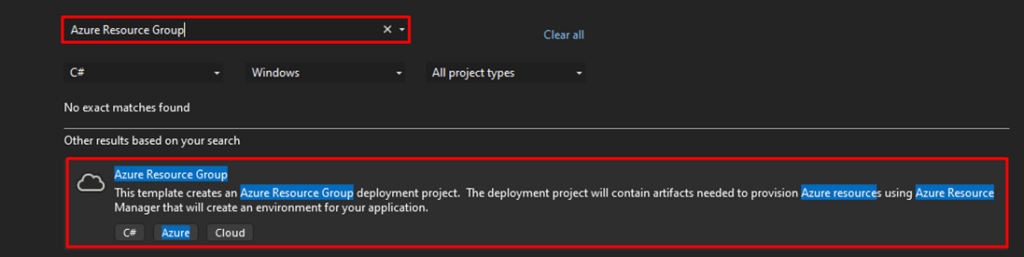
- From there, go to Add -> New Project. Now, search for Azure Resource Group and give it a double click.
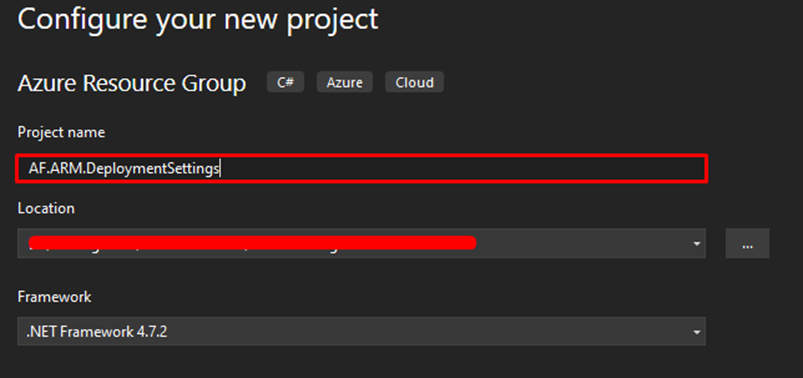
- You’ll be prompted to name your project. You can leave the location as is since it’s the project you’re currently working on. Click on Create once you’re done.
- Now, in the Solution Explorer, you’ll spot a new project. Inside, you’ll find two .json files:
- azuredeploy.json
- azuredeploy.parameters.json
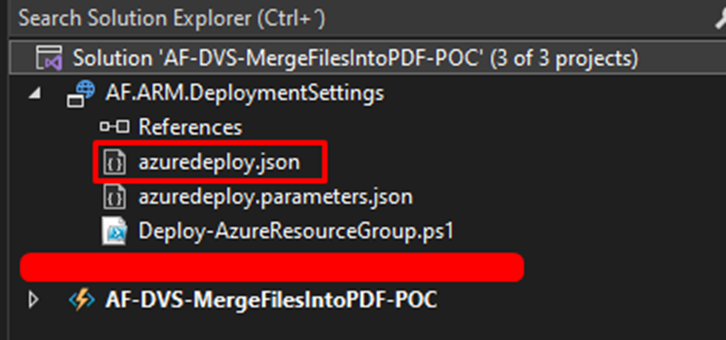
- The file we’re interested in is azuredeploy.json. Double-click on it and replace its content with the provided JSON. Don’t forget to customize it with the tags you need and also your Function App Name. For now, let’s use these tags for our proof of concept:
{
  "$schema": "https://schema.management.azure.com/schemas/2019-04-01/deploymentTemplate.json#",
  "contentVersion": "1.0.0.0",
  "parameters": {
    "functionAppName": {
      "type": "string",
      "metadata": {
        "description": "Name of the Azure Function App"
      },
      "defaultValue": "YOUR-FUNCTION-APP-NAME"
    }
  },
  "resources": [
    {
      "type": "Microsoft.Web/sites",
      "apiVersion": "2020-12-01",
      "name": "[parameters('functionAppName')]",
      "location": "West Europe",
      "properties": {
        "siteConfig": {
          // Define site configuration properties here
        }
      },
      "tags": {
        "Environment": "POC",
        "Project": "PdfMerger",
        "Company": "DevScope",
        "Year": "2024"
      }
    }
  ],
  "outputs": {}
}
- Back in the Solution Explorer, right-click on the project you’ve just created and select Deploy -> New.

- You’ll then need to choose your subscription and resource group. Finally, hit Deploy.

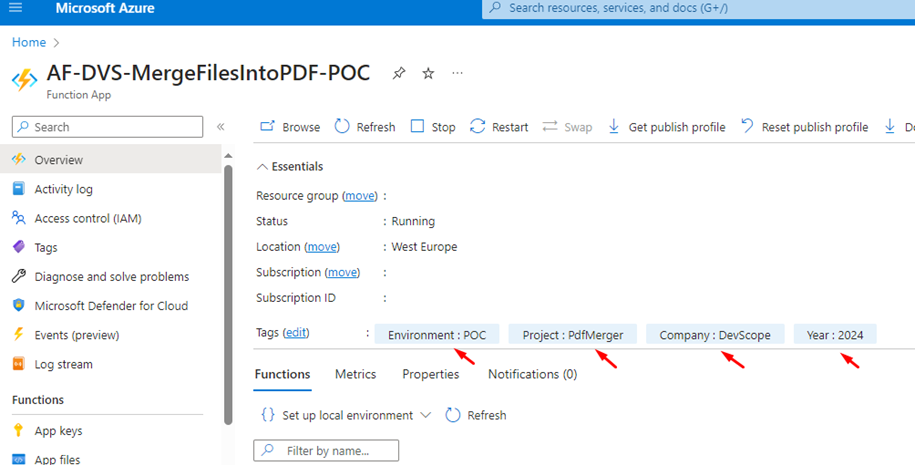
Once the deployment finishes smoothly without any errors, it’s time to inspect your Function App. You’ll notice that all your tags are now displayed on the Function App overview page.
Adding tags to your function app through Visual Studio provides a streamlined way to organize, manage, and govern your resources in Azure by categorizing resources based on criteria such as environment, project, company, etc.
Tags facilitate easier navigation and management, particularly in complex deployments. Moreover, tags play a crucial role in cost allocation, monitoring, reporting, and access control, offering valuable insights and enhancing governance across your environment.
While both methods, Visual Studio and the Azure Portal, offer ways to manage tags for resources like function apps, for simple solutions that don’t require having multiple environments, there are certain advantages to using Visual Studio for this task:
- Automation and Consistency: Visual Studio allows you to automate the deployment of resources along with their tags using Infrastructure as Code (IaC) principles. This ensures consistency across deployments and reduces the chance of human error compared to manually adding tags in the Azure Portal.
- Version Control: When managing your Azure resources through Visual Studio, you can maintain version control over your infrastructure code. This means you can track changes to your tags along with other resource configurations, making it easier to revert to previous versions if needed.
- Integration with Development Workflow: For teams that primarily work within Visual Studio for development tasks, integrating tag management into the development workflow streamlines processes. Developers can manage both code and resource configurations in a unified environment, enhancing collaboration and efficiency.
- Scalability: Visual Studio is well-suited for managing tags across multiple resources or environments. With the ability to define and deploy resource templates containing tags programmatically, scaling tag management becomes more manageable, especially in large-scale deployments.
- Consolidated Management: Using Visual Studio for tag management allows you to centralize the configuration of tags alongside other resource settings. This consolidated approach simplifies overall resource management, providing a single interface for configuring and deploying resources and their associated tags.
It is important to note that the choice between Visual Studio and the Azure Portal ultimately depends on your specific requirements, preferences, and existing workflows. While Visual Studio offers certain advantages for tag management, the Azure Portal provides a user-friendly interface that may be more accessible for simple or ad-hoc tag assignments. This way, organizations should evaluate their needs and capabilities to find the most suitable approach for managing tags in their Azure environment.
Of course, in the end, the best solution is to use CI/CD pipelines to accomplish this task.
Hope you find this helpful! If you enjoyed the content or found it useful and wish to support our efforts to create more, you can contribute towards purchasing a Star Wars Lego for Sandro’s son!