Do you feel difficult to keep up to date on all the frequent updates and announcements in the Microsoft Integration platform and Azure iPaaS?
Integration weekly update can be your solution. It’s a weekly update on the topics related to Integration – enterprise integration, robust & scalable messaging capabilities and Citizen Integration capabilities empowered by Microsoft platform to deliver value to the business.
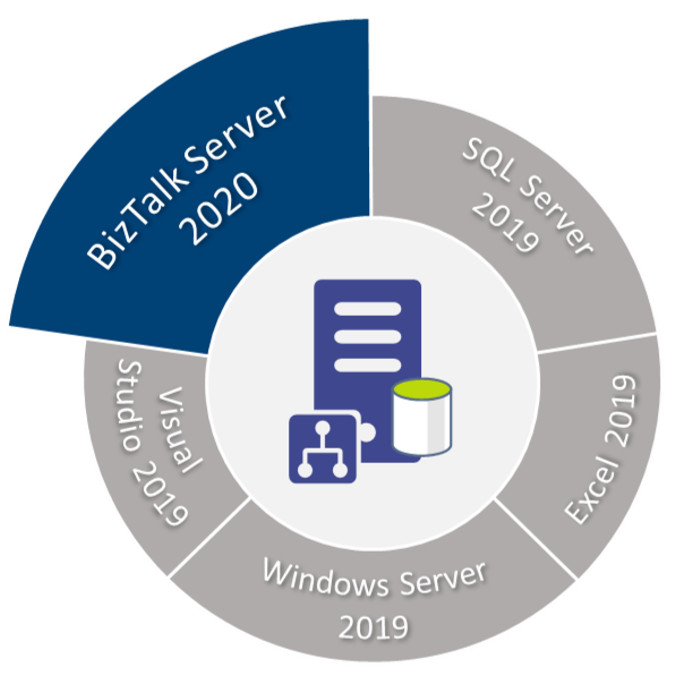
BizTalk Server 2020 – 20 days, 20 posts – day 8. Microsoft announced a few months ago, the release of Microsoft BizTalk Server 2020 – the 11th major release of BizTalk Server –and, as usual with previous versions, I updated my installation and configuration manual for BizTalk Server 2020. This whitepaper will explain in detail – a step-by-step guideline – how to install and configure Microsoft BizTalk Server 2020 on a standalone environment running Windows Server 2019. This information will help you plan the installation and configuration of BizTalk Server 2020, applications and components on which it depends focused on creating a development environment (you can also follow this tutorial to help you create production environments, however, if this is the case you need to skip some steps).
Assumptions and out of scope
We will be assuming that the operating system: Windows Server 2019 and the latest critical Windows updates from Microsoft already have been installed.
In this scenario, we will be performing a full installation of Microsoft BizTalk Server 2020. The following components will be installed:
Enterprise Single Sign-On (SSO).
BizTalk Group.
BizTalk Runtime.
Business Rule Engine.
BAM Tools and Alerts.
BAM Portal.
BAM Portal it is deprecated, but we still can use it.
BizTalk EDI/AS2 Runtime.
REST APIs (Management data APIs)
Management data APIs are endpoints that let you remotely update, add, and query the status of different artifacts in your BizTalk Server environment. The endpoints are added using REST and come with a swagger definition.
BizTalk TMS.
BizTalk TMS is a service that refreshes authentication tokens used by BizTalk. It is a prerequisite for the Office 365 adapters.
Microsoft BizTalk Adapters for Enterprise Applications.
What’s in store for you?
This whitepaper will give you a detailed understanding of the following:
Preparing the Prerequisites and Installation for BizTalk Server 2020
I would like to take this opportunity also to say thanks to Tom Canter for being a reviewer of this installation guide and Lex for all the work to publish this resource.
I hope you enjoy reading this paper and any comments or suggestions are welcome.
You can also find, download and enjoy several other free whitepapers of my own here:
The term purge means removing or erase something completely. Data purging is a process or activity mostly heard with Database technologies, i.e. Cleaning up of Database.
There are many different techniques and strategies for data purging, which is often contrasted with data deletion. Deletion is more of a temporary process whereas Purging removes data permanently which in turn frees up the storage and/or memory space for other uses.
Purging process lets you archive the data even though it removed from the main source permanently, giving us an option to retrieve from the archive in case there is a need for it. The deleting process also removes data permanently but doesn’t necessarily involve keeping a backup and generally involves on insignificant amounts of data.
Why Data Purging is Necessary?
For any organization and in any environment, it is important to keep track of database growth and execute the data purging policies whenever necessary.
When the database size grows, the SQL server needs more memory and CPU to read data from the tables, which slows down the database operation.
Besides that, there is also the risk that, due to the growing database(s), you are running out of disk space.
Database Administrators spend a lot of their time dealing with the problem of database processes consuming too much disk space. So, it’s very important to monitor the database size to ensure the database is not seizing the memory and CPU for smooth operation. Also, it’s essential and necessary to automate the purging process.
The Purge Process
The purge process moves data between and deletes data from three categories of data or data sets:
The current data set, which contains data that needs to be available to users. Users can change or review the data.
The history data set, which contains data that can only be reviewed or aggregated by users. Users can’t change the data.
The archived data set, which contains data that falls out of the availability threshold but needs to be stored to meet legal or business requirements. This data is archived, so it can’t be changed, reviewed, or aggregated by users.
Available Options for Purging
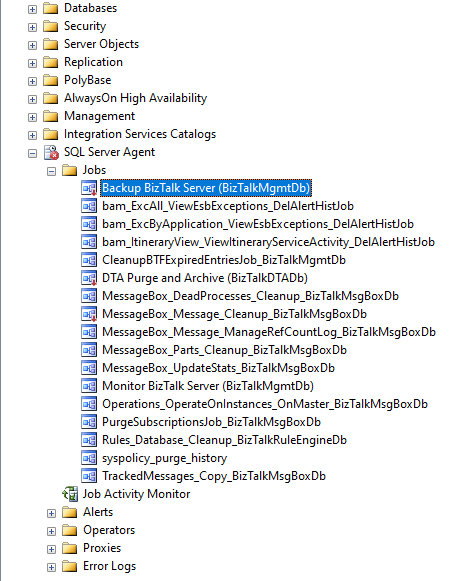
In any BizTalk environment, to purge the SQL database there are two main categories of options available. The most common way is
SQL Server Jobs (by using SQL Agent)
Windows Services
SQL Server Jobs
The purpose of the SQL Agent is to serve as a job scheduler. Many experienced DBAs use jobs running inside the SQL Agent to perform routine tasks such as backups, updating statistics, and rebuilding indexes as needed.
Scheduling jobs is one of the core SQL Server functions. Many businesses have numerous SQL Server jobs scheduled that perform any number of different tasks from database maintenance jobs like backup and index rebuilds to running queries and kicking off ETL (Extract. Transform and Load) tasks.
What is SQL Agent?
The SQL Agent is the SQL Server subsystem that’s responsible for automatic task scheduling. The SQL Agent is available in all of the editions of SQL Server except the SQL Server Express edition. Taking advantage of SQL Agent enables you to automate many of your routine IT database infrastructure tasks.
Advantages of SQL Agent
The SQL Server Agent gives you a more specific focus around scheduling specific types of jobs around SQL Server. As the Agent is a part of the cluster resource when a failover occurs as long as the cluster has been set up correctly the SQL Agent job will start once the SQL Server Service has started.
Windows task Scheduler is a component of Microsoft Windows that provides the ability to schedule the launch of programs or scripts at pre-defined times or after specified time intervals. SQL Server Scheduler is created for Agent job scheduling, so using SQL Server Scheduler to schedule the job is the best method.
Disadvantages of SQL Agent
If the Agent is not running at the time a job is supposed to run, when the Agent is started it will run the job at the next scheduled time. It will not automatically run the job.
SQL Server Agent jobs that are running at the time of a failover event on a SQL Server failover cluster instance do not resume after failover to another failover cluster node. Jobs that begin but fail to complete because of a failover event are logged as started but do not show additional log entries for completion or failure. SQL Server Agent jobs in these scenarios appear to have never ended. So if your server failover, you need to run this job again in the other node.
Windows Services
Definition of Windows Services
Windows Services is a core component of the Microsoft Windows operating system and enables the creation and management of long-running processes.
Advantages
Unlike regular software that is launched by the end-user and only runs when the user is logged on, Windows Services can start without user intervention and may continue to run long after the user has logged off. The services run in the background and will usually kick in when the machine is booted. An option ideal for use on servers when long-running functionality is needed without interference with other users on the same system.
Data Collection in BizTalk360
BizTalk360 consists own database. Collecting the necessary data is important to be able to represent the data in BizTalk360. As many of you aware that BizTalk360 is a one-stop solution for BizTalk monitoring. So for monitoring and analytics purposes, we do collect different data from various environments (it collects the information from BizTalk, SQL Server, and Tracking database) and stored in the BizTalk360’s database for future references.
Advanced Event viewer
Analytics
They are the sparkling examples for the data collection within BizTalk360 when you have configured/added more environments (for each environment there will be multiple machines say example a simple multi-server environment consists of 2-BizTalk servers for HA, 1-SQL server. For cluster servers and Load balancing you can imagine the numbers). However, you don’t want unlimited growth of your database.
BizTalk360 comes out of the box with the “Data Purging” feature to able to manage the size of the BizTalk360 database.
Monitor BizTalk360 Database Growth
There might be a situation where the BizTalk360 database grows due to the amount and size of event log data and performance counter data. The BizTalk360 purging policy will take care of the data growth, but it is also important to monitor the size regularly to ensure BizTalk360 is working seamlessly.
Data Purging in BizTalk360
As mentioned, BizTalk360 comes out of the box with the ability to purge the historic data by setting up the purging duration (days to be monitor) after the specified period. The Administrators/Superusers can set up the “Purge duration” under “Settings -> BizTalk360 Health -> Data Purging”. This will control the database growth and hence the performance of BizTalk360 will not get affected.
Purge Mechanism in BizTalk360
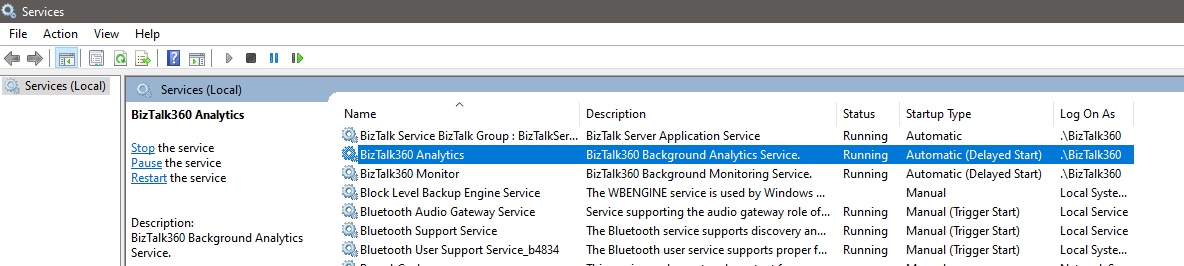
BizTalk360 uses Windows Services to trigger the purging. BizTalk360 owns two services,
Monitoring service
Analytics service
Out of those, purging was created as a sub-service of Monitoring service.
In a regular interval time (for every 2 hours) the “Purge Data – a sub-service of Monitoring service” will purge the data by hitting the Stored Procedures for purging available in the BizTalk360 database.
We have chosen the windows service to utilize the advantages of Sub-service and the services that can be started and paused. As most of you aware that the BizTalk360 services should be always running to collect the data and perform few operations, so we would like to effectively use the service rather than creating SQL job and monitor separately. Also, if any exception appears for the sub-service, the exception will be captured from the log files and it will be shown adjacent to the respective sub-service in the UI.
Based on the values set in the data purge duration, for every 2 hours, the data will be purged using the stored procedures with the trigger of Purge Data sub-service.
Until BizTalk360 v5.0, there was a single stored procedure (sp_b360_admin_PurgePolicies) called from our monitoring service which takes care of all the purging. In v6.0, we improved the logic by splitting it into multiple stored procedures (sp_b360_admin_PurgePolicies) which takes care of various parts of data purging.
How to Check if Purging Service Status is Healthy?
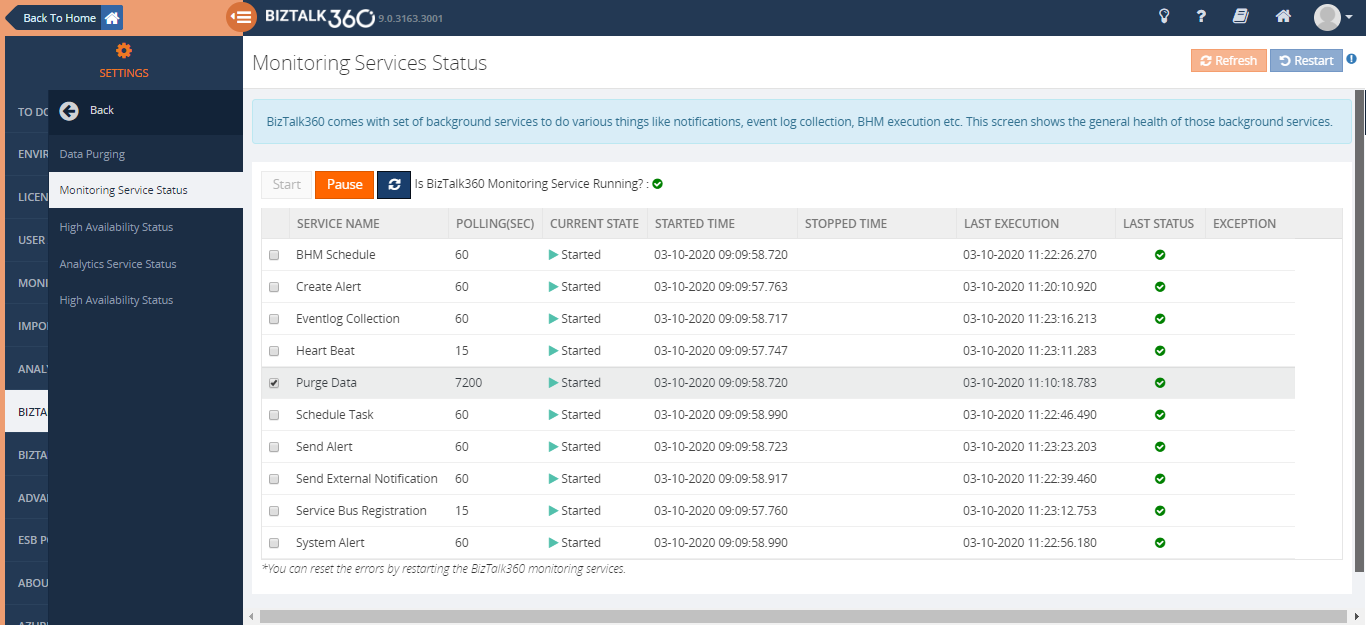
Purge Data – a sub-service of Monitoring service from BizTalk360 Settings -> BizTalk360 Health -> Monitoring Service Status -> Purge Data, will help you to understand and find the information that the purging is running for every 2 hours.
If you can compare the started time and Last execution time, for every 2 hours the execution should happen. Even if there is an exception, the exception will be captured in the log files and it will be shown adjacent to the purge data sub-service.
Additional Capabilities
Along with the purging service within BizTalk360, there are few more options to check if the database size is under the expected size.
Using the Database size monitoring feature, users can monitor the database and log file size of BizTalk and BizTalk360 databases, by simply configuring the error and warning threshold values for the database and log file sizes. By this when the database size exceeds the expected size, you will receive an alert from BizTalk360.
Use Database Query monitoring to Monitor the size of a database.
Whenever the database grows beyond expectations, the first thing to be checked is the standard database reports. This will ensure which table occupies more space. Then we can act on the purging policy and change it according to the business needs and data flow.
What are the Stored Procedures Involved in Purging?
Till the latest release, there were 14 Stored Procedures involved in Purging for 32 tables. Each stored procedure will purge multiple tables. Let’s see what the stored procedures are used for purging the corresponding tables.
sp_b360_admin_PurgePolicies_MBVReports – It will purge the BizTalk Health Check tool execution results.
b360_mbv_Executions
sp_b360_admin_PurgePolicies_GovernanceAudit – It will purge the complete Governance and Audit tables, which is related to BizTalk and BizTalk360 activities.
b360_governance_Application
b360_governance_HostInstance
b360_governance_ServiceInstance
b360_governance_rules
b360_governance_Server
b360_governance_ESBException
b360_audit_History
sp_b360_admin_PurgePolicies_AlertNotification – Will purge the Alert notifications which is sent out from BizTalk360 like Email, SMS and Notification channel.
b360_alert_History_Email
b360_alert_History_SMS
b360_alert_History_System
b360_historical_Alert_Maintenance
sp_b360_admin_PurgePolicies_EventLog – Will purge the data of event logs that are already collected from different machines.
b360_ev_EventLogData
sp_b360_admin_PurgePolicies_Throttling – Will purge the data collection for Throttling analyzer
b360_td_Throttling
b360_td_ThrottlingDataCollectionError
sp_b360_admin_PurgePolicies_MonitoringDashboard – The alarm status update of the monitoring dashboard will be purged
b360_alert_MonitorExecution
sp_b360_admin_PurgePolicies_MonitoringLogState – will purge the monitoring log state, monitoring will put the entries of current and expected state.
b360_alert_Monitor_LogStateCheck
sp_b360_admin_PurgePolicies_MonitoringLogThreshold – will purge the monitoring threshold log, monitoring will put the current, warning and error levels.
b360_alert_Monitor_LogThresholdCheck
sp_b360_admin_PurgePolicies_ProcessMonitoring – will purge the data of all types of data monitoring like Process, Message box data, Tracking data, BAM, EDI, ESB, Logic Apps, and Event log data monitoring.
b360_st_ScheduleActivity
b360_st_ProcessMonitorResults
b360_st_DataMonitorResults
b360_st_DataMonitorTaskActionResults
sp_b360_admin_PurgePolicies_PerformanceAnalyzer – The data collected for the Analytics module will be purged
b360_perf_PerfCounter_Data
b360_perf_PerfCounter_Expanded
sp_b360_admin_PurgePolicies_LiveFeed – Live feed data will be purged
b360_broadcast_Message
sp_b360_admin_PurgePolicies_TrackingData – The data collected for the Analytics module will be purged.
b360_dta_Counter_Data
b360_dta_Counters_Expanded
sp_b360_admin_PurgePolicies_DBCache –
b360_admin_Cache
sp_b360_admin_PurgePolicies_BizTalkReporting – The data collected for the Analytics – Reporting module will be purged.
b360_BizTalkDB_DiskUsages
b360_BizTalkDB_Tbl_sizes
b360_Report_History_Email
b360_report_ReportArchive
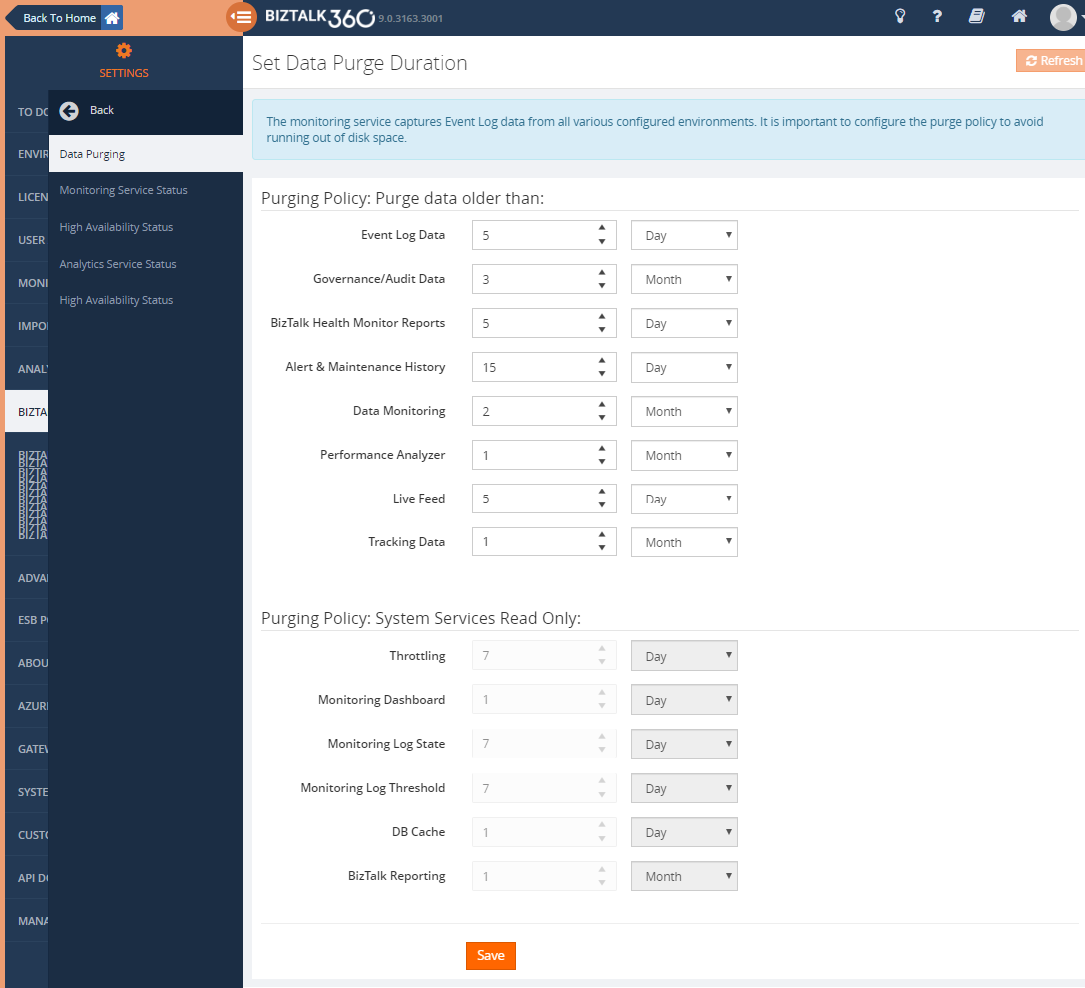
Purge Settings in BizTalk360
Let’s see how purge helps. The default purging settings in BizTalk360 can be seen in the below screenshot;
Based on the values/duration provided by the purging policy, the data will be purged. We can see that the purging duration for Data Monitoring is 2 months. Hence the historical data for 2 months will be present in the BizTalk360 database.
Purging needs to be done to remove the historical data, thereby making the database healthy. BizTalk360 purges the data by running the stored procedure in the specified duration specified in the settings. The purging settings can be altered by the customers according to their business needs and data flow. If a large volume of data flows through the ports, they can set the purge duration to a minimum value so that data growth is controlled.
The customer configured 3 environments in a single installation of BizTalk360. In each environment, there were 5 servers available due to BizTalk and SQL server. Hence there were 15 servers to collect data for Advanced Event Viewer and they have set-up 30days to monitor. The Database has grown almost to 300 GB because of the number of servers to monitor.
We have recommended the customer to decrease the purge duration from 1 month to 2days and TRUNCATE the particular table (Since the table belongs to BizTalk360 and it is historical data, it won’t affect the BizTalk server). After modifying the purge duration, the data were reduced to 2 GB started working as expected.
Can the Purging be done Manually?
BizTalk360 will purge the data automatically. Sometimes the data collection may be out/beyond our expectation and that leads to a huge volume of data.
Our first suggestion is to reduce the number of purge days. So that the data will be reduced.
Until v6.0, the stored procedure sp_b360_admin_PurgePolicies was used and in recent versions of BizTalk360, you can use the stored procedure sp_b360_admin_CleanupDB to manually purge the database in case of large database growth.
When the number of records in the database grows quickly, call to the stored procedure(s) can start to get timed out from the monitoring services. This will result in data not being cleared and resulting in unusual database growth.
Conclusion
Considering the feedback provided by our customers we have improved and fine-tuned the collection of the data into the BizTalk360 database.
Whenever the database grows beyond expectations, the first thing to be checked is the standard database reports. This will ensure which table occupies more space. Then we can act on the purging policy and change it according to the business needs and data flow.
If you have any questions, contact us at [email protected]. Also, feel free to leave your feedback in our forum.
BizTalk Server 2020 – 20 days, 20 posts – day 7. And for this post, I choose a crucial piece for BizTalk developers: How to install BizTalk Server Visual Studio Project Template.
On previous versions of BizTalk Server and Visual Studio, when we were installing BizTalk Server, it would detect that we had Visual Studio present and the BizTalk Server installation process will also install on our machines all the Visual Studio Templates necessary for us to build our BizTalk Server solutions.
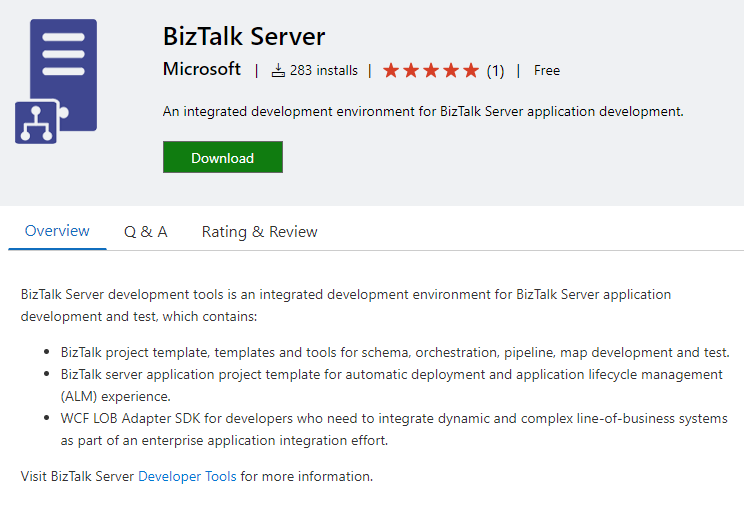
BizTalk Server development tools are an integrated development
environment for BizTalk Server application development and testing, which
contains:
BizTalk project template, templates, and tools for schema, orchestration, pipeline, map development, and test.
BizTalk server application project template for automatic deployment and application lifecycle management (ALM) experience.
WCF LOB Adapter SDK for developers who need to integrate dynamic and complex line-of-business systems as part of an enterprise application integration effort.
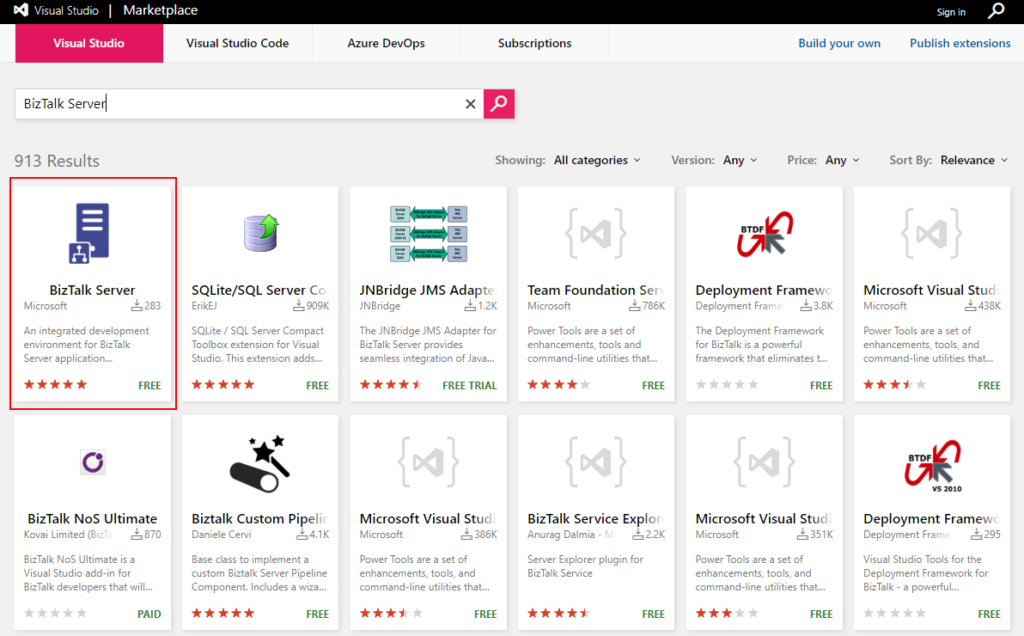
Search for BizTalk Server and download the BizTalk Server development tools provided by Microsoft.
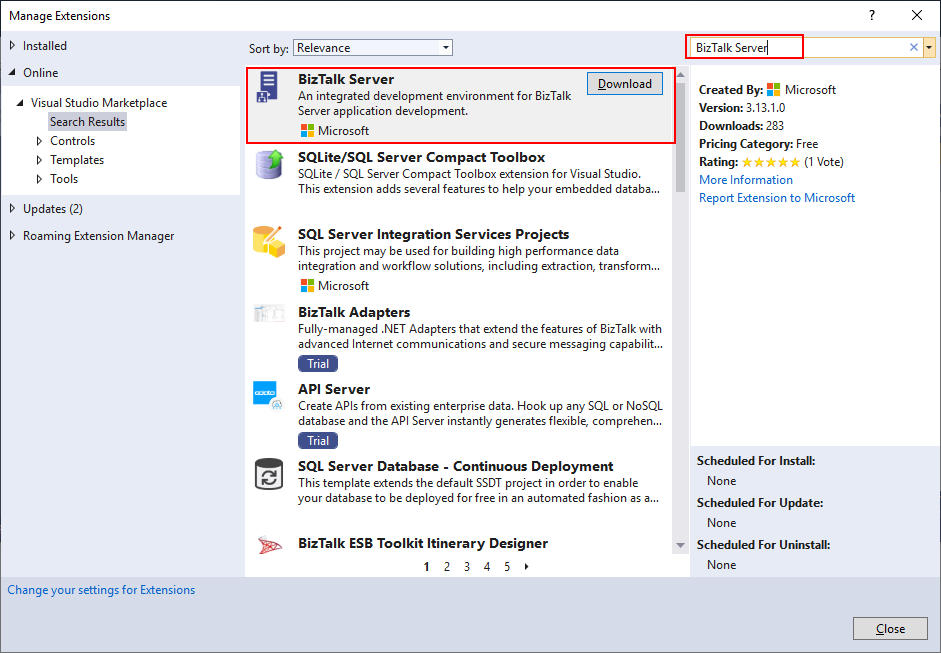
Or directly thru Visual Studio:
Open Visual Studio and use the Manage
Extensions dialog box to install and manage Visual Studio extensions.
To open the Manage
Extensions dialog, choose Extensions à Manage Extensions. Or, type Extensions in the search box and choose Manage
Extensions.
On the Search, type BizTalk
Server and chose to download the BizTalk Server development tools
provided by Microsoft.
It will automatically download
and install these components.
To finalize you need to close
all Microsoft Visual Studio windows that are open. And next time you will open
Visual Studio, the BizTalk Server project template will be available for you to
start developing your solutions.
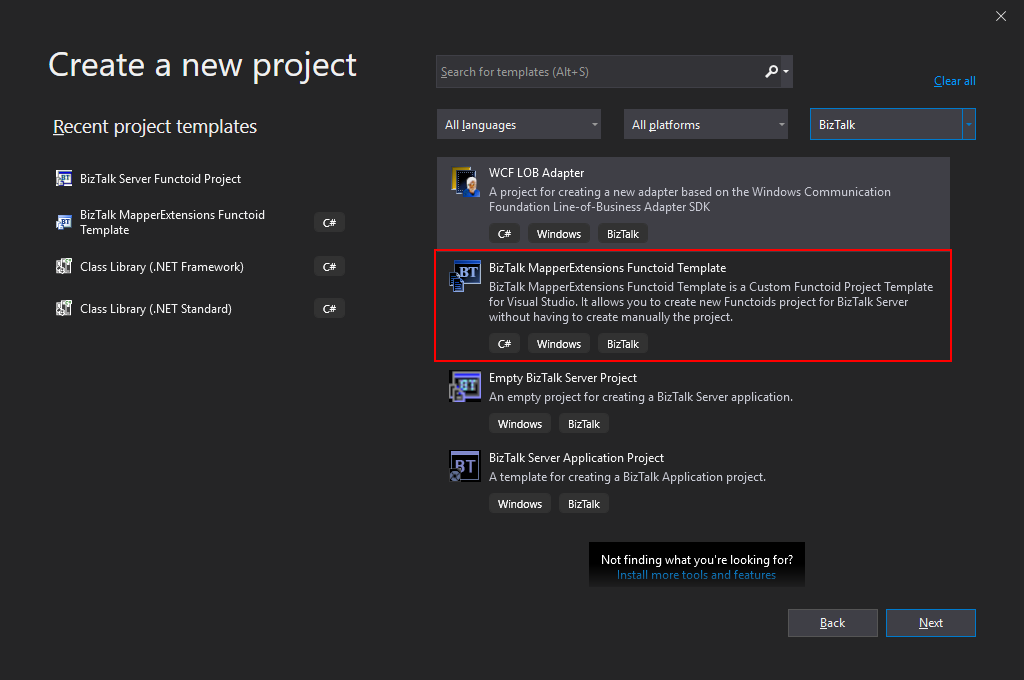
BizTalk Server 2020 – 20 days, 20 posts – day 6. In the last post, I published the BizTalk MapperExtensions Functoid Wizard to be compatible with BizTalk Server 2020 and Visual Studio 2019 but I reference that Visual Studio 2019 has a completely different look and fill and you will not be able to see this project under “BizTalk” projects in your Visual Studio 2019, instead, you need to search for it or scroll down to find it. So I decided to develop an alternative approach: BizTalk MapperExtensions Functoid Project Template.
BizTalk MapperExtensions Functoid Project Template is a Custom Functoid Project Template for Visual Studio 2019. It allows you to create new Functoids project for BizTalk Server 2020 without having to create manually the project, in other words, having to manually create:
A new class library project in Visual Studio;
Add a reference to the Microsoft.BizTalk.BaseFunctoids assembly;
Add New Class and having to code the entire class;
This Template will automatically create a project sample reference for you to create your custom Functoid. You them need to make the necessary changes and implement the required logic.
The difference between this resource (BizTalk MapperExtensions Functoid Project Template) and the BizTalk MapperExtensions Functoid Wizard are:
You don’t required to install nothing, you just need to copy this resouce to a specific folder (explain bellow);
There is no Wizard involved to customize the project, instead a sample project will be created and you need to implememet all the required changes;
You can filter on the Visual Studio menu for BizTalk project and this template will appear, that doesn’t happen with the wizard;
Installation
To use this project template just download the BizTalk MapperExtensions Functoid Template.zip file (without unzip) and copy to the following location:
C:Users<your-account>DocumentsVisual Studio 2019TemplatesProjectTemplates
BizTalk Server 2020 – 20 days, 20 posts – day 5. I will finish my challenge regardless of all these constraints we are facing, and that limits our free time. So, while my wife was sleeping our cute little monster yesterday, I was able to migrate this tool and test it to be compatible with BizTalk Server 2020. Today while she is doing the same, I’m publishing this productivity tool for those that love BizTalk Mapper as I do: BizTalk MapperExtensions Functoid Wizard. Once again, I hope you enjoy and find this tool useful.
BizTalk MapperExtensions Functoid Wizard
BizTalk MapperExtensions Functoid Wizard is a Custom Functoid Project Wizard for Visual Studio 2019. It allows you to create new Functoids project for BizTalk Server 2020 without having to create manually the project, in other words, having to manually create:
A new class library project in Visual Studio;
Add a reference to the Microsoft.BizTalk.BaseFunctoids assembly;
Add New Class and having to code the entire class;
This Wizard will do this process automatically, and used in conjunction with Item Template for Visual Studio: Custom BizTalk Functoid will facilitate and significantly expedite the development process of our projects.
To use this project template download the executable files available on the Installation Files folder and run the setup file.
Once you run the setup file follow these steps:
On the Welcome to the BizTalk MapperExtensions Functoid Template Setup Wizard screen, click Next.
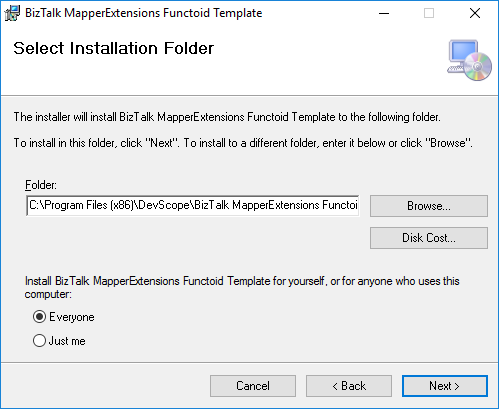
On the Select Installation Folder screen, select the folder where you want to install the Wizard and select the option Everyone. Click Next to continue.
On the Confirm Installation screen, confirm your intent to install by clicking Next.
On the Installation Complete screen, click close and the installation is complete.
Now you can see a new BizTalk project Wizard on Visual Studio 2019. Unfortunately, Visual Studio 2019 has a completely different look and fill and you will not be able to see this project under “BizTalk” projects in your Visual Studio 2019, instead, you need to search for it or scroll down to find it.
I still need to find a way to solve this limitation or release a different approach to solve this issue and have a more friendly approach.
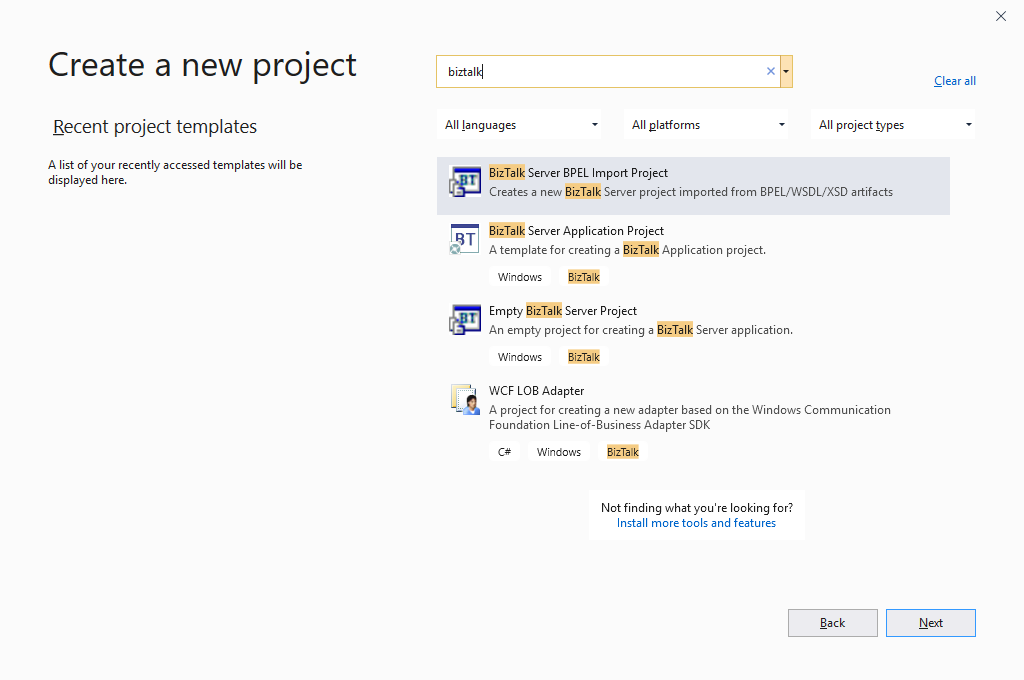
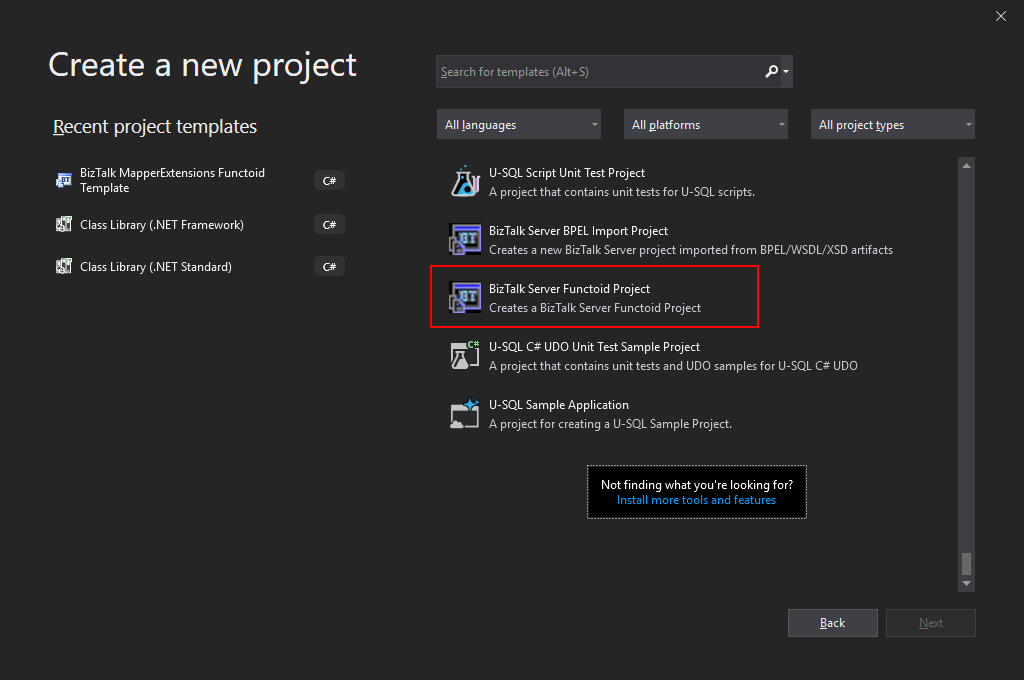
Create New Functoid Project
To create a new functoid using this project template choose the option BizTalk Server Functoid Project in Visual Studio 2019 and a Wizard will pop-up. Follow the requirements of this wizard to create the Functoid.
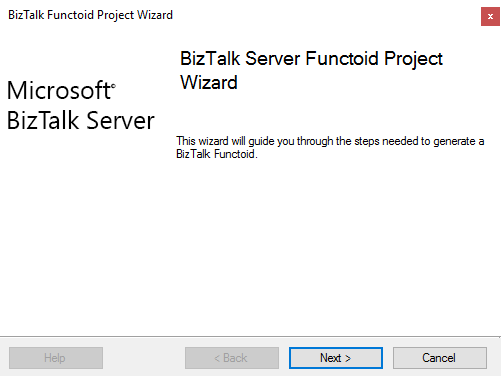
In the Start screen, click Next to continue.
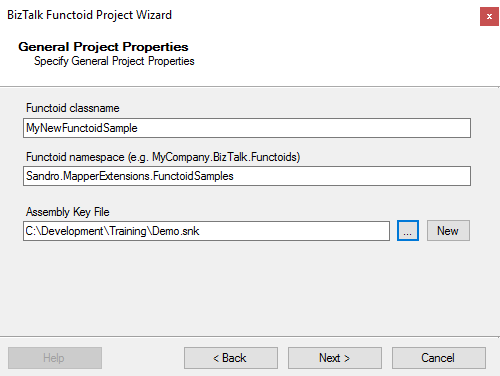
In the General Project Properties screen, fill the Functoid class name, namespace and create or select a new Strong Key (you can use an existing one). Click Next to continue.
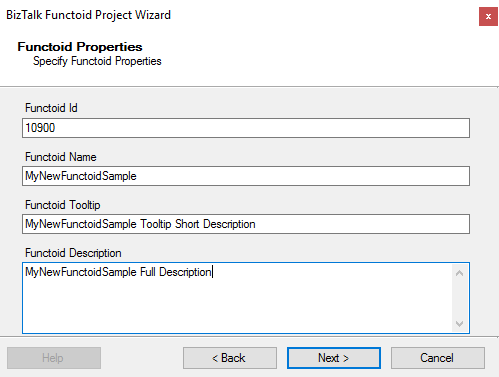
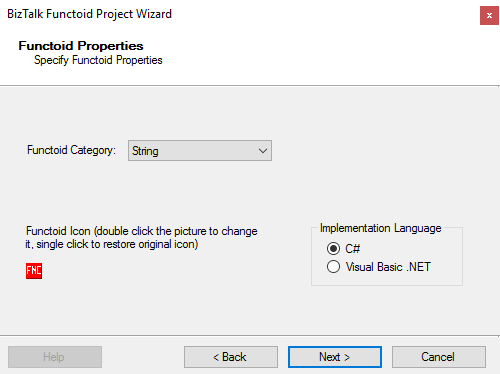
In the Functoid Properties screen, define the Functoid ID (must be greater than 10000), the functoid name, the tooltip (short description) and description (full description). Click Next to continue.
In the second Functoid Properties screen, choose the functoid category and the implementation language (the language in which you want to implement your functoid behavior code): C# or VB.NET. Click Next to continue.
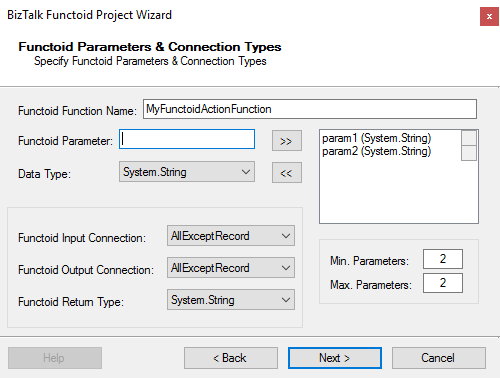
In the Functoid Parameters and Connection Type” screen, define the functoid function name, function inputs and types and output and types. Click Next to continue.
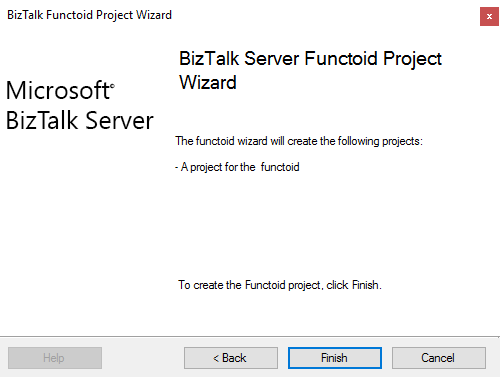
On the final screen, click Finish to create the Visual Studio project.
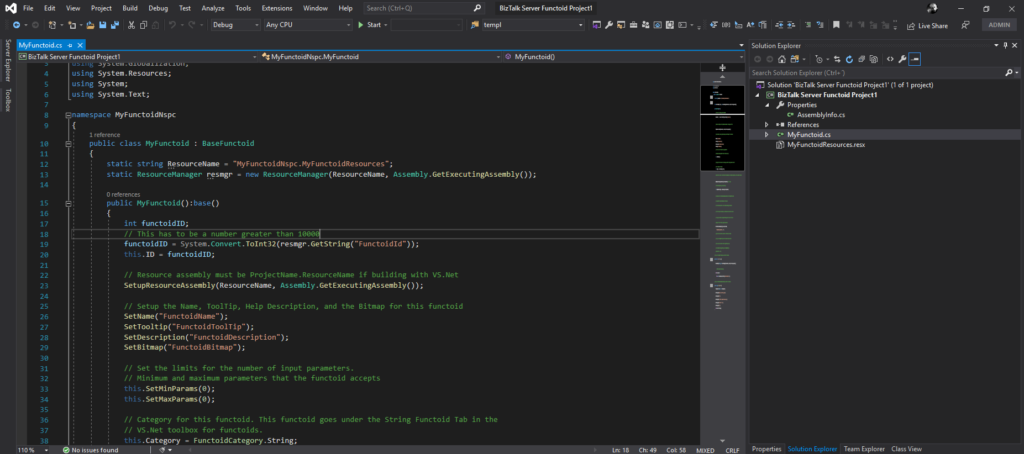
Visual Studio will create a new Project based on your implementation language and definitions provided in the Wizard.
Open the generated class and implement your code
Other versions
This tool is also available for the following BizTalk Server versions:
BizTalk Server 2020 – 20 days, 20 posts – day 4. Again a bit behind on this post, I need to recover the missing days but I will get there. Today I have chosen to migrate another productivity tool that I use often especially when I’m working with pure pub-sub solutions: BizTalk Filter Finder Tool to be compatible with BizTalk Server 2020. I hope you enjoy and find this tool useful.
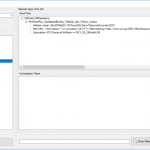
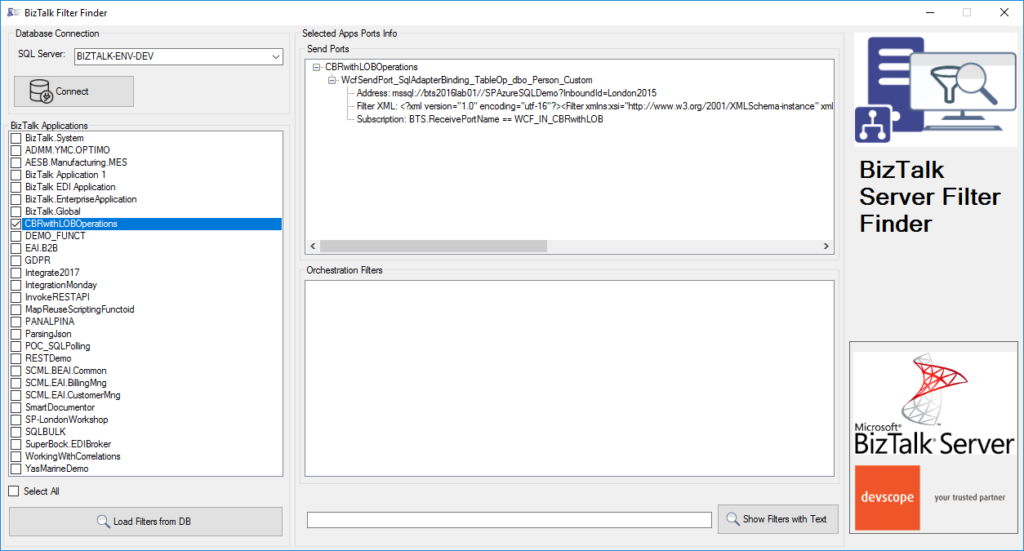
BizTalk Filter Finder Tool
BizTalk Filter Finder Tool is a simple tool that aims to simplify the process for better understand and maintain solutions based on pub-sub and content-based routing. By allowing you to have a quick overview of all the artifacts, send ports or orchestrations that have filters associated.
This tool will extend default BizTalk Server capabilities transforming this tedious and sometimes complicate analyze a little simple, easy and fast.
This tool will extend default BizTalk Server capabilities transforming this tedious and sometimes complicate analysis a little simple, easy and fast. You can read more details about this tool in the original post here: BizTalk Filter Finder Tool.
Other versions
This tool is also available for the following BizTalk Server versions:
BizTalk Server 2020 – 20 days, 20 posts – day 3. Sorry for the delay but with this COVID-19 situation and with 3 small kids at home, sometimes it can be a challenge to find time to do community work and to write. Nevertheless, for today I have chosen to migrate another crucial and productivity tool that I really enjoy using it: BizTalk Bindings Exporter Tool to be compatible with BizTalk Server 2020. Once again, I hope you enjoy it as much as I do.
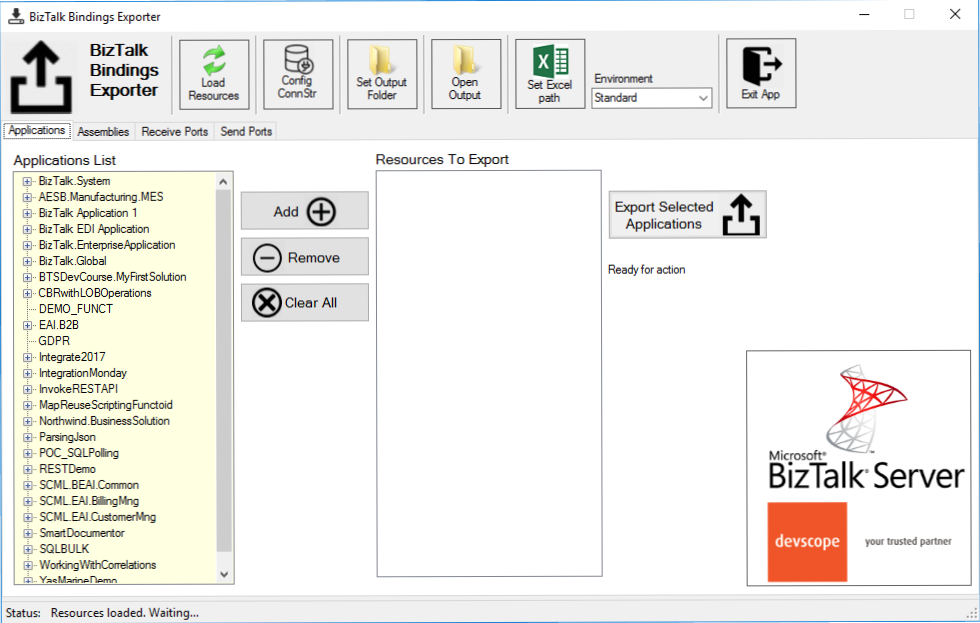
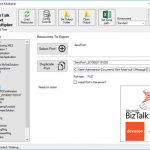
BizTalk Bindings Exporter Tool
BizTalk Binding Exporter Tool is a simple tool that will suppress the absence of advanced binding file generation capabilities in the BizTalk Server Administration Console allowing you to generate and export a binding file from BizTalk Applications in an intuitive and easy way.
Exporting a BizTalk Server Application binding is, at first sight, a simple and quick task that can be done using the BizTalk Server Administration Console. But even in simple tasks, we may encounter challenges that require us to perform some monotonous and boring manual operations that consume some of our precious time and are always subject to failures.
Normally the binding exportation starts in development, but we also will need to generate the same bindings for other environments like production and for that we normally need to open the binding file and replace/fix the differences for each different environment… which is normally a tedious operation. What we need to replace is mainly:
the URI’s: it should be fixed, but it is not mandatory. If you know what you are doing, you can fix them directly on the environment after you import the Binding.
the host instances: not mandatory, if you have the same host and host instances names across all your different environments (as best practices will tell you to do).
the NT Group Name associated in the Services (Orchestrations): according to securities best practices you shouldn’t use the same BizTalk Groups in different environments, so in this case, if you follow these best practices, you need to change these parameters in your binding file.
Normally, everyone changes the URI’s but neglecting the other parameters may be causing problems during the Binding import.
This tool will extend default BizTalk Server capabilities transforming the tedious and sometimes complicate binding generation a little simple and easy.
You just need to specify the connection string to the BizTalk Management database (BizTalkMgmtDb)
And this tool allows you to generate and export binding files with the following capabilities:
Export binding(s) file(s) for an entire Application or a list of Applications;
Export binding(s) file(s) from a specify Assembly or list of Assemblies;
Export binding(s) file(s) from a Receive Port or list of Receive Ports;
Export binding(s) file(s) from a Send Port or list of Send Ports;
Or Generate different binding files for each environment if you create an Excel File with the mapping for each environment ;
Other versions
This tool is also available for the following BizTalk Server versions:
BizTalk Server 2020 – 20 days, 20 posts – day 2. And for today I have chosen to migrate another crucial and productivity tool: BizTalk Server SSO to be compatible with BizTalk Server 2020. Application Configuration Tool. Some of you had already asked me if I would release a new version of this tool for this new version of the product. Well, here it is!
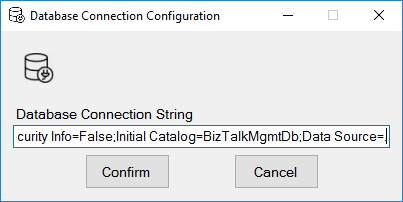
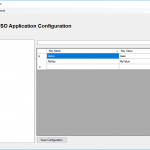
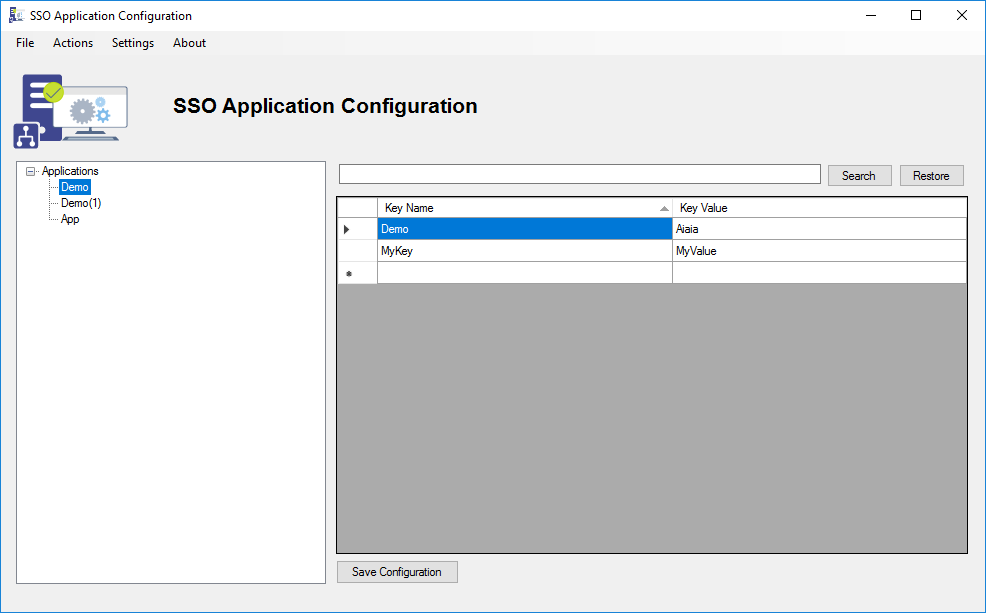
BizTalk Server SSO Application Configuration Tool
BizTalk ServerSSO Application Configuration tool provides the ability to add and manage applications, add and manage key-value pairs in the SSO database, as well as import and export configuration applications so that they can be deployed to different environments.
Fully compatible with BizTalk Server 2020
Fully resizable windows (you will understand if you are a BizTalk Developer);
You can securely export and import Application configurations and it is compatible with MSFT SSO snap-in;
You can duplicate Applications (copy and paste);
You can rename Applications;
You can easily add new key-values without the need to always perform a right-click and select a new key option;
You can easily add edit key-values without the need to always perform a double-click to open a new window;
You can refresh the Applications tree view
You can search!
Other versions
This tool is also available for the following BizTalk Server versions:
You can download BizTalk Server SSO Application Configuration Tool for BizTalk Server 2020 from: BizTalk Server SSO Application Configuration Tool for BizTalk Server 2020 (45 KB) Microsoft | TechNet Gallery
You probably wonder why I haven’t written anything significant yet about this new version of the product. And I could come up with several real reasons but that is not the point here. However, to compensate for this “delay” I will start a crazy personal challenge, which I don’t know where I will find the time, to write 20 posts focus on BizTalk Server 2020 in the next 20 days: BizTalk Server 2020 – 20 days, 20 posts.
This series of posts could be about how to do certain things, what’s new in the product, step by steps guides, tools, components, tips and so on. And to start this series of posts I have chosen to migrate the BizTalk Port Multiplier Tool to be compatible with BizTalk Server 2020.
BizTalk Port Multiplier Tool
BizTalk Port Multiplier Tool is a simple tool that aims to simplify the port “cloning” process by allowing you to quickly “clone or duplicate” any existing port: Receive Port or Send Port.
Send Ports are quite easy to archive, you only need to give a different name to the port, and you can clone it;
Receive Ports are tricky because they may contain several Receive Locations and each URI needs to be unique;
This tool will extend default BizTalk Server capabilities transforming the tedious and sometimes complicate port creation based on an existing one a little simple and easy allowing you to:
Create a new Receive Port based on an existing one;
It will also export the binding file from that new Receive Port;
Create a new Send Port based on an existing one;
It will also export the binding file from that new Send Port;
Generate different binding files for each environment
Why do I need to “clone” a Receive Port?
Sometimes you also need to create a receive port with similar configurations of an existing one, also changing only a few settings or simple the URI, and instead of manually recreating, you can have 90% of the process done automatically.
Sometimes it is practical, occasionally, or in some scenarios, it may not work, but in most cases, it will. So it is a best-effort operation and not an exact clone because they may have several Receive Locations, and each Address/URI needs to be unique. So, you then need to go to each receive location and reconfigure them.
Other versions
This tool is also available for the following BizTalk Server versions: