This post was originally published here
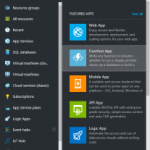
In my my previous post, I showed how we can use a WebJob to process a Service Bus queue and store the data in an Azure SQL database. This was pretty simple to set up, but it did require a good understanding of how to connect with these and process the data. Sometimes however we just want to do a quick integration without needing to set up all this plumbing. Recently Microsoft announced a new feature called Azure Functions, with now makes this possible. Azure functions can be used to create a small function which can run stand-alone, or be called from other applications, for example from a logic app, as has been described here by Sandro Pereira. Azure Functions provide out of the box connections for triggers, input and output to a lot of other Azure features, including Event Hubs, Service Bus, Azure Storage and DocumentDB. In this post I will show how we can process our message from the queue we created in this blogpost, and store it in an Azure Storage table. We will start by creating a new Function App in the portal.
Fill out the fields as specified. In case we allready have other App Services, we can run the Function in the same App Service Plan we are using for these by choosing Classic App Service Plan. However if we want the true cloud experience, it can also be run in a Dynamic App Service Plan, in which case Azure will provide all of the necessary resources when needed, and it will only cost us when our code is actually running.
Once the Function has been deployed, we can find it under App Services. Let’s create a new function in our Function App we just created. There’s either the possibility to start from scratch, or to use one of the premade templates.
We will create a function from scratch for this demo. Click on New Function, and select the ServiceBusQueueTrigger – C# template.
Now we can set up our function. We can either choose to use an existing queue, or if we specify a name for a queue which is not in the selected namespace yet, it will be created for us. We will select the queue we created earlier. When creating the connection to our Service Bus namespace, we have to use credentials with Manage permissions.
Once this simple setup has been done, click Create and we will see a Code editor in our browser with the outline for our function. As you will see, by default this function expects a string from our queue, however we are sending in a BrokeredMessage. Luckily, we can reference any namespace from our function as well. There are a couple of options to import namespaces. In our function, we will want to import the Microsoft.ServiceBus.Messaging namespace, which is part of the WindowsAzure.ServiceBus package. As this package is available from NuGet, we will use this to add the reference. Start by creating a project.json file, and add the following code, which will add a reference to version 2.7.6 of the package.
{
    "frameworks": {
        "net46":{
            "dependencies": {
                "WindowsAzure.ServiceBus": "2.7.6"
            }
        }
    }
}
|
Now we will use Kudu to upload the project.json file. The Kudu for our Function App can be reached on https://YOURAPP.scm.azurewebsites.net/. Go to the CMD Debug Console, and navigate to D:homesitewwwroot. Now we can drag and drop our project.json file here to upload it.
Going back to our Function App’s console, we will now see that the NuGet package we just added is being restored.
Now that we have added this NuGet package, we can reference the Microsoft.ServiceBus.Messaging from our code, and use the BrokeredMessage class in our incoming parameters.
Now that we have our input set up, we will add our output. Open the Integrate tab, and click New Output. Select Azure Storage Table as output, and set up the properties. We will let the function create a table for us, and we will use the shipname as a partition key.
To save our object to the Azure Storage Table, we have to create a class which will be used to map the data. Add the following class after the function. Be sure to include the PartitionKey and RowKey fields, as these are required when writing to Azure Table Storage. The other fields will hold the data we receive from our queue.
public class ErrorWarning { public string PartitionKey { get; set; } // Required for writing to table storage public string RowKey { get; set; } // Required for writing to table storage public string CreatedDateTime { get; set; } public string ShipName { get; set; } public string Message { get; set; } } |
We also have to add a parameter to the function’s input parameters. When working with Azure Table Storage, this has to be an ICollector holding instances of the class we just created. Make sure to use the Table parameter name we just specified as name of the parameter. Once this is done, we can start implementing our function’s body. We will start by writing the data to the log, followed by creating an instance of our ErrorWarning class with the data we just received from the queue. We will then add this data to the Azure Table Storage.
public static void Run(BrokeredMessage myQueueItem, ICollector<ErrorWarning> queuesAndWarningsStorageTable, TraceWriter log) { log.Verbose($"C# ServiceBus queue trigger function processed message: {myQueueItem.Properties["time"]}, {myQueueItem.Properties["ship"]}, {myQueueItem.Properties["exceptionMessage"]}"); var item = new ErrorWarning { PartitionKey = myQueueItem.Properties["ship"].ToString(), RowKey = Guid.NewGuid().ToString(), CreatedDateTime = myQueueItem.Properties["time"].ToString(), ShipName = myQueueItem.Properties["ship"].ToString(), Message = myQueueItem.Properties["exceptionMessage"].ToString() }; queuesAndWarningsStorageTable.Add(item); log.Verbose($"Added item {item.PartitionKey} to the table"); } |
Now click Save and we will see our function is being compiled.
Now whenever a message is being placed on the queue, our Azure Function will pick it up, process the data, and place it into our Table Storage.