This post was originally published here
The wait is over, Microsoft has released BizTalk Server 2020 with a bunch of new exciting features.
To know more about the stirring features, look at our series of blogs;
- What’s New in BizTalk Server 2020
- BizTalk Server 2020 – Why it’s a Game-Changer
- BizTalk Server 2020 – Operations and Administration Capability
- BizTalk Server 2020 – Features that Developers/Administrator can leverage
This release allows customers to achieve true hybrid connectivity by connecting on-premise systems to SaaS applications through Azure connectivity. In this blog, we will be discussing the new set of cloud adapters (Blob Storage, Service Bus, Event Hubs, O365 Mail, O365 Schedule, O365 Contact).
Note: All these adapter features were already built-in with the BizTalk Server 2016 Feature Packs.
Blob Storage Adapter
With the Blob storage adapter, you can send and receive files of any format (video, audio, images, XML, .pdf, .txt, .zip, .pptx, etc.) between BizTalk Server and Azure Blob Storage with very few configurations.
- Create a Windows Azure Storage Account with a container
- Configure AzureBlobStorage in Send Port to send message to blob /Configure AzureBlobStorage in Receive Location to receive a message from blob
Using this Blob Adapter, the administrator can have the Backup BizTalk Server Job to back up the databases and log files and easily upload that to an Azure Blob Storage account.
Scenario 1 – Send Message to Azure Blob Storage
When a file dropped into a folder, a BizTalk receive port that listens to that folder will pick up the file. It can then be routed to a send port that subscribes to the files coming in through the receive port. The send port is configured with the AzureBlobStorage adapter and will send the file to a container in Windows Azure Storage, according to its configuration.
- Create a receive port using the File adapter” FileReceivePort”, map that to your receive location where the file gets dropped
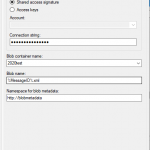
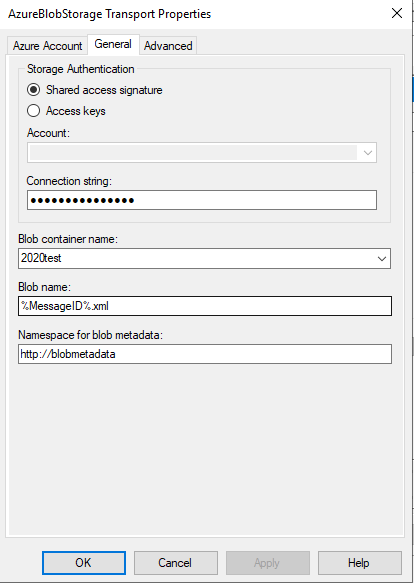
- Create a send port with type “AzureBlobStorage”. Update the blob details as below
- Configure Azure properties – Sign in to your Subscription, Select the subscription and Resource Group that has your Azure Storage account
- Configure General Properties – Select the Storage Authentication method Shared access signature/Access keys (The connection string will be automatically populated if you select Access Key method)
- Select the Blob Container, enter the blob name, you can also use the macros and enter the namespace for blob metadata
- You can set the Blob type and the write mode i.e Create new/Overwrite/Appends in the advanced properties settings
Scenario 2 – Receive Message from Azure Blob Storage
The BizTalk receive location which is configured with the AzureBlobStorage adapter will receive a file. When a file is uploaded in the Azure Blob container, it will then be routed to the subscribed send port folder location.
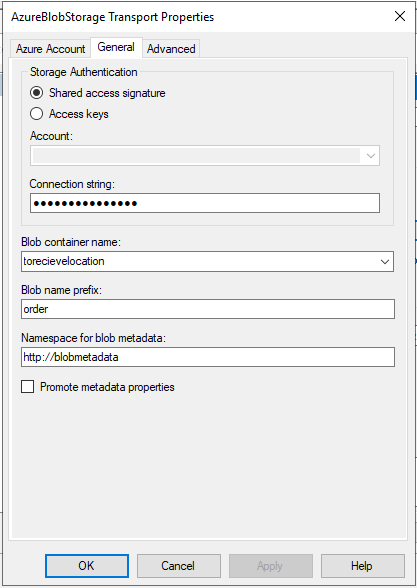
Create a Receive Port, add a Receive Location as type “AzureBlobStorage” and configure the blob details as below;
- Configure Azure properties – Sign-in to your Subscription, Select the subscription and Resource Group that has your Azure Storage account
- Configure General Properties – Select the Storage Authentication method Shared access signature/Access keys (The connection string will be automatically populated if you select Access Key method). Select the Blob Container Name, Blob Name prefix (in my case it was ‘Order’) and Namespace for blob metadata, click Apply
- You can set “Polling Interval”, “Maximum messages per batch”, “Parallel download- Max number of blobs to download parallel” and “Error threshold – when the receive location reaches this number of errors, the receive location is disabled.” in advanced properties
Event Hubs Adapter
Event Hubs capture is the easiest way to load/process streaming data into Azure. You can send/receive a large volume of messages between BizTalk Server and Azure Event Hubs using Event Hub Adapter was the streaming data is captured to Azure Blob Storage.
For instance, you can save and process all your tracking data in an Event Hub using the EventHub Adapter.
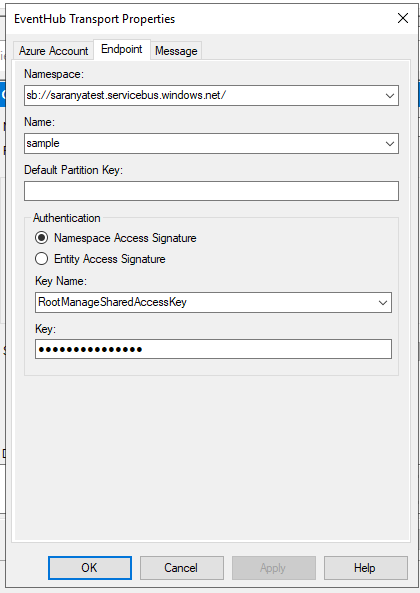
You can configure the EventHub Adapter in a Send Port to send messages to Event Hub/Configure the EventHub Adapter in a Receive Location to receive a message from Event Hubs.
- The publisher/subscriber can connect to the Event Hub by using shared access signature token
- Configure the Messageproperties, the Namespace for User-Defined Message Properties and you can also promote the same
Service Bus Adapter
You can use the SB-Messaging adapter to connect to your on-premises BizTalk Server to Azure. The Service Bus (SB-Messaging) adapter is used to receive and send from Service Bus entities like Queues, Topics, and Relays.
For instance, you can send a message on a service bus queue via Postman which will be later picked up by on-premise BizTalk Server, using the SB-Messaging adapter.
Refer – https://blogs.biztalk360.com/azure-service-bus-biztalk-2016-enterprise-messaging/
Office365 Adapters
Note: POP3 and SMTP adapters are now deprecated, for that Office365 adapter is set as a replacement.
You can use the Office365 Outlook adapters in BizTalk to send and receive messages between BizTalk Server and Office365 Outlook features by configuring below few steps;
- Office365 account – Configure Office365 with proper credentials, which will authorize BizTalk to connect to, and access the Office365 account
- Configure BizTalk TMS – which is a service that manages the Office365 OAuth tokens used by BizTalk. It refreshes these tokens periodically, ensuring that the tokens always remain valid
-
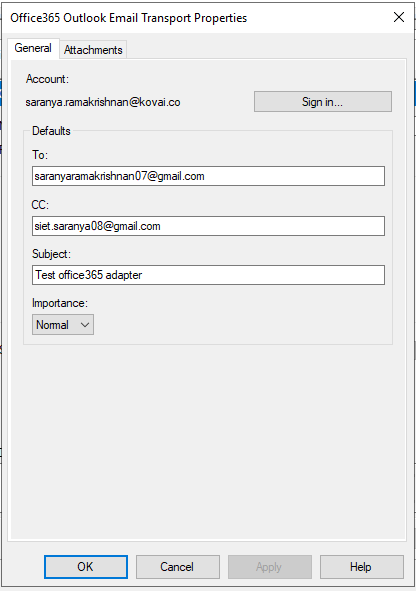
Office365 Outlook Email – The Office 365 Outlook Email Adapter allows you to send and receive emails from your Office 365 Outlook Email from BizTalk.
Send Mail Using a Send Port
Set the following properties to transmit emails via a send port;
- To, CC– separate email addresses with a semicolon (‘;’), maximum 256 characters
- Subject– enter a maximum of 256 characters
- Importance– select Low, Normal or High from the drop-down in the Send Port
You can also attach the files and BizTalk message parts by configuring the attachment properties.
Receive Email Using a Receive Port
Set the following properties to get office365 email to the specific folder via receive port;
- Select a folder from which to retrieve email. The default folder is set as Inbox
- Select a timestamp from which you want to receive emails. i.e receivedTimeStamp
- Retrieve unread emails only
- Select an action after the email has been read, like marking the email as read or deleting the email
Once you receive an email on a Receive Location, the Receive pipeline adds promoted properties, which you can use for routing the emails.
Office365 Calendar Adapter
You can create and receive calendar events from your Office365 Outlook Calendar by using Office365 Outlook Calendar adapter in BizTalk Server.
- Create calendar event using send port: Configure the receive location such that when an XML file is received in receive folder. the send port creates an event in your Office365 Outlook calendar based on the details provided in the XML file
- Receive calendar event XML: Create a FILE send port to receive messages from your Office365 Outlook Calendar and map that to an Office365 Outlook Calendar receive location (by setting send port filters)
Outlook Contact Adapter
You can create contacts in your Office365 Outlook by configuring the Outlook Contact adapter in a send port.
Note: You can only create contacts, you cannot get the contact details. i.e, the Outlook Contact Adapter is not available in receive location to get the contact details.
Conclusion
BizTalk360 is ready for BizTalk Server 2020. Why not give BizTalk360 a try! It takes about 10 minutes to install on your BizTalk environments and you can witness and check the security and productivity of your own BizTalk Environments.
Stay tuned to get more exciting blogs on BizTalk Server 2020!
The post BizTalk Server 2020 – Hybrid Adapter appeared first on BizTalk360.