
by Daniel probert | Mar 25, 2017 | BizTalk Community Blogs via Syndication
Update 2017-03-26: I’ve updated the article below to make it clearer that each separate Logic App execution instance has its own member variable instance, but that variables are shared (currently) between parallel iterations in a loop.
The latest Logic Apps refresh, on March 24th 2017, finally added support for variables.
Microsoft have taken an interesting approach with variables: unlike a BizTalk orchestration, where you define variables separately to your workflow, in Logic Apps they’re defined in new Variables actions. This means that they’re defined inline, similar to how you would define them in source code. There is also a new @variables(‘variableName’) expression that can be used to obtain the value of a named variable.
There are some limitations to variables though:
- They are currently only global in scope within a Logic App execution (same value is available everywhere within that Logic App instance)
- You can currently only initialize a variable, or increment its value – you can’t update the value in any other way
- Only Integer and Float values are supported
In this post, I’m going to look at how you can add variables to your Logic Apps; what you can use them for; and why there is such limited support for variables in this initial release.
How to add variables
You can initialize and increment variables using the two new Variables actions (you can find them by entering “Variable” into the action search box):
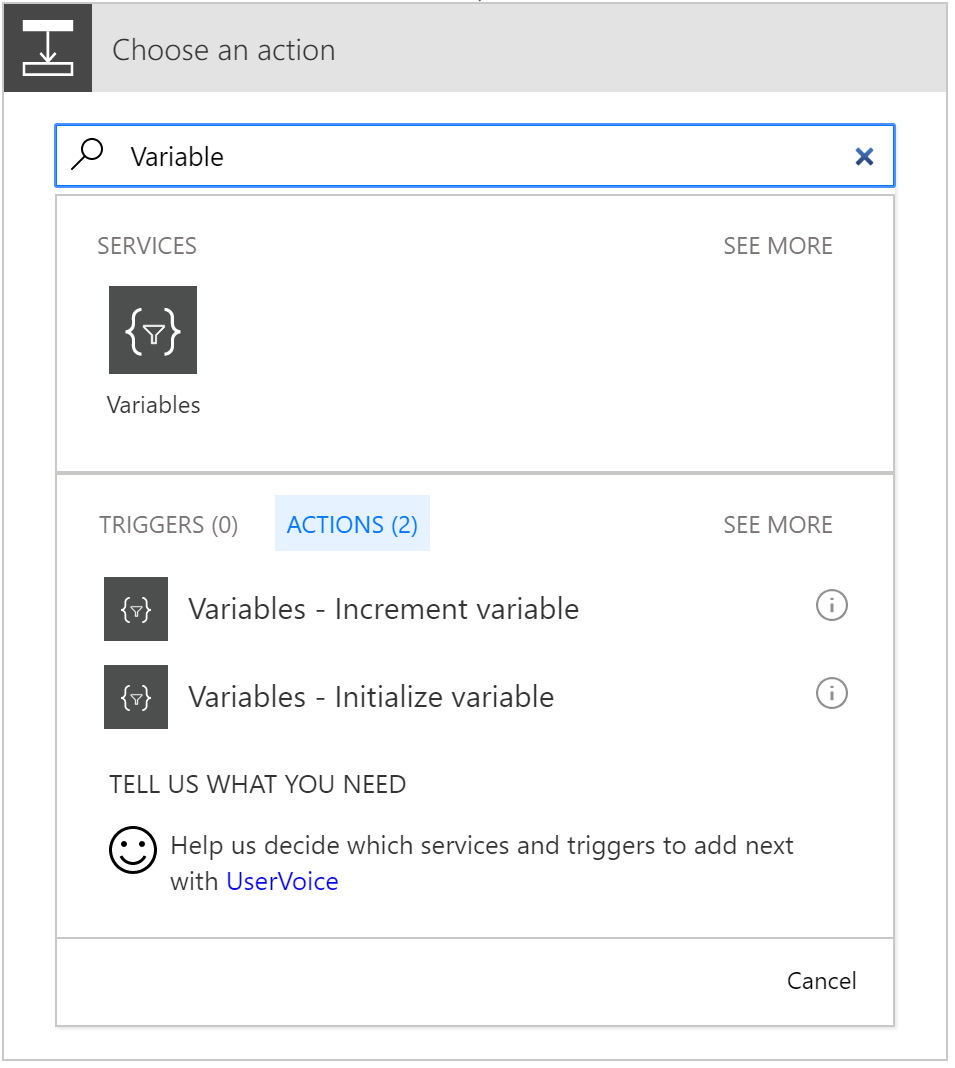
As mentioned above, there are currently only two options.
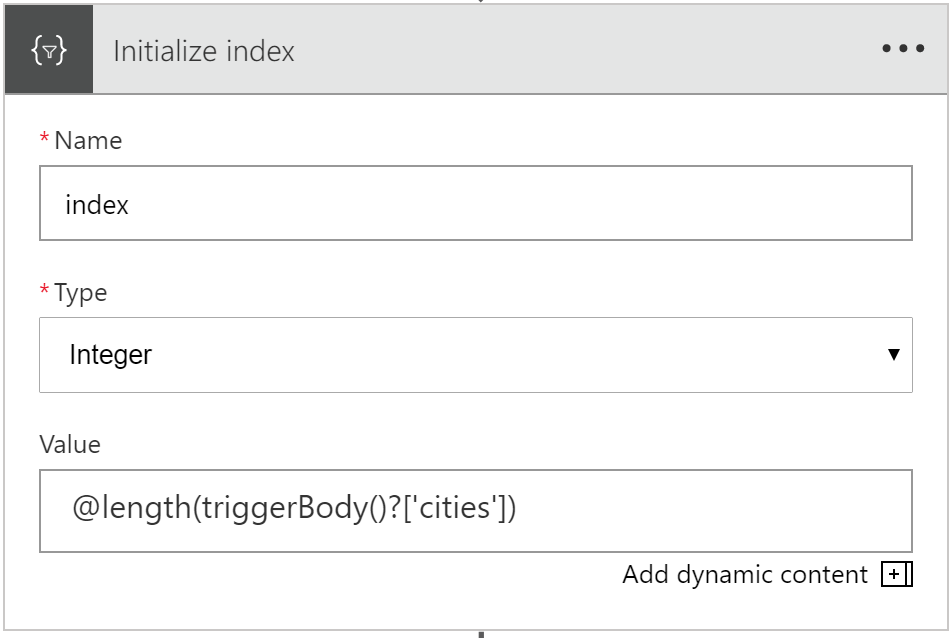
Selecting Initialize variable gives you an action that looks like this:
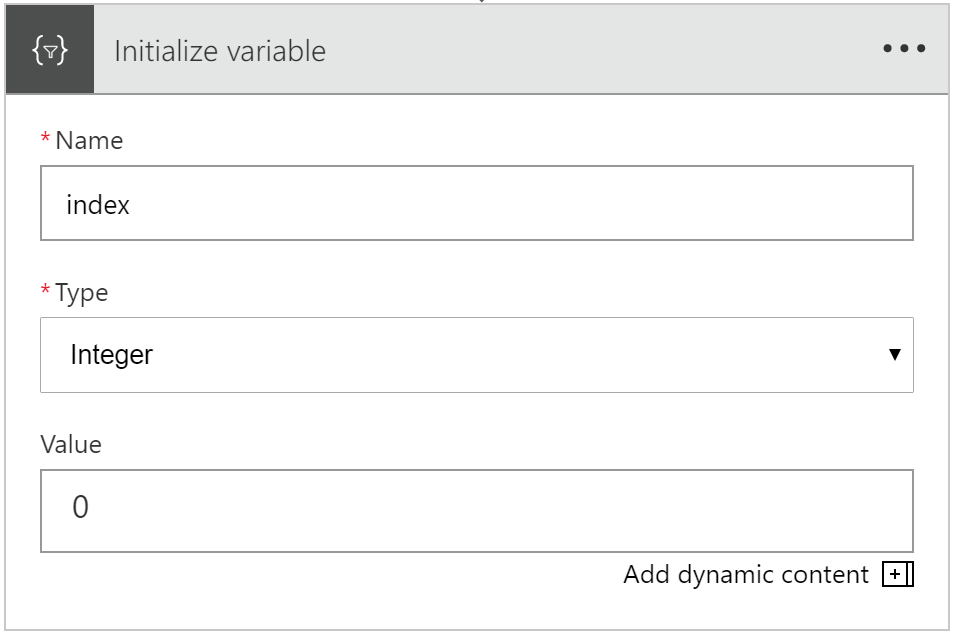
You can supply the variable name, give it a type (only Integer and Float supported), and give it an initial value.
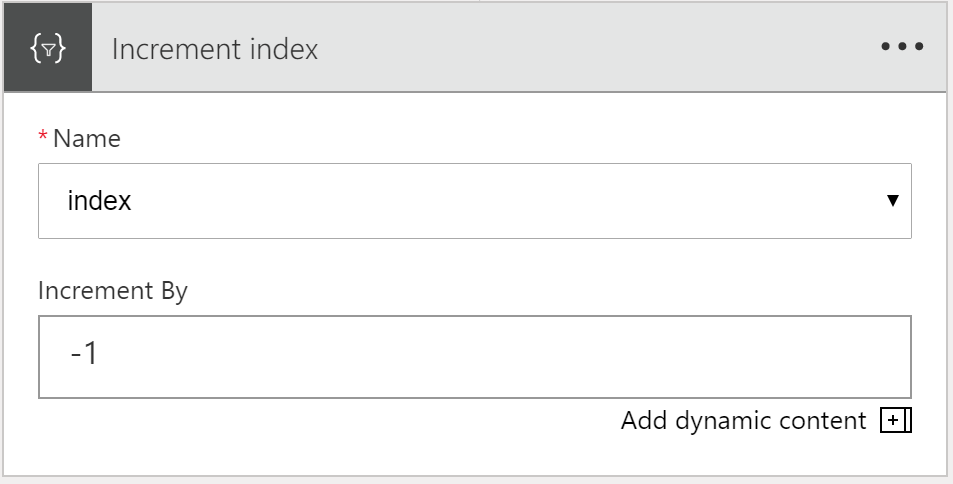
Selecting Increment variable gives you an action that looks like this:

You can select an existing variable (numeric variable types only – Integer or Float – although those are the only types you can create at the mo!), and enter the amount you want to increment by.
Interestingly, you can put a negative value in here, and it will decrement by that much.
What you can do with variables
Numeric variables that can be incremented/decremented are useful for two main activities: maintaining the count in a loop; and selecting a specific value (by index) from an array.
Here’s an example to show you how you could use the current numeric variable support.
Let’s imagine we’re sent an array of cities, as a JSON message. However, we don’t want to process *all* the cities in the array: we just want to process a subset. The request includes start and end position properties that give us the subset of cities to process.
For example:
{
“count”: 4,
“startPos”: 1,
“endPos”: 3,
“cities”: [
{
“city”: {
“name”: “New York”,
“lat”: 40.71,
“long”: -74
}
},
(more cities removed)
]
}
In the example above, we’re going to be supplied 4 cities, but we only want to process cities 1-3.
Without variables, this is tricky to do in Logic Apps, as we have no way of knowing where we are in a loop. Logic Apps only supports 2 types of loops currently: foreach, and do-until.
foreach iterates over all items in an array; do-until will iterate until a condition is reached. Neither of these options provide us a built-in way to iterate over a subset of items in an array.
Note: there are other ways to achieve this e.g. using the @take function, but none so clean as a for loop.
But now we can do this with Variables: by creating an Index variable, setting it to 0, using a foreach loop, and incrementing the index value. Unfortunately, there’s no equivalent of a for loop in LogicApps (i.e. where we can start at a given value and continue until a condition is met). So, that means we’re still going to iterate over every item in the array, but we’ll only process items that fall between the start and end positions.
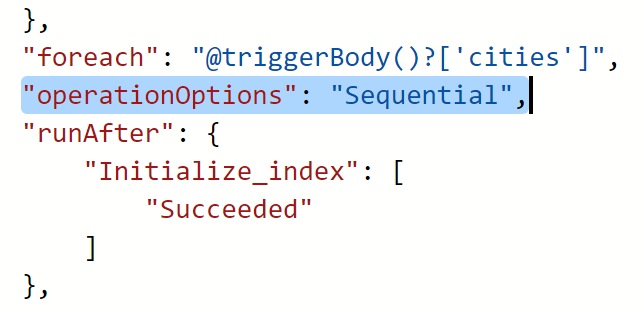
There’s one other thing we need to do: we must set our foreach loop to execute sequentially i.e. not in parallel. By default, foreach loops will execute each iteration of the loop in parallel, up to 20 executions at a time. But trying to decrement a variable in a parallel loop gives us a non-deterministic value each time.
I learnt this the hard way, as I forgot to set my foreach loop to execute in sequence (in the example below), and I couldn’t work out why I was getting odd results…
Setting a foreach loop to execute in parallel is as simple as adding “operationOptions”: “Sequential” to the foreach definition. However, we currently need to do this from the code view as there’s no UI option to do this:
A For-Loop Example
Let’s create an example logic app that shows this.
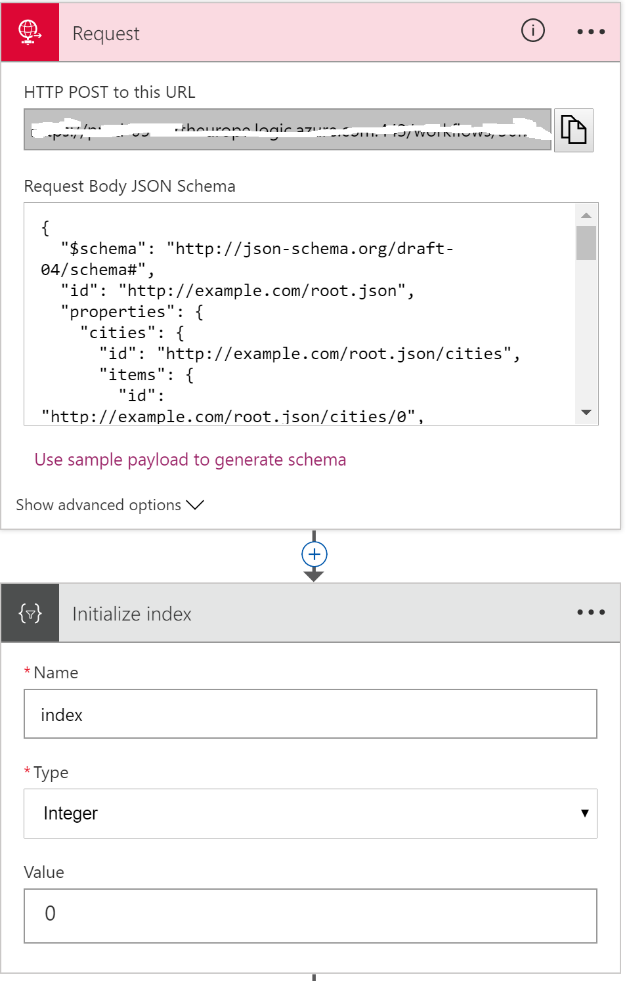
We’ll take in the JSON message from above, which gives us a start position, and an end position, and then an array. And then we’ll initialize an Index variable to 0:
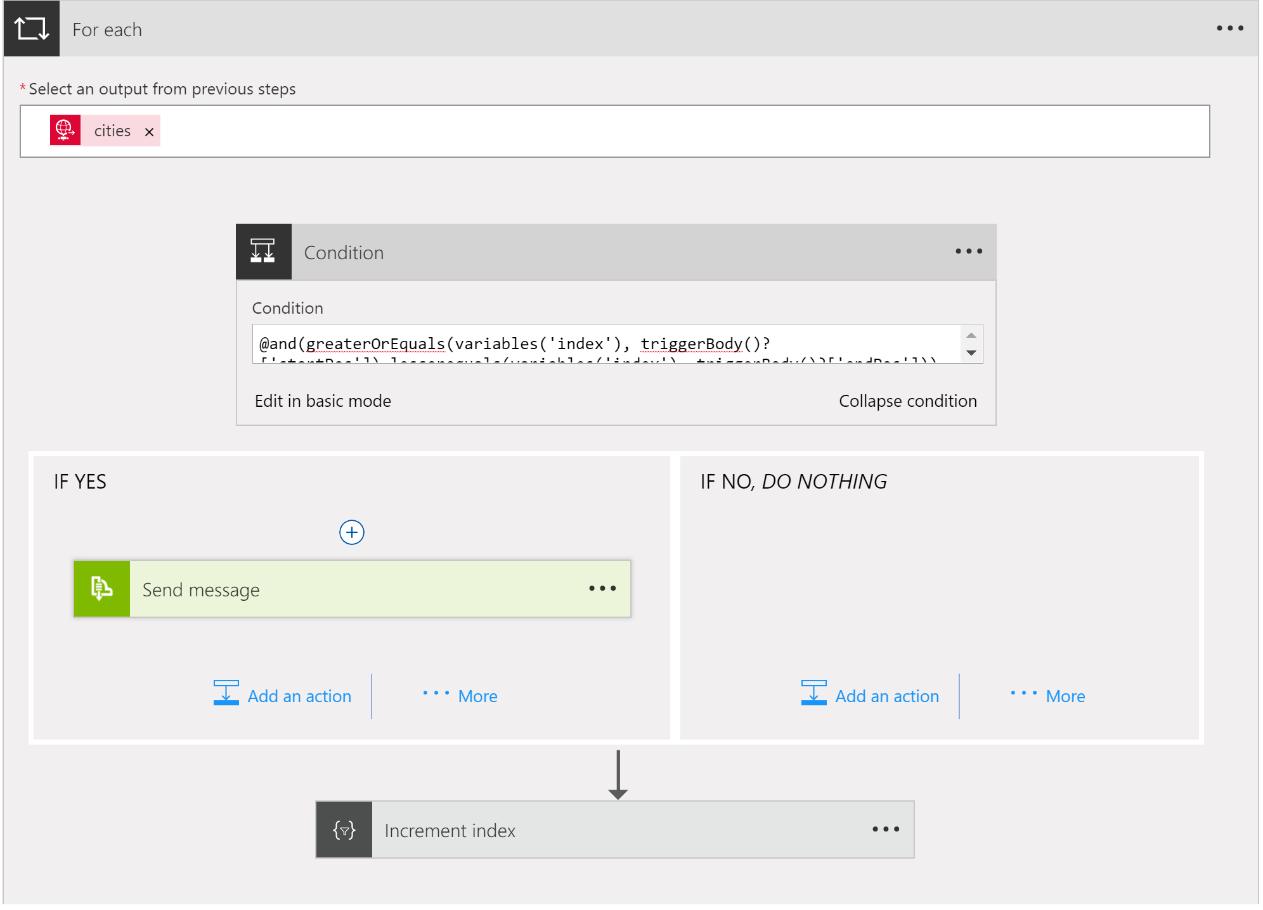
And then we’ll create a foreach loop. Because we don’t want to process all the items in the array, just those that are between the start/end positions, we’ll use a condition.
The condition we use needs to ensure that the current index is greater than or equal to the start position, and less than or equal to the end position. We’ll use the advanced editor and write it manually like this:
@and(greaterOrEquals(variables(‘index’), triggerBody()?[‘startPos’]),lessorequals(variables(‘index’), triggerBody()?[‘endPos’]))
Notice the use of the new variables expression.
If we are between start/end then we’ll send the city object to a service bus queue; if we’re outside the start/end position, then we do nothing. And then we’ll use the Increment variable action to increment the index variable by 1.
The for-each action looks like this:
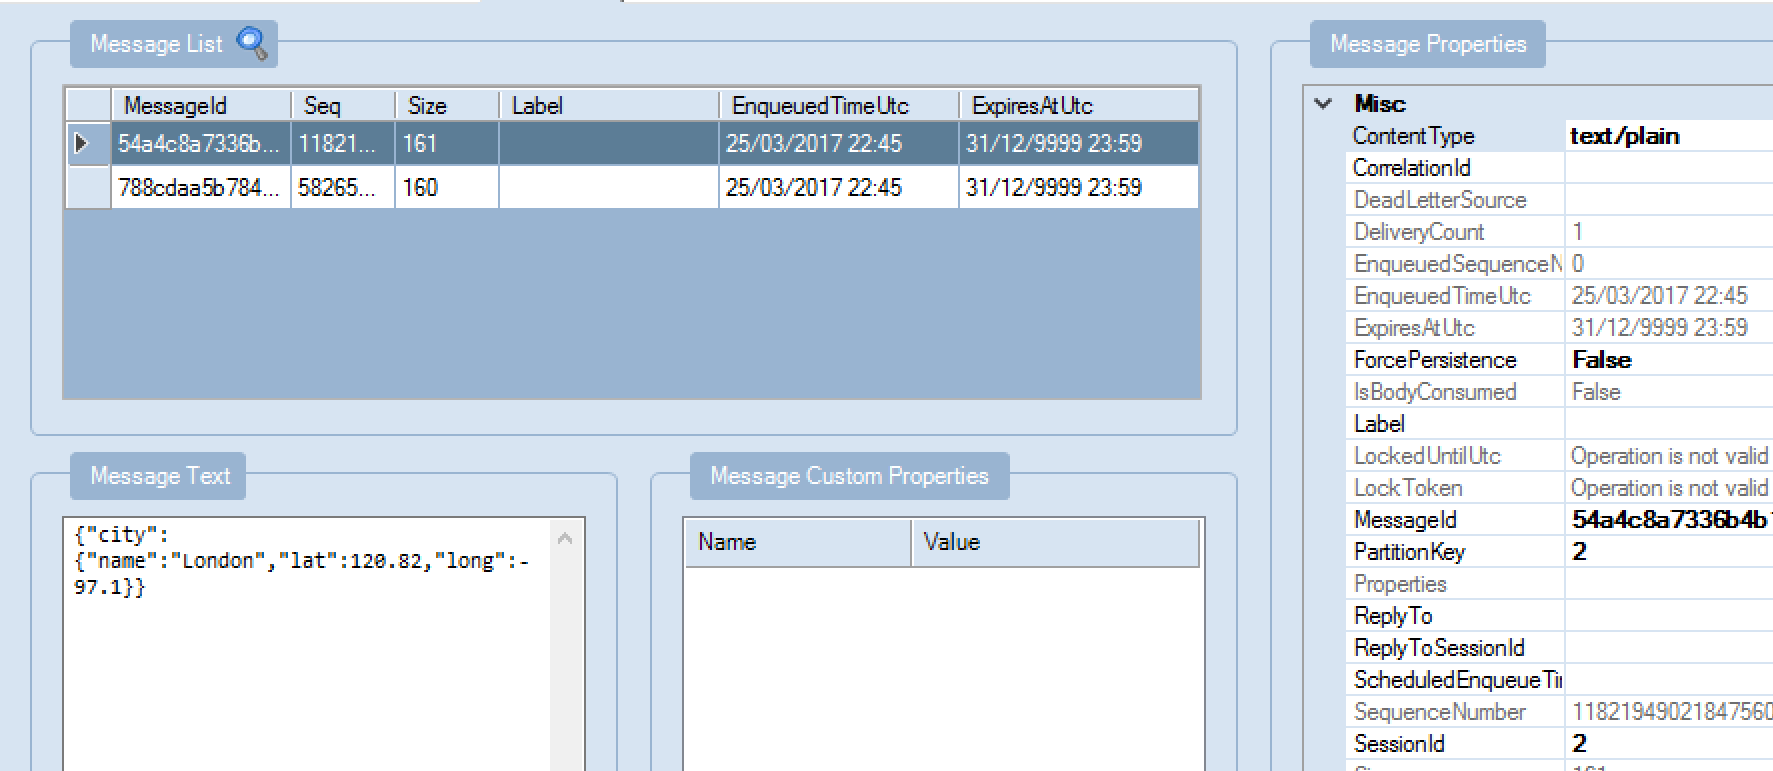
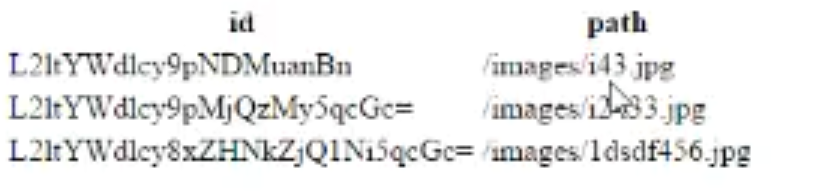
We can test our Logic App by submitting a message to it using Postman, and if things go correctly, we should end up with 3 messages in our Service Bus queue:
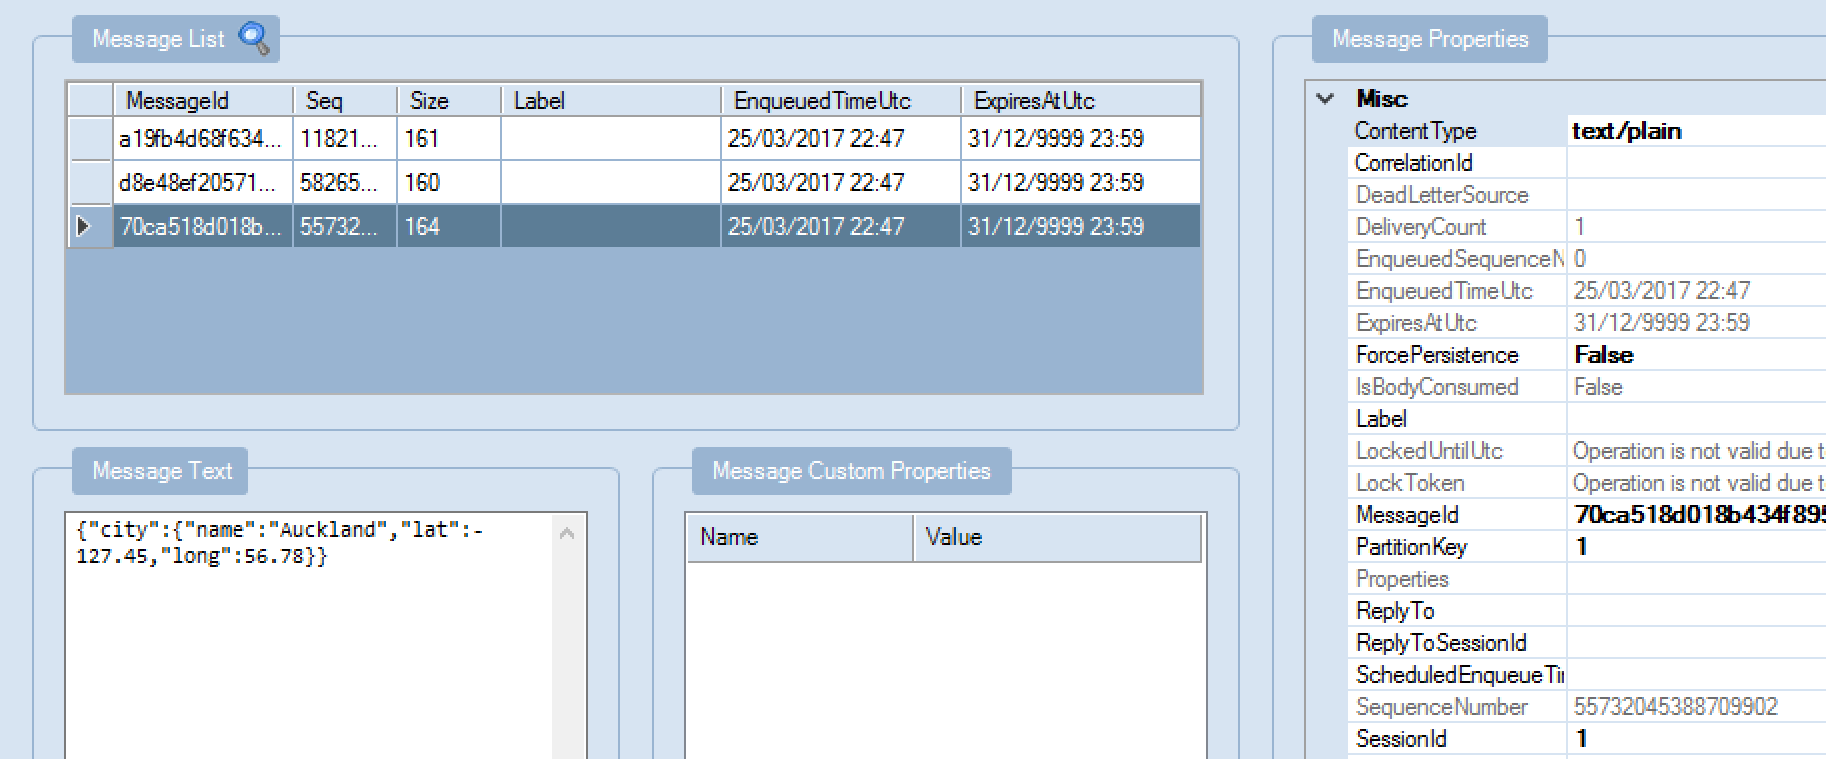
Which is exactly what we get! (Note that I passed in the current Index variable value as the SessionId so I could debug.)
How about decrementing?
We can test that by initializing the index variable to the count of array items; and using “-1” as our increment value:
I tested using this message:
{
“count”: 4,
“startPos”: 2,
“endPos”: 3,
“cities”: [
{
“city”: {
“name”: “New York”,
“lat”: 40.71,
“long”: -74
}
},
{
“city”: {
“name”: “London”,
“lat”: 120.82,
“long”: -97.1
}
},
{
“city”: {
“name”: “Auckland”,
“lat”: -127.45,
“long”: 56.78
}
},
{
“city”: {
“name”: “Tokyo”,
“lat”: -12.98,
“long”: 34.66
}
}
]
}
I expected to get 2 more messages to my Service Bus queue, which is what I saw:
So, there we go, successful first test of using variables.
Why such limited support for variables?
One of my clients asked why we can’t yet set variable values i.e. what use are variables if you can only initialize them. And where’s support for string variables?
As the Logic Apps team mentioned in their last webcast, support for more variable types, and support setting a variable value, are coming.
But I can appreciate this is a tricky thing to do.
For example, let’s say you have a foreach loop, and you want to set a variable value on each iteration. How does that work if your loop is executing in parallel (the default)? Remember that the current variable action defines a variable that is effectively static within loop iterations i.e. all parallel runs that are spawned from a loop will have access to the same variable instance.
I suspect the product group will need to either find a way to scope variables (i.e. making changes to a variable in a particular execution in a loop doesn’t affect any other instances of that variable); or they may implement a version of the C# lock() keyword, so that only one thread can update the global variable at a time.
Note that this doesn’t mean that separate triggered executions of your Logic App share the same variable value: this only applies to parallel iterations in loops.
We’ll have to wait and see.
In any case, I hope this helps with your understanding of how to use variables in a Logic App. I’ll update this article, as more variable functionality is released.
by Daniel probert | Mar 23, 2017 | BizTalk Community Blogs via Syndication
The Logic Apps team have been crazy busy this month. In case you missed the latest webcast (link here) this is what’s new and updated this month – and it’s a big list!!! 17 new features in all! Plus, one new region. And 17 new connectors. Here’s a look at all of that:
- Header Control
For HTTP actions (e.g. HTTP or HTTP+Swagger, although not the Response action) you can now properly set headers in the designer – rather than using a JSON blob, you can enter name/value pairs directly in the designer – in the example below I’ve set the SOAPAction header:
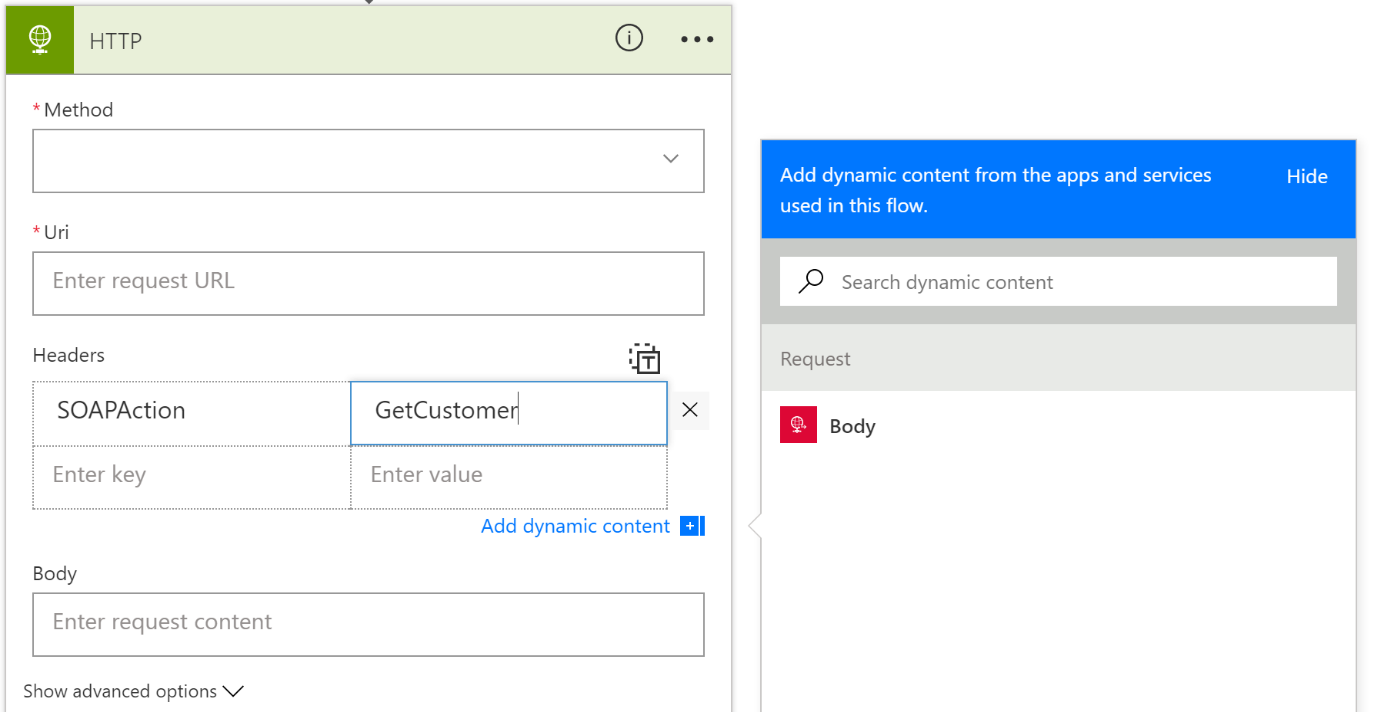
Note that the header value can also be set from a value returned by a previous step.
Also note that there’s a little “T” button at the top right of the Headers section – clicking this lets you switch back to the old JSON-based way of supplying headers.
- Generate schema from sample
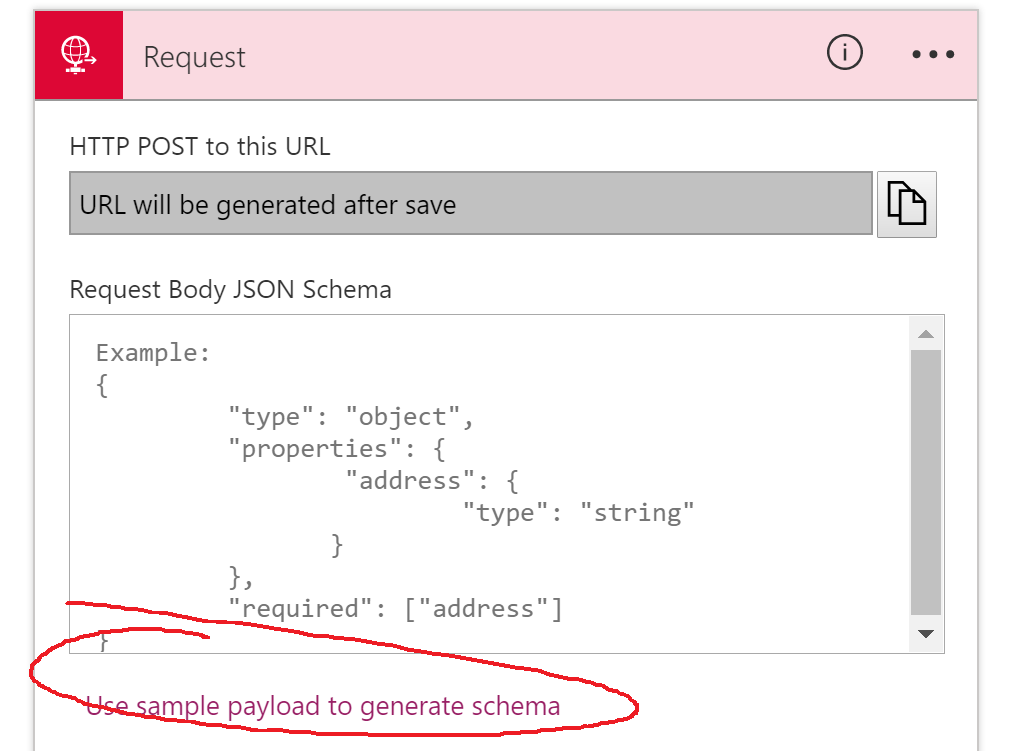
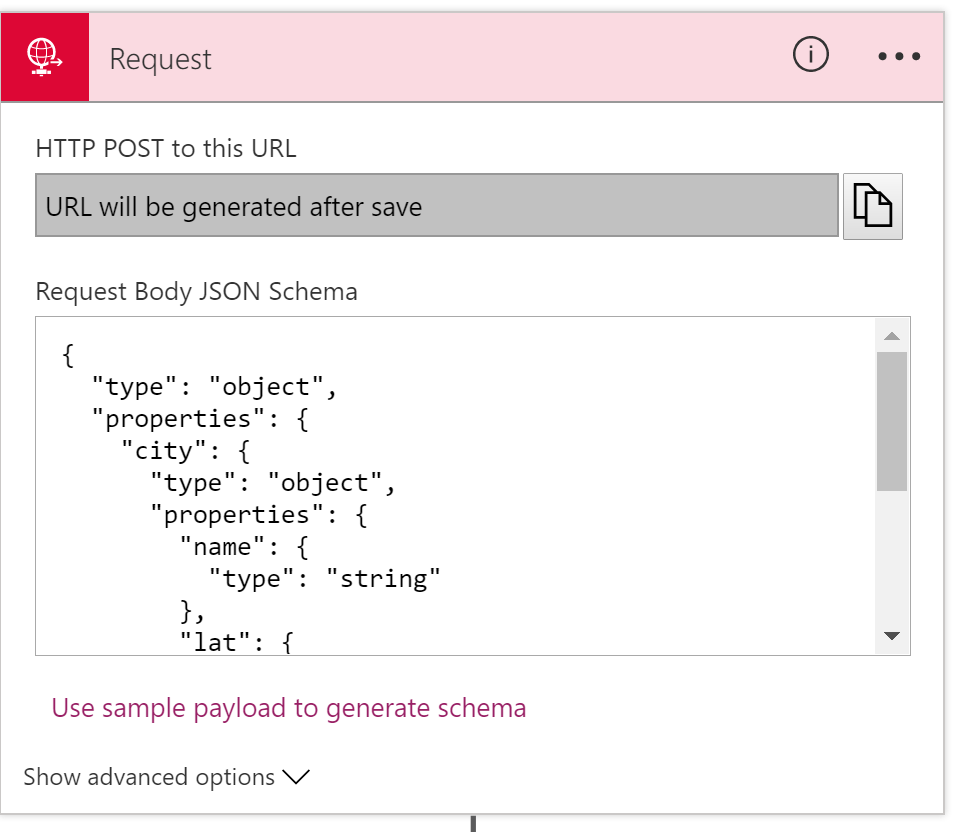
The Request trigger gives you the option to specify a JSON schema for the message being received. If you do this, then you get rich UI support for the fields in your message i.e. they appear in the dynamic content boxes, so you can select the fields you wish to use).
To get the JSON Schema, you usually went to jsonschema.net to generate it. Now, you don’t have to – there’s a new option called “Use sample payload to generate schema” on the Request trigger:
When you click this, you get a window where you can paste in a sample JSON message:
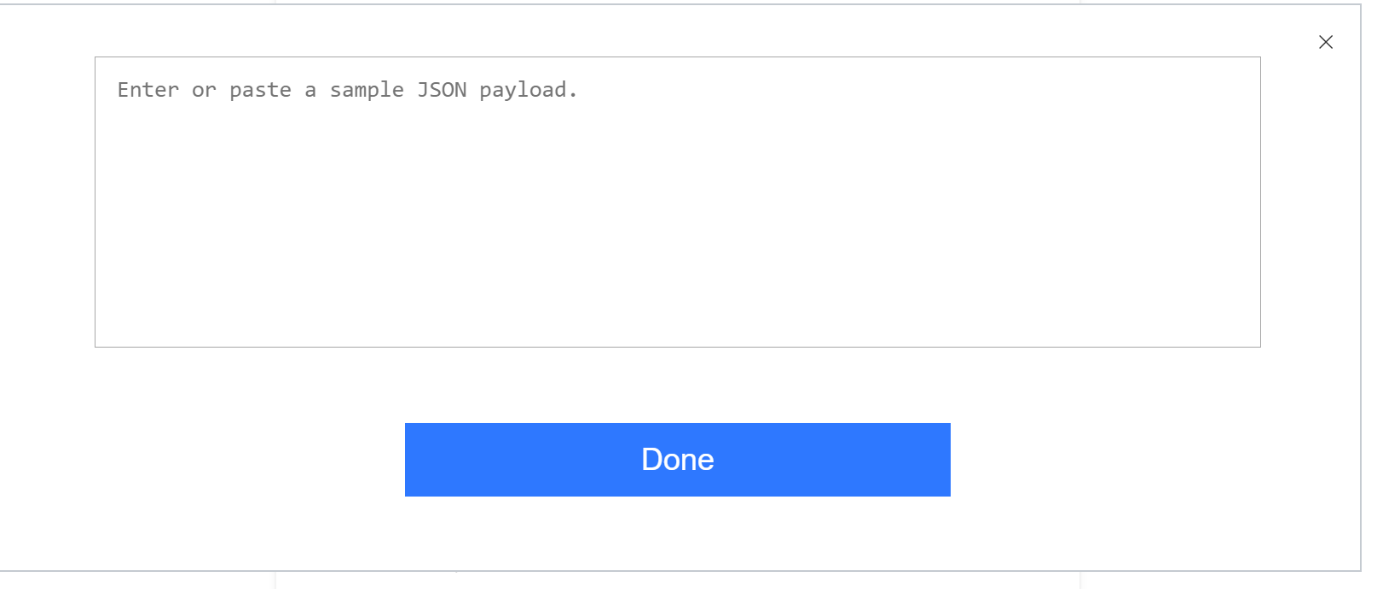
When you do this and click Done, a new JSON schema is generated and added to the Request trigger:
Saves some time, although remember that if you’re working in Visual Studio, you’ll also want to save your JSON schema as a separate file, so it can be reused.
Note: JSONSchema.net gives you more advanced control over your schema, but for simple schemas this is a real time saver.
- Add a new action from anywhere in designer
This is a fairly subtle addition. Previously, if you wanted to add a new action to your logic app, you’d use the Add Action button that appears after the last action in a scope (e.g. last action in your logic app, or last action in a scope, or last action in a decision branch).
What wasn’t clear was how you add a new action in between two existing actions.
The way I always did it was to create a new action at the bottom, and then drag it up (did you know you can drag and drop actions?!) to the appropriate place. But apparently, some people did it from the code-behind.
Now, the team have got you covered:

- Table Action
This is a new action, that converts an array to html or csv. It basically allows you to pull out certain fields from an object array, and group those into an HTML template or a CSV stream.
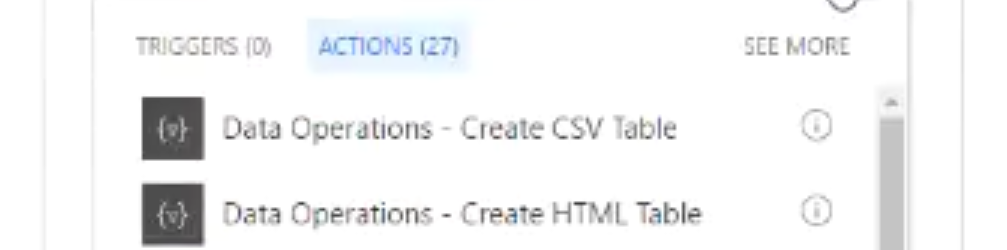
It’s not yet available in the region I tested in, so I can’t see exactly how it works, but from the video you get two new actions, under Data Operations:
The demo showed using the Create HTML Table action:
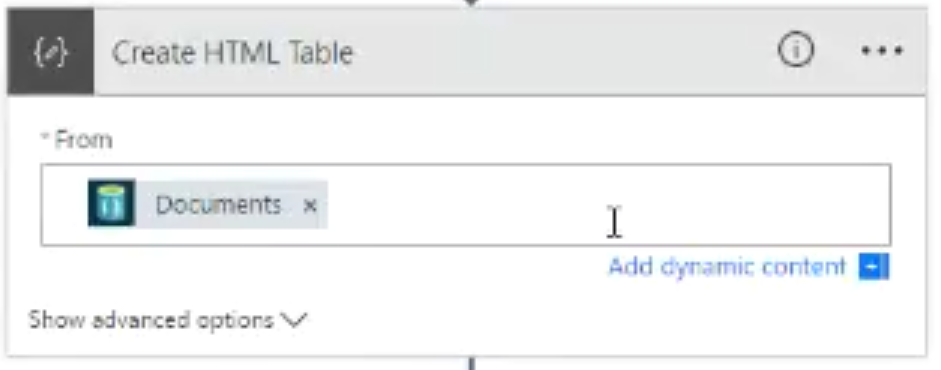
You provide an array of objects, and it will return an HTML representation of those objects.
From the demo, it looks like it gives you an HTML table:
- Connection Resource Picker
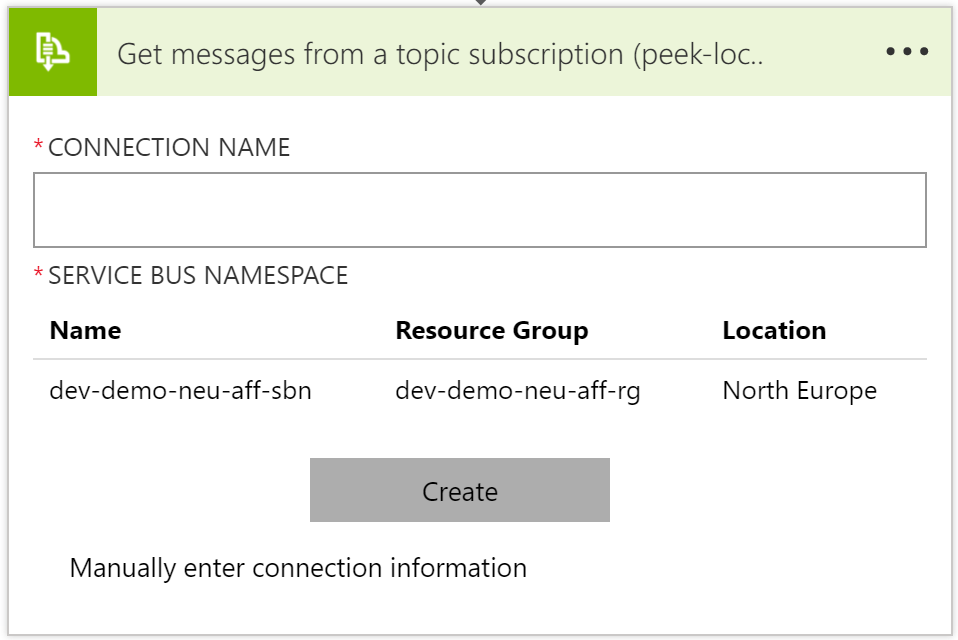
This is a new feature that allows you to select the resource you want to connect to from within the designer. It currently supports ServiceBus, Document, and Blob storage. Previously, when you used the ServiceBus/DocDb/Storage connectors, you would have to enter a connection string for the resource you were accessing.
Now, the designer gives you a list of resources (that you can access via RBAC and which are in the same subscription), and you can pick the resource.
For example, the image below shows the use of the Service Bus GetMessage action, and it gives me a list of the Service Bus Namespaces I have access to – I can then click on one to select it:
Note: If you’re doing this from Visual Studio, you’ll have to first create the resources you want to access *before* you create your Logic App.
- Multipart formdata and formencoded
Some actions will return multipart/formdata or multipart/x-www-form-urlencoded data (or sometimes you just have an HTTP POST to a Logic App from a web form!).
Previously you’d have to go out a function or API App to parse this data. But now you can do this from within the Logic App, using several new expressions that parse the data and make it available easily.
- Terminate with Succeeded
The Terminate action is used to stop your Logic App at a certain point. Previously, the Terminate action could be used to indicate that your Logic App run had failed or been cancelled:
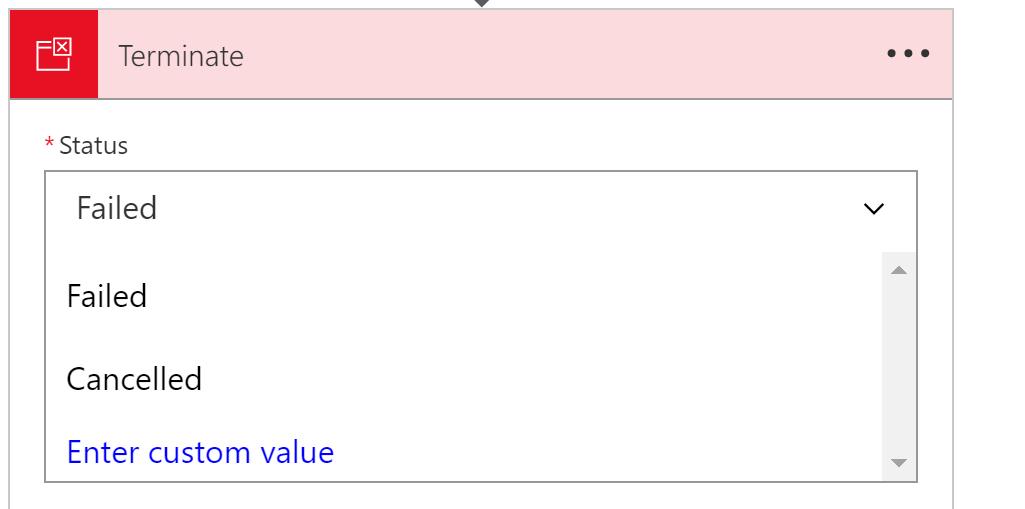
But now there is an option for your Terminate action to show up as a successful run.
- Open Azure Function from designer
This option is exactly as it sounds: in the CallFunction action, there is a new context option to open the function directly:
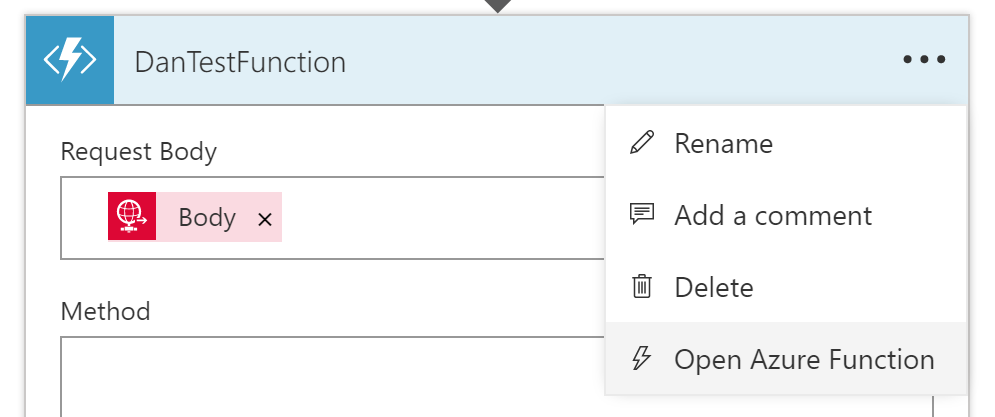
Selecting this opens the Functions App designer in a new blade, meaning you can edit the function, save it, and return to the Logic App.
Note that this option will not work from Visual Studio, where you would edit your function via a Visual Studio project, but if you’re using DevTool-less environment, then this is a great timesaver.
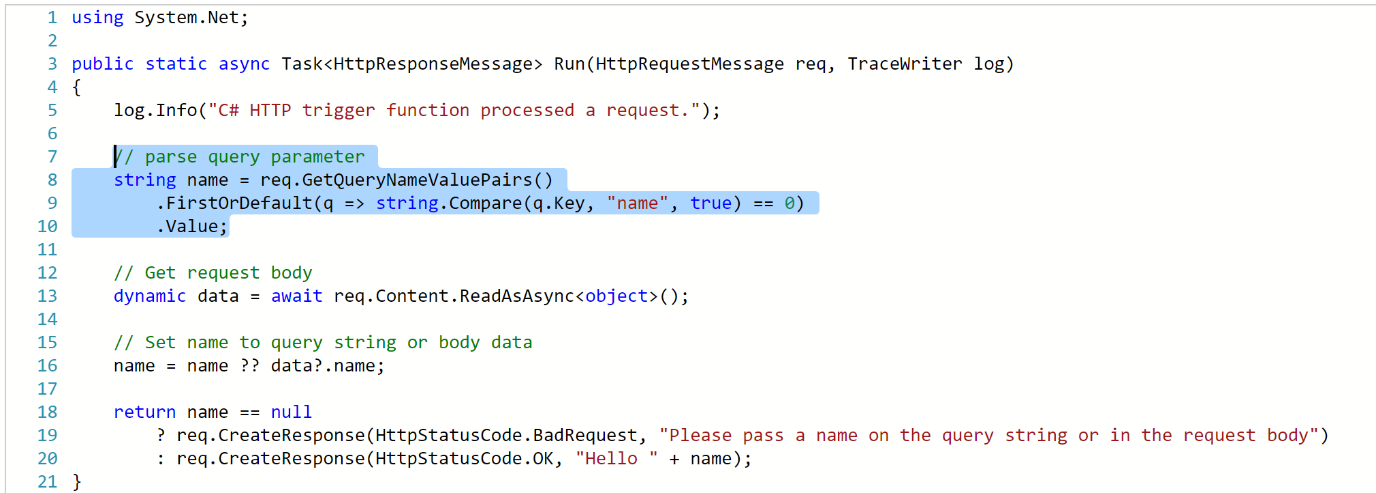
- Azure Functions HTTP Trigger Support
Previously, you could only call a function from a Logic App if it used the Webhook binding (either C# or JavaScript/Node.JS).
But now you can also use Functions that that use the HTTP binding:
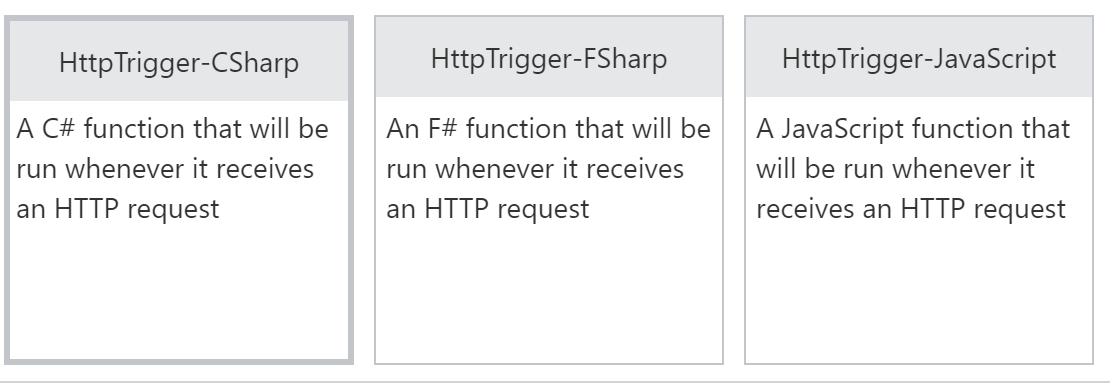
The function template for an HTTP Binding trigger is identical to that of a WebHook trigger; one of the main differences between the two is that you can access query string parameters in an HTTP trigger, as shown in the sample you get when you create an HTTP Binding function:
- Variables
Finally! Rock on!!! I’ve been waiting for this for years, it feels.
For those of you who use Logic Apps regularly, and come from the BizTalk world, you may have noticed that there was no variable support: there was no direct way to store a value in a Logic App, and then change it, or access it later.
There were ways around this (e.g. using metadata in an Integration Account, or storing your variable sin Blob Storage/Azure SQL) but these weren’t ideal.
As of today, we have variable support.
Initial variable support is limited.
What we get is:
- Initialize a variable (e.g. loopCount = 0)
- Increment a variable (e.g. loopCount = loopCount + 1)
- Access a variable (using the @variable expression – @variable(‘loopCount’))
Variables are currently global, but it sounds like scoped variables (plus additional variable support) is coming.
There’s no documentation on how to initialize/increment variables yet, but it’s coming
- Multiple actions in Do-Until
This may seem like a no-brainer if you’re new to Logic Apps, but up until today, a Do-Until loop could only contain a single action. This mean that most developers would call a function or a child Logic App here to get past the limitation.
But now a Do-Until loop is its own scope, so you can add multiple actions into it:
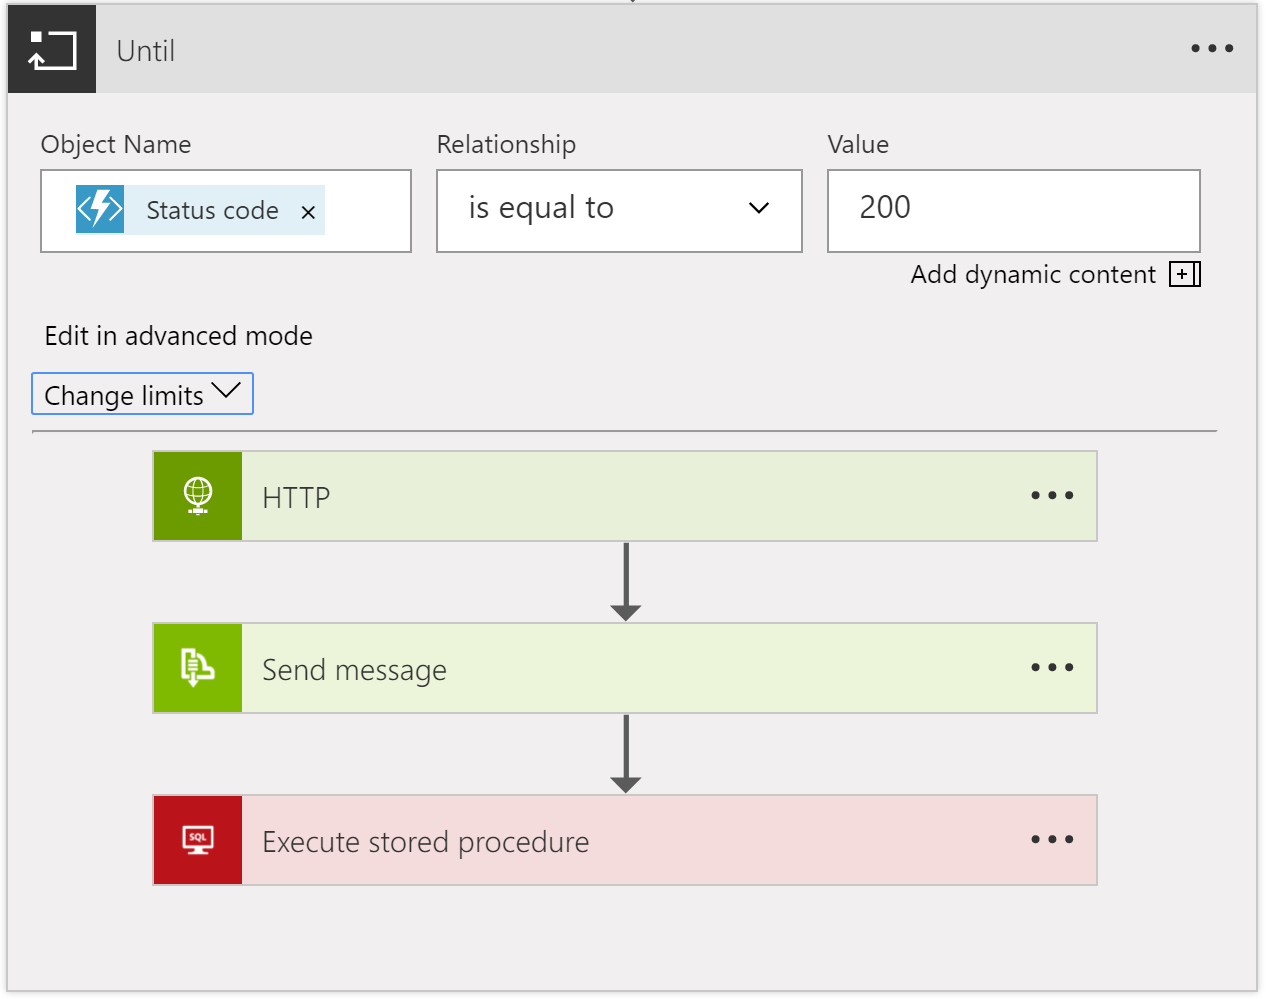
Note: although the Do-Until supports multiple actions, when I tested it (today) there was no “Add Action” option inside the loop, instead I had to create new actions outside the loop, and drag them in.
- Nested Foreach
Again, this is an incremental change, but also super useful. Previously, you couldn’t put a foreach inside another foreach loop. Now you can.
Although this may seem surprising if you’re a sequential programmer, the reason this was hard to do lies with the way that Logic Apps handles loops: by default, the Logic Apps execution engine will parallelise each iteration of a foreach loop (up to 20 executions in parallel).
For example, if you have a loop that will run 10 times, the execution engine will spin up 10 separate instances of the actions in that loop, and they will all execute in parallel, and then serialise back after they’ve all finished.
You can disable this behaviour using the sequential value on the operationOptions property for the foreach action (see the Logic Apps workflow action and triggers guide).
I’m not yet sure what happens with parallelisation of nested foreach loops – do they all execute in parallel? I’d assume so, but there must a limit on the total number of parallel executions across all loops.
- Foreach support 100k items
Previously, you could only support arrays/collections with up to 5000 items using foreach. Now you can use arrays/collections with up to 100,000 items. Bear in mind that your array might be a JSON object array, with each object having a lot of data.
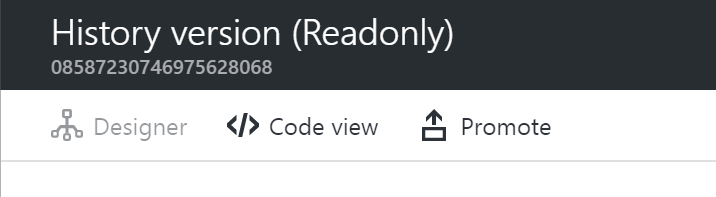
- Version Promotion
This is great news for operations staff. For a while now, Logic Apps has supported the idea of storing the previous versions of a Logic App every time you save it. And you could swap the latest version with the previous version. But now you can see a list of all the versions, and you can promote any of them to live.
This is great news for operations/support staff if they have to quickly roll-back a production Logic App to a previous version.
Having said that, you should be using a fully automated deployment process that automatically tests your logic Apps, in which case you’d never need this feature 😊.
You can access the list of versions from the Versions tab (under Development Tools) when you view the properties for your Logic App:

Clicking on a version gives you the option to promote it:
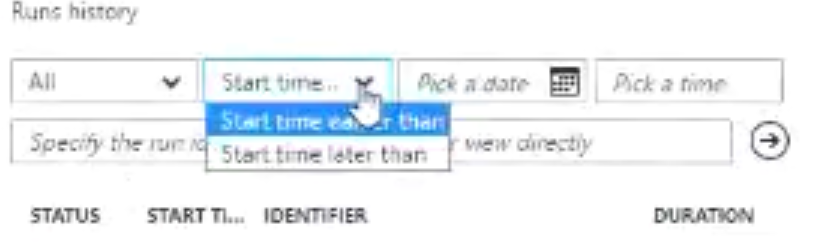
- Date-time filter for runs
This is an extension to work done to help you filter/search the run history for a Logic App.
Up till now, you could only filter on the run status i.e. Failed, Succeeded, Cancelled:

But now, you’ll also be able to filter by Date/Time. However, this change doesn’t yet seem to have made it to the region I was using so I can’t test it. Here’s the (low quality) image from the webcast:
- Open Nested Logic App
This is a monitoring view change: when you’re looking at the run history for a Logic App, if your Logic App called a child Logic App, you couldn’t previously jump into the child Logic App definition – you had to go find the run history for that Logic App separately.
But now, it will jump into the monitoring view for that child Logic App’s run.
Again, this doesn’t seem to be enabled in my region, so I can’t test it.
- Partner Tile in OMS
This is an addition to the B2B support for Operations Management Suite (OMS). Now you can view information grouped by Partner, not just by protocol.
- New Region: Canada
The Canada Azure datacentres are now available for hosting Logic Apps. And then after that comes the UK!
17 new connectors in total:
- Azure Data Lake
- Azure Automation (calling runbooks from Logic Apps)
- Azure Event Hubs (trigger and action)
- Oracle DB (supports On-Premises Data Gateway)
- Zendesk (helpdesk)
- Bitbucket (Git hosting)
- Eventbrite (event organisation)
- Pipedrive (sales CRM)
- Infusionsoft (small business CRM)
- Basecamp2 (Project Management/Team Communication software)
- Intercom (messaging system for sales/marketing etc.)
- FreshBooks (small business accounting software)
- LeanKit (support software for KanBan)
- WebMerge (pdf/word/excel file generation online)
- Pivotal Tracker (agile project management software)
- Toodledoo (to-do lists and notes)
- Muhimbi PDF (PDF converter)
- Azure Blob trigger: can start a Logic App when a new blob entry is created in a container.
- FTP metadata-only trigger: can trigger when a file arrives, but instead of getting the file, you just get the metadata, and you can do claim checks, or decide if you want to get the file.
- SQL Stored Procedures on-premises: can now call stored procedures via the On-Premises Data Gateway.
They’re also working on some cool new stuff:
- Optical Character Recognition Connector
This is part of the Computer Vision API, and will run OCR over an image you provide, and then return the text for that image.
- Additional Variables support
Will give the option to update the value of the variable once the Logic App has started (now, you can only initialize and then increment a variable).
You’ll also be able decrement a variable value, and also append your variable to an array.
- Parallel Designer Support
This is something you can do today (e.g. using the splitOn expression), but you can only do it from code-view. Support for executing Logic Apps in parallel will be surfaced up into the UI.
- Function Parameters
Functions will have SWAGGER support, which means that the Logic Apps designer will be able to display function parameters in the dynamic code viewers, and you’ll be able to use those function parameters in other actions.
- Select
This will let you create new arrays from existing arrays by selecting items in the array that met certain conditions.
- Join
This lets you create a string from an array, by supplying a separator token – each item in the array is added to the string, separated by the separator token.
- Retry Monitoring
At the moment, the Logic Apps execution engine handles retries for you, but the information isn’t surfaced up to the monitoring view. This information will be surfaced up, so you can see when retries occur plus the results, time they took, etc.
- Expression Tracing
This is super cool: if you have complex nested expressions, and you’re debugging a run and want to see what the value of each of the expressions was, then you’re stuck – you can only currently see the final value. But this new feature will show you the value of each expression evaluation.
- Management Portal Updates
Instead of having to go to aka.ms/logicappsupdate, you’ll be able to get to the list of updates directly from the Management Portal.
- Export Logic App to Visual Studio
A long-awaited feature, you’ll be able to select a deployed Logic App (from Visual Studio) and import that Logic App into a Logic Apps project in Visual Studio. This will appear in the next version of the Logic Apps Tools for Visual Studio. I’m not sure if you’re exporting from Azure, or importing into Visual Studio… 😊.
- New Connectors in-progress
New connectors are on their way, including:
- Service Bus Sessions (will enable convoy patterns, yay!!)
- Azure Cognitive Vision (OCR)
- SQL Trigger (trigger when new rows are created)
- Oracle EBS (E-Business Suite)
- ProsperWorks (CRM for Google products)
- Benchmark Email (Email marketing services)
- Inoreader (content and news reader)
Whew! And that’s it.
Don’t forget the Global Integration Bootcamp, coming to a location near you… https://www.globalintegrationbootcamp.com/
by Daniel probert | Mar 8, 2017 | BizTalk Community Blogs via Syndication
Azure Enterprise Integration Series
Part 3: Visual Studio and Project Types
1. Visual Studio Development
As an enterprise integration developer, Azure gives you some new choices. Foremost amongst those is the ability to develop code *outside of Visual Studio*. Whilst that is the norm for most open-source and non-Microsoft technologies (e.g. Python, Ruby, anything developed on a non-Windows PC), for most Microsoft integration developers, developing outside of Visual Studio may take you outside of your comfort zone.
In fact, when Logic Apps first debuted, much was made of the fact that you could develop in your browser – a revolutionary idea (to Microsoft developers) and one that Microsoft have put a lot of time and effort into.
In fact, the early versions of Visual Studio Online were focused around you being able to write. Test, and deploy C# code from your browser, the legacy of which still carries on with Azure Functions today.
But developing in a browser introduces its own concerns: how you do manage your code, how do you source control it, what about promoting it to different environments, etc.
Some organisations love the idea of browser development: these are organisations that have jumped whole-heartedly on the Agile bandwagon, use Git and Scrum, release regularly, and much prefer a lighter-weight development process.
But for most Enterprises, Visual Studio is where it’s at: it complements our existing development processes; reduces training on new development techniques; and is familiar to most of the developers we employ.
2. Project Types
Although Visual Studio contains templates for many different types of projects, we’re only interested in a subset of them for Azure integration development:
|
Visual Studio Project Type
|
Supported Azure Resources
|
|
Azure Resource Group
|
API Connection
App Service
Azure SQL Server1
Integration Account2
Logic Apps3
Service Bus
Storage Account
etc.
|
|
Azure Functions
|
Functions
|
|
ASP.NET Web Application
|
Web App4
Mobile App4
API App4
|
|
Integration
|
Integration Account contents (schemas etc.) 3
|
|
Web Job
|
Web Job
|
|
SQL Server Database
|
Database objects (tables etc.) 2
|
There are a few discrepancies with the project types though:
1 An Azure SQL Server is defined in an ARM template, although the SQL entities (databases, tables, stored procedures, etc.) need to be defined in a separate SQL Server Database project.
2 At the current time, the Integration project type doesn’t support the creation of the actual Integration Account in Azure, so you need a separate Azure Resource Group project that contains the ARM Template for the Integration Account.
3 Although Logic Apps are created in an Azure Resource Group project, they have their own designer. They are the only resource in an Azure Resource Group project that has a dedicated designer.
4 The ASP.Net Web Application project type contains the code for web applications, but doesn’t define the App Service or App Service Plan (ASP): you need a separate ARM Template for this. Although you can create the App Service/ASP at the time you publish from Visual Studio, this doesn’t allow you put the definition for the App Service/ASP in source control.
Most of the project types we use for integration development can be found in the cloud category:
The rest of this section covers the individual project types.
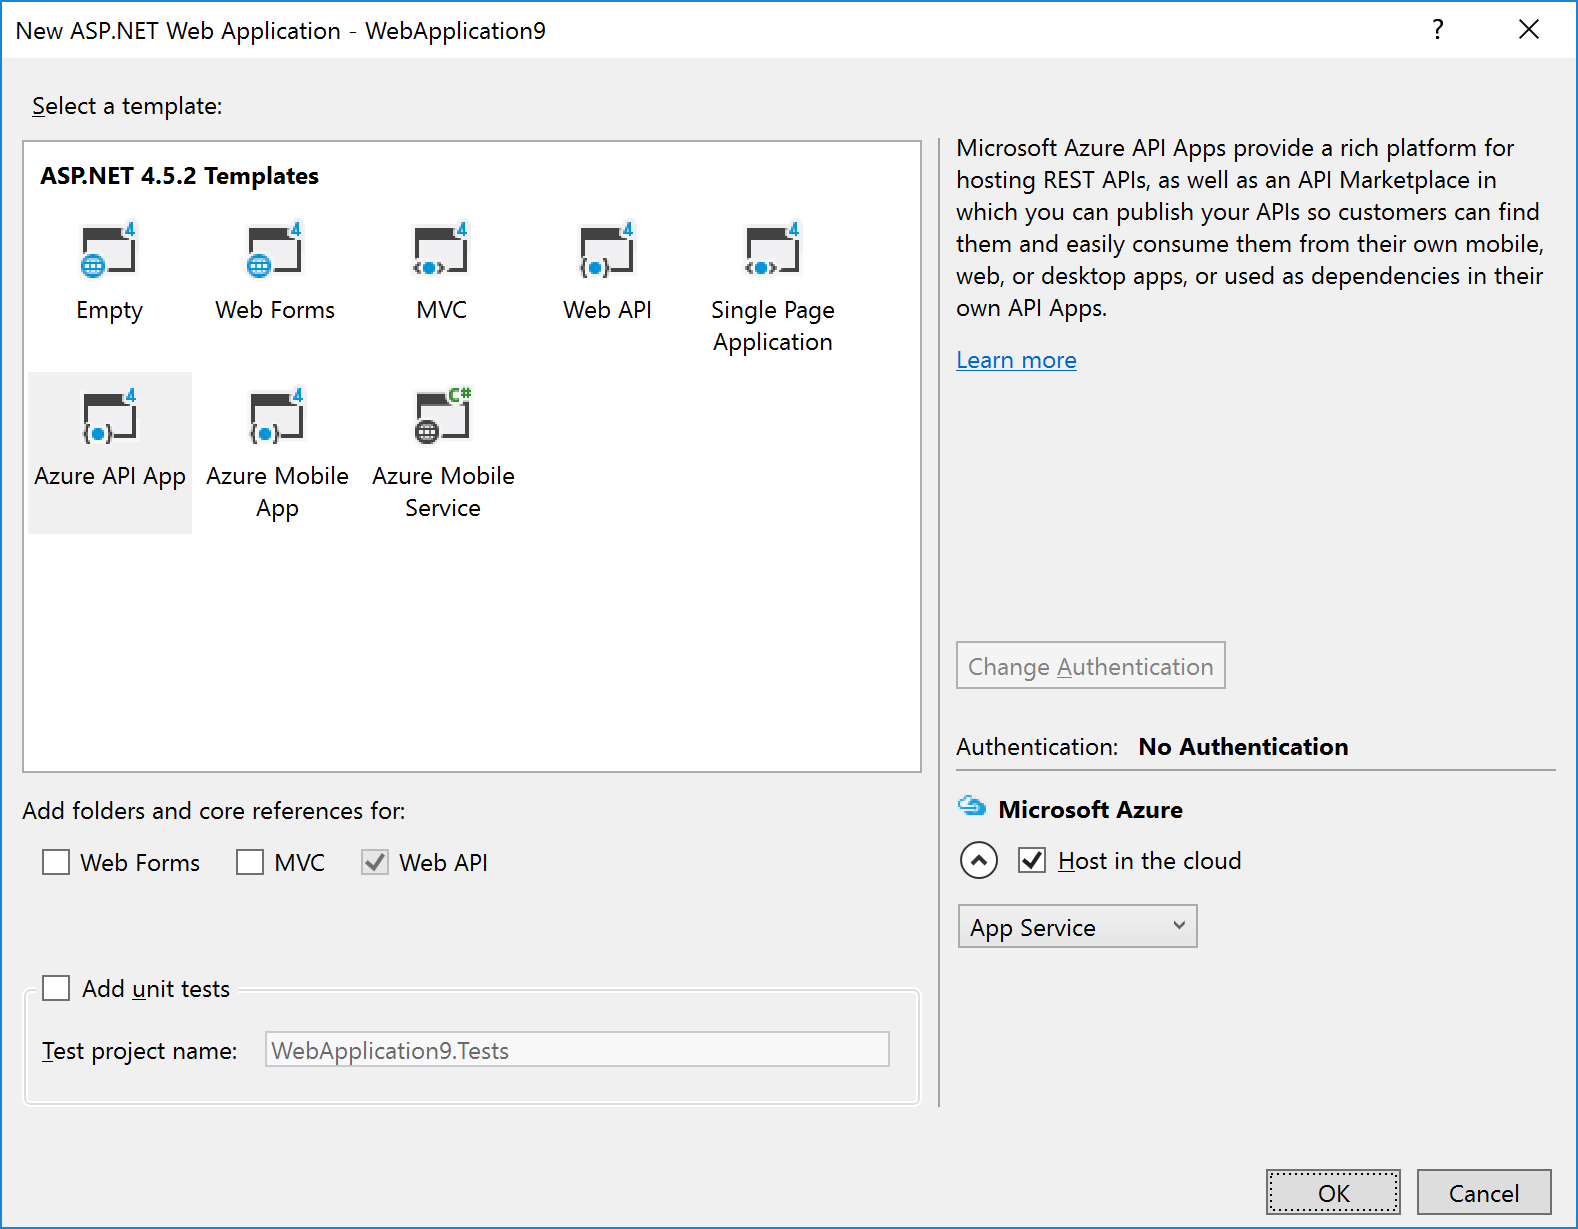
2.1 ASP.NET Web Application Project
The ASP.NET Web Application project template covers most Azure App Service technologies (Web Apps, API Apps, Mobile Apps).
After selecting this option (and entering the project/solution name details), you are given a dialog where you can select the type of ASP.NET technology, and whether you want to host in in Azure:
|
Note: If you’re using the Visual Studio testing framework, we suggest you select the option to Add unit tests in the above dialog – this will create a separate Unit Tests project with an example of a unit test.
|
The example in the image above shows that we wish to create an Azure API App and to host it in Azure.
Selecting the Host in the cloud option will cause a secondary dialog to appear, which is used to create an App Service and create/select an App Service Plan (this is the same dialog used when you choose the Publish option):
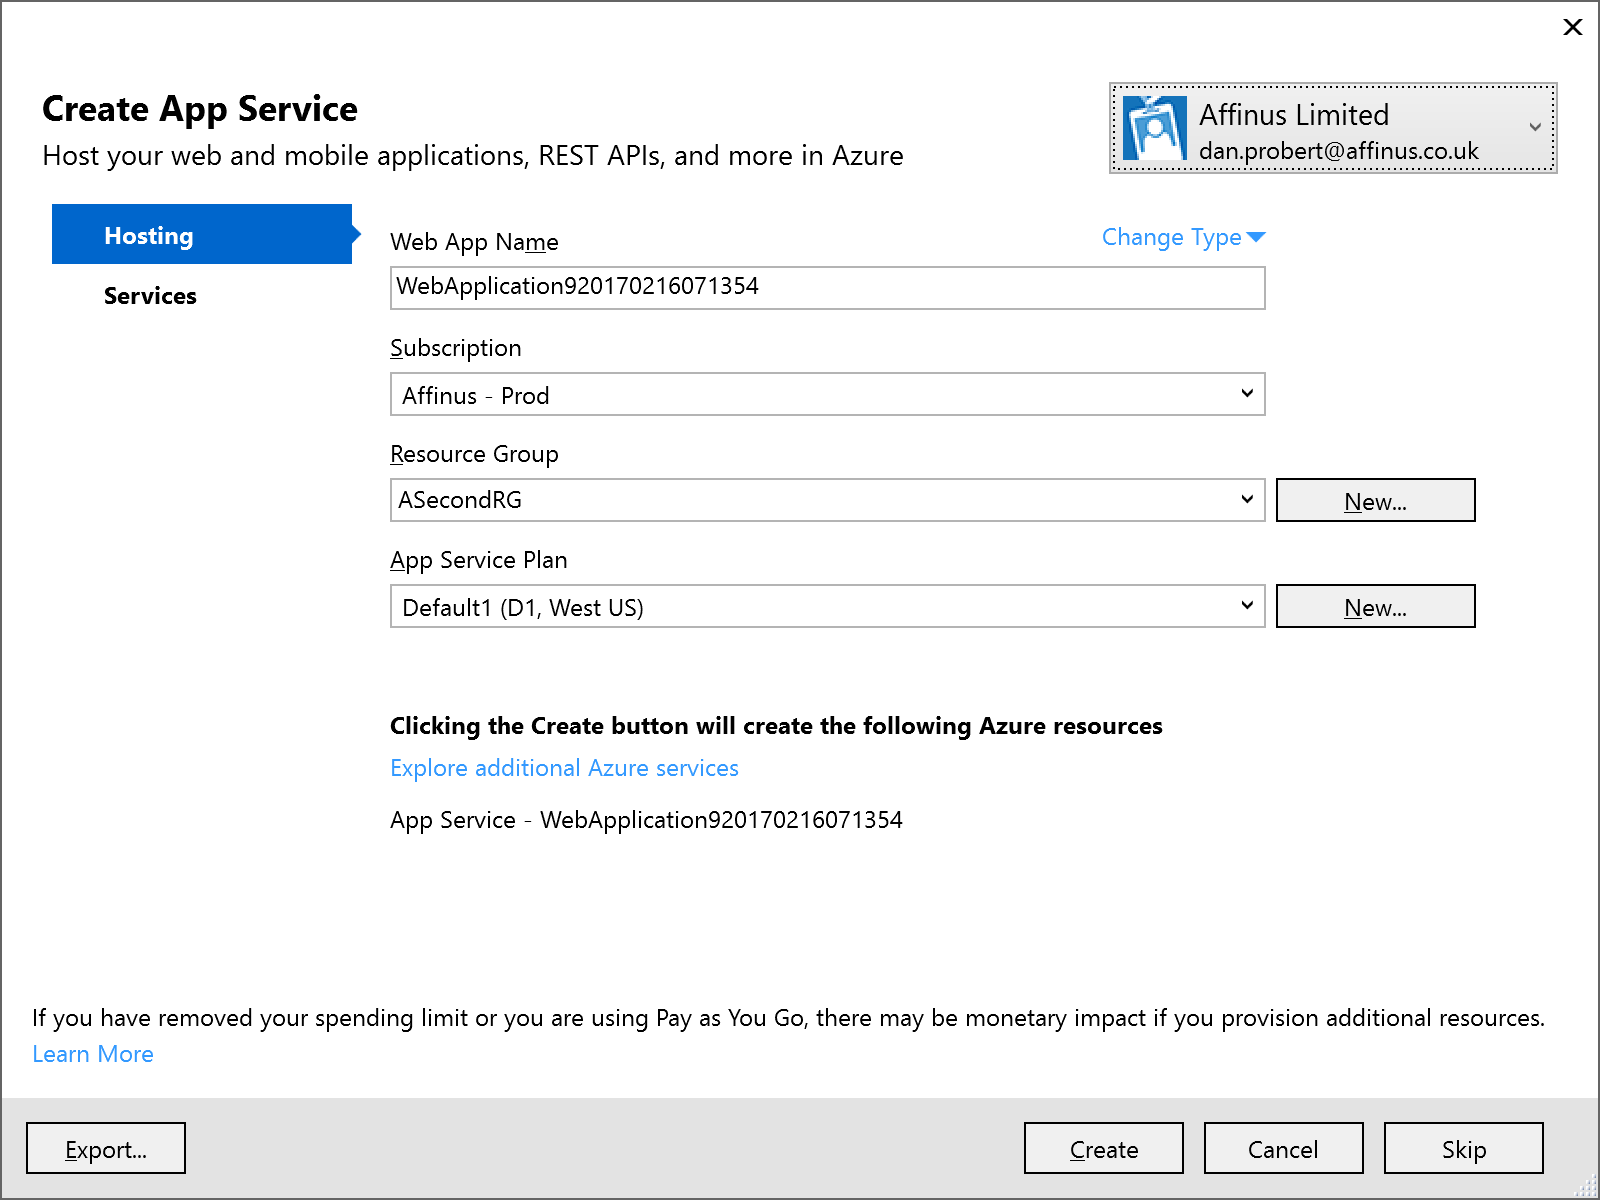
Remember: An App Service is equivalent to an IIS Application, and the App Service Plan defines the type of Server Farm your application is hosted on (i.e. how many servers, types of servers, how much memory you have, etc.).
We recommend that you *don’t* select the option to host in Azure at project creation: the rationale behind this is that you still must supply the same information in an ARM template (i.e. the App Service and App Service Plan) to deploy the App Service (and your ASP.NET application) from VSTS.
|
Note: Although Visual Studio can create an App Service/App Service Plan for this app (via the Publish option), we recommend creating a separate Azure Resource Group project in Visual Studio that contains an App Service and App Service Plan for this ASP.NET Web Application project. This Resource Group Project can then be deployed from both Visual Studio and VSTS.
|
|
Note: One thing that the above dialog is useful for, is creating an ARM Template that specifies your App Service and App Service Plan: if you fill in the dialogue, and then click the Export… button, it will save an ARM Template file that you can use in an Azure Resource Group project, and you can then cancel out of the dialog.
|
2.2 API App Project
API Apps are a type of ASP.NET Web Application project, and are created by selecting that option under Cloud projects. The API App template is then selected:
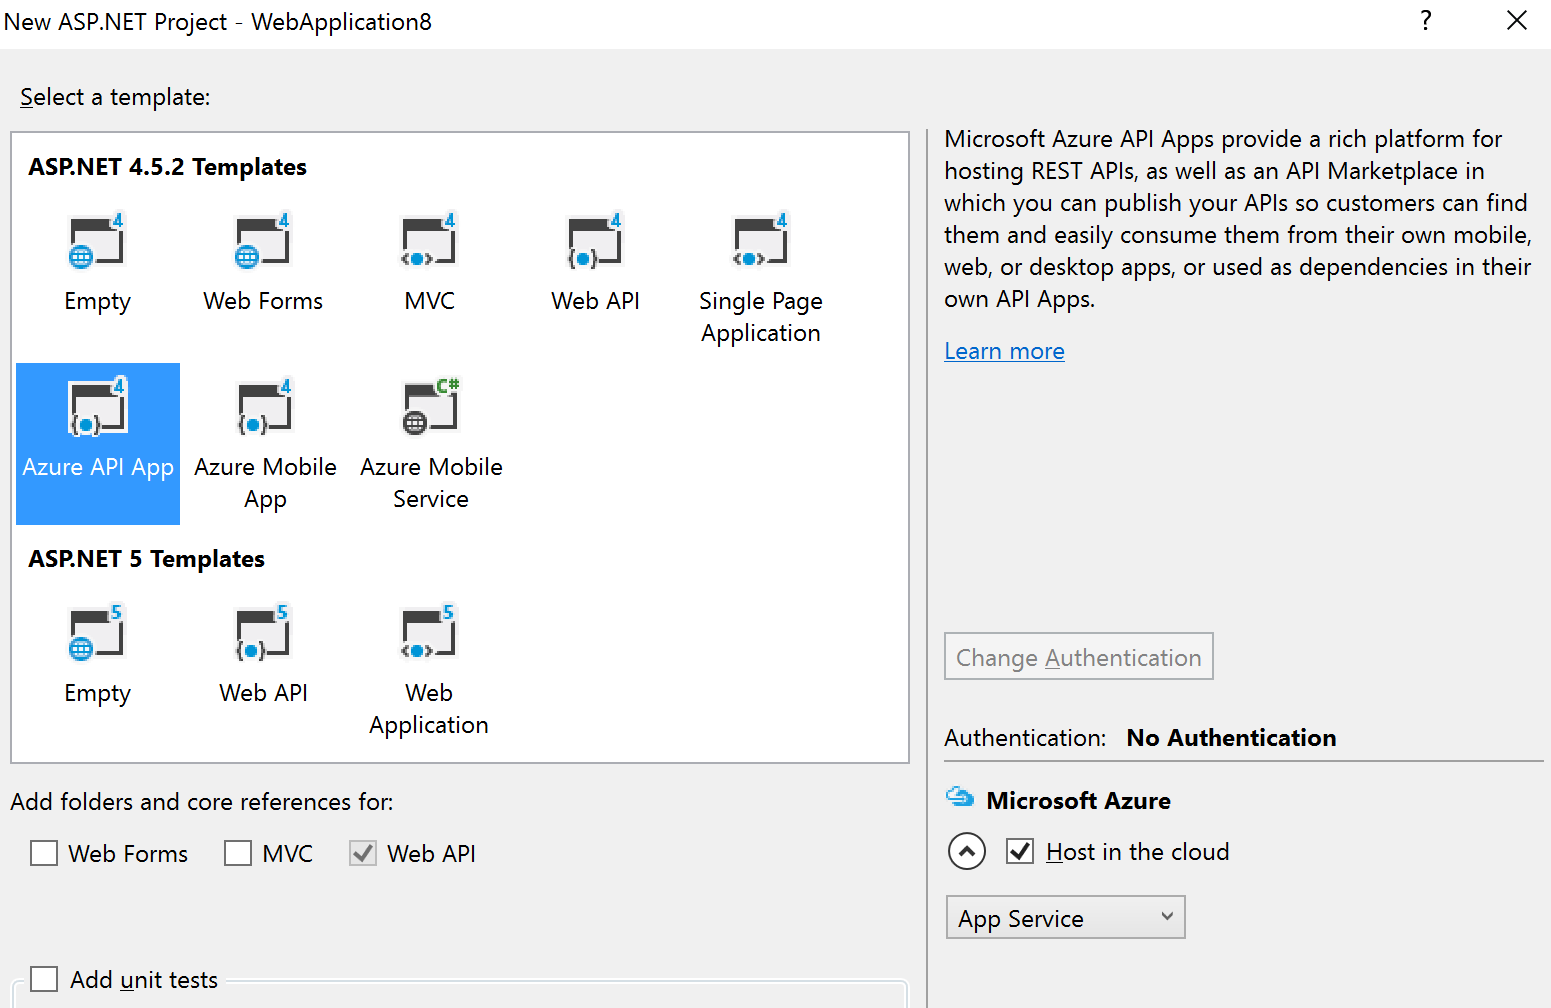
The API App template in Visual Studio creates a stubbed MVC REST app, with a Swagger interface:
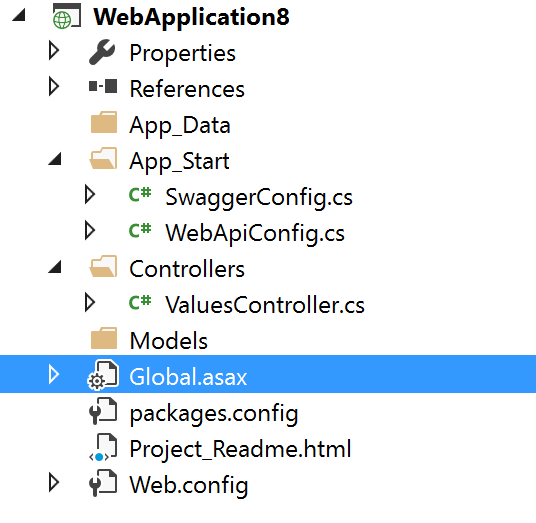
The developer then modifies this stub to implement the required functionality: the actual REST methods are contained in the ValuesController.cs file.
|
Note: Although Visual Studio can create an App Service/App Service Plan for this app (via the Publish option), we recommend creating a separate Azure Resource Group project in Visual Studio that contains an App Service and App Service Plan for this ASP.NET Web Application project. This Resource Group Project can then be deployed from both Visual Studio and VSTS.
|
2.3 Azure Functions Project
An Azure Functions project is a specialization of an ASP.NET Web Application project: Functions are hosted in a Function App, which is a specialized version of an App Service (technically, Functions are a type of Web Job, which is a type of App Service). Function Apps also use an App Service Plan: A Function App can use a standard App Service Plan (which limits the number of executions, but is charged at a regular monthly amount); or it can use a dynamic App Service Plan (known as consumption billing), where you pay per execution. The Azure Functions project in Visual Studio represents the Function App that needs to exist in Azure.
|
Note: Functions can also be authored in the portal, but this is not recommended as any changes are not automatically reflected in Source Control in VSTS.
|
The Azure Functions project template is (as of this writing) in preview – therefore its capabilities (and its location) may change in future.
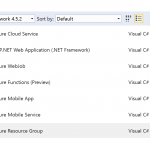
To create an Azure Functions project, select the template from the New Project screen:
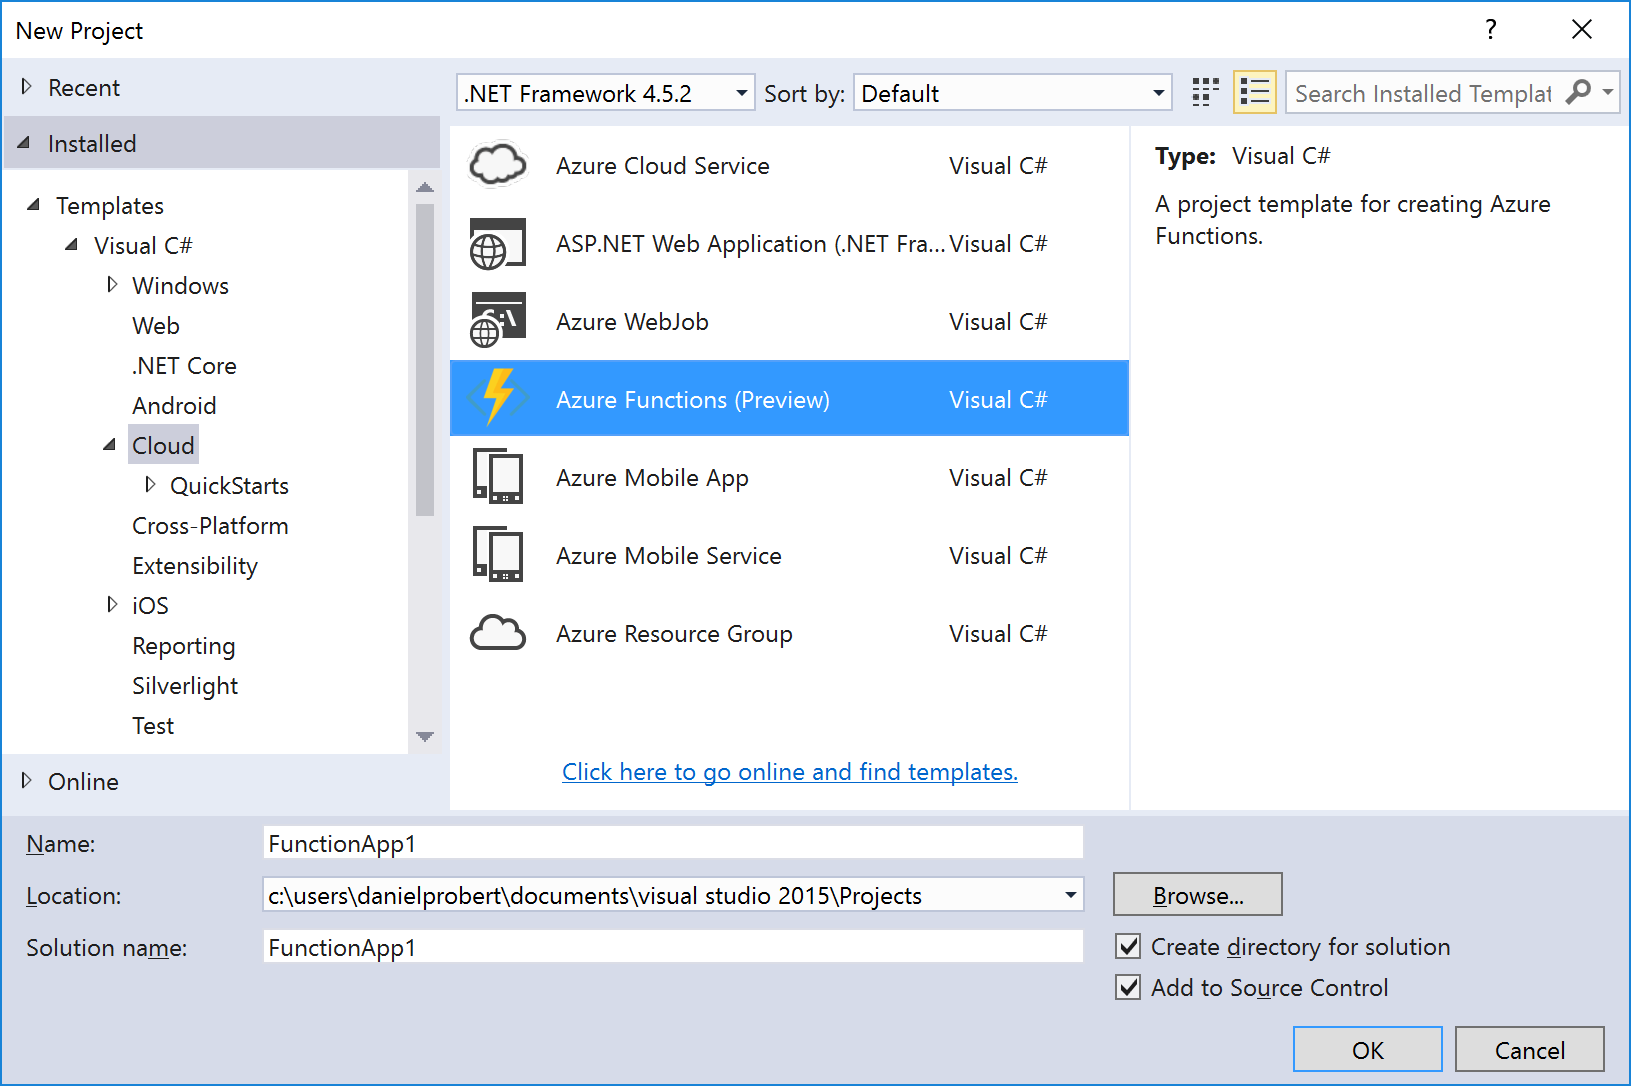
This will create a stub Function App project that looks like this:
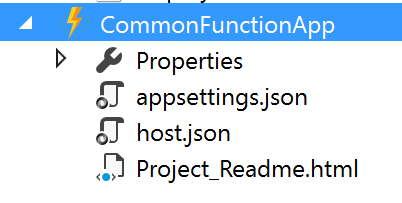
An Azure Functions project can contain one or more functions – each function will be in a separate folder in the project. When the project is first created, it will contain no functions – functions can be added by the “Add” option in the project:
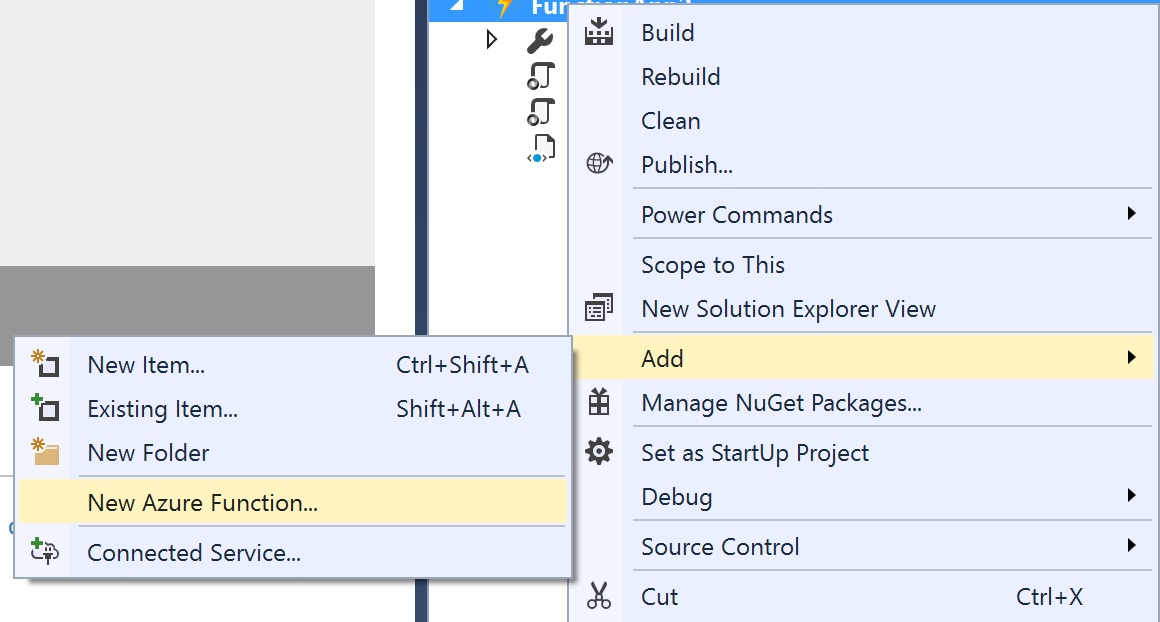
The New Azure Function dialog allows you to select the type of function to create:
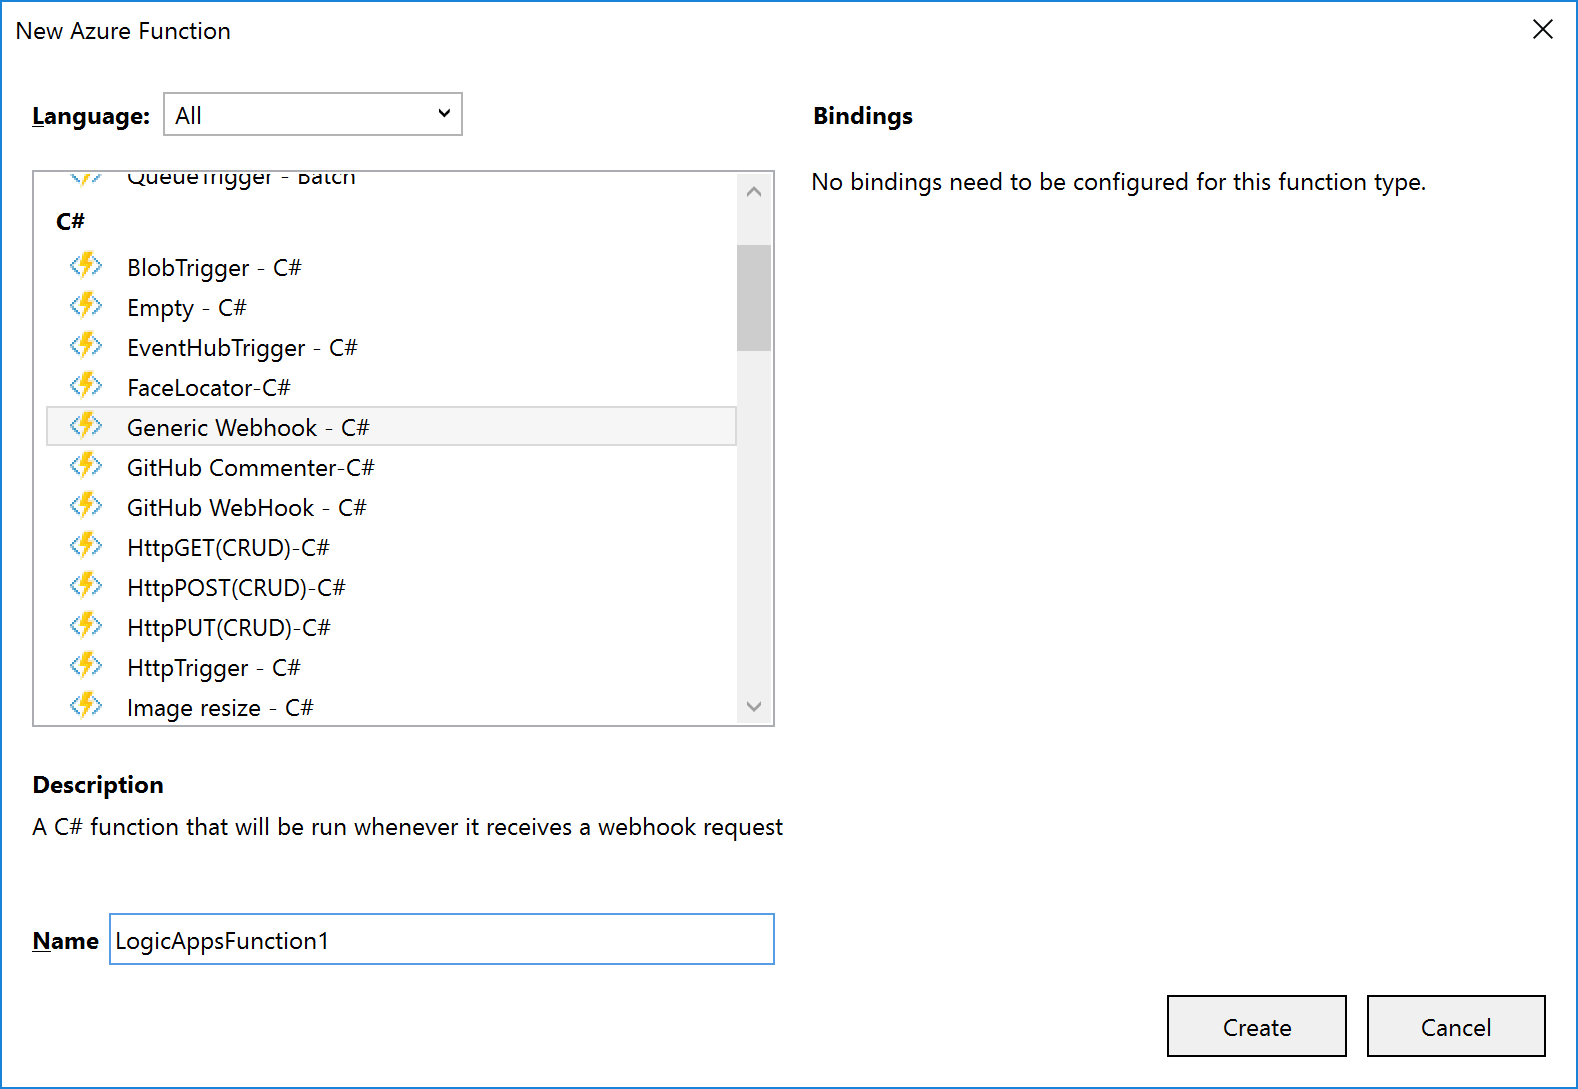
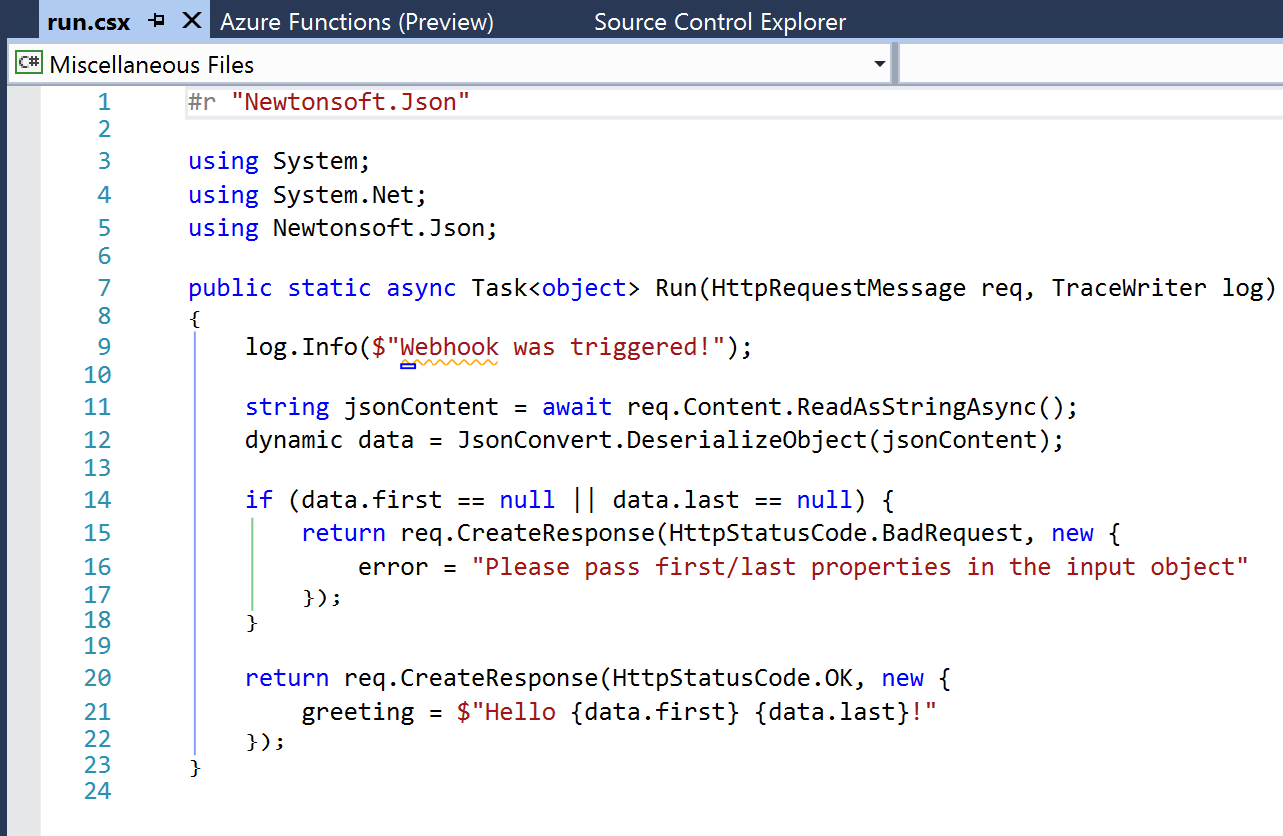
A function will consist of several files, depending on the template chosen. The example shown (and discussed) below is for a C# Generic Webhook function:
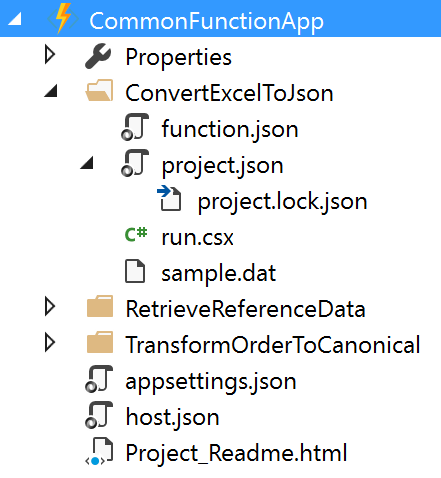
The function and function app files shown are:
|
File Name
|
Level
|
Description
|
|
function.json
|
Function
|
Contain settings for the function e.g. type of trigger, type of output, whether it starts disabled etc. For Logic App functions, you shouldn’t need to edit this, if a Generic WebHook template was used.
|
|
project.json
|
Function
|
Contains a list of dependencies this function needs from NuGet (or locally).
|
|
run.csx
|
Function
|
Contains the source code for the function.
|
|
sample.dat
|
Function
|
Contains sample data that works with the sample code in run.csx.
|
|
appsettings.json
|
Function App
|
Contains settings that affect the Function App App Service.
|
|
host.json
|
Function App
|
Contains information about the host used with the App Service.
|
|
Project_Readme.html
|
Function App
|
Read Me file, is displayed by Visual Studio when an Azure Functions project is first created.
|
|
Note: support is being added to functions for ability to use code from a pre-compiled assembly; and additionally, to have a parent function that can look at a request and forward it to a child function (function proxy). Neither of these features are available in Visual Studio now, but moving forward it will make sense to have a separate C# Library project that contains classes with the function code in them: this will allow for easier unit testing and editing.
|
|
Note: Although an Azure Functions project has a Publish option, the Function App it deploys is broken, and not visible from Logic Apps. For this reason, we recommend creating a separate Azure Resource Group project in Visual Studio that contains an App Service and App Service Plan for the Function App.
|
The default run.csx file for a C# Generic Webhook project looks like this:
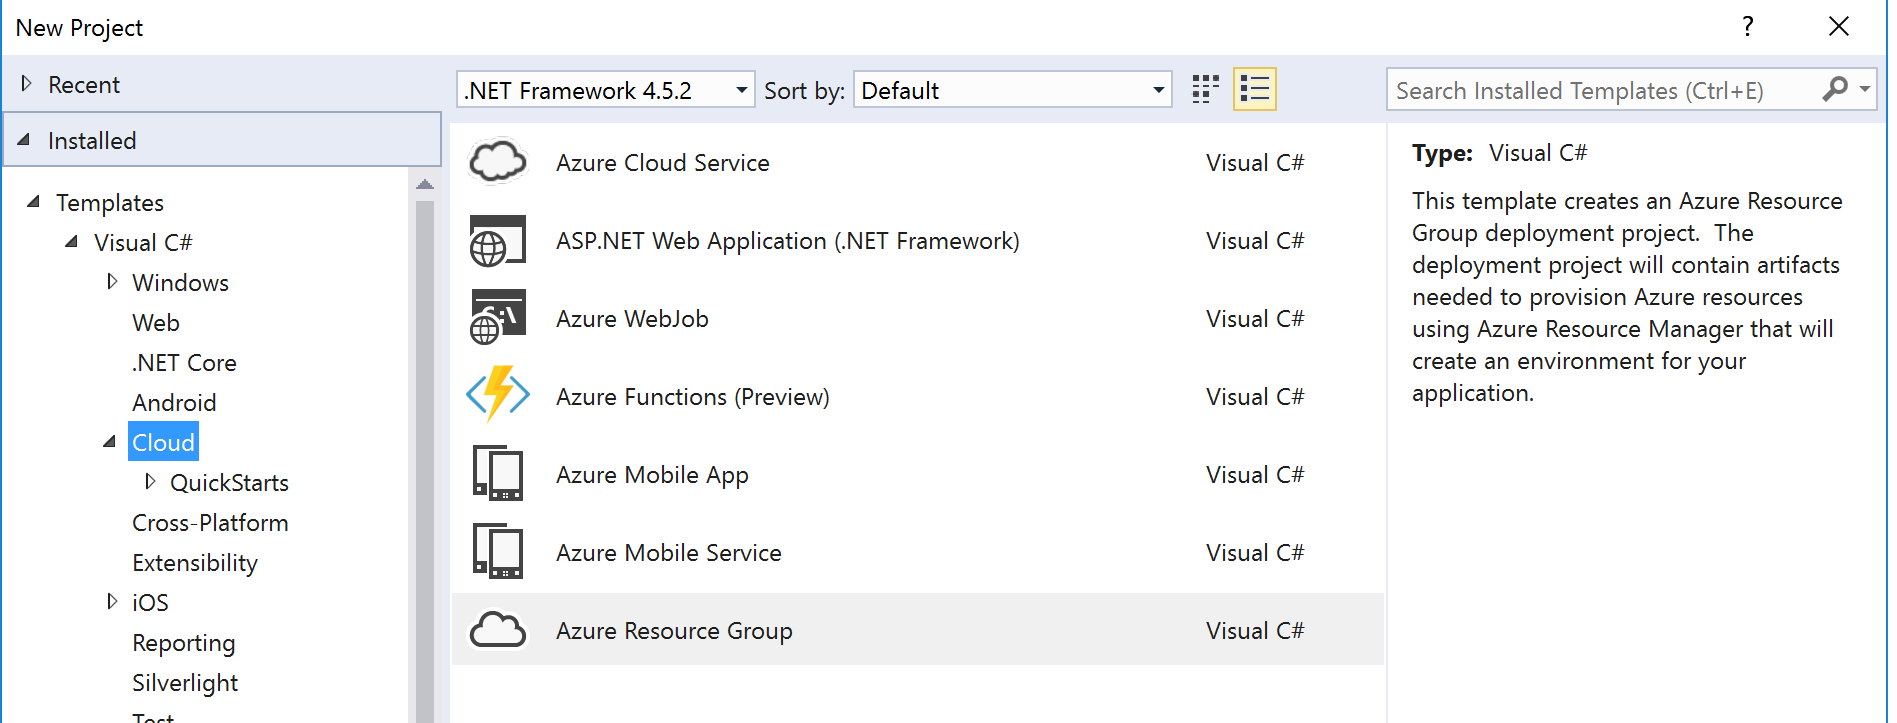
2.4 Azure Resource Group Project
The Azure Resource Group project type lets you manage resources specified via ARM Templates.
When you create an Azure Resource Group project, you can choose to start from a number of pre-populated ARM Templates (including QuickStart templates from GitHub), or from a blank ARM Template:
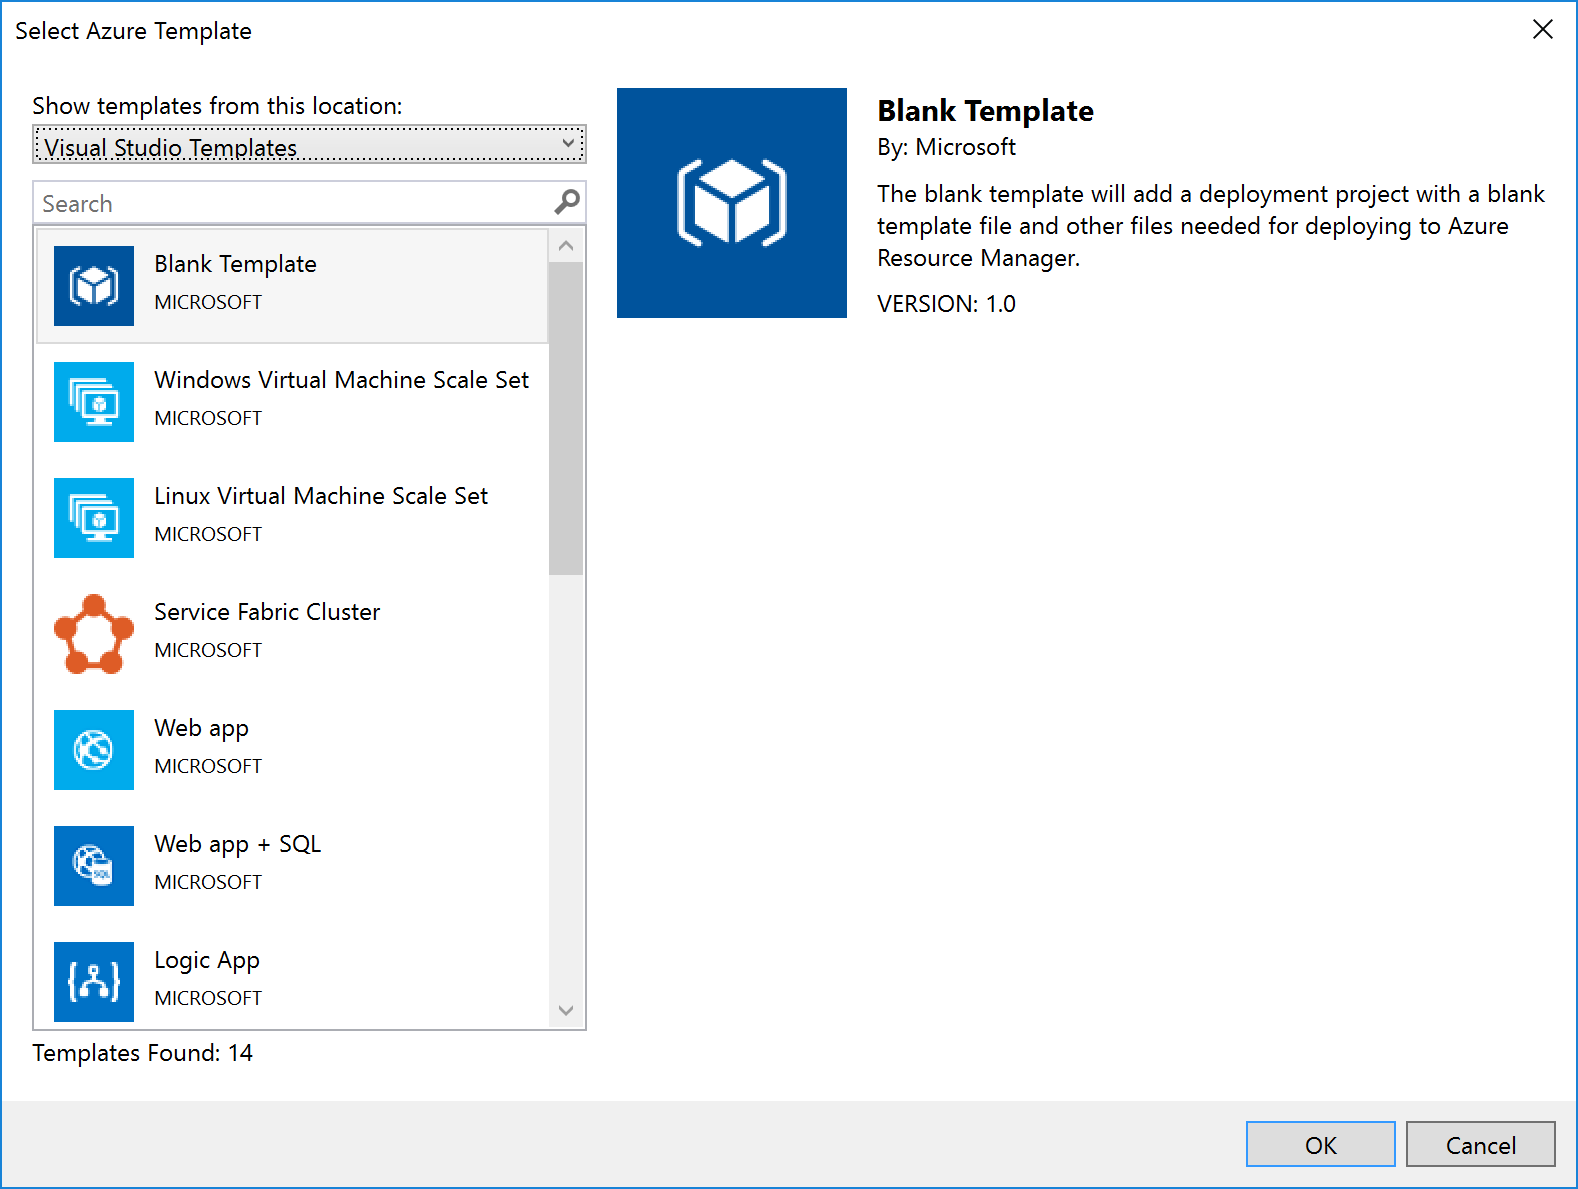
Notice that Logic Apps are one of the items in the list – if you select this option, you get a stub Logic App (i.e. something that the Logic App designer recognises as a Logic App and which it can open). Note that this assumes you have installed the Logic App tooling for Visual Studio.
|
Note: The link to download the Logic App visual studio extension can be found at the end of this article.
|
For some resources, e.g. Service Bus Namespaces, Storage Accounts, API Connections, etc., there is no template: you must start with a blank ARM Template file and add the content yourself.
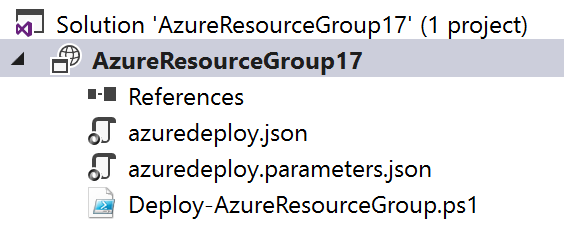
No matter which template you select, you’ll end up with a project with 3 files in it:
|
File Name
|
What
|
Description
|
|
azuredeploy.json
|
An ARM Template
|
A JSON file that describes what should be created.
|
|
azuredeploy.parameters.json
|
An ARM Template parameters file
|
A JSON file which contains values passed in to the ARM template.
Note: although only one of these is created, the idea is to create multiple template files, one for each environment.
|
|
Deploy-AzureResourceGroup.ps1
|
A Deployment PowerShell script
|
Contains a default script that creates the Resource Group and then deploys the ARM Template. This is the script that Visual Studio executes when you select the Deploy option for the project. Changing the name of this file will break the ability to deploy this project from Visual Studio.
|
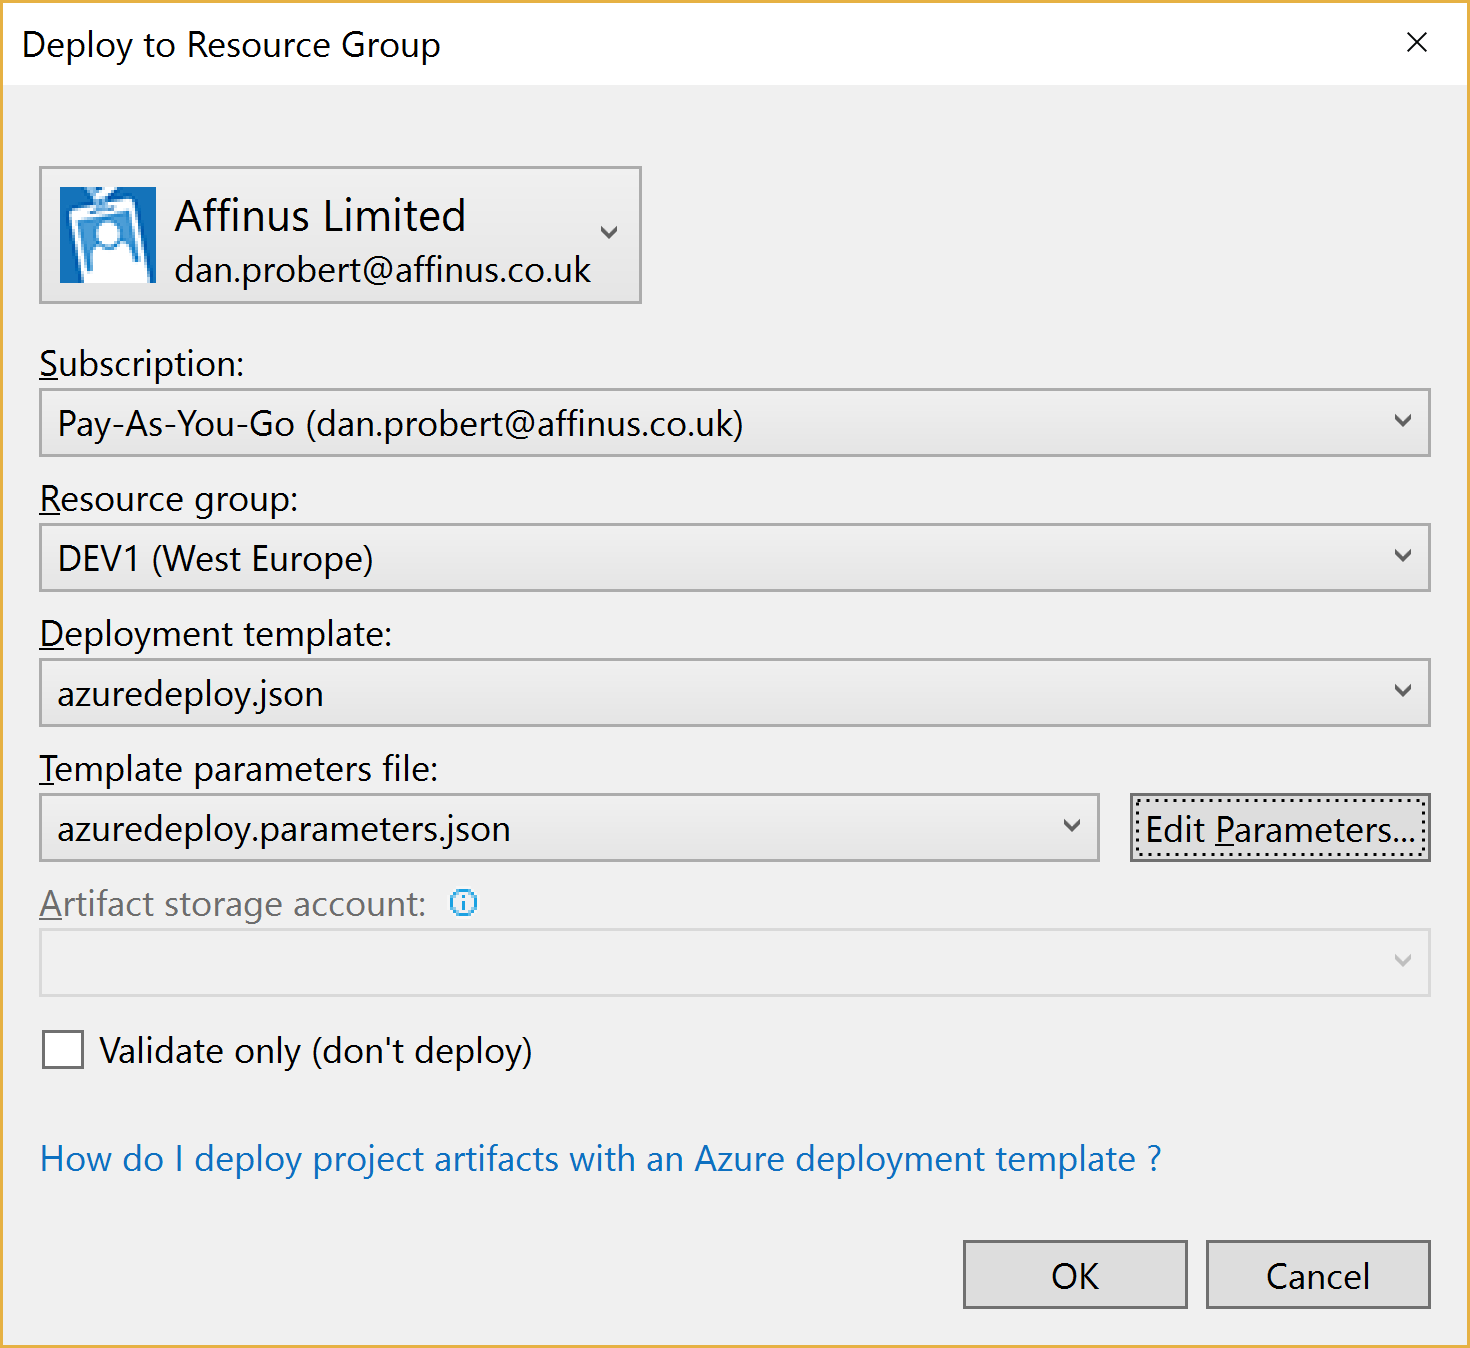
When you right-click the project file and select Deploy, you’re given the option of selecting an existing deployment, or creating a new one. All this does is pre-populate the name of the ARM Template file to use, the Parameter file to use, and the subscription being used:

Creating a new deployment prompts us to select the Subscription, Resource Group, ARM Template, Parameters File, and also allows us to edit the parameter values:
When we kick off a deployment, all that happens is that Visual Studio executes the Deploy-AzureResourceGroup.ps1 using the values supplied above.
For this reason, it is important that you don’t edit the Deploy-AzureResourceGroup.ps1 file unless you are extending the deployment in some fashion.
2.5 Integration Account Project
An Integration Account project type is used to create and store XSD Schemas and Transforms used with Azure Integration Accounts.
It is created via this option:
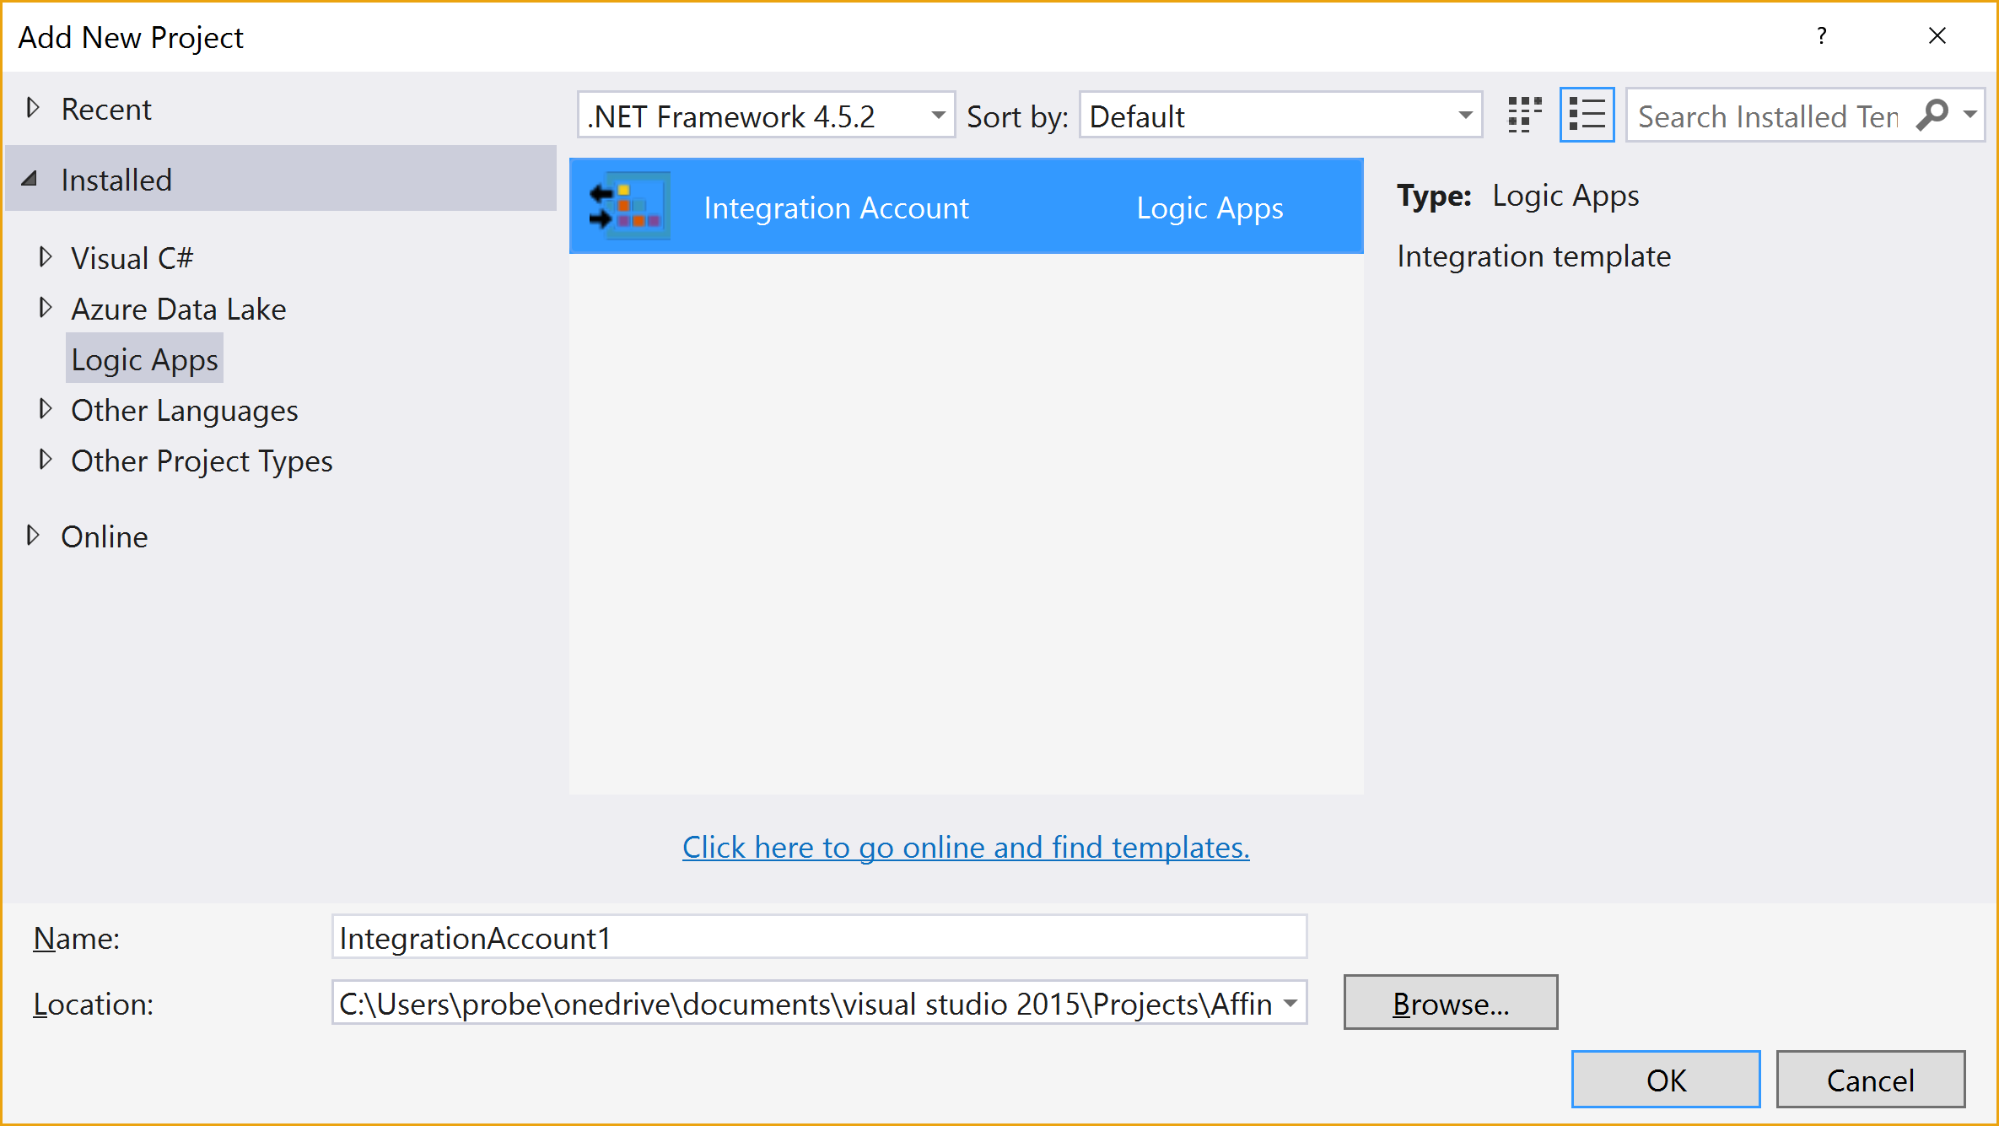
When the project is created, it has no resources in it.
Selecting the “Add New Item” gives 3 options:
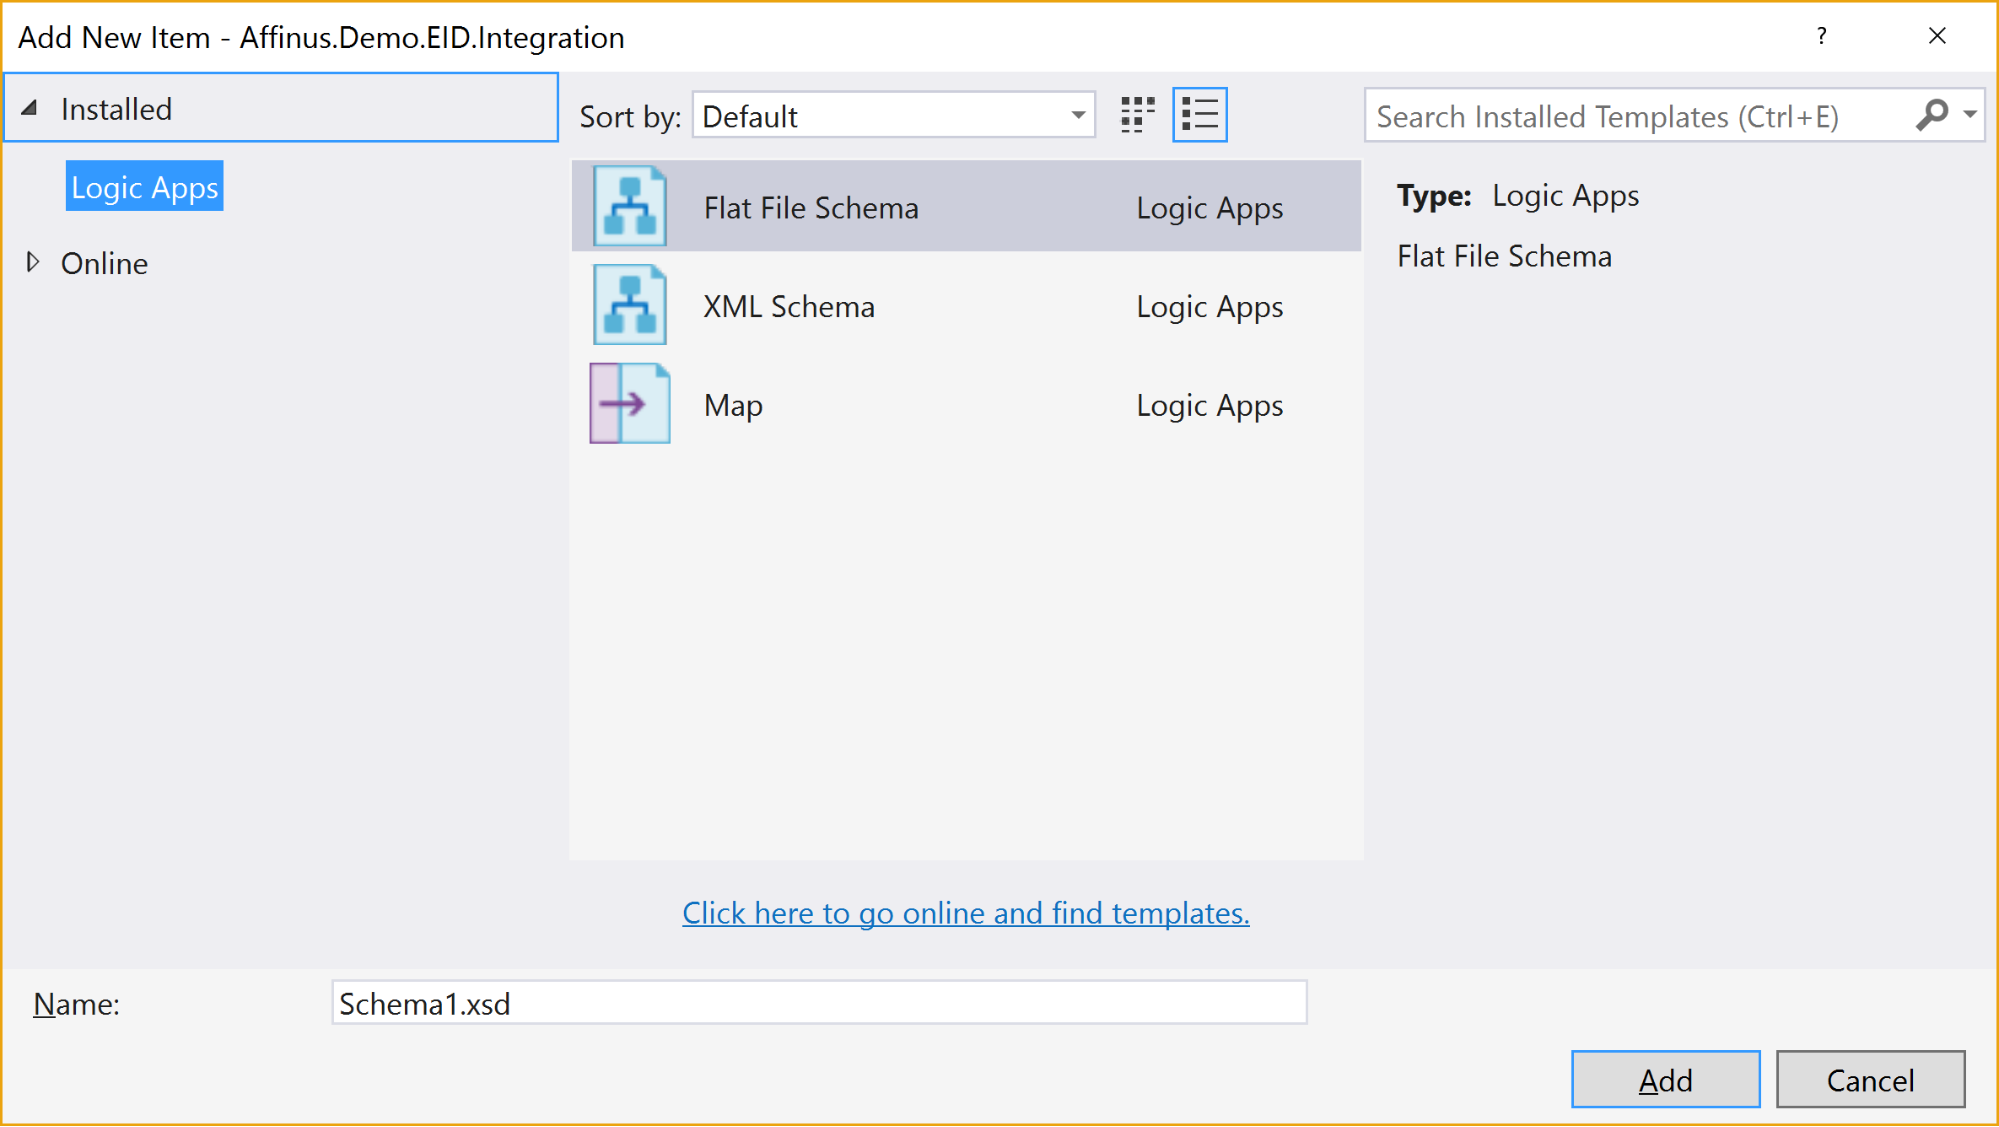
The available items are:
|
Item Name
|
Description
|
|
Flat File Schema
|
Opens the BizTalk Flat File Parser wizard, allowing you to build a flat-file schema (for use with the Flat File Parsing connectors in Logic Apps) from a sample flat file (e.g. csv or positional file).
|
|
XML Schema
|
Opens the BizTalk Schema Editor, which allows you to create/edit an XSD file.
|
|
Map
|
Opens the BizTalk Mapper, which allows you to create or edit a BTM map file.
|
There are a couple of restrictions with this project type:
- You can’t install the Integration Account type on the same PC that has BizTalk Server installed – they use the same components and don’t currently play nice with each other
- Only Visual Studio 2015 is supported (at this time)
- The BTM files generated by the mapper are converted into XSLT files (stored in the bin folder) when the project is built
- You can’t put maps in folders: they need to stay in the root folder
- There is no option to create an Integration Account nor publish the schemas/maps to an existing Integration Account from this project
|
Note: The link to download the Integration Account project extension can be found at the end of this article.
|
|
Note: We recommend that you create a separate Azure Resource Group project that will create the Integration Account in Azure and deploy the schemas/maps from this project. The script for this will be covered in the next article/video.
|
3. Further Reading
How to author an ARM template:
https://docs.microsoft.com/en-us/azure/azure-resource-manager/resource-group-authoring-templates
ARM Template expression and functions:
https://docs.microsoft.com/en-us/azure/azure-resource-manager/resource-group-template-functions
Integration Account visual studio extension
https://aka.ms/vsmapsandschemas
Logic Apps Visual Studio extension
https://visualstudiogallery.msdn.microsoft.com/e25ad307-46cf-412e-8ba5-5b555d53d2d9
by Daniel probert | Mar 8, 2017 | BizTalk Community Blogs via Syndication
Azure Enterprise Integration Series
Part 2: Azure Resource Manager Overview
1. Azure Resource Manager
The Azure Resource Manager (ARM for short) is the deployment engine behind Azure. It’s actually a whole lot more than that, but let’s just start with that.
In a nutshell, we can supply it a description of what we want to create (in a JSON file known as an ARM Template) and it will go away and provision all the required resources. It does this asynchronously, and we can check back regularly to see how it’s getting on.
The beauty of ARM is that we can group our resources however we want, and we can keep the definition of those resources in a single file, or group them in multiple files, depending on our needs.
Each resource to be created is represented by a Provider which uniquely identifies the type of resource being created. For each provider, there is also an API Version, which specifies which version of the resource to create. For example, to create a Logic App, you use a provider type of “Microsoft.Logic/workflows” and an API Version of “2016-06-01” (as at the current date).
Almost every resource in Azure can be created by the ARM engine, and the goal is to support all resource types. For example, you may want ARM to create: a virtual machine, the hard disks, a Virtual Network, Traffic Manager, and then kick off a script that install some software on the VM.
Alternatively, you may use ARM to create some Logic Apps, and API App, an Azure SQL Database, and an instance of API Management.
The ARM engine also sits behind the Azure Portal: when you provision a new resource in the portal (e.g. API Management) the portal sends a REST request to the ARM engine instructing it in what to create.
2. Resource Groups
A Resource Group is a mechanism for grouping a set of related resources in Azure. Any actions you perform on that Resource Group then apply to all the contained resources. The Resource Group also acts as a billing container, allowing you to see the costs of all contained resources.
The main criteria for which resources to group together is that all the resources share the same deployment lifecycle. Ultimately how you group your resources is left up to you, but the general rules to follow are:
- Resources that are exclusively used by an application, should be in the same Resource Group.
- Resources that are shared with other applications should be grouped with other resources used by those same applications
- If you would end up with a whole lot of resources on their own in a Resource Group, look at grouping those in a common Resource Group
- Use Resource Groups to delineate application environments e.g. Dev, Test, UAT, Prod
- For larger applications, it may make sense to split the application amongst multiple Resource Groups e.g. put Web Front end in one Resource Group, and middleware/database in another.
For example, say you had the following application, called CustomerService:
- 3x Logic Apps
- 1x API Apps
- 1x Function App
- 1x Azure SQL Server
If all those resources are only used by the same application, then we put them all in the same Resource Group (called CustomerServiceRG). That way, if we need to tear down the CustomerServiceRG Resource Group (e.g. to move it, or during redeploy) we don’t affect any other application. We can also apply Security (RBAC) and Tagging at the Resource Group level, and have it affect all the resources in the group.
Now imagine that 6 months later, the Azure SQL Server starts being used by 2 other applications.
If we *don’t* move the Azure SQL Server to a separate Resource Group, then next time we tear down the CustomerServiceRG resource Group, we inadvertently break those other two applications.
|
Note: you’ll notice that when you create a resource group, you need to specify a location (i.e. an Azure Data Center). And that you also need to do this when adding resources to the Resource Group.
The location for the Resource group is just the location where Resource Group metadata is stored. It has no bearing on the location where the actual resources are deployed.
In fact, you could have a Resource Group located in North Europe that contained some resources in Wes US, and some in South East Asia.
But for simplicities sake, it’s usually best to keep the Resource Group location, and the resource locations, the same.
One exception might be for Disaster Recovery situations, where you have a supplicate set of resources in a separate region.
|
3. ARM Templates
An ARM Template is a JSON file the specifies the resource that the ARM engine should create.
ARM templates also contains sections to handle parameters that are passed in, variables used during the execution, and for returning outputs.
There is a whole ARM Template language, containing expressions and functions, that you can use (along with the JSON you write) to set values and define the resources. You can read more about the format of an ARM template here, and see a list of supported expression and functions here.
Almost everything in Azure can be represented via an ARM template: Logic Apps are defined in ARM Templates, as are Integration Accounts, App Services, Virtual Machines, Storage Accounts, Service Bus Namespaces/Topics/Subscriptions, etc.
An empty ARM template looks like this:
|
{
“$schema”: “https://schema.management.azure.com/schemas/2015-01-01/deploymentTemplate.json#”,
“contentVersion”: “1.0.0.0”,
“parameters”: {},
“variables”: {},
“resources”: [],
“outputs”: {}
}
|
Looking at the sections above:
3.1 Parameters
The parameters section contains a list of parameter objects, defining the values to be passed into the ARM template (either by an ARM template parameter file, or via a parameter override).
A parameter definition contains:
- The name of the parameter (required)
- The type of parameter (required)
- Minimum length (for string parameters)
- Maximum length (for string parameters)
- Minimum value (for numerical types)
- Maximum value (for numerical types)
- Metadata (e.g. description)
- Default value (if no value passed in) – if this value is missing, it’s a required parameter
- Allowed values (an array of allowed values)
For example, a parameter that passed in a Logic App name might look like this:
|
“logicAppName”: {
“type”: “string”,
“minLength”: 1,
“maxLength”: 80,
“metadata”: {
“description”: “Name of the Logic App.”
}
|
|
Note: Parameterization is a crucial part of integration development in Azure.
|
3.2 Variables
The variables section contains values that are created at the time of deployment, usually from a combination of parameter values and expression/function value.
Variables allow you to simplify your template by putting common values in one place, improving readability and preventing repetition of values.
For example, imagine you have an Integration Account in a Logic App ARM Template.
You reference that Integration Account using an ID, which is a bit like a URL to the Azure resource (in fact, it’s a lot like a relative URL to the Azure resource!).
Suppose you had an Integration Account ID that looked like this:
/subscriptions/aaaaabbbbbbcccccccddddddeeeeeeffff/resourcegroups/integrationaccountresourcegroup/
providers/Microsoft.Logic/integrationAccounts/integrationaccountname
If you needed to reference that Integration Account at multiple places in your Logic App, you’d have the same value repeated in multiple places.
If you wanted to change the Integration Account ID, you’d have to change it at each location in the Logic App.
What would be easier, would be to define the Integration Account ID as a variable:
“variables”: {
“LogicAppIntegrationAccountId”: “/subscriptions/aaaaabbbbbbcccccccddddddeeeeeeffff/resourcegroups/
integrationaccountresourcegroup/providers/Microsoft.Logic/integrationAccounts/integrationaccountname
“
}
And you can then refer to this variable in your ARM Template like this:
variables(‘LogicAppIntegrationAccountId’)
Going one step further, you could parameterize the variable, so that the value came partly from expressions, and partly from passed in parameter values:
|
“variables”: {
“LogicAppIntegrationAccountId”: “[concat(subscription().id,’/resourcegroups/’,parameters(‘integrationAccountResourceGroupName’),
‘/providers/Microsoft.Logic/integrationAccounts/’,parameters(‘integrationAccountName’))]”
},
|
In the example, above, we are assuming that the Integration Account is in the same subscription as the ARM template we’re going to be deploying, and we pass in the name of the Integration Account and the Resource Group it is in.
3.3 Resources
The resources section contains an array of resource objects defining the Azure resources we want the ARM engine to create.
Each Resource object follows a standard format:
|
{
“name”: “”,
“type”: “”,
“location”: “”,
“tags”: {},
“apiVersion”: “2016-06-01”,
“properties”: {},
“dependsOn”: []
}
|
The values above are:
|
Section Name
|
Description
|
|
Name
|
Name of the resource being created
|
|
Type
|
Name of the provider to use for this type of resource e.g. Microsoft.Logic/workflows
Note: provider names are grouped under namespaces. In the example, above, “Microsoft.Logic” is the namespace. Not all providers are supported in all regions.
|
|
Location
|
The region the resource should be deployed in. Note: this doesn’t have to be the same region as the Resource Group.
|
|
Tags
|
Contains metadata for the resource e.g. for a logic app, the displayName value is stored here.
|
|
API Version
|
The specific version of the resource you want to create. API Version change occasionally, usually when a major new release (or breaking change) is introduced. This value allows you to specify which version of the resource you want created, which allows you to maintain compatibility even after a new version is realised.
|
|
Properties
|
The properties for the resource. This is where the actual resource content is stored. For example, for a logic app, this is where the Logic App definition is stored: if you switch to Code View in the Logic App designer, what you’re seeing is this properties value (i.e. you don’ see the rest of the ARM template that defines the Logic App).
|
|
Depends On
|
An array of resource name or IDs that this resource depends on. The ARM engine will build dependent resources first, and in sequence. Any resources that have no dependency are provisioned in parallel. The resources in this array must be defined in this template.
|
|
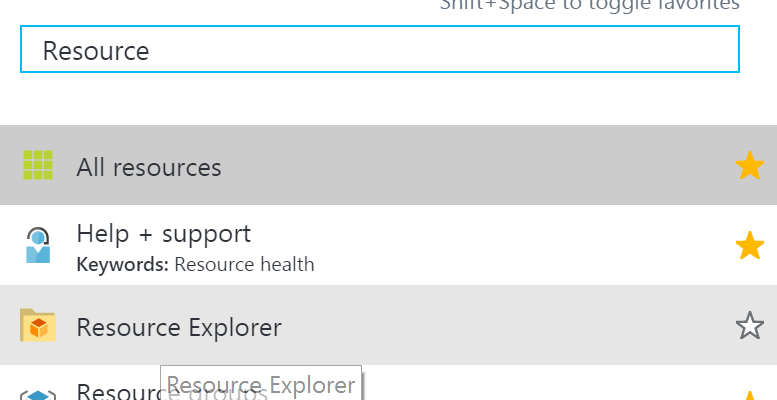
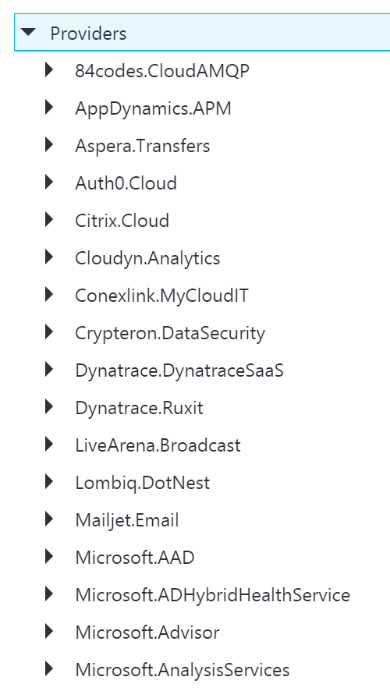
Note: You can see a full list of providers (grouped by namespace) in the portal, by selecting Resource Explorer, and then choosing providers:
|
3.4 Outputs
The outputs section is a list of output objects, which are used to return values after the deployment is complete.
Often, the outputs section is used to return a URL to a resource, or a connection string (e.g. for a Service Bus Namespace).
A output object definition contains:
- The name of the output (required)
- The type of output (required)
- The value being returned
For example, an output that returns the Connection String for a newly created Service Bus Namespace might look like this:
|
“NamespaceConnectionString”: {
“type”: “string”,
“value”: “[listkeys(variables(‘authRuleResourceId’), variables(‘sbVersion’)).primaryConnectionString]”
}
|
4. ARM Template Parameter Files
An ARM Template Parameter File provides an easy way to group all the parameters required for an ARM template into one place.
The Parameter file is a JSON file that contains at least one parameter definition for each required parameter in the corresponding ARM Template.
There is no actual relationship between a parameter file and an ARM template: you could use one parameter file for multiple ARM Template, if the parameter names were the same.
A parameter file looks like this:
|
{
“$schema”: “https://schema.management.azure.com/schemas/2015-01-01/deploymentParameters.json#”,
“contentVersion”: “1.0.0.0”,
“parameters”: {
“logicAppName”: {
“value”: null
}
}
}
|
You can have multiple parameter files for a single ARM Template, with each parameter files containing the values for a given environment (e.g. Dev, Test, UAT, Production).
5. Deploying ARM Templates
There are multiple ways to deploy an ARM template: via the Portal, via the Resource Explorer web site (https://resources.azure.com/), via PowerShell, and directly via the ARM REST API.
To deploy an ARM Template using PowerShell, you use the New-AzureRmResourceGroupDpeloyment cmdlet:
|
New-AzureRmResourceGroupDeployment -Name DeploymentName `
-ResourceGroupName ResourceGroupName `
-TemplateFile ARMTemplateFile `
-TemplateParameterFile ParameterFile `
|
When you execute this cmdlet, you’ll get back a Tracking ID you can use to check the deployment status: this is because the deployment is asynchronous.
An ARM Template can only be deployed to a single Resource Group – you can’t have an ARM Template that spans Resource Groups.
However, you *can* have multiple ARM templates that all deploy to the same Resource Group: this allows you to separate resources into separate ARM templates by resource type, for example. You could then have all your Logic Apps in one ARM template, Storage Accounts in another, etc.
ARM Templates can be deployed in one of two modes:
- Full: In full mode, all existing resources in the Resource Group are removed, and only the resources in the ARM Template are deployed.
- Incremental: In Incremental mode, the ARM engine compares the resources in the ARM Template to the existing resources in the Resource group, and only deploys what has changed e.g. it might add some resources, and modify others, but it won’t remove any.
Incremental mode is what allows us to separate resources into multiple ARM Templates.
6. Obtaining ARM Template Samples
ARM templates can be obtained in several ways:
- Via the Resource Explorer application (https://resources.azure.com/)
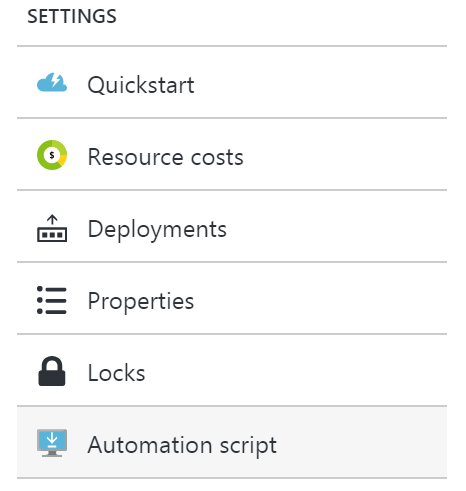
- From the Portal, using the Automation Script option:
- Via PowerShell cmdlets
- From the ARM management REST API
As an integration developer, it’s important that you learn how to author ARM templates: not all resources (in fact very few) have a visual designer. Instead, you either need to create your resources in the Portal and export the ARM Template; or you need to manually create the ARM Template in Visual Studio.
The best option is to have a library of ARM templates which you can then modify to suit your needs.
7. Further Reading
How to author an ARM template:
https://docs.microsoft.com/en-us/azure/azure-resource-manager/resource-group-authoring-templates
ARM Template expression and functions:
https://docs.microsoft.com/en-us/azure/azure-resource-manager/resource-group-template-functions
by Daniel probert | Mar 6, 2017 | BizTalk Community Blogs via Syndication
Azure Enterprise Integration Series
Part 1: Challenges in Enterprise Integration Development in Azure
1. Why the need for this series
It’s been nearly 9 months now since Logic Apps went GA, and there’s starting to be real growth in adoption and usage. We’re also seeing a lot more community content, as developers and companies start to see the real benefits of cloud integration and, specifically, the use of Logic Apps.
But for all this, there is a lot that is missing. If you’re new to Logic Apps, especially if you’ve come from a more formal development background (e.g. BizTalk or C# development) you’ll notice that there’s not a massive amount of development or pattern guidance out there.
2. What is Enterprise Integration Development?
For our purposes, we’ve defined Enterprise Integration Development as development that:
- Follows a known and proven process
- Scales to hundreds of developers and thousands of interfaces
- Uses DevOps where possible
- Uses integration patterns
- Produces quality code
- Thinks ahead about production and maintenance
- Provides guidance on operations and monitoring
3. BizTalk Development
Let’s assume you’re a BizTalk developer: You’re used to how BizTalk development works.
For example, some of the tasks you perform may include:
- Receiving a design brief or requirements
- Preparing your development machine (which will likely have BizTalk, Visual Studio, SQL Server etc. on it)
- Following guidance on naming conventions, logging, exception handling, and common patterns
- Creating a BizTalk solution and projects on your development machine
- Creating BizTalk artefacts (pipelines, schemas, transforms, orchestrations, etc.)
- Probably creating at least one C# library project (with either helper classes, or custom components)
- Creating unit tests
- Creating integration tests
- Deploying your code to your development machine and testing it
- Monitoring your BizTalk system and viewing log files
- Checking in your code to a source repository (e.g. VSTS)
- Deploying your code to other environments using either BTS console, or Deployment Framework, or scripts in VSTS
And if you don’t know how to do any of the above, you’ll be able to easily find out online, or look in one of the many BizTalk books.
4. Azure Integration Development
Now compare this to Azure Integration Development. If you’re new to Logic Apps, you’ll find that it’s not clear what the equivalents to the above steps are: Cloud development in Azure works differently.
For example:
- There’s no concept of deploying your code to local development machine – instead you must deploy to a subscription in Azure
- There’s limited or no guidance on naming conventions, logging, exception handling or common patterns
- Do you do development in the Portal, or Visual Studio, or both?
- There’s (currently) no book to refer to
- It’s unclear how you create some resources in Visual Studio (e.g. how do you create a Service Bus namespace? Or a Storage Account?)
- Little guidance on unit testing or integration testing of resources
- It’s not always clear how resource should be deployed e.g. how do you deploy an Integration account from Visual Studio?
- What do different environments (e.g. Dev, test, UAT, Prod) look like in Azure? Are they different subscriptions? All in one?
- What extra considerations do you need to think about that you may not be aware of?
Azure integration development also introduces a series of unique challenges that we didn’t have with local development.
For example:
- The Logic Apps designer will discover other Logic Apps, API Apps, and Functions… but only if they’re deployed at the time you are creating your Logic App: the designer can’t find resources that exist in Visual Studio buy which haven’t yet been deployed
- The Logic Apps designer can (currently) only discover resources which are in the same region and subscription
- Every time you execute a Logic App, you’re charged some money (assuming you’re on a consumption plan and have no free credits). If your developers have MSDN subscriptions, then they each get USD$50-$150 of free credits to use in their own subscription – but then they can’t see code in other subscriptions (see above)
- When you design an Integration Solution, you should think about the runtime cost, and calculate what the yearly/monthly costs might be, and factor this into your design
- Some resources (e.g. Integration Accounts, premium API Connections) incur extra cost, so use of them should be shared where possible
5. How we’ll address these questions and issues
This series of videos and blog posts aims to answer most of those questions and address these issues, by providing guidance on how to develop integration solutions in Azure. It’s based on our experience, at Affinus, on working with Logic Apps and Azure integration for over a year, both internally and for our clients.
If you’ve been using BizTalk for a while, you might remember that when BizTalk 2004 first came out, there was very little guidance or patterns or conventions. But then the BizTalk 2004 Unleashed book came out, and the Bloggers Guide to BizTalk was released, and then various forums and blog posts appeared, and developers gained experience and gradually a network of community content and support appeared.
The same will happen with integration development in Azure: we’re at the early exciting stages of integration PaaS development, and what’s more, Microsoft have moved to a new agile model where new features and capabilities are being released on a 2-weekly cycle.
Whether you’re a single developer, a small-medium business, or a large enterprise, Azure integration has a lot to offer.
6. The solution we’ll build
This series is all about practical examples and samples, hence the video webcasts.
In this series, we’ll be creating a moderately complex integration application that will consist of the following:
- Web App
- API App
- Function App
- Logic Apps
- Integration Account
- Service Bus
- Connectors: SalesForce, SQL, Service Bus
by Daniel probert | Aug 3, 2016 | BizTalk Community Blogs via Syndication
In case you missed it, Logic Apps moved to General Availability last week.
At the same time, pricing for Logic Apps gained a new option: Consumption charging i.e. pay by use.
I‘ve been talking to a number of clients about this new pricing model, and every single one has expressed concerns: it‘s these concerns that I wanted to touch upon in this post. Most of these concerns are based around the fact that these customers feel they can no longer accurately calculate the monthly cost for their Logic Apps in advance.
I also feel that the whole discussion might be a bit overblown, as once you remove the cost of having to pay for servers and server licenses for a traditional on-premises application (not to mention the run and maintain costs), Logic Apps can be significantly cheaper, regardless of which pricing model you use.
Old Pricing Model vs New
Prior to GA, Logic Apps were charged as part of the App Service Plan (ASP) to which they belong: An App Service Plan has a monthly charge (based on the number of compute units used in the plan), but also throttles a Logic App once a certain number of executions are exceeded in a month (the limit changes depending on the type of ASP the Logic App uses).
Effectively the old way was Pay Monthly, the new way is Pay As You Go.
This table outlines the changes:
|
|
App Service Plan Model
|
Consumption Model
|
|
Static Monthly Charge
|
TRUE
|
FALSE
|
|
Throttling
|
TRUE
|
FALSE
|
|
Limit on Number of Logic App Executions
|
TRUE
|
FALSE
|
|
Pay per Logic App Execution
|
FALSE
|
TRUE
|
I can understand why Microsoft are making the change: consumption pricing favours those that have either a small number of Logic App executions per month (as they only pay for what they use); or who have large numbers of executions per month (and were therefore being throttled as they exceeded the ASP limits).
I‘m not sure yet if the ASP-style pricing model will stay: there‘s no mention of it any more in the Logic Apps pricing page, but you can still (optionally) associate a Logic App with an ASP when you create it.
How to select either pricing model when creating or updating a Logic App
When you create a new Logic App, you used to be able to select an App Service Plan: now this option is no longer available, and all new Logic Apps use the Consumption pricing plan by default.
However, if you have an existing Logic App and you wish to switch the billing model, you can do so via PowerShell here. You can also follow the instructions at the bottom of this blog post here (I suspect this will get surfaced in the Portal if both billing models are kept).
Why the new model can be confusing
Consumption pricing makes sense: one of the benefits of Azure is that you pay for what you use. Instead of paying upfront for an expensive license fee (e.g. SQL Server and BizTalk Server licenses) you can instead pay a smaller amount every month. A lot of businesses prefer this as it helps with cash flow, and reduces capital expenditure.
The main issue with consumption pricing for Logic Apps is that instead of paying for each execution of the Logic App, you‘re paying for the execution of the actions within that Logic App. And this is the problem, as a Logic App is opaque: when you‘re designing a solution, you may know how many Logic Apps you‘ll have, but you may not know exactly how many actions each will contain (or how many pf those actions will be executed) and this makes it difficult to estimate the runtime cost.
Up to now, it‘s been easy to work out what a Logic App will cost to run. And that‘s usually one of the first questions from a client: how much will this cost me per month.
But now, it‘s harder: instead of knowing exactly you have to estimate, and this estimate has to be based not only on how many times a Logic App will execute, but also *what* the Logic App will be doing i.e. if it will be looping, or if actions in an IF branch will execute.
Effect of the consumption model on development and testing
The main concern I (and others) have with the Consumption billing model is the effect it will have on development and testing: developers (and testers) are used to executing their applications with little or no cost (other than maybe the cost of an dev/test server and dev/test licenses).
Take a BizTalk Developer: chances are the BizTalk and SQL Server Licenses they are using came from an MSDN subscription, or they bought the Dev edition. In either case, they will execute their code during the development process without paying any attention to cost.
The same applies to testers.
An argument can be made that the cost per action of a Logic App is so low that this wouldn‘t be an issue (e.g. a reasonably complex Logic App with 50 actions per execution would cost 2.5p (4c) per execution. But the pennies do add up: imagine a corporate customer with 100 developers: each time those developers execute a Logic App like this, it costs the company £2.50 (US $4.00) – and that‘s just executing it once.
Microsoft will likely point out that an MSDN Subscription comes with free Azure credit, and that therefore there is no extra cost to execute these Logic Apps as they‘re covered in this free credit. But this doesn‘t apply to most of my clients: although the developers have MSDN, the free credit applies only to their MSDN subscription not the corporate subscription where they perform dev and testing. The MSDN subscriptions are usually used for prototyping, as they‘re not shared amongst multiple developers, unlike the corporate subscriptions.
So to summarise:
Consumption pricing could lead to:
- A preference against Test Driven Development due to perceived cost of executing code frequently against tests
- Corporates hesitant to allow developers to execute code during development whenever they want due to perceived cost
- A hesitation on performing Load/Perf Testing on Logic Apps due to the cost of doing so e.g. with our sample 50 action Logic App, executing it a million times for load testing would cost £4500 (about US $6000) – consumption pricing gets cheaper once you get over a certain number of actions (so a million actions is £0.00009 per action) – this is retail pricing though, some large customers will benefit from a volume licensing discount e.g. for an Enterprise Agreement.
Note: There is questionable value in performing Load/Perf Testing on Logic Apps, as there is little you can do to tune the environment, which is the usual rationale behind Load Testing (especially in a BizTalk environment). However, some level of testing may be required if your Logic App is designed to process multiple messages and there is either a time limit or the messages are connected in some way (e.g. debatching a request and then collating responses).
The solution
The solution (in my view) is to keep both billing models:
- ASP pricing can be kept for development/testing, which will have the effect of putting a cap on the cost of development and testing (although will hamper Load Testing). ASP pricing also benefits customers who have a reasonable number of executions per month, but aren‘t hitting the throttling limits. ASP pricing also allows for customer to try out Logic Apps for free by using the Free pricing tier.
- Consumption pricing can then be used for Production workloads, or for those who find that consumption pricing is cheaper for them for dev/test than ASP pricing
In addition, it would help if Microsoft provided more examples on monthly cost; provided some way to help calculate the monthly cost under the consumption model; and highlighted the overall reduction in cost through using Logic Apps for most customers. For example, if your Logic App is under the ASP pricing model, and you execute it, then the portal could tell you what that execution would have cost you under the consumption model (using retail pricing). Just an idea!
Let me know if you have other opinions, or agree/disagree with this.
by Daniel probert | May 11, 2016 | BizTalk Community Blogs via Syndication
At the BizTalk360 Integrate2016 conference today, Microsoft announced a whole slew of new features and functionality for both BizTalk 2016 and Logic Apps.
Some of these include:
1) BizTalk 2016 will have a Logic Apps Connector
2) Logic Apps will have a BizTalk Connector…
Yes, you read that right: it will be possible to execute/initiate a Logic App from BizTalk on-premises (or in a VM/IaaS); and from a Logic App, you will be able to send a message directly to BizTalk.
Now although both of these scenarios are possible today (by exposing a RESTful service on BTS, or using the REST/JSON functionality on BizTalk), these new announcements make this even easier.
The BizTalk Connector in Logic Apps connects directly to your BizTalk Server on-premises, although details of how this is achieved were not released.
3) Integration Accounts
Integration accounts are an EIP feature which will allow storage of schemas, maps, certificates, TPM etc. and allowing this data to be shared by a number of Logic Apps.
4) Visual Studio Integration
The Logic Apps designer will be available in Visual Studio… soon! They will be part of an ARM resource Group project (which exists in Visual Studio today) and when you open an ARM template (JSON file) which contains a Logic App, then that file will be opened in the Logic Apps designer, but within Visual Studio.
Additionally, Visual Studio will allow any items within your Integration Accounts (maps, schemas, etc.) to be added to a project and synced magically up to Azure.
And all of this can be stored in your source control repository (VSTS/Git).
And… this integrates with ALM/Build so you can deploy it all up to Azure: you can parameterise your ARM Templates so you can use a single template for Dev/Test/Prod etc.
And that’s just on Day 1.
Excited to see what Day 2 brings!
by Daniel probert | Apr 1, 2016 | BizTalk Community Blogs via Syndication
Update: I’ve just realised the links in this article were wrong when I published it, so have updated them.
I’ve decided to update my 2008 article on Understanding the BizTalk Mapper for BizTalk 2013R2. You can download the article here (in .docx and .pdf formats):
Understanding the BizTalk Mapper v2.0.docx (243.08 KB)
Understanding the BizTalk Mapper v2.0.pdf (1.49 MB)
I originally wrote this article in 2008, and it was aimed at BizTalk 2006 R2. Since then, we’ve had 3 more versions of BizTalk: 2010, 2013, and 2013R2. With BizTalk 2016 entering CTP in the next few days, I thought it was time to revisit this article and update it for the latest (public) version of BizTalk.
At the time I wrote this article, I was of the view that the mapper was always the answer. In fact, the reason I started the article was that I had an argument with a colleague over what technology was better for transforming data in BizTalk: Maps (i.e. XSLT) or C# (serializing/deserializing your XML into a class). I actually set out to prove my colleague wrong by comparing the two – and ended up surprising myself by just how little there was in the comparison.
8 years on, and my views have changed (somewhat): I spent 4 years working on a very large BizTalk system that had huge throughput (200tps) and very low latency (<500ms) requirements, and maps had to go out the window. In fact, we took over the system from a well-known consultancy that had used standard BizTalk practices i.e. maps, pipelines etc. The system did what it was supposed to, but was horribly slow.
But this was not your average run-of-the-mill BizTalk system. The BizTalk Mapper is still a very powerful tool, and with the advent of Azure and Microsoft’s cloud integration platform (Logic Apps et al) the mapper will live on.
Over the last 8 years, people have asked why it’s important to know what each of the functoids emit: The answer is that it’s the best way to understand what each functoid does. If you can’t get your head around the documentation for the Table Looping functoid (for example) then just look at what XSLT the functoid emits: this should help you understand what it does.
What surprised me in doing this update is that there have been zero changes to the mapper functoids since BizTalk 2006R2. The biggest change has been that support for choosing whether to use XslTransform or XslCompiledTransform for your maps – this can have a significant impact on performance (as seen later).
I’m still a firm believer that you shouldn’t be creating complex maps in the Mapper unless you understand how XSLT works, and I hope that this article helps you with that understanding.
by Daniel probert | Mar 31, 2016 | BizTalk Community Blogs via Syndication
The 1st CTP (Community Technical Preview) for BizTalk 2016 has been released today.
Whilst you have to sign up to Microsoft Connect to access the CTP, Microsoft have published the release notes for the CTP here: BizTalk 2016 Release Notes
These release notes will be added to as the product gets closer to release.
For more details, including instructions on how to sign up, go here: https://blogs.msdn.microsoft.com/biztalk_server_team_blog/2016/03/30/announcing-biztalk-server-2016-community-technology-preview-1/
by Daniel probert | Feb 25, 2016 | BizTalk Community Blogs via Syndication
In the latest installment of the logicappsio webcast, Jeff Hollan and Kevin Lam covered off new features released this month, and also talked about what is coming up – you can watch it here: https://www.youtube.com/watch?v=7iZc1i9d7y0.
Of note in this webcast:
Released features this month:
- Updated Designer now released – now the cards are smaller, it’s a nicer mechanism for adding triggers/actions, and the cards run vertically instead of horizontally.
- We now have support for manual triggers e.g. a manual HTTP trigger which replaces the v1 HTTP Listener
- There’s a new Response action which can be used to send a response back to a waiting party (i.e. solicit-response)
- There’s a new action called “HTTP + Swagger” which allows you to supply a Swagger endpoint, and the designer will read the Swagger and give you a first-class experience in using your API App i.e. will show trigger actions, documentation etc.
- If/Else conditions are now supported in the designer.
- The “connectors” we used in the old designer have been replaced by Managed API Apps – these are also known as Connections. These are v2 API Apps, and no longer use the gateway service or Zumo tokens, and Microsoft host these connections for us. You can also use any custom API app as well, as long as it has a Swagger/Swashbuckle API.
- The trigger blade will now show you the Shared Access Signature URL needed to post to the trigger directly. Additionally logic apps will support multiple triggers (the designer doesn’t yet support this).
Features coming up soon:
- Adding support so that recurrence trigger can be run-now i.e. run immediately – today this is only supported for the manual triggers.
- Support for parallel actions in the new designer (this should be very cool – convoys anyone?!)
- Auto discovery of custom APIs – they talked about how any API Apps you have in your Resource Group will appear in a separate list, which is awesome. The idea that you can call any API you like is very powerful. Link this isn with Azure API Management Services and you get a very powerful set of tools.
- Auto discovery of workflows – you’ll be able to call another Logic App, and you’ll see a list of those logic apps inside your logic app.
- Flow monitoring – you get a view of your logic app history, but from inside the designer so you can see which paths were taken, which were skipped (a bit like the old Orchestration Debugger I imagine in BizTalk).
- Support for the Salesforce sandbox endpoint.
- The trigger experience in the new designer will get better – there will be more information on the trigger card.
Jeff then took us through a demo of how to use a v1 API App in the new designer (using the JSON Encoder BizTalk Connector as an example).
Jeff has also expanded on my blog post about using BizTalk/v1 connectors in the new designer, and has included details on how to add the Swagger/Swashbuckle details to your API App so that the new designer will be able to list any BizTalk/v1 API Apps you have defined in your Resource Group – you can read Jeff’s post here: http://blogs.msdn.com/b/logicapps/archive/2016/02/25/accessing-v1-apis-and-biztalk-apis-from-logic-apps.aspx.