
by Senthil Palanisamy | Sep 18, 2018 | BizTalk Community Blogs via Syndication
Introduction
In real time scenarios, monitoring all the HTTP endpoints in an environment is a complex process. Constantly monitoring the web endpoints which are running and produce the expected results for each execution is tedious. In a BizTalk environment, the health of Web Endpoints is vital to be able to process the data between multiple applications/partners. BizTalk Administrators manually monitoring the health and results of web endpoints in every execution is a cumbersome process. To overcome this challenge in BizTalk360, Web Endpoint Monitoring is introduced during 7.x version and it is received positive feedback about Web Endpoint Monitoring. We are constantly improving this feature. During 8.1 version, this feature had added functionalities like configuring custom HTTP headers, Payload details and additionally Response configuration like Return Code Alerts, Keyword Alerts, Response Time Alerts for every monitored web endpoint.
Web Endpoint monitoring is important in BizTalk Integration; Based on the feedback’s received, we decided to further improve the web endpoint monitoring to meet their business needs. Most of the customers, who provided feedback, requested to support additional authentication methods in web endpoints like:
- Basic
- SSL client certificate support to Basic & Windows authentication
- Azure Services

Additional Authentication Support
Prior to BizTalk360 version 8.9, Web Endpoint monitoring supported Windows authentication to monitor the endpoints. From 8.9 version on, BizTalk360 Web Endpoint authentication is extended to support:
- Basic Authentication
- Certificate Authentication
- Azure Services Authentication
Below, we have a better look at each of the added authentication methods.
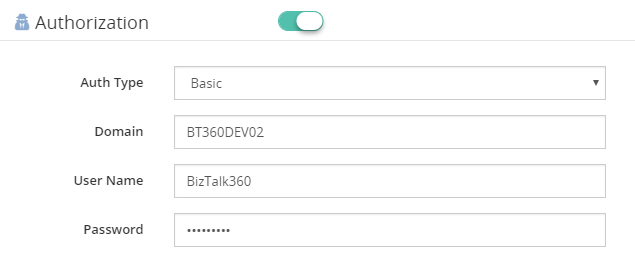
1. Basic Authentication
In the context of an HTTP transaction, Basic Access authentication is a method for an HTTP user agent to provide a user name and password when making a request. To unauthenticated requests, the server should return a response whose header contains a HTTP 401 Unauthorized status and a WWW-Authenticate field. In the BizTalk Admin Console, an HTTP endpoint can provision Basic authentication with a username and password.
2. Certificate Authentication
For monitoring HTTP web endpoints with SSL certificate settings, a client certificate thumbprint is provided in BizTalk HTTP transport properties, along with user name and password. A client-based certificate thumbprint is used to negotiate the server-side certificate.
BizTalk HTTP Transport Properties:
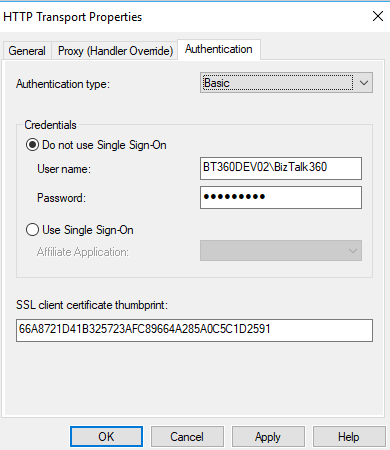
Similarly, In BizTalk360, the authentication type of Basic or Windows along with the client certificate thumbprint is configured in the Authorization section of Web Endpoint monitoring.

Note: Client certificates must be installed in the machines where BizTalk360 Web and Monitoring services reside.
3. Azure Services Authentication
To be able to use Azure Services Authentication, a Service Principal must be configured in Azure.
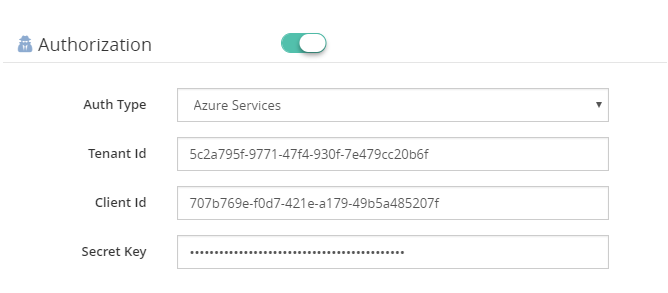
To be able to use Azure Services Authentication, a Service Principal must be configured in Azure. A Service Principal is an application within Azure Active Directory whose authentication tokens can be used as the client Id, client secret, and tenant fields (the subscription can be independently recovered from your Azure account details). With a Bearer Token being generated, using the Service Principal authentication takes place at the Web Endpoint.
There are two tasks needed to create a Service Principal via the Azure Portal:
- Create an Application in Azure Active Directory (which acts as a Service Principal)
- Grant the Application access to manage resources in your Azure Subscription
You can check how to create service principal in Azure Portal.
Content Type Support
The Content-Type entity header is used to indicate the media type of the resource. In responses, a Content-Type header tells the client what the content type of the returned content is. Browsers will do MIME sniffing, but in some cases, they will not necessarily follow the value of this header. To prevent this behavior, the header X-Content-Type-Options can be set to “nosniff”. In requests, (such as POST or PUT), the client tells the server what type of data is sent.
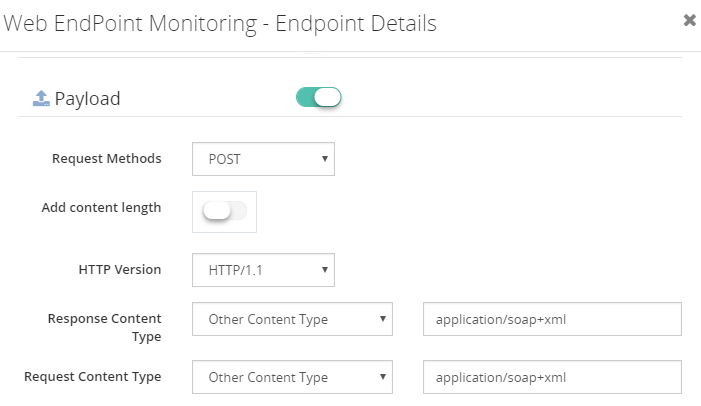
BizTalk360 8.9 extends the support to additional content types in request and response objects:
- SOAP (1.2) Content Type: “application/soap+XML” is a SOAP 1.2 content type which is added to the list. With this additional content type, SOAP V1.2 protocol is supported in web endpoint monitoring. The user can configure the XPath conditions to monitor the SOAP 1.2 endpoints, based on the results of the execution.
- Custom Content Type: When Endpoint Request/Response content types are not supported by BizTalk360, the Web Endpoint throws a HTTP 415 Unsupported Media Type. To prevent this from happening, you can configure Custom Content types. From the Request/Response content type drop downs, BizTalk360 allows you to select custom content type. When this option is chosen, users can enter Content Types which are not supported by BizTalk360, out-of-the-box, like:
- application/EDI-X12(application)
- text/CSV(Text)
- application/vnd.ms-excel (VDN)
Deprecation of TLS 1.0
The TLS 1.0 encryption protocol can no longer be used for secure communications in most of industries like PCI (Payment Card Industry). All web servers and clients must transition to TLS 1.1 or above. This deprecation will primarily affect non-browser software, APIs, and other internet infrastructure. Older versions of development tools which don’t support TLS 1.2, such as curl, are still widely in use—either directly by developers or as dependencies bundled into other software
BizTalk360 Web Endpoint monitoring throw an error when TLS 1.0 is disabled. From BizTalk360 version 8.9, Web Endpoint monitoring supports the TLS encryption protocol (TLS 1.1 and TLS 1.2), when TLS 1.0 is disabled.
Conclusion
The Web Endpoint monitoring improvements in this version will be helpful to monitor additional web endpoints. BizTalk Administrator/Developers can utilize the powerful Web Endpoint Monitoring feature in BizTalk360 with additional authentication type and content type.
Get started with the free 30 days trial. For any queries/feedback please write to us support@biztalk360.com.
Author: Senthil Palanisamy
Senthil Palanisamy is the Technical Lead at BizTalk360 having 12 years of experience in Microsoft Technologies. Worked various products across domains like Health Care, Energy and Retail. View all posts by Senthil Palanisamy

by Gautam | Sep 16, 2018 | BizTalk Community Blogs via Syndication
Do you feel difficult to keep up to date on all the frequent updates and announcements in the Microsoft Integration platform?

Integration weekly update can be your solution. It’s a weekly update on the topics related to Integration – enterprise integration, robust & scalable messaging capabilities and Citizen Integration capabilities empowered by Microsoft platform to deliver value to the business.
If you want to receive these updates weekly, then don’t forget to Subscribe!
Feedback
Hope this would be helpful. Please feel free to reach out to me with your feedback and questions.

by Sandro Pereira | Sep 13, 2018 | BizTalk Community Blogs via Syndication
Some time ago I wrote a blog post on how to Process Feedback Evaluations (paper) automagically with SmartDocumentor OCR, Logic Apps, Azure Functions and Power BI, at that point there weren’t so many of the functionalities that we have at the moment both on Logic Apps and Microsoft Flow: like concept of variables, Case operations, more expressions an so on. I will not address here in this blog post if can we redesign to be different or better. The question I raise and will address here is: can we do the same with Microsoft Flow, instead of using Logic Apps?
And the reason I ask this question is that Microsoft Flow is more targeted to Business Users which fits perfectly with scenarios in which we want to extend a product to fit each business users’ requirements/scenarios. If you have an Office365 you can use Microsoft Flow and you will have 2,000 runs per month, so you don’t need to pay extra for using Logic Apps, you can instead use Microsoft Flow.
And the answer is: Yes, you can!
The problem and scenario will be exactly the same: How can we easily convert paper in data to generate additional value? How can we perform operations on it and easily gain insights?

But in this case, to solve this problem, in which I wanted to have the evaluations forms to be processed in real-time, i.e., as the attendees handed in the forms, the results were presented in a public Power BI dashboard in a matter of seconds, we will be using:
- DevScope SmartDocumentor OCR that, not also allowed me to extract the data from my documents and easily integrate with other systems, but also to intelligently set my OCR streams (flows), defining:
- Different receive locations, like FTP, file or directly from scanner devices;
- Create/test my recognition templates and review/ validate the data which is gathered;
- But also, enabled me to connect and send the metadata, XML or JSON, through any kind of HTTP service, I could even extend it by using a PowerShell provider that would enable me to execute a PowerShell script.
- Microsoft Flow that allows all type of Business Users to create and automate workflows across multiple applications and services without the need for developer help in a very simple and fast way. These automated workflows are called flows.
- And finally, Power BI to create interactive data visualization (dashboards and reports)

Processing Feedback Evaluations: The solution
SmartDocumentor: to process and extract metadata from paper
Again, I’m not going to explain in details how the solution is implemented inside DevScope’s SmartDocumentor for it is not the point of this article, and if you want to know more about it, you can always contact me. However, let me contextualize you:
- SmartDocumentor OCR flow will be listening in two receive locations: Share Folder and directly from the scanner device;
- After receiving and extract the data from the scanned documents (paper), SmartDocumentor will send the metadata to a Microsoft HTTP endpoint.

- Inside the SmartDocumentor processes, we optional can specify if we want to review the documents – SmartDocumentor Review Station – before you sent to the Microsoft Flow (or any other system).

Power BI to deliver interactive data visualization (dashboards and reports)
Regarding Power BI, Microsoft Flow Power BI connector (is the same of the Logic Apps connector) only accepts you to use streaming datasets (this has advantages and some disadvantages that we will see further on), that allows you to easily build real-time dashboards by pushing data into the REST API endpoint. To create your streaming datasets, you should access to Power BI with your account:
- Select your ‘Workspace à Datasets’, and then on the top right corner click ‘+ Create’ and then ‘Streaming dataset’

- In the ‘New streaming dataset’, select ‘API’ and then click ‘Next’
- In the second ‘New streaming dataset’, give a name to your dataset: “FeedbackForm” and then add the following elements:
- SpeakerName (Text) – represents the name of the speaker that is obtained in the evaluation form according to the session.
- ContentMatureFB (Number) – a value between 1 and 9 that is obtained in the evaluation form
- GoodCommunicatorFB (Number) – a value between 1 and 9 that is obtained in the evaluation form
- EnjoySessionFB (Number) – a value between 1 and 9 that is obtained in the evaluation form
- MetExpectationsFB (Number) – a value between 1 and 9 that is obtained in the evaluation form
- SpeakerAvrg (Number) – A simple average calculation (sum all the above metrics divide by 4)
- WhoAmI (Text) – represents the type of attendee you are (developer, architect, …) that is obtained in the evaluation form
- SpeakerPicture (Text) – picture of the speaker according to the session that is that is obtained in the evaluation form.

- And because we want to create interactive reports in order to have more insights from the event. We need to enable ‘Historic data analysis’ and then click ‘Create’
Unfortunately, streaming dataset is meant to be used for real-time streaming and is a little limited in terms of want we can do with it. For example, it doesn’t allow you to combine different sources, for example, a “table” that can correlate speaker to get their pictures, or to make aggregations of metrics like “Speaker average”. Which means that we need to send all of this information from Microsoft Flow.
Microsoft Flow to create an integration process flow
At the beginning of this article, I told that one of the advantages of Microsoft Flow is that allows Business Users to create and automate workflows across multiple applications and services without the need for developer help. So, for this example, I will try to abstract from the fact that I am a developer and “try” to implement as if I were a business user: no custom code is allowed!
Microsoft Flow it will be the component that will allow us to extend a product (OCR software) that, as all products, are limited to certain features and capabilities to be able to communicate with a huge range of SaaS applications that appear all day on the market.
In order to integrate SmartDocumentor OCR with Power BI, we need to create a Microsoft Flow that:
- Accept a JSON through an HTTP Post. For that, we use a ‘Request – When a HTTP request is received’ trigger.

-
- And, because we do have friendly tokens to access the elements of the message, we will use a sample of the JSON message to be able to generate the correct JSON Schema. For that you should:
- From the trigger configuration box, select the option “Use sample payload to generate schema” and past the above sample:
[
{
“Key”: “RecognitionRating”,
“Value”: “100”
},
{
“Key”: “RecognitionStatus”,
“Value”: “Final”
}
]
-
-
- To generate the JSON schema, click “Done”

- Next, we need to create the following support variables, that we will use to store the data extracted from the SmartDocumentor JSON message – that is a Name/value typed message – to be sent to Power BI dataset:
| Name |
Type |
Initial Value |
| count |
Integer |
0 |
| speakerName |
String |
|
| Picture |
String |
|
| ContentClear |
String |
|
| GoodCommunicator |
String |
|
| EnjoySession |
String |
|
| MetExpectation |
String |
|
| whoAmI |
String |
|
-
- For that, we need to add a ‘+New step’, ‘Add an action’ and then enter Variables’ into the search box. Select “Variables – Initialize variable” from the actions list.

-
- And repeat the same task for all the variables.
Note: Unfortunately, to the date, there is still no way to create multiple variables using a single shape. In my opinion, this could and should be made as a table approach instead of the existing approach.
Now that we have all our variables that we need to store the information that we need to extract from the SmartDocumentor JSON message, we need to start extracting based on the Evaluation form. The first part of the form is: “What session are you evaluating”:

and for us to find out what session is being selected so we can “map” the speaker and picture name we need to look for the keys “S1”, “S2”, “S3” and “S4” and see which on them is filled. To do that we need to:
- Add a ‘+New step’, ‘… More’ and then select ‘Add a switch case’

-
- On the “On” property of the switch condition configuration, select from the list of tokens the “Key” token from the “When a HTTP request is received” trigger

-
- Because this is a Key/Value messages with multiple records, the Flow designer will automatically place this switch condition inside a Loop that will iterate thru each key/value pair.
- In the first case, let rename it ‘Case S1’ branch configuration:
- On the “Equals” property, type “S1”
- And then add a new condition by selecting ‘… More’ and then select ‘Add a condition’
- On the ‘Yes’ branch
- Choose the “Add an action” option and on the “Choose an action” window, enter “Variables” and select the trigger “Variables – Set variable”
- And set the “Picture” variable to the desired value
- Do the same steps this time to set the “speakerName” variable
- Leave the ‘No’ branch as it is

- Add 3 more new Case branches and repeat the same steps, this time configuring the values to look for “S2”, S3” and “S4”.
The second part of the form is: “What is my evaluation”:

To extract this information, and because we already have a Switch case condition in place, what we need to do is:
- Create 4 new different branches in the Switch case condition, one for each question – “Q1”, “Q2”, “Q3” and “Q4” – and then:
- On the “Equals” property, type “Q1”
- And then Choose the “Add an action” option and on the “Choose an action” window, enter “Variables” and select the trigger “Variables – Set variable”
- And set the “ContentClear” variable to the rate provided by selecting from the list of tokens the “Value” token from the “When a HTTP request is received” trigger
- Do the same steps for
- “Q2” to set the variable “GoodCommunicator”
- “Q3” to set the variable “EnjoySession”
- “Q4” to set the variable “MetExpectation”

Finally, the last section is about “Who am I”

This is probably the more complicated section. Here, we basically want to travel from a range of position and if this is selected we append to a string separated by a comma, something like “Developer; Student”. To do that we need to:
- On the Default branch, add a new condition by selecting ‘… More’ and then select ‘Add a condition’
- In the condition expression, select “Edit in advanced mode” and then type the condition to treat the key/name pair if “count” variable is >13 and less or equal with 28
@and(greater(variables('count'), 13),lessOrEquals(variables('count'), 28))

-
- On the ‘Yes’ branch
- We need to check if “tag” is selected or not. If yes set we need to add to the “whoAmI”, otherwise we don’t do nothing. To do that we need an extra if condition: Add a new condition by selecting ‘… More’ and then select ‘Add a condition’
- On “Choose a value” property select the “Key” token from the “When a HTTP request is received” trigger.
- On the condition set “Is not equal to”
- And in the other “Choose a value” property leave it empty

-
-
- However, to set properly the “whoAmI” variable we need another additional condition to check if the “whoAmI” variable is empty or not. If empty set the “whoAmI” variable with the value, otherwise append to the existing value a comma and the new value. To do that we need to:
- Add a new condition by selecting ‘… More’ and then select ‘Add a condition’
- On “Choose a value” property select the “whoAmI” token from the “Variable” context.
- On the condition set “Is not equal to”
- And in the other “Choose a value” property leave it empty
- On the “Yes” condition, choose the “Add an action” option and on the “Choose an action” window, enter “Variables” and select the trigger “Variables – Set variable”
- And set the “whoAmI” variable to the desired value – select the “Key” token from the “When a HTTP request is received” trigger.
- And on the “No” condition, choose the “Add an action” option and on the “Choose an action” window, enter “Variables” and select the trigger “Variables – append to string variable”
- And set the “whoAmI” variable to the desired value – select the “Key” token from the “When a HTTP request is received” trigger.

- Finally, after the Switch case condition, and just before finishing the “Apply to each” cycle
- Choose an action” window, enter “Variables” and select the trigger “Variables – Increment variable”
- On the “Name” property select the “count” variable
- And on the “Value” set as 1

To finalize the entire process, we just need to:
- Calculate the rate average – the sum of all question results divided by the number of questions.
- And send it to Power BI
To accomplished that we need to:
- Add a ‘+New step’, ‘Add an action’ and then enter “Variables” into the search box. Delect the trigger “Variables – Initialize variable”
- On the “Name” property select the “SpeakerAvrg” variable
- On the type property set to be Integer
- And in the Value property, from the context dialogue box, select “Expression” tab and set the following expression:
int(div(add(add(int(variables('ContentClear')), int(variables('GoodCommunicator'))) , add(int(variables('EnjoySession')), int(variables('MetExpectation')))),4))

- In the last step of the Logic App: we push the data into the Power BI streaming dataset created earlier by using the new ‘Power BI’ Connector. To do this we need to:
- Add a ‘+New step’, ‘Add an action’, and then enter ‘Power BI’ into the search box. Select “Add row to streaming dataset” from the actions list.
- Select the name of the workspace and then the name of the streaming dataset
- The next step is to select the Table titled “RealTimeData”
- And finally, map the properties with the different variables tokens has in the picture

Give a proper name to the flow and save it
The end result
After saving the Microsoft Flow and process the Evaluation forms, the result is this beautiful and interactive report that we can present in a monitor during the breaks of our events:

Author: Sandro Pereira
Sandro Pereira lives in Portugal and works as a consultant at DevScope. In the past years, he has been working on implementing Integration scenarios both on-premises and cloud for various clients, each with different scenarios from a technical point of view, size, and criticality, using Microsoft Azure, Microsoft BizTalk Server and different technologies like AS2, EDI, RosettaNet, SAP, TIBCO etc. He is a regular blogger, international speaker, and technical reviewer of several BizTalk books all focused on Integration. He is also the author of the book “BizTalk Mapping Patterns & Best Practices”. He has been awarded MVP since 2011 for his contributions to the integration community. View all posts by Sandro Pereira
by Mekala Ramesh | Sep 12, 2018 | BizTalk Community Blogs via Syndication
Introduction
We are super excited to announce the availability of another interesting improvement in our upcoming version! BizTalk360 will allow you to setup monitoring maintenance, based on the business holidays configured for the environment.
Sometimes, administrators setup the maintenance period during new deployments or installation of security patches in their BizTalk environment. In such situations, to temporarily stop the monitoring in BizTalk360, there is a feature available “Stop Alerts for Maintenance”. Using this capability, the user can set the multiple future maintenance windows to stop false alerts being triggered from BizTalk360. This feature can be found in the Settings area of the application.
Initially, BizTalk360 allowed users to set only a single maintenance window. From v8.8 onwards, users can setup multiple future maintenance windows. So, during these maintenance periods the alarms will be disabled and no notifications will be sent from BizTalk360. At the same time, a maintenance notification will be shown in the Home dashboard and in the Stop Alerts for Maintenance Settings section. Refer to this article, to know more about this enhancement.
What is the new enrichment?
The basic idea here, is that perhaps if a user is able to setup multiple maintenance windows, they need to configure the business holidays individually. It will take much of your time, to configure for every single environment in BizTalk360. To reduce the time and ease the maintenance configuration for the users, the capability to add business holiday calendars has been introduced.
What is a business holiday calendar?
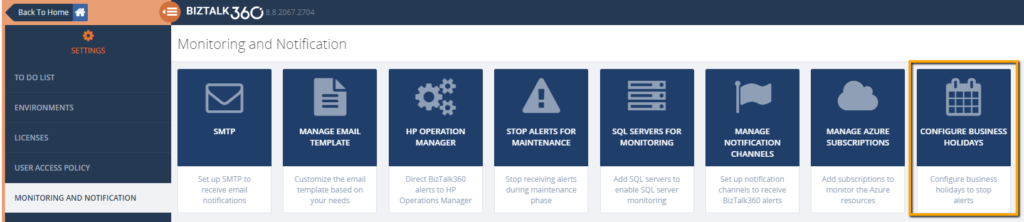
BizTalk360 provides this new capability to configure the business holidays in a calendar. These business holiday calendars can be mapped during maintenance window setup. This new configuration section is introduced in the Monitoring Notification settings section as “Configure Business Holidays”.
Using this intuitive UI, users can configure the business holidays in a calendar and save it for further mapping during the maintenance setup process.
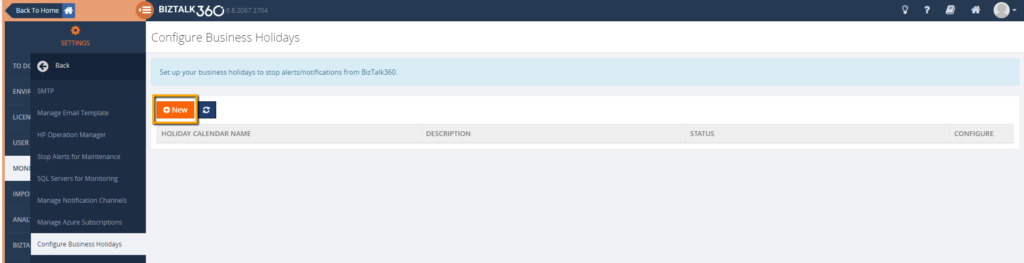
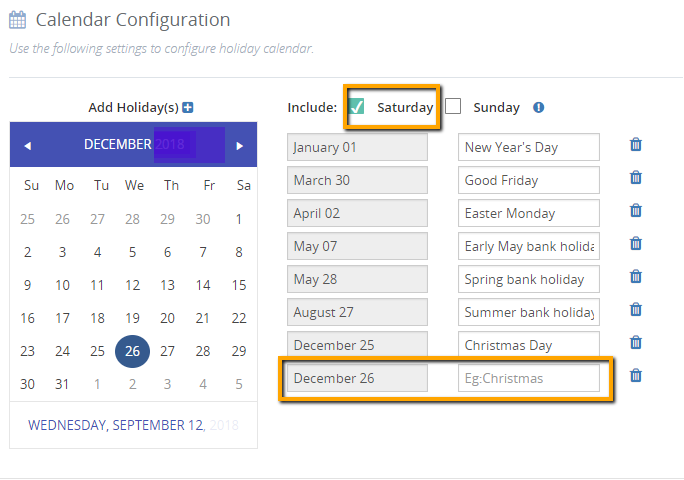
Let’s take an example: as a user, I wanted to configure a calendar for London business holidays. By clicking the “New” button, you can access the screen to configure the business holiday calendar.
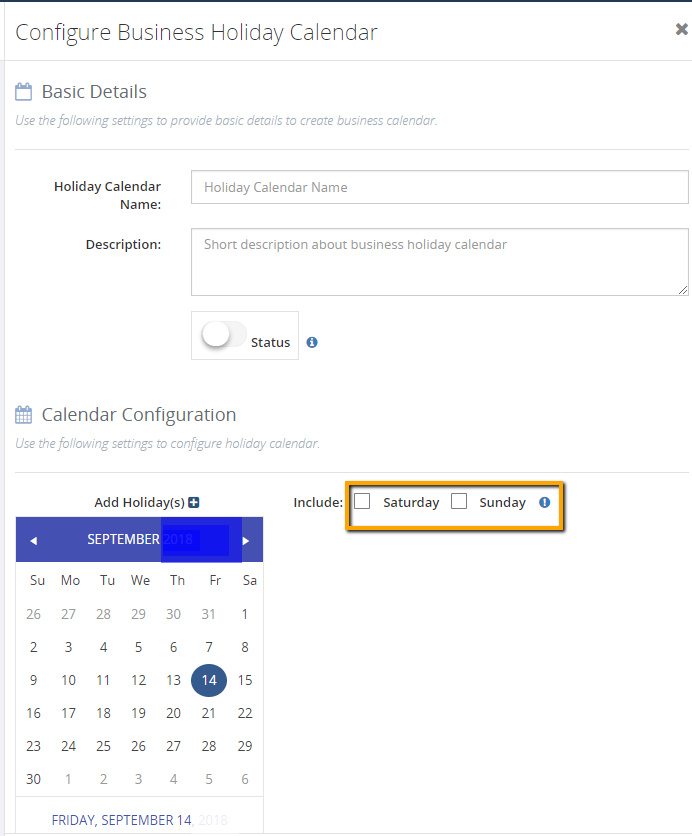
After providing the basic details (Holiday Calendar Name, Description, Status), you can configure the dates for the business holiday in the Calendar Configuration part of the screen. For each date selection, a set of text boxes will be generated. The user has the liberty to provide their own text for the selected dates. On the right-hand side of the calendar configuration section, there are two checkboxes. Using these checkboxes, a user can include Saturdays and Sundays in the maintenance window. You can select both options or either one option, based on the business need.
Once the calendar is configured with business holidays, the user can save it for further use. The calendar will be listed in the Manage Business Holiday grid view. At any point in time, a user can add/delete new business holidays to the existing calendar configuration and save it. The changes will be updated automatically and maintenance will happen accordingly.
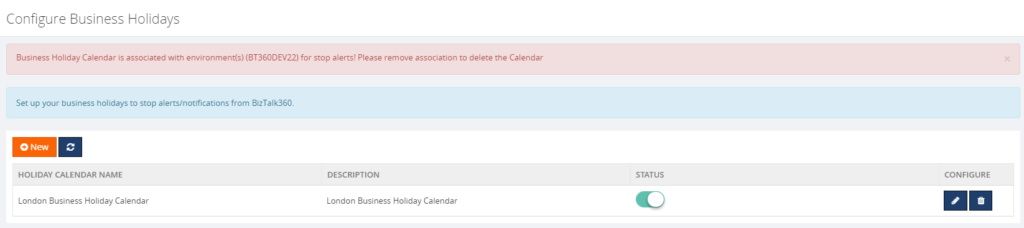
Preventing the business holiday calendar from accidental deletion
There is a chance that a configured calendar becomes deleted accidentally. The UI is designed in such a way that accidental deletion of calendars which are associated with maintenance windows is prevented. By any chance, if a user tries to delete a calendar which is associated with a maintenance window, a message will be shown in the UI that deletion is prevented.
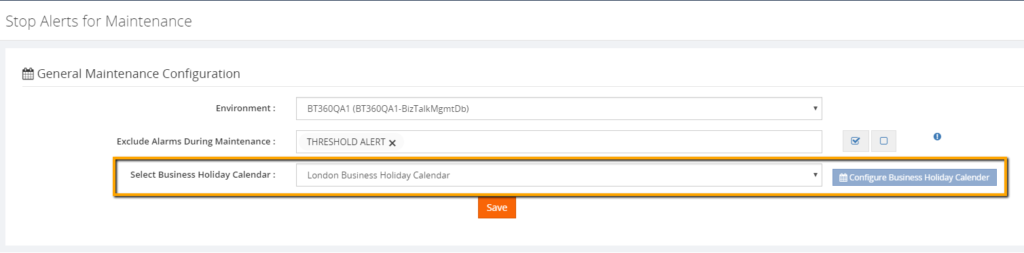
How to associate the business holiday calendar to maintenance windows?
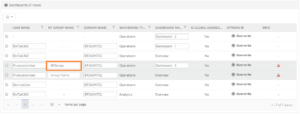
In the Stop Alerts for Maintenance settings page, A new section is introduced to configure the business holiday calendars. All the configured calendars with Status enabled will be displayed in the “Select Business Holiday Calendar” dropdown list. A user can select the desired calendar and use it for a maintenance window. During the business holiday, a maintenance window will be active.
There is a new tab “Business Holidays” added in the grid section to view the configured business holidays to the calendar.

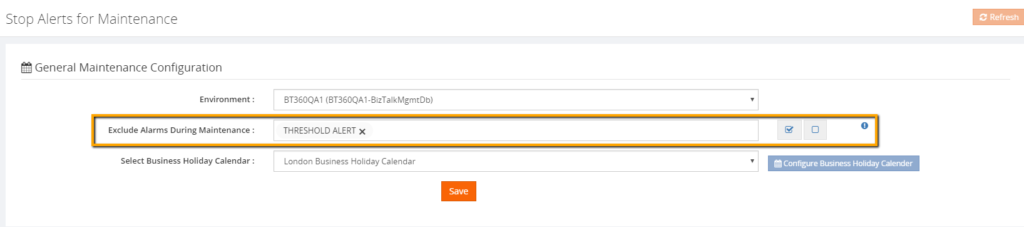
Excluding alarms during maintenance
wherewith this capability, users can exclude alarms during the maintenance. This means, that, except the selected alarms, other alarms will undergo maintenance.
Scenario: Enable Monitoring for few alarms (for example to monitor system resources) during deployments or security patch updates.
Let’s consider a situation, where administrators have configured critical alarms to monitor the system resources (CPU usage, Memory usage) of their BizTalk Environment in BizTalk360. It is important to monitor these resources in their BizTalk Environment to identify any performance glitches as early as possible to avoid significant business consequences.
In such scenarios, there will be a need to keep those alarms always on. Though the environment is in maintenance mode, if administrators wanted to monitor their system resources, they can make use of this new capability.
This capability is very useful in situations where administrators don’t want to receive alerts during the weekends except for few alarms.
Conclusion
Definitely, these improvements are like icing on the cake to our existing Stop Alerts for Maintenance capability. Happy migrating and try BizTalk360!!!
Get started with the free 30 days trial. For any queries/feedback please write to us support@biztalk360.com.
Author: Mekala Ramesh
Test Lead at BizTalk360 – Software Testing Engineer having diverse exposure in various features and application testing with a comprehensive understanding of all aspects of SDLC. Strong knowledge to establish the testing process from the scratch. Love to test the software product to deliver it with good quality. Strongly believes on “Testing goes beyond just executing the test protocol”. View all posts by Mekala Ramesh
by Sowmiya Subramanian | Sep 11, 2018 | BizTalk Community Blogs via Syndication
This is a sequel blog to my post about the Export/Import Configuration feature. Along with BizTalk Reports and Knowledge Base, we also brought import/export capabilities for Dashboards and Custom Widgets.
A BizTalk administrator needs to perform many tasks every day. When the time comes to analyse or visualize BizTalk data, it can be difficult to break it down and discover exactly what you need to know. By building a BizTalk360 dashboard, the administrator can get a better look at exactly the information of a specific environment. BizTalk admins can create such insightful dashboard for four different sections in BizTalk360:
- Operations
- Analytics
- EDI
- ESB
The Dashboard options are great and they help to monitor and troubleshoot your environments proactively. However, the downside is that, it can take some time to craft the different dashboards you want and subject matter expertise to display the relevant metrics needed to troubleshoot a specific issue. The Dashboard Import/Export feature allows you to export your fine-tuned, purpose-built Dashboard screens, and import the ones that have been shared with you.
Exporting Dashboards
BizTalk360 admins can export all the available dashboards under each environment in BizTalk360. Using this capability, users can import all the configured dashboards or any specific ones.
Scenario 1: For their business needs, BizTalk administrators can manage multiple environments. If the admin wants to migrate the Dashboard configuration from one environment to another, the Admin can export the configuration in one environment and import it into another one. Even the globally created dashboards can be imported and exported.
Importing Dashboards
The BizTalk admins can import the exported Dashboard configurations from another environment. The admin can create new dashboards and can also overwrite existing dashboards in the target environment.
Having said already, the Dashboards are user specific. This means that users, for which dashboards will be exported and imported between environments, need to exist in the target environment. So, while importing dashboards from one environment to another, make sure the user is existing in the User Access Policy screen. If, by any chance, that specific user does not have a profile in the destination environment, it can be created by using the User Access Policy import capability.
If the user does not have the access for the particular environment in the User Access Policy screen, then the admin cannot import the dashboard for the specific user. Hence, the user must be available in the destination environment.
In case, the user may exist in a Windows NT Group, then the admin can import the dashboard by providing the NT Group name.
The result of the imported Dashboards is shown in a nicely formatted grid view, with an explanation of what happened with each Dashboard during the import process.
Exporting Custom Widgets
The import and export custom widgets implementation is mainly to handle the custom widgets in dashboards. Because, when a dashboard contains any custom widgets, then it will not get exported along with the dashboard functionality. The user can export the needed custom widgets along with the dashboard from one environment to another environment.
Note: The widgets are not environment specific. All the available widgets will be accessible for all the environments.
Importing Custom Widgets
Importing custom widgets is done by uploading an export file. Using the import functionality, the widget can be imported into other environment or used to restore widgets to the same environment. The Import process takes into consideration, if the widget already exists in the destination environment (widgets are not duplicated). If so, it will be overwritten.
In case the user still wants to import that widget into the destination environment, the user can edit the original name of the widget, thereby making sure that the widget will become created in the destination environment.
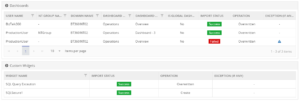
The results of an import are shown in a nicely formatted grid view with an explanation of what happened with each widget during the import process.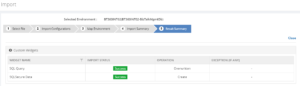
Scenario 2: While Exporting and importing a dashboard into another environment, the dashboard can contain custom widgets for any kind of data visualization or analysis. Those custom widgets won’t be imported with the Dashboard because, in BizTalk360, the custom widgets are handled separately. In such case, the user can Export the Dashboard along with the custom widgets and import then in the required environment. This will reduce the time on manual creation of each custom widget.
Conclusion
The Import/Export functionality in BizTalk360, tremendously reduces the time of migrating the data configuration form one environment to another. For the business user, it helps to create dashboards in multiple environments and the user can create the dashboards into collaborative group easily.

by Sandro Pereira | Sep 11, 2018 | BizTalk Community Blogs via Syndication
I finally started and published the first version of the sibling BizTalk project Mapper Extensions UtilityPack for BizTalk Server 2016: BizTalk Pipeline Components Extensions Utility Pack
What is BizTalk Pipeline Components Extensions Utility Pack?
BizTalk Pipeline Components Extensions Utility Pack is a set of custom pipeline components (libraries) with several custom components that can be used in received and sent pipelines, which will provide an extension of BizTalk out-of-the-box pipeline capabilities.

What’s to expect in this version?
Content-Based Routing Pipeline Components
CBR IDoc Operation Promotion Encode component (CBRIdocOperationPromotionEncode)
- Content-Based Routing Component to promote IDOC Operation property.
- This component requires one configuration that is the MessageType string to be ignored. Then it will take the last string (word) from the MessageType Message Context Property and promote it to the Operation Message Context Property.
- This component is to be used on the Encode stage of BizTalk Server Send Pipelines and to be used exclusively on Send Ports.
CBR Operation Promotion Encode component (CBROperationPromotionEncode)
- Content-Based Routing Component to promote Operation property.
- This component doesn’t require any configuration. Then it will take the value (word) which lies ahead of the cardinal (#) from the MessageType message context property and promote it to the Operation Message Context Property.
- This component is to be used on the Encode stage of BizTalk Server Send Pipelines and to be used exclusively on Send Ports.
The project is available on BizTalk Server Open Source Community repository on GitHub (https://github.com/BizTalkCommunity) and everyone can contribute with new pipeline components that can extend or improve the existing BizTalk Server capabilities.
At the moment it is only available for BizTalk Server 2016 but it will soon be compiled and available for previous versions of the product.
Special thanks to my team coworker at DevScope: Pedro Almeida for helping me on this project.
Deploying Pipeline Components
All the .NET pipeline component assemblies (native and custom) must be located in the Pipeline Components folder to be executed by the server. If the pipeline with a custom component will be deployed across several servers, the component’s binaries must be present in the specified folder on every server.
You do not need to add a custom pipeline component to be used by the BizTalk Runtime to the Global Assembly Cache (GAC).
To know more about Deploying Pipeline Components, please see: Deploying Pipeline Components
Where to download?
You can download BizTalk Pipeline Components Extensions Utility Pack from GitHub here:
 BizTalk Pipeline Components Extensions Utility Pack
GitHub
Author: Sandro Pereira
Sandro Pereira lives in Portugal and works as a consultant at DevScope. In the past years, he has been working on implementing Integration scenarios both on-premises and cloud for various clients, each with different scenarios from a technical point of view, size, and criticality, using Microsoft Azure, Microsoft BizTalk Server and different technologies like AS2, EDI, RosettaNet, SAP, TIBCO etc. He is a regular blogger, international speaker, and technical reviewer of several BizTalk books all focused on Integration. He is also the author of the book “BizTalk Mapping Patterns & Best Practices”. He has been awarded MVP since 2011 for his contributions to the integration community. View all posts by Sandro Pereira
by Sandro Pereira | Sep 10, 2018 | BizTalk Community Blogs via Syndication
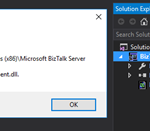
Sometimes errors seem to find me, sometimes it fills that I’m chasing errors! And because someone did something that you shouldn’t do, configuring the build folder of a Functoid project to be <BizTalk Server installation folder>Developer ToolsMapper Extensions directory, I got a new and strange error while trying to open a BizTalk map inside Visual Studio: Microsoft BizTalk Mapper Unable to load wrapper. Here is the full error message:
Microsoft BizTalk Mapper
Unable to load wrapper <BizTalk Server installation folder>Developer ToolsMapper ExtensionsMicrosoft.BizTalk.Interop.Agent.dll

Of course, at that time I was quite curious to know the cause of this problem because I didn’t do anything wrong, just building a custom Functoid project and a few minutes before I actually was working in a map and I was able to open without any kind of problems.
Cause
When you build a project, by default any kind of project it will add the project assemblies as well as the dependencies to the binDebug – again this is the default behavior.
In this case, by changing this behavior in a Custom Functoid project to the <BizTalk Server installation folder>Developer ToolsMapper Extensions directory, was causing the problem, because it was adding not only the custom Functoid assembly but also some BizTalk internal assemblies, in this case the Microsoft.BizTalk.Interop.Agent.dll, that are incompatible with the internal BizTalk Mapper wrapper.

Note: BizTalk Server installation folder>Developer ToolsMapper Extensions directory is where Visual Studio BizTalk project looks for custom functoids to be added to the Toolbox.
Solution
Once again, the solution is simple, you should delete all the unnecessary assemblies, especially the internal ones of the product.
Once you delete all the unnecessary assemblies, in this case, the Microsoft.BizTalk.Interop.Agent.dll, and I also advise to delete all the ones that are selected on the above picture, the Unable to load wrapper problem will be solved and you can once again open the BizTalk Mapper without any kind of problems inside Visual Studio
Author: Sandro Pereira
Sandro Pereira lives in Portugal and works as a consultant at DevScope. In the past years, he has been working on implementing Integration scenarios both on-premises and cloud for various clients, each with different scenarios from a technical point of view, size, and criticality, using Microsoft Azure, Microsoft BizTalk Server and different technologies like AS2, EDI, RosettaNet, SAP, TIBCO etc. He is a regular blogger, international speaker, and technical reviewer of several BizTalk books all focused on Integration. He is also the author of the book “BizTalk Mapping Patterns & Best Practices”. He has been awarded MVP since 2011 for his contributions to the integration community. View all posts by Sandro Pereira
by Gautam | Sep 9, 2018 | BizTalk Community Blogs via Syndication
Do you feel difficult to keep up to date on all the frequent updates and announcements in the Microsoft Integration platform?
Integration weekly update can be your solution. It’s a weekly update on the topics related to Integration – enterprise integration, robust & scalable messaging capabilities and Citizen Integration capabilities empowered by Microsoft platform to deliver value to the business.
If you want to receive these updates weekly, then don’t forget to Subscribe!
Feedback
Hope this would be helpful. Please feel free to reach out to me with your feedback and questions.
by Lex Hegt | Sep 5, 2018 | BizTalk Community Blogs via Syndication
In this blog post we will update you on which new capabilities came with BizTalk Server 2016 Feature Pack 3. Earlier, we have also written about Feature Pack 1 and 2. You can find these articles here:
Introduction to BizTalk Server 2016 Feature Packs
In 2017, Microsoft started releasing so-called Feature Packs for BizTalk Server 2016. The concept of releasing these Feature Packs is that Microsoft doesn’t want their BizTalk Server customers to wait for new features, until a new release of BizTalk Server arrives. Instead, they want their customers to enjoy these new features, as soon as possible once they have been developed and are ready to go to market. As these Feature Packs contain non-breaking features, there is little risk that a BizTalk customer runs into issues as a result of installing such Feature Packs. These Feature Packs are only available with the Enterprise and Developer edition of BizTalk Server 2016.
Since Microsoft started with this strategy, they have released 3 Feature Packs:
The BizTalk Server 2016 Feature Packs are cumulative. This means that once you installed, for example, Feature Pack 3, you can also enjoy the features which were brought in Feature Pack 1 and 2.
You might have also noticed, that each Feature Update also contains a Cumulative Update. It is also possible to install these Cumulative Updates without the new capabilities which are provided by the Feature Packs. To check the most recent releases of these Cumulative Updates, please check this web site:
What’s new with BizTalk Server 2016 Feature Pack 3
This Feature Pack brings improvements in below mentioned areas:
- Compliance
- Compliance with US government accessibility standard
- Privacy – Compliance with FIPS and GDPR
- SQL Server 2016 SP 2 – Deploy multiple databases per instance of an Availability Group
- Adapters
- Office365 Outlook Email – Send and Receive messages using Office365 e-mail
- Office365 Outlook Calendar – Create appointments using Office365 schedules
- Office365 Outlook Contact – Create Office365 contacts
- Web Authentication – Authenticate with Azure AD and OAuth using Microsoft Enterprise Single Sign-On
- Administration
- Advanced Scheduling – Set up recurrence on Receive Locations with greater precision
Compliance with FIPS and GDPR
As of this Feature pack, BizTalk Server is compatible with FIPS (Federal Information Processing Standard) and GDPR (General Data Protection Regulation).
FIPS is a standard developed by the US federal government for use in computer systems by non-military government and agencies. The specification comes with standards for among others:
- Codes – country, region and state codes, weather conditions, emergency indications
- Encryption – Data Encryption Standard, Advanced Encryption Standard
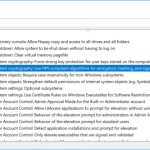
In case of BizTalk Server, this relates to how data becomes encrypted and decrypted in SQL Server. FIPS-compliance is enabled in the Operating System, under Local Policies; refer to the screenshot below. Once enabled, SQL Server will enter the FIPS compliant mode, thereby using cryptographic standards as defined in FIPS 140-2.

GDPR is a European law on data protection which intends to regulate the privacy of individuals in the European Union. This new law supersedes Data Protection Directive 95/46/EC from 1995.
If you want to read more about BizTalk and GDPR, there are few resources written by Sandro Pereira on this topic:
Multiple databases in Availability Groups SQL instances
Also SQL Server 2016 SP 2 is supported from Feature Pack 3. This is especially good news when you are running SQL Server Availability Groups. Because this allows you to have multiple BizTalk databases in the same SQL instance. As this was not possible earlier, this made setting up BizTalk Server in Availability Groups complex and expensive. The reason for that, is because you needed to have multiple SQL Server instances than without Availability Groups and more expensive as you need to license each SQL Server instance in the Availability Groups.
New Adapters for Office365 connectivity
Few other interesting features of this Feature Pack are the adapters for Office365 Email, Calendar and Contacts. These adapters allow you to use Office365 accounts for receiving and transmitting emails, creating and updating calendar items and creating contacts.
The Office365 Email adapter
This adapter can be uses both for receiving as for transmitting messages. In BizTalk terms, you can use this adapter both on Receive Locations as on Send Ports.
On the receive side the adapter enables you to:
-
Select a folder from which to retrieve email
-
Select a timestamp from which you want to receive emails
-
Retrieve unread emails only
-
Select an action after the email has been read, like marking the email as read or deleting the email
When transmitting emails via a Send Port, you can set the following properties:
-
To – separate email addresses with a semicolon (‘;’), maximum 256 characters
-
CC – separate email addresses with a semicolon (‘;’), maximum 256 characters
-
Subject – enter maximum 256 characters
-
Importance – select Low, Normal or High from the drop down in the Send Port
Also, it is important to realize that you can only send plain text messages.
Once you receive an email on a Receive Location, the Receive pipeline adds promoted properties, which you can use for routing the emails. These promoted properties are:
-
Importance
-
Subject
-
SenderName
-
SenderAddress
-
HasAttachments
The Office365 Calendar adapter
You can use this adapter both for receiving events as for transmitting events. To be able to receive/send events you need to have the XSD schemas for both operations. You will find these schemas here:
Program Files (x86)Microsoft BizTalk Server 2016SDKSchemas
Related to calendars, this folder contains the following schemas:
The advantage of having these schemas is, that you can determine yourself which elements you will promote for routing purposes.
When you want to receive calendar items, you can select a calendar from an Office365 Outlook account. Next, you can configure that you want to receive events which are starting within a particular time frame.
You can also use the adapter to create events from BizTalk Server. Therefore, you can, populate a message according the above mentioned Send schema. Yet, some event properties can also be set on the Send Port. The properties you can set on a Send Port are:
The Office365 Contact adapter
You can use the Contact Adapter for creating contacts in Office365. For this adapter too, Microsoft has provided a schema. You will find this schema in the same location as the Calendar schemas and has the following name:
Office365OutlookContactSend.xsd
Again, because you can add this schema to your BizTalk solution, you can determine yourself which fields you would like to promote. The Send Port configuration only allows you to sign in with an Office365 account. You cannot configure any contact properties on the Send Port.
Note: To be able to use the Office365 adapters from BizTalk, besides Feature Pack 3, you need to install TMS. This service refreshes the Office OAuth tokens which BizTalk uses. After installation of the Feature Pack, navigate to the installation folder of BizTalk Server (Program Files (x86)Microsoft BizTalk Server 2016). There you will find BizTalkTMS.msi, which you must install.
Read this article for more details about the Office365 adapters for BizTalk Server 2016.
Advanced Scheduling of Receive Locations
Scheduling Receive Locations has always been hard with the out-of-the-box capabilities of BizTalk Server. Often people used the open source Scheduled Task Adapter which exists since BizTalk Server 2004. Currently, Sandro Pereira maintains this adapter on GitHub.
The open source Scheduled Task Adapter does a good job. But, organisations might prefer not to go for open source software, but still they might have a need to schedule Receive Location(s). Microsoft has listened to their requests and introduced Advanced Scheduling of Receive Locations with Feature Pack 3!
Below screenshots show how the scheduling capabilities of a Receive Location look like, before and after installation of Feature Pack 3.
In case of the Feature Pack 3 scenario, the upper part of the screen is extended with capabilities to select a time zone and to configure automatic adjustment for Daylight Saving Time (DST).
The ability of setting the time zone can help in case your integration partner(s) live in different regions of the world. Using the Time Zone drop down will make it easier to configure when Receive Locations will pick up messages according the partner’s time zone.
Daylight Saving Time, also mentioned Summer Time, is a practice which is done in a number of countries in the Northern and Southern hemisphere. During DST, the clock becomes advanced one hour close to Spring and adjusted backwards in Autumn. This way daylight lasts longer in the evening. These adjustments might effect the proper working of your interfaces. That’s why Microsoft introduced the ability to automatically adjust the schedule of your Receive Locations, according DST.
By the way: did you know that the Data Monitoring features in BizTalk360 are also compliant to Daylight Savings? Our colleague Mekala wrote an article about it. Here you have the link to that article:
Especially the Service Window capability of Receive Locations are improved hugely. The original ability to configure just a Start and a Stop time has been extended with the following recurrence features:
- Daily – configure the number of recurring days and from which date the recurrence will be active
- Weekly – configure the number of recurring days, from when the recurrence will be active and on which weekdays the recurrence must be active

- Monthly – configure which months and which days the recurrence should take place
Conclusion
With BizTalk Server 2016 Feature Pack 3, Microsoft has released many useful features for BizTalk Server 2016. The Office365 adapters, the improved scheduling capabilities and the support of SQL Server 2016 SP2 (because of simplification of Availability Groups) can be considered as the most useful ones.
Meanwhile, the community is also waiting for the release of BizTalk Server vNext which has been announced recently. This version of BizTalk underlines the on-going commitment of Microsoft in the platform. The new version of BizTalk will, amongst others, contain all the release Feature Packs for BizTalk Server 2016.
You can receive this kind of announcements and many other interesting articles in the Microsoft Integration space directly in your email box, by subscribing to our monthly Integration Newsletter. You can find the August edition of this newsletter, which provides more information about BizTalk vNext, here.
by Sowmiya Subramanian | Sep 4, 2018 | BizTalk Community Blogs via Syndication
Introduction
Here is another exciting capability we have added to our existing import and export capability. Curious to know? In this blog post, I would like to highlight what are all the new enhancements in Import/Export Configurations we made for our upcoming version V8.9. These enhancements would ease the BizTalk administrator’s day to day operations, particularly migrating data from one environment to another.
All the newly created BizTalk Server applications are being tested first in the preproduction or UAT and shadow environments to avoid business consequences. Likewise, customers would prefer to test all the functionalities of the BizTalk360 in their non-production environments. Further, they populate necessary data to operate, monitor and find analytical information of their environment.
Admins don’t need to recreate the data again in their production environment as in such scenarios, our import and export capability plays a major role. Already we have support to export and import,
- Alarms
- User Access Policies
- Saved Queries
- Secure SQL queries
New Capabilities
In the version 8.9, we added support for import and export of the following sections:
- Knowledge Base
- Service Instances
- ESB Exceptions
- Event Logs
- Throttling Data
- BizTalk Reports
- Dashboards
- Operation (Default & Custom Dashboards)
- Analytics (Default & Custom Dashboards)
- EDI Dashboards
- ESB Dashboards
- Custom Widgets
Using this rich capability, one can easily export and import the configuration between environments, thereby reducing the migration effort. This is especially useful in scenarios, where the user tries to carry out testing in a test environment, and upon achieving the desired result, they can import the configuration from the production environment.
What has enhanced in Import/Export Grid Pagination
Previously, BizTalk 360 has a static pagination which is available for the grid by default. In Import/Export, the user can customize the pagination using the “Max Matches” on System Settings sections in BizTalk360. Pagination will be visible for the Import/Export grid once the row count exceeds the max match size.
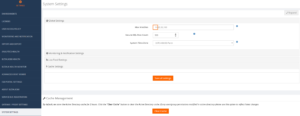
For Instance: If the Max Matches size is set to 10 means, then the pagination for each grid in import/export will be visible when the row count exceeds 10.
Exporting configurations
Exporting your data is a great way to make the information more digestible or find patterns that can give your team better insight between different environments. The user can make use of export functionality in two ways:
- To migrate configuration data between different Environment
- To archive the configurations in the local system
Exporting the Knowledge Base
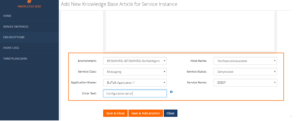
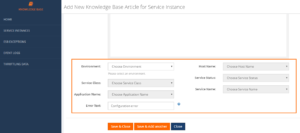
The BizTalk360 knowledge base is useful to document the BizTalk issues which administrators encounter on a day-to-day basis. To migrate the BizTalk360 knowledge base it is possible to use the Export functionality.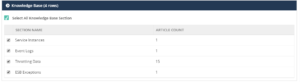
The user can export the articles based on the sections Service instances, Event Log, Throttling Data and ESB Exception. The knowledge base section is preselected, the user can deselect and reselect the knowledge base according to their needs. Once the selection has been made, the user can Export the knowledge base articles.
Exporting BizTalk Reports
The BizTalk Reports help organizations to visualize/monitor their business data. Using the Export functionality, the user can archive or export the BizTalk Reports.
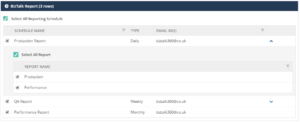
The BizTalk Reports and their associated schedules are preselected. The user can view the associated reports by clicking the arrow on each schedule and they can edit the selection according to their needs.
Importing Configuration
The Import functionality is mainly useful for importing large amounts of data quickly. By importing the configuration, you can replicate the required configuration on the target machine. To import the configurations from a certain environment, you should have already saved and exported those configurations in a Zip file. Import can be used in two ways in BizTalk360
- To create a new configuration from the source environment to the destination environment
- To update the existing configuration on the destination environment
Importing Knowledge Base
In BizTalk360, the customer can create KB articles as and when they fix issues in the environment. Over a period of time, they can have a wealth of information ready to fix those repeated issues. Those articles can be imported to another environment using the import knowledge base feature.
For Instance: The organization has Production Environment and they are planning to build a separate QA environment for testing. After creating the new environment, it is a lot of work to manually create the knowledge base article for frequent/repeated issues. Here, the import knowledge base comes into play. The user can easily import the knowledge base articles from the Production environment to QA environment.
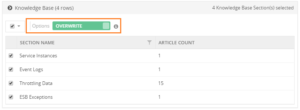
The existing articles can be overwritten or else can be ignored. If the article doesn’t exist, it will create a new article in the target environment.
In BizTalk360, the knowledge base articles can be created for a specific environment or globally (without selecting the environment) accessible articles. The BizTalk360 user can create or overwrite the articles.
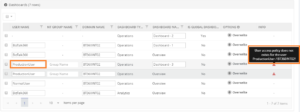
For specific Environments: The knowledge base articles will be imported to the target environment with the configuration tags (like Host Name, Application name etc.., which is specific for each error code they encounter) for specific articles. If the article is overwritten, then the import process will overwrite the configuration tags on the existing article.
When the configuration tags are not available in the target environment, the article will not be imported and it will throw an exception on result summary.
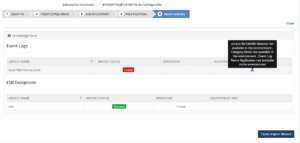
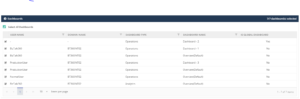
For Global articles: When the global knowledge base is imported, the environment selection will not happen. The articles are accessible to all the available environments.
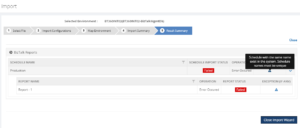
Importing BizTalk Reports
In a business environment, the BizTalk reports provide a comprehensive, high-level overview of the performance of their BizTalk environment. The configuration of these reports, can be easily managed using the Import BizTalk Reports feature.
For instance: An organization has deployed BizTalk360 on one of the Development/QA/UAT environment(s) and they want to move all configurations to the Production environment. The BizTalk360 administrator must do the usual practice to set up the configurations manually in a production environment. It is not feasible to configure all the configuration manually, instead BizTalk360 allows you to easily export and import all the BizTalk Reports.
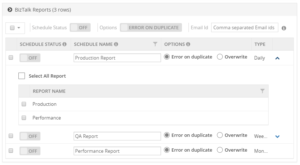
While importing the schedules and the associated reports to another environment, the user can edit the schedule name as per their requirement and the user can enable the schedule after importing by selecting the ON/OFF option available on each schedule. By default, the status of schedule during import, is disabled. The user can also change the Email ID after importing. This will help the user to create/overwrite the schedule and the reports as per their business needs.
Note: The user cannot import the reports without the selecting the associated schedule.
If the user sets the option to “Error or Duplicate”, the import process would not allow duplicate schedules and associated reports to be imported.
If the user sets the option to “Overwrite”, the import process will overwrite the existing schedule with the same name. In case the associated reports are not available, the import process will create the reports and associate to the schedule.
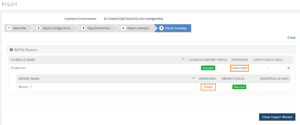
If the associated report already exists in another schedule means, it will ignore the report while importing.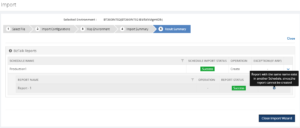
Conclusion
By adding the above feature, the Import/Export Configuration has become more versatile. This provides a great option for the administrators who find the migration process intimidating and would like expert help to assure an effortless transition between multiple environments. No matter where your configuration needs to go, BizTalk360 lets you Import/Export data with ease.
Apart from knowledge base and BizTalk reports we have included the Dashboards and Custom widgets for v8.9 release. I will cover those two functionalities on my next blog “Stay tuned!”.


