by BizTalk Team | Sep 11, 2017 | BizTalk Community Blogs via Syndication
As a second step in the increased commitment to provide a better product to our customers and increase the collaboration with our community. we took the first step into joining the open source community with BizTalk Server.
Today we open sourced 3,539 files for our customers as well as the community, these are all the schemas we ship as a part of the product. Or intention is to continue our open source commitment, and the repository is made available for everyone. while the main branch will be managed by the BizTalk Server Product group, the community contributions is more than welcome, this can include elements like Schemas, Samples, Adapters, pipeline components or anything else you feel the community can take advantage of.
by Rochelle Saldanha | Sep 11, 2017 | BizTalk Community Blogs via Syndication
We are planning a series of blogs, Customer feedback getting Answered, where we will be trying to address and answer some of the issues where a workaround is possible rather than awaiting a new feature release.
Many of our customers put a lot of effort in describing their problems in the feedback portal – (where we collect all requirements in single place and we pick the popular features to be implemented based on the voting done by various customers). We often go through the feature requests – updating the status of the issues and also discussing them with our technical development team of the feasibility of implementing them.
Behind the scenes, we go through a process for the popular requests and help to bring them to implementation in the upcoming releases.
In one of our previous blogs, I went through the FAQ’s a lot of our customers usually have. In this article, I take an issue from the feedback portal and show how it can be solved with the API we expose.
The Issue:
Monitoring Alarms information on the Operations Dashboard
The Operations Dashboard is widely used by a lot of companies to have a quick overview of the system. While we do have a lot of interesting widgets, we do not have anything which links the Alarm notification section to this area.
http://feedback.biztalk360.com/forums/331698-biztalk360-monitoring/suggestions/20369500-widget-with-errors
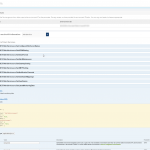
With API Documentation capability of BizTalk360, we have exposed over 350 REST services (APIs) that have the capability to retrieve the requested information from the BizTalk server environment. The APIs are defined as Swagger files which mean that you have the ability to execute them online to see if the result is what is intended. For example, you may want to display the list of BizTalk Applications or the performance of the BizTalk server (such as CPU, Memory, etc.) in a custom dashboard application within your organization. With BizTalk360 API Documentation, it is very easy for you to consume the API and retrieve the information from the BizTalk server environment. It not only ends with these. You can access pretty much any information like EDI, BAM, Artifact information, and so on from the BizTalk environment with the help of BizTalk360 APIs.
The Solution:
I have used for this example, a very simple API to retrieve the latest monitoring data for a specific alarm from the below API.
GET Services. REST/AlertService. svc/GetLatestMonitoringData
You can use the BizTalk360 API documentation to test your parameters and then view the output response.
In BizTalk360, navigate to Settings -> API documentation -> Select Alert services from the dropdown and then select GetLatestMonitoringData.
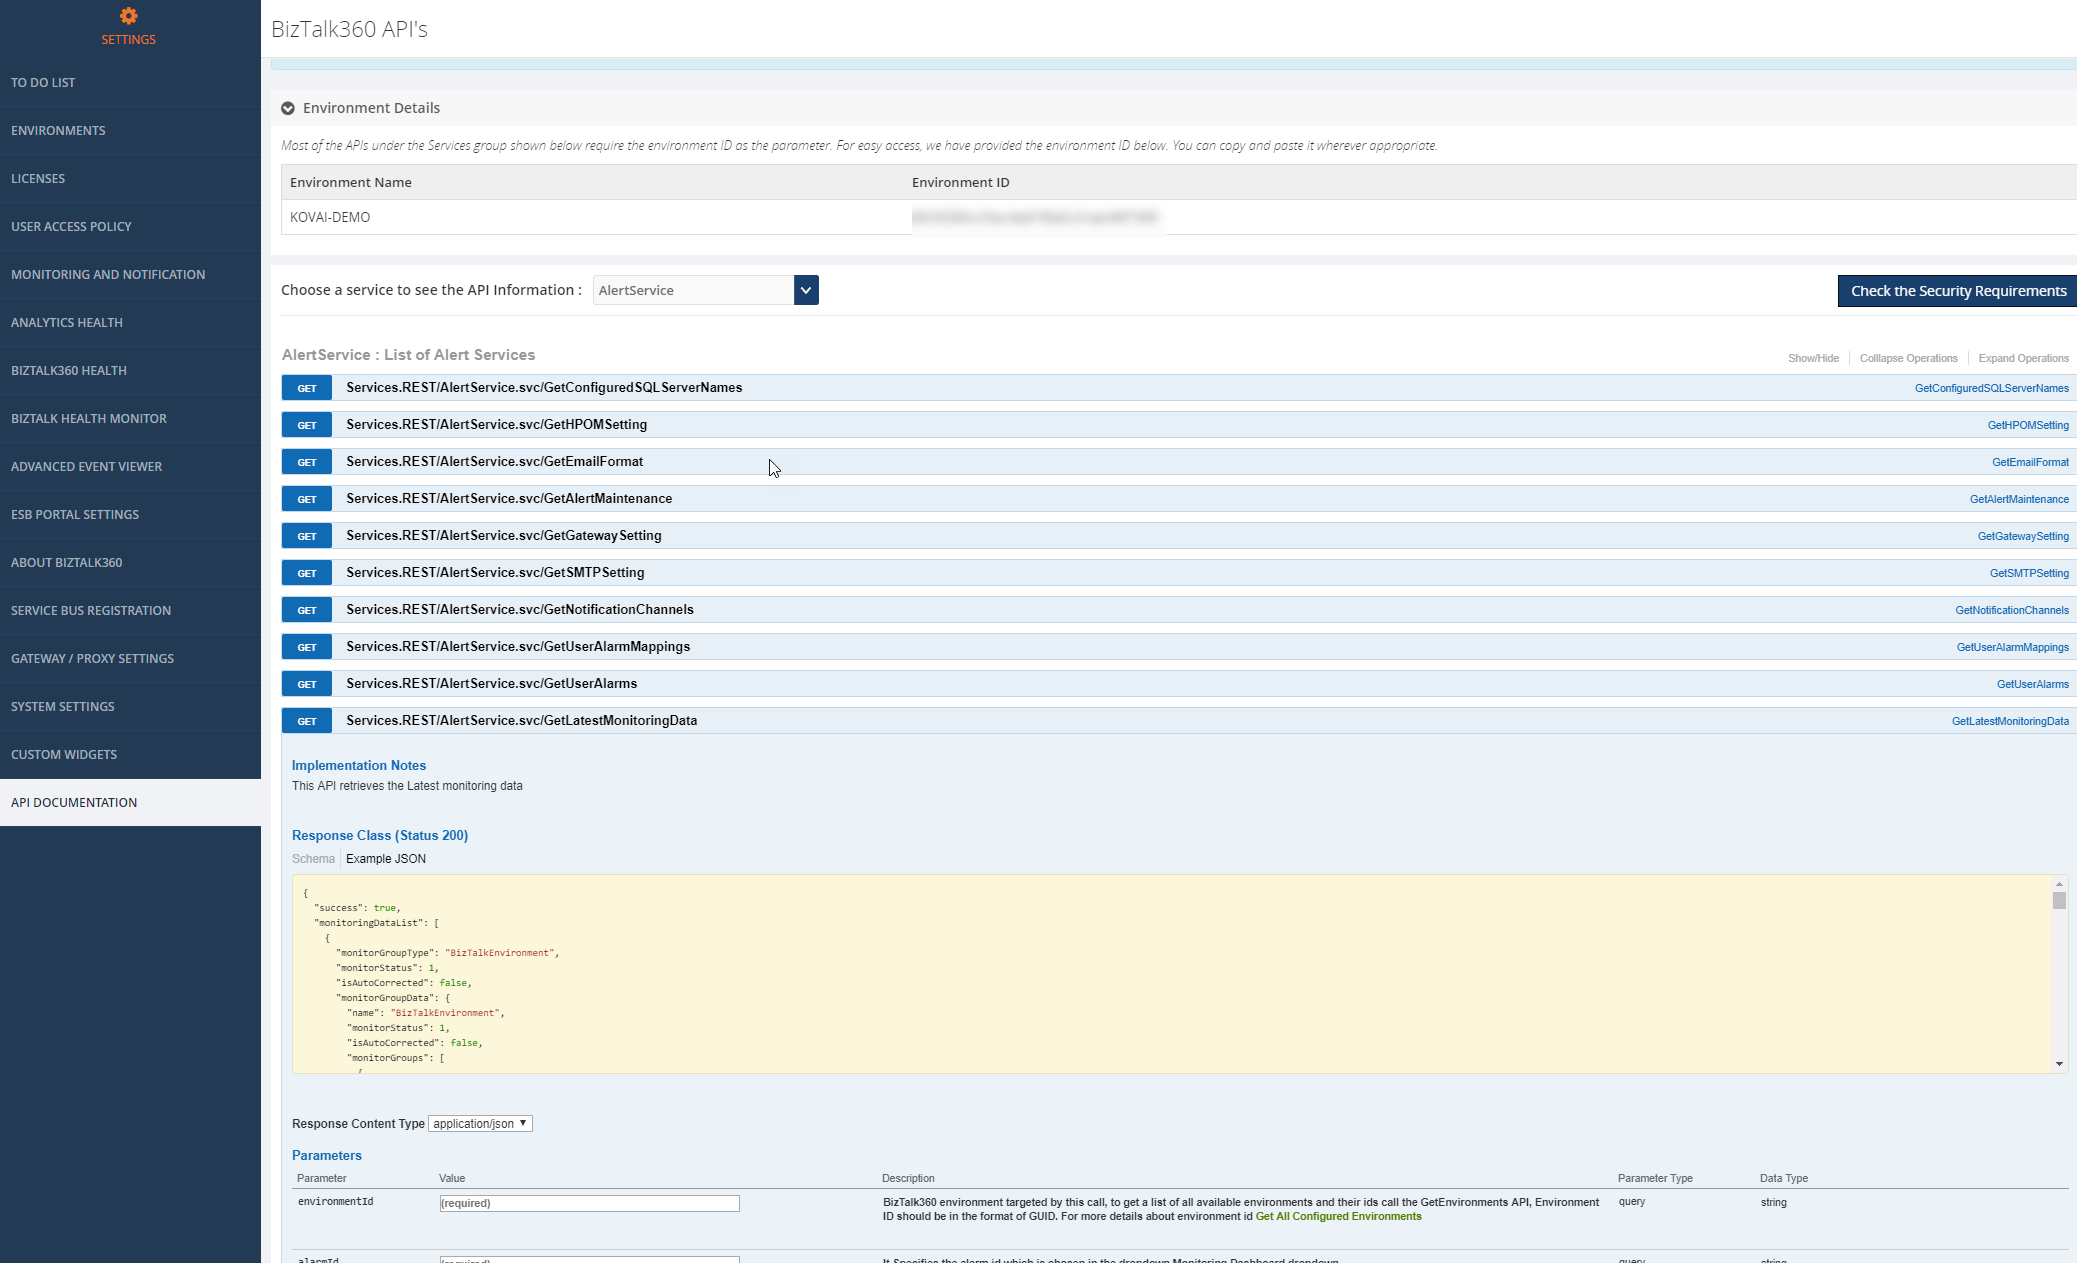
Current Alarm Monitoring Dashboard View
This is how my Alarms current state is in the Monitoring dashboard is currently.
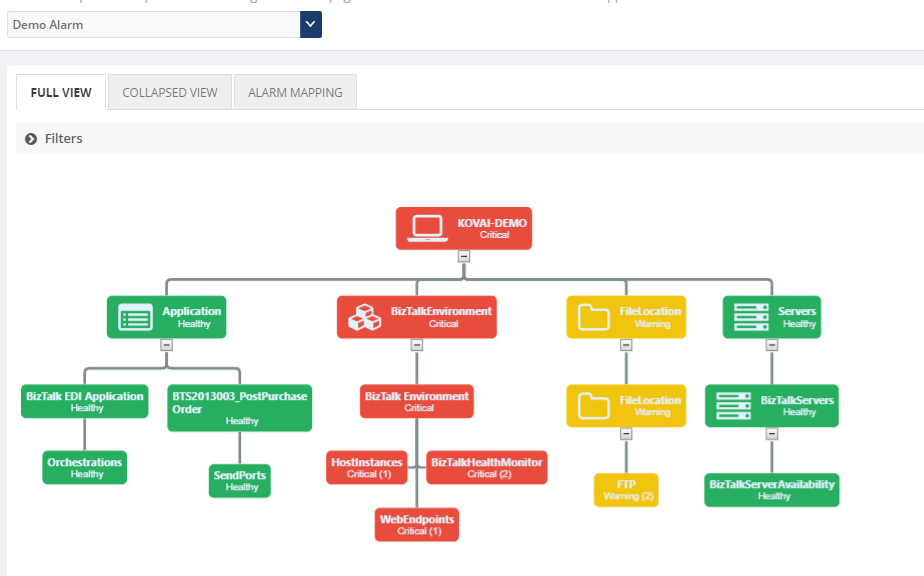
And now to view the same data in the Operations Dashboard, we need to create a custom widget which will use the API call as shown earlier. All you need to provide is the <Environment ID> & <Alarm Id> to pass as parameters which you can retrieve from the SQL tables. (Environment ID is provided at the top of the API Documentation page already)
Then you can use this code for the widget which I wrote to have a basic widget for a specific alarm to show on the Operations Dashboard.
Thus, you can see for the Alarm – Demo Alarm, I have displayed all the artifacts and the state they are in.
This can be crucial for those who use their dashboards a lot. Rather than switch to the Monitoring dashboard, you can view the same data as a widget on the Operations Dashboard, along with other useful information.
Hopefully, this blog gave you some more ideas on how you can use the API & Custom widgets to customise the data displayed.
If you have any questions, contact us at support@biztalk360.com. Also, feel free to leave your feedback in our forum.
Author: Rochelle Saldanha
Rochelle Saldanha is currently working in the Customer Support & Client Relationship Teams at BizTalk360. She loves travelling and watching movies. View all posts by Rochelle Saldanha
by Bill Chesnut | Sep 11, 2017 | BizTalk Community Blogs via Syndication
Currently BizTalk Server 2016 has support for REST, but the support is fairly limited and is missing some feature that most developer expect from REST services.
To overcome these missing feature for companies that are exposing these services to their consumers/partner over the internet, I will show you have to use Azure API Management to publish SOAP services from BizTalk as REST.
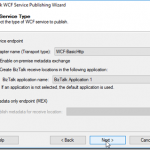
For this blog post I took the Hello World example from the BizTalk SDK samples and converted it to a Request/Response orchestration and used the WCF publishing wizard to publish

Publish schema as WCF service (this allows better control over the URL)

Rename the Service and Operation, Select Schemas

Select the location to publish to and I am allowing Anonymous for my example
Note: I ended up using BizTalkWcfService2 as the URL, because an issue I am working with the API Management group

Publish Service

Now you need to setup the App Pool and make sure you can get the WDSL, for this example, We also need to update the WSDL to have the internet name for the server, by default the WSDL is going to be generated with the local server name

I downloaded the WSDL file and changed the server name
Open your Azure API Management Instance and go to the Add a new API blade

Click Upload to upload the WSDL file, if it was not necessary to change the WSDL file you could use the URL instead

Update the highlighted fields with your values, Click “Create”

Wait for the create to complete, Click “Done”

Now before we can use our newly imported SOAP service exposed as REST, we need to add it to a Product to allow users to call it.
I am using a Product Named BizTalk, you can create and use any Product Name you like

Now I go back to the API Definition, Click on our “submit” operation

Then Click on the “Test” Tab

This is the Test blade, notice that API Management has supplied the API Management Subscription Key (necessary to call API Management, this is based on the product we put our API in), the Sample JSON Document and a “Send” button to test with. Click the “Send” button

View the results of the call

You will notice that the send and receive bodies are JSON, but we are calling a SOAP Service, this is what the SOAP call would look like

Lets now examine how API Management published our SOAP Service as REST, on the API tab, Click the “View Code”

The API Management use a policy to do the inbound and outbound transformation, the policy uses the liquid language to do the translation from JSON to XML and them XML to JSON and include error handling

The process of importing our WSDL as REST to SOAP automatically created the policy that does the transformations and also created the inbound and outbound JSON schemas

In a later blog post I will talk about how you can modify the schemas and the transformation.
One of the main features that BizTalk is missing with its REST adapter is the ability to provide the definition of the API for the clients to use to generate the code to call our REST services, in the Developer Portal, API Management provides either Open API (swagger) or WADL for our clients to use.

I hope this blog post helped you understand how you can use Azure API Management to publish your BizTalk SOAP Services as REST
by Gautam | Sep 11, 2017 | BizTalk Community Blogs via Syndication
Do you feel difficult to keep up to date on all the frequent updates and announcements in the Microsoft Integration platform?
Integration weekly update can be your solution. It’s a weekly update on the topics related to Integration – enterprise integration, robust & scalable messaging capabilities and Citizen Integration capabilities empowered by Microsoft platform to deliver value to the business.
If you want to receive these updates weekly, then don’t forget to Subscribe!
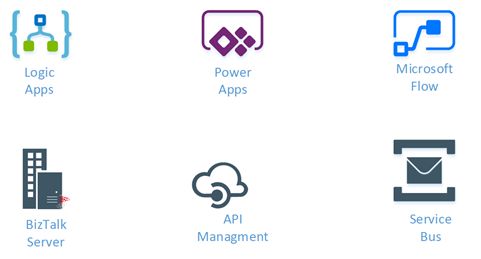
On-Premise Integration:
Cloud and Hybrid Integration:
Feedback
Hope this would be helpful. Please feel free to let me know your feedback on the Integration weekly series.
by Sandro Pereira | Sep 8, 2017 | BizTalk Community Blogs via Syndication
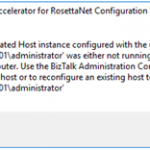
While trying to document, or better update my RosettaNet installation and configuration guide, I got a very strange (but by now I should know that nothing is strange with BizTalk and RosettaNet) while executing Microsoft BizTalk 2016 Accelerator for RosettaNet Configuration Wizard:
A BizTalk Isolated Host instance configured with the user account ‘DOMAINadministrator’ was either not running or does not exist on this computer. Use the BizTalk Administration Console to create a new Isolated host or to reconfigure an existing host to run as ‘DOMAINadministrator.

This error occurred just after I try to open the BTARN configuration wizard! (first thing that appears)
I well aware that when you are planning to install and configure Microsoft BizTalk 2016 Accelerator for RosettaNet (BTARN), you need to be very careful with a certain configuration like this one:
- The BizTalk Host Instance Account and the BizTalk Isolated Host Instance Account should be the same account. Otherwise, BTARN does not function correctly.
Or that:
- BTARN requires the IIS_WPG group (group provided by IIS 6.0 that provides the minimum set of user rights and permissions required to run an application).
- BTARN requires both in-process and isolated host to be marked as “Authentication Trusted” (this setting is off by default when you create a new host)
Notice that this last one is just for everything to work well but it doesn’t impact the configuration itself.
And in fact, all my host instances have the same account and all of them was running.

Cause
BTARN installation process it’s quite old fashioned and weird is some points, the true it that Microsoft just invest a little to modernize it, and change some behaviors and requirements which are no longer justified, a good example is the IIS_WPG group requirement, this group doesn’t exist anymore, so you need to create it manually. Otherwise, BTARN installation fails.
In this case, the problem, as you can see in the figure above, is that I have two types of logon formats:
- The 2 default host instances, created by the BizTalk installation wizard, are defined as “username” – without the domain or in this case the machine name (this is a standalone environment)
- And others are set up in the format “DOMAINUsername”.
Well, regarding BTARN, if you want to avoid problems during the installation/configuration process or future problems in the runtime you should:
- Never use Full Qualify domain name in the Logon credentials. Otherwise, BTARN does not work correctly.
- To avoid BTARN problems use the down-level logon name format (DOMAINUsername).
Solution
To solve this issue the solution was quite simples, I just need to configure the logon to all my host instance in the down-level logon name format (DOMAINUsername).

After that, I was able to execute the BTARN configuration wizard without any further issues and especially no more user account was either not running or does not exist on this computer.
Author: Sandro Pereira
Sandro Pereira lives in Portugal and works as a consultant at DevScope. In the past years, he has been working on implementing Integration scenarios both on-premises and cloud for various clients, each with different scenarios from a technical point of view, size, and criticality, using Microsoft Azure, Microsoft BizTalk Server and different technologies like AS2, EDI, RosettaNet, SAP, TIBCO etc. He is a regular blogger, international speaker, and technical reviewer of several BizTalk books all focused on Integration. He is also the author of the book “BizTalk Mapping Patterns & Best Practices”. He has been awarded MVP since 2011 for his contributions to the integration community. View all posts by Sandro Pereira
by Sandro Pereira | Sep 7, 2017 | BizTalk Community Blogs via Syndication
Typical basic error for beginners that also occur sometimes even with experienced BizTalk developers… While trying to deploy a BizTalk Server solution directly from Visual Studio 2017 I got the following errors messages:
| Severity |
Code |
Description |
Project |
File |
Line |
Suppression State |
| Error |
|
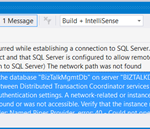
A network-related or instance-specific error occurred while establishing a connection to SQL Server. The server was not found or was not accessible. Verify that the instance name is correct and that SQL Server is configured to allow remote connections. (provider: Named Pipes Provider, error: 40 – Could not open a connection to SQL Server) The network path was not found |
|
|
0 |
|
| Severity |
Code |
Description |
Project |
File |
Line |
Suppression State |
| Error |
|
Deployment cannot initialize the connection to the database “BizTalkMgmtDb” on server “BIZTALKDEMO”. Verify that you have the required security permissions and that communication between Distributed Transaction Coordinator services on the machines involved is not prevented by current DTC security, firewall or authentication settings. A network-related or instance-specific error occurred while establishing a connection to SQL Server. The server was not found or was not accessible. Verify that the instance name is correct and that SQL Server is configured to allow remote connections. (provider: Named Pipes Provider, error: 40 – Could not open a connection to SQL Server) The network path was not found |
|
|
0 |
|

Cause
This error may occur for several reasons, like BizTalk Server cannot communicate with SQL Server machine because some firewall restrictions or SQL Server does not accept Remote Connections or that SQL Server Network Protocols are not properly configured – I wrote a few days ago a blog post about that: WCF-SQL Adapter: Connecting to the LOB system has failed. A network-related or instance-specific error occurred while establishing a connection to SQL Server– and so on.
However, in the cause of this problem is quite different, the first error doesn’t tell us to much about the main cause of the problem but the second one:
Deployment cannot initialize the connection to the database “BizTalkMgmtDb” on server “BIZTALKDEMO”…
Gives you a good clue about the problem.
In fact, I was migrating an existing BizTalk Server solution to a new server and I forgot to update the Visual Studio deployment properties and the Server was pointing an incorrect to an incorrect an inaccessible SQL Server.

Solution
Again, this is a typical a beginner error and quite easy to fix, so to solve the problem you just need to properly configure the BizTalk Server deployment properties in all your Visual Studio projects inside your solution by:
- In Visual Studio Solution Explorer, right-click a project for which you want to configure properties, and then click “Properties”.
- Click the “Deployment” tab in Project Properties Designer.
- And make sure you properly configure the following properties:
- Application Name: Name of the BizTalk application to which to deploy the assemblies in this project. If the application already exists, the assemblies will be added to it when you deploy the project. If the application does not exist, the application will be created. If this field is blank, the assemblies will be deployed to the default BizTalk application in the current group. Names that include spaces must be enclosed by double quotation marks (“).
- Configuration Database: Name of the BizTalk Management database for the group, “BizTalkMgmtDb” by default.
- Server: Name of the SQL Server instance that hosts the BizTalk Management database on the local computer. In a single-computer installation, this is usually the name of the local computer. Note: If you move this BizTalk project to a different computer, you probably will need to modify the Server property to reflect the new computer name before you will be able to deploy the assembly.
Note: there are other properties but these three (3) are the most important ones (see the full list of properties here: How to Set Deployment Properties in Visual Studio)
- Save the file and then redeploy the BizTalk Server solution (or project).

Author: Sandro Pereira
Sandro Pereira lives in Portugal and works as a consultant at DevScope. In the past years, he has been working on implementing Integration scenarios both on-premises and cloud for various clients, each with different scenarios from a technical point of view, size, and criticality, using Microsoft Azure, Microsoft BizTalk Server and different technologies like AS2, EDI, RosettaNet, SAP, TIBCO etc. He is a regular blogger, international speaker, and technical reviewer of several BizTalk books all focused on Integration. He is also the author of the book “BizTalk Mapping Patterns & Best Practices”. He has been awarded MVP since 2011 for his contributions to the integration community. View all posts by Sandro Pereira
by Senthil Palanisamy | Sep 6, 2017 | BizTalk Community Blogs via Syndication
Introduction
BizTalk server state based artifacts such as receive location, send port, orchestration may go down due to various reasons. This could stop a business critical interfaces from processing messages. Monitoring the artifact states is a tedious task for both operational and administrative users. The operational users must monitor the state of artifacts constantly if any violation happens to the artifact state the operational user will intimate the administrative users immediately. In turn, administrative users should take corrective actions to bring the artifact to the expected state to avoid/minimize the business impact. This process involves the operational and administrative users be available throughout the clock to enable the interfaces again. BizTalk360 overcomes this challenge with its auto healing capability.
I am writing series of articles on “Automating BizTalk Administration Tasks Using BizTalk360”. First Blog was focused on service instance data monitoring. In this article, I will be explaining how you can leverage auto healing capability in BizTalk360.
How it works
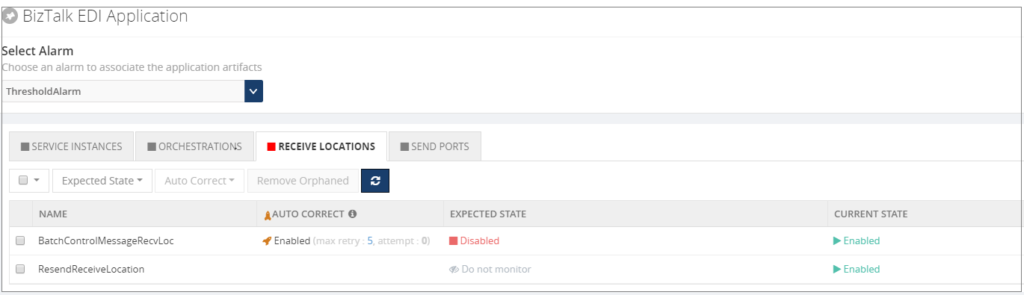
With the auto healing functionality, Administrators can set up monitoring on any “State-based” artifact and let the monitoring service to automatically heal the artifact any time when there is a mismatch between the “Expected State” and “Current State”. For instance, Administrators can set up monitoring on the receive location(s) of an application and additionally set up the auto correct functionality for the Expected State of the artifact (which should be “Started”). Whenever the receive location goes down/gets disabled, there will be a state mismatch and the auto correct will try to bring the artifact back to the expected state. If the operation is successful, the artifact will come back to the Expected State within the next monitoring service cycle (60 seconds).
State Based Monitoring
Artefacts State Based monitoring is one of core feature in BizTalk360. State Based monitoring is included for Application Artefacts
- Send Ports
- Receive Location
- Orchestrations
- Host Instances
- NT Services
- SQL Jobs
- Logic Apps
To avoid this manual intervention, administrators can set up the “Max Retries” count in the auto healing. This would allow the auto healing (BizTalk360 monitoring service) to continuously try and bring back the receive location to “Enabled State”. If the operation was successful within the Max Retry count, the artifact would be automatically healed to ensure business continuity. If the operation was not successful within the Max Retry count, the artifact would move into a Critical state.
Email Notification
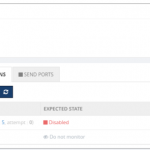
Artefact (Receive Location) is configured for monitoring and auto healing when the receive location violates the threshold condition means monitoring service will first trigger the down alert.

Monitoring service will auto correct the state of receive location to expected state and trigger an auto correct email.

Custom BizTalk Adapters
Custom BizTalk adapters are used in Receive Location/Send Port; In this case, we must install Custom adapter components in BizTalk360 servers.
If you have installed BizTalk360 Monitoring service in multiple servers for BizTalk360 HA then install Custom Adapters pack in multiple servers.
We can few cases where custom adapters pack needs to be installed;
1. BizTalk Scheduler Adapter
When you are using BizTalk Scheduler in BizTalk Artefacts and not installed in BizTalk360 Box. Then you will get the error as like below
“ReceiveLocations: Exception raised while trying to set receive locations to the expected state. Ex: Microsoft.BizTalk.ExplorerOM.BtsException: Could not validate TransportTypeData, Address or Public Address properties for Receive Location ‘Receive_INV_Scheduler’ “
To address this issue we need to GAC Microsoft.BizTalk.Scheduler.dll in BizTalk360 Box(es).
2. nSoftware Adapter
nSoftware Adapters are used in BizTalk Artefacts (e.g.: FTP(s)/SFTP Adapters). Exception raised while trying to set receive locations to the expected state by auto correct feature.
“Ex: Microsoft.BizTalk.ExplorerOM.BtsException: Failed to create ‘nsoftware.SFTP v4’ Transport Component at Microsoft.BizTalk.ExplorerOM.BtsCatalogExplorer.SaveChangesWithTransaction(Object transactionObj)”
Overcome this challenge we need to install the nSoftware adapters where BizTalk360 Monitoring service is running.
3. Host Integration Adapter Pack
BizTalk Artefacts are using MQSC (HIS) adapters in your BizTalk Environment means you have to install Host Integration Pack Adapters.
The following are adapters in Host Integration Adapter Pack
- Host Applications
- DB2
- WebSphere MQ
- Host Files
User Permission
Taking automatic actions on BizTalk Artefacts, SQL Jobs, Host Instances and NT Services we need adequate permissions to Service Account user with respect to Windows, SQL, and Azure.
| Feature |
Minimum Required Permission |
| BizTalk Artefacts – To change the status of BizTalk Artefacts |
BizTalk Operators Group |
| Host Instances – Operations (WMI) |
BizTalk Administrator Group |
| SQL Jobs – Change state of Jobs |
SQLAgentOperatorRole |
| Logic Apps – Enable/Disable |
Owner (Subscription User) |
You can see more information about BizTalk Server Security.
Conclusion
BizTalk users can leverage this most powerful feature “Auto Healing” in BizTalk360 to maintain/monitoring the states of various Artefacts. It will minimize the downtime of BizTalk Artefacts.
Author: Senthil Palanisamy
Senthil Palanisamy is the Technical Lead at BizTalk360 having 12 years of experience in Microsoft Technologies. Worked various products across domains like Health Care, Energy and Retail. View all posts by Senthil Palanisamy

by Sandro Pereira | Sep 6, 2017 | BizTalk Community Blogs via Syndication
Sometimes the best option to create a REST API and provide something for to the partners to try it out (documentation or starting to developer their side), especially if the requirements are not completely defined, is not to start coding your backend API, which takes more time to develop and which sometimes will be subjected to constant changes, becoming in many cases an inglorious work and a complete waste of time (… sometimes) but instead to prototype your API in your frontend system. So in this post, I will address the question: How to mock responses in API Management?
API Management provides different, powerful and easy ways to mock your API’s to return static or dynamic sample responses even when there is no functional backends service capable of providing them. Mocking can be very useful in several scenarios like:
- Create proof of concepts or demos
- Test Driven Development approach: when the API façade is designed first and the backend implementation comes later or is worked upon in parallel.
- When the backend is temporarily not operational.
- When a specific operation is not yet implemented.
- And so on…
Despite being pretty simple to set up a mock, at the moment there are several ways to archive this in API Management, some of them more simple and static and others more complex and dynamic. So, let’s see all the options.
Options 1) Using the return-response policy in the “old” Publisher portal
Using the return-response policy, it would halt the execution of the API pipeline (… if it exists) and return a response code as specified. You can also send an optional set of headers and a body to the caller.

(Picture from https://www.youtube.com/watch?v=SDyUw93hx1w)
Note: One of the beautiful things on using this policy, comparing with the mock-response policy that we will describe in option 3, is that the mock can be implemented in a very dynamic way if you combine this policy with expressions.
To accomplish that we need to:
- Access to the “old” Publisher portal, by accessing you API Management resource in Azure Portal and then click “Publisher portal” button

- On the Publisher portal, select the option “Policies” from the left menu

-
- Note: Policies can be configured globally or at the scope of a Product, API or Operation.
- The next step is to define the scope of the policy, in our sample, we will be selecting a particular operation. To do that you need to select you API from the “API” drop box and then the specific operation from the “Operation” drop box.
- And then on the “Policy definition” click “ADD POLICY”

- Add a return-response policy in the inbound section by:
- Focus the cursor in the inbound section and then from the Policy statements toolbox click in the option

-
- TIP: When mocking, the policy should always be used in the inbound section to prevent an unnecessary call to the backend.
- This will add the default template format of the policy to the policy definition, that you will need to set up according to your needs:

- To simplify our case, we just need to return a 200-status code with a static JSON response and for that, we need to apply the following policy:
<return-response response-variable-name="existing response variable">
     <set-status code="200" reason="OK" />
     <set-header name="Content-Type" exists-action="override">
         <value>application/json</value>
     </set-header>
     <set-body>{
                 "success": true,
                 "data": {
                    "cards": [
                       {
                          "id": 28,
                          "Name": "Sandro Pereira"
                       },
                       {
                          "id": 56,
                          "Name": "Carolina Pereira"
                       },
                       {
                          "id": 89,
                          "Name": "José Pereira"
                       }
                    ]
                 }
     }</set-body>
</return-response>
- Save the policy to take effect next time a call is made to the operation.
Of course, this policy can be used in many different ways, for example, if you only want to return a 200 OK without body response, you can use an abbreviated version of the policy that will be represented like this:
<return-response/>
But as I told you earlier that this also can be very dynamic as you can see in the “Mocking response in Azure API Management” tutorial provided by Microsoft where they are mocking an “Add two integers” operation in which the policy will look like this:
<return-response response-variable-name="existing response variable">
     <set-status code="200" reason="OK" />
     <set-header name="Content-Type" exists-action="override">
         <value>application/json</value>
     </set-header>
     <set-body>{
          "success": true,
          "data": "@((Convert.ToInt32(context.Request.Url.Query.GetValueOrDefault("a", "0")) + Convert.ToInt32(context.Request.Url.Query.GetValueOrDefault("b", "0"))).ToString())"
     }</set-body>
</return-response>
Here, I am taking the actual query parameters provided in the request and implementing the all the operation logic of my backend API dynamically inside my policy… pretty cool!
Options 2) Using the return-response policy in the Azure Portal.
This second option is exactly the same as the previous one, but instead of doing in the “old” Publisher portal, we will accomplish the same goal using the “new” API Management capabilities/functionalities embedded in the Azure portal.
To accomplish that you need to:
- Access your API Management resource in Azure Portal and then click “APIs” option under “API Management” section from the left menu

- Select the API from the API list, then from the operation list select the correct operation and then click the edit button on the “Inbound processing” policies

- Click in “</> Code View” to view or edit your policies as explained earlier in the first option

- You will find the same experience as the “old” Publisher portal while editing the rules

Both option 1 and 2 are the same, the only difference between them is that in the first option we are using the Publisher portal (this portal still exists because not all functionalities have yet been migrated for the Azure Portal) and in the second we are using the Azure Portal UI.
Options 3) Using the Mock-Response policy
The first two options, that in fact use the same rule are very useful in several distinct scenarios, especially if you want to implement some intelligence (dynamic responses) in you mock.
But what if you want to combine your mocking cases against our API specifications that we used while creating our operations? Fortunately for us, Microsoft released a few months ago a new policy to perform this task in an easier way and you can now use the Mock-Response policy to achieve this effect and it is fully supported through the UI in the Azure Portal.
Note: this policy can also be used in the “old” Publisher portal but I will not address that.
TIP: Once again, you can apply this policy to every section, but its typical usage scenario is on the inbound path to provide a response instead of the backend service and also to prevent unnecessary calls to the backend.
To configure this policy from the Azure Portal you need to:
- Access your API Management instance, under “API Management” section click “APIs”, select the API from the API list, then from the operation list select the correct operation and then click the edit button on the “Inbound processing” policies to open the Inbound processing editor

- You will now notice that a tab titled “Mocking” is available, in which you can configure the desired static response back to your caller by:
- Selecting the “Static responses” option
- And what response status should be returned by configuring the “API Management will return the following response” drop box

Are you wondering where you can define the response?
If you look at the description of this policy in the documentation it says: “… as the name implies, is used to mock APIs and operations. It aborts normal pipeline execution and returns a mocked response to the caller. The policy always tries to return responses of highest fidelity. It prefers response content examples, whenever available. It generates sample responses from schemas, when schemas are provided and examples are not. If neither examples or schemas are found, responses with no content are returned.”
So, in other words, when designing the operation specification:
- if you provide expected response types and samples:

-
- The mock-response policy will take this sample response that you defined as the response to be delivered to the caller
Note: If there are already response status codes, with or without content types, examples and schemas defined, configured on that particular operation (as shown in the figure above), these HTTP status codes will be listed at the top of the “API Management will return the following response” drop box on the mocking section.

- if you instead provide a response schema instead of samples, the mock-response policy will generate a sample response from the schema provided
- If you don’t define samples or schemas, the policy will return a 200 OK response with no content return.
Normally, the policy template (or signature) is:
<mock-response status-code="code" content-type="media type"/>
However, as similar with the return-response policy, you can use an abbreviated version of the policy that looks like this:
<mock-response/>
And again, it will return a 200 OK status code and the response body will be based on an example or schema, if provided for this status code. The first content type found will be used and if no example or schema is found, a response with no content will be returned.
Conclusion
Both mock-response and return-response policies can be used on API Management for prototyping your API frontend. Although at first glance they may have similar behaviors, both policies have advantages and disadvantages and can be used in different scenarios/context.
But I will probably say for mocking propose I will use or advice to use the mock-response policy just because it is simpler and will take advantage from the API specification to generate the mock response which also “force” the developers (or admins in charge of your frontend) to properly document the APIs.
Author: Sandro Pereira
Sandro Pereira lives in Portugal and works as a consultant at DevScope. In the past years, he has been working on implementing Integration scenarios both on-premises and cloud for various clients, each with different scenarios from a technical point of view, size, and criticality, using Microsoft Azure, Microsoft BizTalk Server and different technologies like AS2, EDI, RosettaNet, SAP, TIBCO etc. He is a regular blogger, international speaker, and technical reviewer of several BizTalk books all focused on Integration. He is also the author of the book “BizTalk Mapping Patterns & Best Practices”. He has been awarded MVP since 2011 for his contributions to the integration community. View all posts by Sandro Pereira
by Venitta Priya | Sep 6, 2017 | BizTalk Community Blogs via Syndication
What is Web Endpoint?
In simple terms, a web service endpoint is a web address (URL) at which customers of a specific service can gain access to it. By referencing that URL, customers can get to operations provided by that service. The endpoint is a connection point where HTML files or active server pages are exposed. Endpoints provide information needed to address a Web service endpoint.
Why Web Endpoint:
Typically, in a BizTalk environment, an application needs to associate with external web endpoints to monitor and validate the health of the web endpoint. BizTalk360 allows the administrators to set up web endpoints monitoring for the web services in the solution and validate the actual response code against the expected return code.
Before version 8.1, web endpoint monitoring had the capability to manage the external endpoints using options like to provide authorization credentials and with a proxy. While monitoring the endpoint, if there is any mismatch between the expected return code and actual return code, the system will alert to the administrator with the information. In 8.1 version, we have improved with some more interesting options like Payload and Custom HTTP headers.
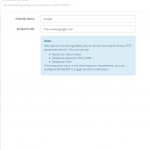
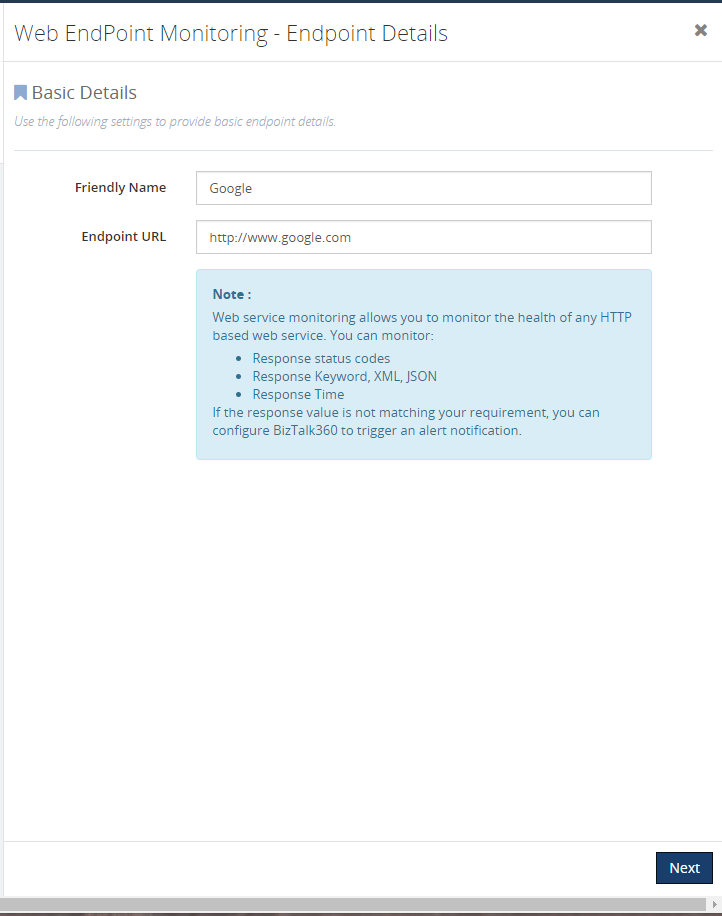
Basic Detail
In basic detail, we can give the Endpoint name which is going to be monitored. In Endpoint URL, we can give the URL of the web endpoint for ex. www.google.com
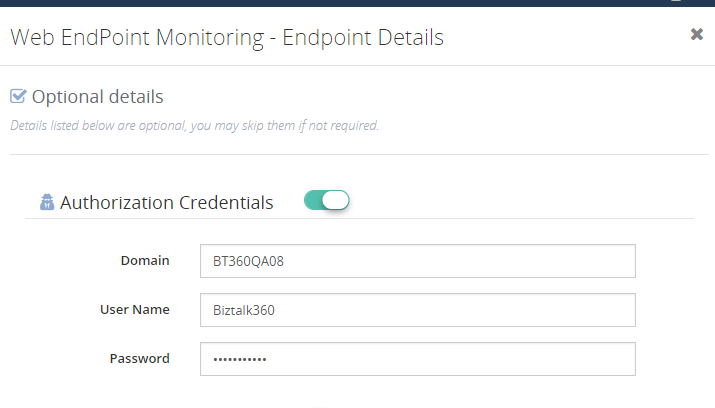
Optional details configuration
In this section, we can have a deep look at the new optional settings available for monitoring the endpoint. This is an optional section, you can skip this configuration.
Authorization credentials:
Web endpoint will require Username and Password for monitoring. In that scenario, we can utilize this option. For ex, if we need to access remote machine URL, in this case, we need to specify the domain name, user name, and password. If you can monitor the endpoint without any issue, then it will be healthy else it will return an error message.
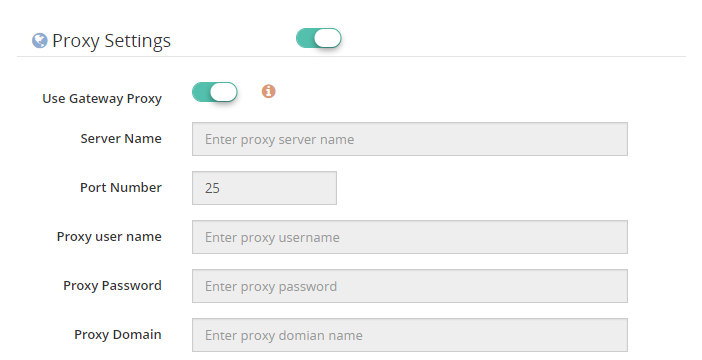
Proxy:
Some organization will be using a proxy, in that case, you can give the proxy details to monitor the endpoint. In you enable the toggle button near the Use Gateway Proxy it will fetch the proxy details which we have given in the settings -> gateway settings. Global gateway settings can be overridden by giving the below details
- Server Name– the name of your proxy server
- Port Number– the port number used to associate through your proxy
- Proxy username– the username to associate with the proxy server
- Proxy password– the password to authenticate the credentials to associate with the proxy server

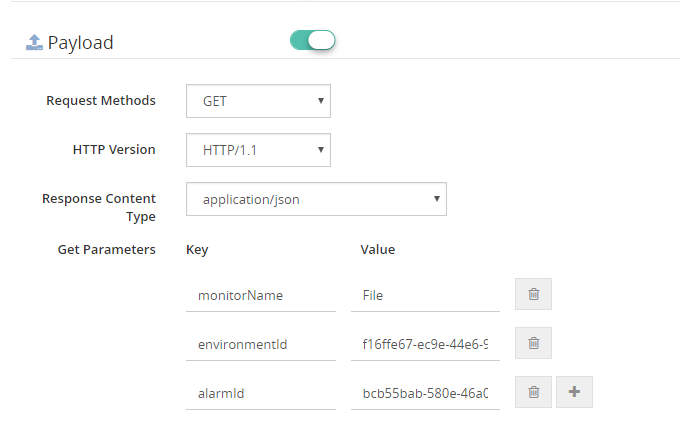
Payload:
When data is sent over the Internet, each of the transmitted unit includes both header information and the actual data being sent. The header identifies the source and destination of the packet, while the actual data is referred to as the payload. The part of the message or code that carries the data. In a key-length-value structure, the key and length are descriptive data about the value (the payload). Here we can configure the parameters of GET or POST methods. Some Endpoints cannot be monitored without giving additional parameters. We can retrieve those information’s using payload and monitor those API in web endpoints.

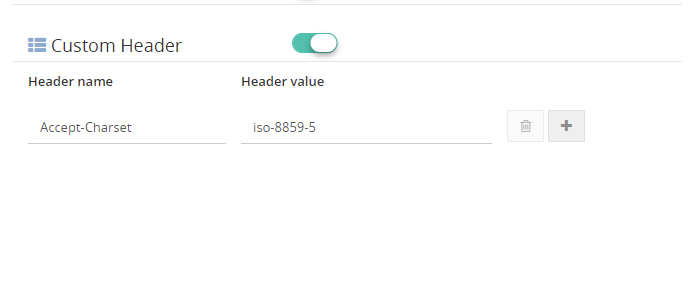
Custom header:
HTTP headers allow the client and the server to pass additional information with the request or the response. You can give custom headers along with the endpoint which you are going to monitor. (Ex: Accept-Charset, Accept-Language, Allow, Authorization, Content-Language)
Response alert configuration
Here comes the response alert configuration section, you can see three type of response format. We will see one by one.
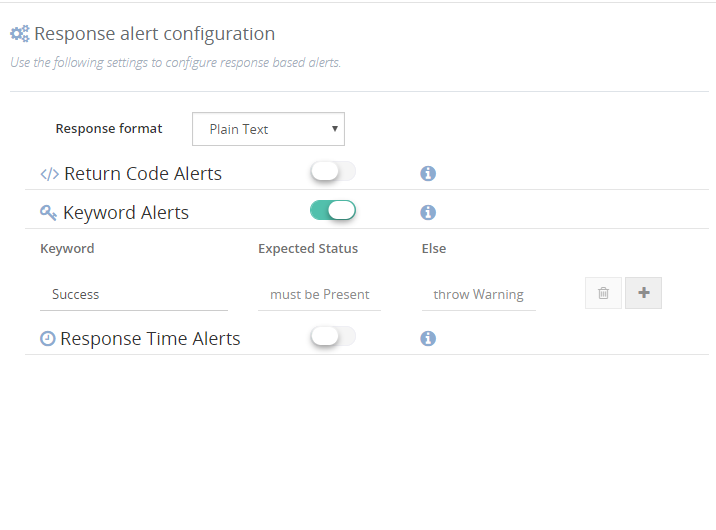
Response Format:
Plain text: In this type, you can see Keyword alert where you can specify the keyword which will be available in the endpoint which you are monitoring
Ex. Let’s go with www.google.com
If you mention the keyword as Success and if it is present in the endpoint the status will be healthy based on the conditions.
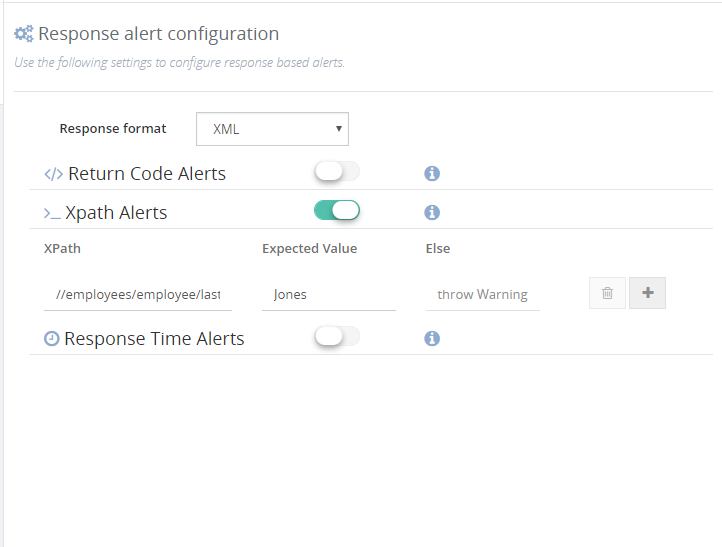
XML: Here you can see _XPath Alerts, you can even monitor your endpoints using XPath.
Ex. You have an endpoint with XML data and you need some specific information in that case you can give XPath and monitor the endpoint. Say, your endpoint is having information about employees and you want to fetch the name of the 3rd employee, at that time you can give as
//employees/employee/lastName Jones
Example:
<employees>
     <employee>
         <firstName>John</firstName> <lastName>Doe</lastName>
     </employee>
     <employee>
         <firstName>Anna</firstName> <lastName>Smith</lastName>
     </employee>
     <employee>
         <firstName>Peter</firstName> <lastName>Jones</lastName>
     </employee>
 </employees>
If the given XPath values are true, then endpoint will be healthy else it will show error/ warning based on the configurations.
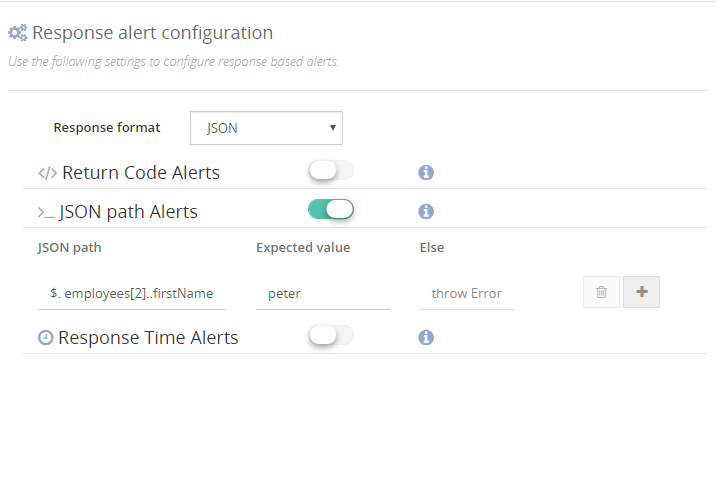
JSON: Same as XPath you can see JSON path alerts, and monitor the endpoint using JSON path. Say, for an example, an endpoint with Json data and looking for some specific data – 3rd employee:
{“employees”: [
{ “firstName”:”John”, “lastName”:”Doe” },
{ “firstName”:”Anna”, “lastName”:”Smith” },
{ “firstName”:”Peter”, “lastName”:”Jones” }
]}
$. employees [2]..firstName peter
If the given Json path values is true, then endpoint will be healthy else it will show error/ warning based on the configurations.
Return Code Alert:
Endpoints can be monitored based on the return codes. If you set return code as 200 and while monitoring if the endpoint does not have the expected return code. then it will indicate error/warning based on the configuration else it will be healthy.
Response time Alerts:
The same way we can monitor the endpoints using response time. We can monitor the delay of the endpoint using this setting. We can change the response time based on the necessity.
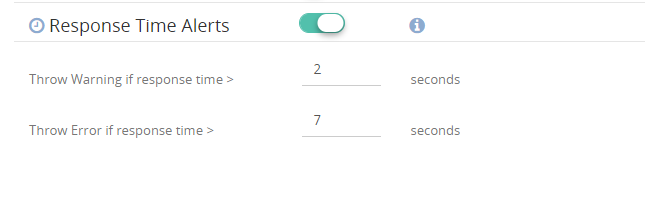
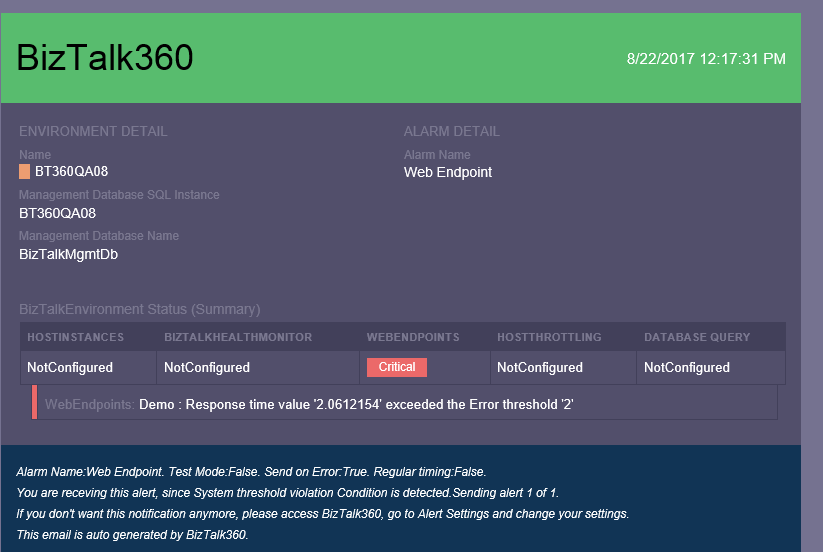
Based on the configuration we have provided we will get the notification in email.
Conclusion:
So I hope this blog gave you some idea about how you can monitor Web Endpoint in BizTalk360. If you have any questions, contact us at support@biztalk360.com. Also, feel free to leave your feedback in our forum.
by BizTalk Team | Sep 4, 2017 | BizTalk Community Blogs via Syndication
Microsoft BizTalk Server product team has released Cumulative Update 3 for BizTalk Server 2016. For more information, see Microsoft Knowledgebase Article 2555976, posted to
https://support.microsoft.com/help/4039664.
BizTalk Server Team


