by community-syndication | Jan 28, 2010 | BizTalk Community Blogs via Syndication
[In addition to blogging, I am also now using Twitter for quick updates and to share links. Follow me at: twitter.com/scottgu]
I’ve been working on a series of blog posts the last few months that cover some of the new features coming with .NET 4 and VS 2010.
Earlier today someone pointed me at some nice “quick hit” videos that have been published that also provide quick first looks at some of the new features coming with ASP.NET 4 and VS 2010. These videos aren’t an exhaustive list of everything new – but do provide a great way to quickly learn about many of the cool new things coming with the release.
ASP.NET 4 Videos
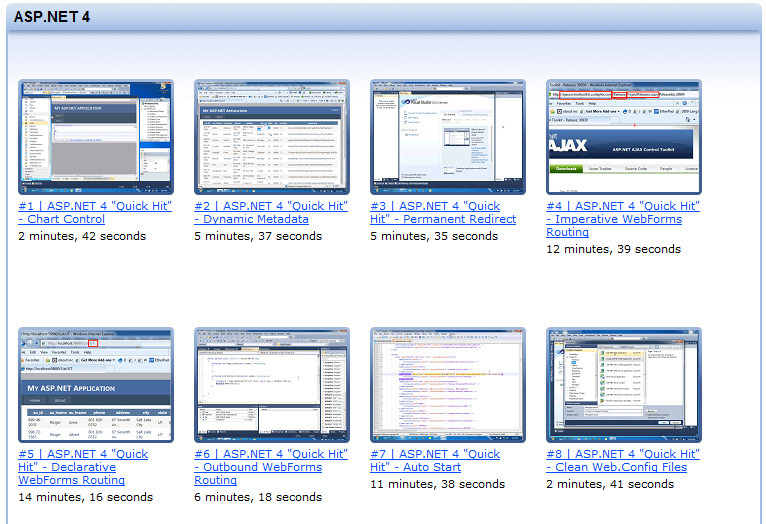
You can learn more about some of the new ASP.NET 4 features by watching these 22 ASP.NET Quick Hit Videos.
VS 2010 Videos
You can learn more about a few of the new VS 2010 features by watching these 8 VS 2010 Quick Hit Videos.

ASP.NET Team Member Interviews
In addition to the feature demo videos above, you can also watch these ASP.NET team member interviews done by Scott Hanselman. In them various ASP.NET team members talk about a few of the new features they’ve worked on.

There are a lot more features coming with .NET 4 and VS 2010 not covered by all of these videos. But hopefully the above clips provide a good way to quickly get a sense of some of the new capabilities.
Hope this helps,
Scott
by community-syndication | Jan 28, 2010 | BizTalk Community Blogs via Syndication
Jeffrey Knight was kind enough to point out a small missing thing in the expressions for built-in variables in my modified syntax file for PowerShell scripts for Vim. I’ve now updated the syntax file in my github repository following Jeffrey’s suggestion and also fixed another related issue while at it.
Thanks Jeffrey!

by community-syndication | Jan 28, 2010 | BizTalk Community Blogs via Syndication
As Meagon announced over on her blog, I’m heading to the SoCal Code Camp this weekend two give a few of my favorite talks in sunny California:
Why you need some REST
12:15 PM – Saturday, January 30, 2010
Location: UH 319
REST is quickly becoming the default architectural style for services in the cloud. Come learn what every cloud developer needs to know about REST moving forward, and how you can start building RESTful services using WCF 3.5/4.0 and the evolving WCF REST Starter Kit.
What's New in WCF/WF 4.0
4:00 PM – Saturday, January 30, 2010
Location: UH 248
NET 4.0 brings several improvements in the areas of WCF and WF, including improved REST capabilities, a new workflow model, seamless integration between WF and WCF, and a new visual designer. It also provides the ability to author completely declarative (XAML-based) workflow services that can be more easily deployed, hosted, and managed. This session walks you through the various new 4.0 features and shows you how to write code using them today.
You can register your interest in attending these sessions here, and see the complete Code Camp schedule. If you’re interested in these topics, I’d also recommend checking out Michele Bustamante’s sessions, as well as Brian Loesgen’s, who are both experts from the area.
In addition, Pluralsight is pleased to sponsor and support the SoCal Code Camp. We’ll have a table outside of the registration desk, so be sure to stop by, say hi, and sign-up for a chance to win 1 of 3 FREE 1-year Standard subscriptions to Pluralsight On-Demand!. Each SoCal Code Camp attendee also receives a FREE 5-day Standard trial subscription to check-out the entire Pluralsight On-Demand! library.
**The first 50 people at the Pluralsight table can grab a Pluralsight Cloud Tag t-shirt! **
If you can’t make it, you can still follow all the SoCal Code Camp action on Twitter via #socalcodecamp, @skonnard, @woodyp, @81megs,
For more information on the SoCal Code Camp, visit their website: http://www.socalcodecamp.com.
by community-syndication | Jan 28, 2010 | BizTalk Community Blogs via Syndication
This is part seven of a twelve part series that introduces the features of WCF WebHttp Services in .NET 4. In this post we will cover:
- Creating ASP.NET cache profiles in configuration for use with WCF WebHttp Services
- Using the [AspNetCacheProfile] attribute to associate service operations with cache profiles
Over the course of this blog post series, we are building a web service called TeamTask. TeamTask allows a team to track tasks assigned to members of the team. Because the code in a given blog post builds upon the code from the previous posts, the posts are intended to be read in-order.
Downloading the TeamTask Code
At the end of this blog post, you’ll find a link that will allow you to download the code for the current TeamTask Service as a compressed file. After extracting, you’ll find that it contains “Before” and “After” versions of the TeamTask solution. If you would like to follow along with the steps outlined in this post, download the code and open the “Before” solution in Visual Studio 2010. If you aren’t sure about a step, refer to the “After” version of the TeamTask solution.
Note: If you try running the sample code and see a Visual Studio Project Sample Loading Error that begins with “Assembly could not be loaded and will be ignored”, see here for troubleshooting.
Getting Visual Studio 2010
To follow along with this blog post series, you will need to have Microsoft Visual Studio 2010 and the full .NET 4 Framework installed on your machine. (The client profile of the .NET 4 Framework is not sufficient.) At the time of this posting, the Microsoft Visual Studio 2010 Ultimate Beta 2 is available for free download and there are numerous resources available regarding how to download and install, including this Channel 9 video.
Step 1: Specifying that Responses should be Cached
Caching is fundamental to HTTP, so its not surprising that since .NET 1.1 there has been a rich mechanism for declaratively setting the caching policy of a webpage in ASP.NET. Known as Output Caching, it allows developers to specify many aspects of how a page should be cached. Should the page be cached on the server to be used again for future requests, or should an HTTP Cache-Control header be included with the response for client (or proxy) caching? When should the cached content expire and become considered stale? Are there certain query string parameters in the URI or HTTP headers in the request that will require different responses and therefore will need to be cached separately? ASP.NET output caching can accommodate all of these complexities.
With .NET 4, the rich caching capabilities of the ASP.NET output cache can now be leveraged from within a WCF WebHttp Service when ASP.NET compatibility mode is enabled. Specifying that a response from a service operation should be cached in some form is done by adding an [AspNetCacheProfile] attribute to the operation. The [AspNetCacheProfile] attribute will then point to an ASP.NET cache profile in the Web.config where the details of how the response should be cached are specified.
With the TeamTask service we’ll begin caching the user data returned by the GetUsers() and GetUser() operations. We’ll assume that this user data changes very rarely, making it appropriate for caching. In this step we’ll add the [AspNetCacheProfile] attribute to the service operations and in the next step we will configure their respective cache profiles in the Web.config file.
If you haven’t already done so, download and open the “Before” solution of the code attached to this blog post.
Open the UserService.cs file from the TeamTask.Service project in the code editor.
On the GetUsers() operation, add an [AspNetCacheProfile] attribute with the cache profile name “UsersCollection” like so:
[AspNetCacheProfile(“UsersCollection”)]
[Description(“Returns the users on the team.”)]
[WebGet(UriTemplate = “?skip={skip}&top={top}&manager={userName}”)]
public List<User> GetUsers(int skip, int top, string userName)
On the GetUser() operation, add an [AspNetCacheProfile] attribute with the cache profile name “SingleUser” like so:
[AspNetCacheProfile(“SingleUser”)]
[Description(“Returns the details of a user on the team.”)]
[WebGet(UriTemplate = “{userName}”)]
public User GetUser(string userName)
Step 2: Configuring Server-side Caching
Let’s first configure the “UsersCollection” cache profile for the GetUsers() operation. We’ll configure the profile to cache the responses on the server.
In addition to the caching location, we’ll need to specify some other details in the cache profile. For the sake of demonstrating the feature we’ll specify that the cached responses should expire after one minute, but we could set them to expire after an hour, a day or even longer. Since the GetUsers() operation accepts the “skip”, “top” and “manager” query string parameters and these change the content of the response, we’ll need to specify this in the cache profile. Lastly, with automatic format selection enabled, the format (XML or JSON) of the response will vary depending on the value of the request’s HTTP Accept Header, so we’ll also need to account for this in the cache profile configuration.
Open the Web.Config file of the TeamTask.Service project in the code editor. Since cache profiles are an ASP.NET feature, they are specified under the <system.Web> element, which should currently have the following configuration elements specified:
<system.web>
<compilation debug=“true” targetFramework=“4.0” />
</system.web>
All of the caching related configuration is specified in a <caching> element under the <system.web> element. Add the caching related configuration elements as follows:
<system.web>
<compilation debug=“true” targetFramework=“4.0” />
<caching>
<outputCache enableOutputCache=“true“/>
<outputCacheSettings>
<outputCacheProfiles>
</outputCacheProfiles>
</outputCacheSettings>
</caching>
</system.web>
ASP.NET output caching has to be enabled for any of the cache profiles to be applied and this is done with the “enableOutputCache” attribute on the <outputCache> element. The cache profiles themselves are specified under the <outputCacheProfiles> element.
Add the following cache profile under the <outputCacheProfiles> element:
<outputCacheProfiles>
<add name=“UsersCollection” location=“Server” duration=“60”
varyByParam=“skip; top; manager” varyByHeader=“Accept“/>
</outputCacheProfiles>
The settings on the cache profile should be fairly self-explanatory. The duration is specified in seconds, so a value of “60” indicates that the response should be cached for a single minute. The varyByParam attribute specifies that requests with different values for the “skip”, “top” and “manager” URI query string parameters should be considered different requests such that the respective responses are cached separately. Likewise, the varyByHeader attribute specifies that requests with different Accept header values should be considered different requests. Note: For the varyByParam and varyByHeader attributes, use a semi-colon separated list if there is more than a single value.
Be Careful:Requests that require authorization should not have their responses cached, because the authorization is not performed when the response is served from the cache. Caching such responses would introduce a serious security vulnerability. Usually, requests that require authorization provide user-specific data and therefore server-side caching is not even beneficial. In such situations, client-side caching or simply not caching at all will be more appropriate. |
Step 3: Configuring Client-side Caching
One of the benefits of using ASP.NET output caching is that it provides a single programming model for both server-side and client-side caching even though the two mechanisms are very different. Server-side caching is invisible to the client. After a response has been cached on the server, future responses are served from the cache such that the request never even reaches the WCF WebHttp Service code. Client-side caching on the other hand is achieved by adding an HTTP Cache-Control header to the response. Future request from (supposedly different) clients would still be handled by the WCF WebHttp Service code.
Configuring server-side verse client-side caching is a simple matter of setting the location attribute on the cache profile. For the “UsersCollection” cache profile in step two, we set the location to “Server”. For the “SingleUser” cache profile, we’ll set the location to “Client” to enable client-side caching. Of course, it is also possible to use server-side and client-side caching in tandem-see here for the possible values of the location attribute.
Open the Web.Config file from the TeamTask.Service project in the code editor.
Add the “SingleUser” cache profile under the <outputCacheProfiles> element as shown below:
<outputCacheProfiles>
<add name=“UsersCollection” location=“Server” duration=“60”
varyByParam=“skip, top, manager” varyByHeader=“Accept“/>
<add name=“SingleUser” location=“Client” duration=“60”
varyByParam=“none“/>
</outputCacheProfiles>
Notice that the location of the “SingleUser” cache profile is “Client”. Note: Because we are configuring client-side caching, the query string parameters and HTTP headers of the request aren’t relevant. However, a varyByParam value is required, so we’ve set the value to “none”.
Helpful Tip: It is possible to configure an SQL dependency with cached responses in WCF WebHttp Services. Once configured, the ASP.NET cache will poll a given table of your database such that any changes to the table will result in the cached response being evicted. For more information on configuring SQL dependencies with the output cache, see here. |
Step 4: Verifying that Responses are Cached
Now that we have our cache profiles configured we’re ready to demonstrate that the responses are indeed cached. To verify the client-side caching we’ll write some client code to print the Cache-Control header from the response to the console. To verify the server-side caching we’ll set a break-point in the service code and send two HTTP GET requests, noting that the debugger breaks with the first request but not the second (since it is served from the cache).
Open the Program.cs file from the TeamTask.Client project in the code editor.
In the static GetUser() method, add a line of code to write the Cache-Control header value from the response to the console like so:
using (HttpResponseMessage response = client.Send(request))
{
Console.WriteLine(” Cache-Control: {0}”,
response.Headers.CacheControl);
Console.WriteLine(” Status Code: {0}”, response.StatusCode);
Console.WriteLine(” Content: {0}”, response.Content.ReadAsString());
}
Now we’ll implement the Main() method to simply call GetUser() once and GetUsers() three times. Replace any code within the Main() method with the following code:
using (HttpClient client = new HttpClient(“http://localhost:8080/TeamTask/”))
{
GetUser(client, “user1”, “application/json”);
Console.WriteLine(
“Press Enter to call GetUsers() with top=3. Should hit the breakpoint…”);
Console.ReadKey();
client.Get(“Users/?top=3”);
Console.WriteLine(
“Press Enter to call GetUsers() with top=3 again. Should hit in the cache…”);
Console.ReadKey();
client.Get(“Users/?top=3”);
Console.WriteLine(
“Press Enter to call GetUsers() with top=2. Should hit the breakpoint…”);
Console.ReadKey();
client.Get(“Users/?top=2”);
Console.ReadKey();
}
Before we start the server and client, we need to set a breakpoint in the GetUsers() operation. Open the UserService.cs file from the TeamTask.Service project in the code editor and click on the breakpoint bar along the left-hand side to add a breakpoint like so:
Start with debugging (F5) to get the TeamTask service running and then start the client by right clicking on the TeamTask.Client project in the “Solution Explorer” window (Ctrl+W, S) and selecting “Debug”->”Start New Instance”. The console should contain the following output:
Notice that the Cache-Control header is present with a max-age of 60, which agrees with the duration value we used in the “SingleUser” cache profile.
With the client console application in focus, press any key as needed so that the client application continues to execute.
You should find that the service breaks after the first request to the GetUsers() operation. You can press (F5) to continue executing the service. The service should not break after the second request because the response is being served from the cache and the GetUsers() operation never executes. However, the service should break on the third request because it has a different value for the “top” query string parameter and the response can’t be served from the cache.
Next Steps: Returning Custom Formats from WCF WebHttp Services
Back in part four of this blog post series we demonstrated the first-class support for XML and JSON in WCF WebHttp Services for .NET 4. While XML and JSON are certainly popular web content-types, there are others. In part eight of this blog post series we’ll reinvestigate the format support included with WCF WebHttp Services in .NET 4 and demonstrate how to send responses with other content-types like Atom feeds, plain text, or even binary data.
Randall Tombaugh
Developer, WCF WebHttp Services
by community-syndication | Jan 28, 2010 | BizTalk Community Blogs via Syndication
Reason: Could not load file or assembly ‘file:///C:\Program Files (x86)\Microsoft BizTalk Server 2009\Pipeline Components\Microsoft.Solutions.BTAHL7.HL72fDasm.dll’ or one of its dependencies. An attempt was made to load a program with an incorrect format.
Make sure that your host is running under 32bit mode, if it is running in 64 bit mode, you will get this error.
by community-syndication | Jan 28, 2010 | BizTalk Community Blogs via Syndication
The Host adapters is a very significant part of BizTalk. However, the knowledge about them are almost absent, which is unfortunate as they should be quite useful. I quick study among our biggest clients shows that many of them are still using mainframe/AS400, and find it challenging to integrate these with other systems and applications in- and outside there organization.
We are looking for someone with knowledge and experience from working with the Host Application and Host File adapter. If you are an “expert” in the field, and feel comfortable doing a couple of sessions about it – Please let us know, as we would like to invite you Sweden and come talk to our user group.
The BizTalk User Group Sweden is one of be biggest user groups, and we are proud to have had speakers like; Richard Seroter, Charles Young, Stephen W. Thomas, Jon Flanders, Darren Jefford, Paolo Salvatori, Brian Loesgen, Dwight Goins among others. The goal of the user group is to spread knowledge and get people and organizations to adapt to products and technologies related to BizTalk and Connected Systems Division.
Interested? Send me a mail and let me know.
by community-syndication | Jan 28, 2010 | BizTalk Community Blogs via Syndication
During last years CodeCamp in Rotterdam I recorded my presentation on doing iPhone development using jQTouch and ASP.NET MVC. After looking at several options I have posted the recording on Vimeo. You can view the Dutch language recording here.
If you are interested in doing iPhone development but don’t want to get started using Objective-C that jQTouch might just be what you need. Its a cool way to build HTML 5 and JavaScript application for the iPhone. And, thanks to HTML 5, it will even let you take the application and data offline if you want that. Best of all you can deploy them without going through the Apple AppStore if you prefer not to. And if you still want to go the AppStore route a product like PhoneGap will even let you do that.
Enjoy!
www.TheProblemSolver.nl
Wiki.WindowsWorkflowFoundation.eu

by community-syndication | Jan 28, 2010 | BizTalk Community Blogs via Syndication
[In addition to blogging, I am also now using Twitter for quick updates and to share links. Follow me at: twitter.com/scottgu]
This is the fourteenth in a series of blog posts I’m doing on the upcoming VS 2010 and .NET 4 release. Today’s post covers some of the output caching extensibility improvements being made to ASP.NET 4. These can be used by all ASP.NET 4 applications – including those built using both ASP.NET Web Forms and ASP.NET MVC.
Output Caching Today
ASP.NET 1.0 introduced the concept of output caching, which enables developers to capture and store the generated output of pages, controls, controllers, and HTTP responses in an in-memory cache. On subsequent web requests, ASP.NET can then serve content faster by retrieving and using the generated output from the cache instead of having to execute the page/controller to regenerate the output from scratch. This can dramatically improve the performance of your application – especially in cases where your content is based on data within a database (since when the content is output cached you end up not having to hit the database on subsequent requests).
ASP.NET’s output caching system is flexible enough to enable you to cache different versions of content depending on the querystring/form-post parameters to a page/controller (for example: Browse.aspx?category=Beverages versus. Browse.aspx?category=Meat). It also enables you to cache different versions based on the browser type or user-language preference of the client visiting your application. This allows you to cache a mobile version of a page separate from a version optimized for a desktop browser, as well as to vary the cache entries based on whether the user wants to read a page in English or French. You can configure ASP.NET to cache a particular output cache entry for a specific period of time (for example: 1 minute – after which the next request will regenerate the content and cache it again). You can also configure ASP.NET to dynamically invalidate a cache entry based on an external event (for example: if the database upon which the cached content depends changes).
One limitation of output caching with ASP.NET V1->V3.5, though, is that the cache store itself is not extensible – and the cached content always has to be stored in-memory.
ASP.NET 4 Output Cache Extensibility
ASP.NET 4 adds an extensibility point to output caching that now enables developers to configure one or more custom output-cache providers. Output-cache providers can use any storage mechanism to persist output cached content. This makes it possible to easily create output-cache providers that store the cached content using any persistence mechanism – including local or remote disks, databases, cloud storage, and distributed cache engines (like memcached or velocity).
You can create a custom output-cache provider by creating a class that derives from the new System.Web.Caching.OutputCacheProvider class in ASP.NET 4. Within your derived class you then override 4 public methods that provide implementations for adding/removing/retrieving/updating cached content (a unique key is passed to identify each separate cached entry). You can then configure ASP.NET 4 to use your custom outputcache provider by registering it using the new <providers> subsection of the <outputCache> element within an application’s web.config file:
Above I’ve added a new output cache provider (which I’ve named “SampleCache”) that is implemented using the “ScottOutputCache” class within my OutputCacheSample.dll assembly. I’ve also configured ASP.NET to use my “SampleCache” implementation as the default output cache implementation whenever content is output cached – this is done by setting the “defaultProvider” attribute on the <outputCache> element.
And now, when I add an OutputCache directive to the top of any of .aspx page the content will be cached and stored using my ScottOutputCache provider:
<%@ OutputCache Duration="60" VaryByParam="None" %>
Likewise, if I add an [OutputCache] attribute on any action method within an ASP.NET MVC Controller the content will also be cached and stored using my ScottOutputCache provider:

Customizing Which Output Cache Provider is Used
Above I configured ASP.NET to by default always cache content using my “SampleCache” provider whenever output caching is used within the application.
As a slightly more advanced option, developers can also configure ASP.NET to dynamically choose which output cache provider to use on a per-request basis. This is useful for scenarios where you want to have a slightly richer set of cache semantics. For example, you might want to cache the “Home” page or "Top 10" requested pages of a site using the built-in ASP.NET in-memory provider (which will be super fast because the content will be in-memory), and then cache less frequently requested pages that get lower traffic on disk.
You can dynamically indicate which output cache provider to use on a per-request basis by overriding the GetOutputCacheProviderName() method within the Global.asax file of an application. Below I’m indicating that for the “Home.aspx” page within my application I want to use the built-in in-memory ASP.NET output cache provider – and that I then want to use whatever is registered within the web.config file for every other request:

This ability to easily switch between providers depending on scenarios ends up enabling a bunch of really powerful scenarios.
Common Output Cache Providers
We’ll be shipping samples that demonstrate how to implement a disk-based output cache provider that stores cached content on the file-system. We’ll also be shipping samples that demonstrate how to integrate output caching with the new Windows Server AppFabric Caching Service (formerly known as “Velocity”). AppFabric’s caching service will be a free, fully supported, Microsoft distributed cache system. It will also be easy to use the new ASP.NET 4 output caching extensibility with memcached – a popular open source distributed caching system.
You can learn more about how to create providers by watching Stefan Schackow’s ASP.NET 4 Core Runtime talk at PDC 2009. You can also learn more about AppFabric’s Caching service from this PDC 2009 talk.
Summary
The addition of output-cache provider extensibility to ASP.NET 4 enables developers to easily pursue more aggressive and more intelligent output-caching strategies for web sites and applications. These can significantly improve the performance and responsiveness of applications, and improve both end-user experiences as well as reduce the amount of server resources required.
Hope this helps,
Scott

by community-syndication | Jan 27, 2010 | BizTalk Community Blogs via Syndication
The next ACUSG meeting is confirmed for the 25th of February at 6:00pm (arrive 5:30 for drinks and pizza). Register to Attend | Add event to Outlook
Location: Datacom Systems Limited, 210 Federal Street, Auckland CBD, Auckland, 1141. Parking on the street around Datacom. There is also pay parking in Hobson […]
by community-syndication | Jan 27, 2010 | BizTalk Community Blogs via Syndication
Note: This blog post is written using the .NET framework 4.0 Beta 2
In this previous blog post I showed how to create an asynchronous activity using the NativeActivity and CreateBookmark to pause a workflow execution. Using that in a WorkflowApplication was easy but what about WorkflowInvoker or WorkflowServiceHost?
So what about using a WorkflowInvoker or a WorkflowServiceHost?
Neither the WorkflowInvoker not the WorkflowServiceHost contain a ResumeBookmark function so how do we resume a bookmark using either of those execution hosts? The trick is to use a IWorkflowInstanceExtension.
Using a IWorkflowInstanceExtension
Workflow extensions can be of any type you want, there is no base class or interface requirement. But that also means they are not aware of the workflow runtime environment and can’t do much more that respond to calls from a workflow. The way do be able to do a little more is by implementing the IWorkflowInstanceExtension interface. This interface has just two methods. One of those, the SetInstance, is passed a wrapper object around the running workflow allowing us do do some more work. The most important is that this also lets us resume bookmarks.
My workflow extension basically waits for the activity to call it and once done wait one second and resume the bookmark. A
class MyExtension : IWorkflowInstanceExtension
{
private WorkflowInstanceProxy _instance;
public IEnumerable<object> GetAdditionalExtensions()
{
return null;
}
public void SetInstance(WorkflowInstanceProxy instance)
{
_instance = instance;
}
public void WaitSome(Bookmark bookmark)
{
ThreadPool.QueueUserWorkItem(state =>
{
Thread.Sleep(1000);
var ias = _instance.BeginResumeBookmark(bookmark, 42, null, null);
var result = _instance.EndResumeBookmark(ias);
Console.WriteLine("BookmarkResumptionResult: '{0}'", result);
});
}
}
Note that the GetAdditionalExtensions() function just returns null as we are not adding extra extensions.
The new version of the activity
With the required extension done we still need to make sure it gets added to the workflow runtime of choice. The easiest option is to let the activity itself do so in the CacheMetadata() function by using the AddDefaultExtensionProvider() function. The new activity looks like this:
public class MyBookmarkedActivity : NativeActivity
{
protected override void CacheMetadata(NativeActivityMetadata metadata)
{
base.CacheMetadata(metadata);
metadata.AddDefaultExtensionProvider<MyExtension>(() => new MyExtension());
}
protected override bool CanInduceIdle
{
get { return true; }
}
protected override void Execute(NativeActivityContext context)
{
var bookmark = context.CreateBookmark("MyBookmark", BookmarkResumed);
var extension = context.GetExtension<MyExtension>();
extension.WaitSome(bookmark);
}
private void BookmarkResumed(NativeActivityContext context, Bookmark bookmark, object value)
{
Console.WriteLine("Bookmark resumed with '{0}'.", value);
}
}
Now this is all we need to run the activity as it will automatically add the required extension:
WorkflowInvoker.Invoke(new MyBookmarkedActivity());
or when using a WorkflowServiceHost
var wsh = new WorkflowServiceHost(new MyBookmarkedActivity());
wsh.AddDefaultEndpoints();
wsh.Open();
Console.WriteLine("Listening");
Console.ReadLine();
wsh.Close();
And just in case you where wondering, neither of these last two use any configuration file.
Enjoy!
www.TheProblemSolver.nl
Wiki.WindowsWorkflowFoundation.eu


